
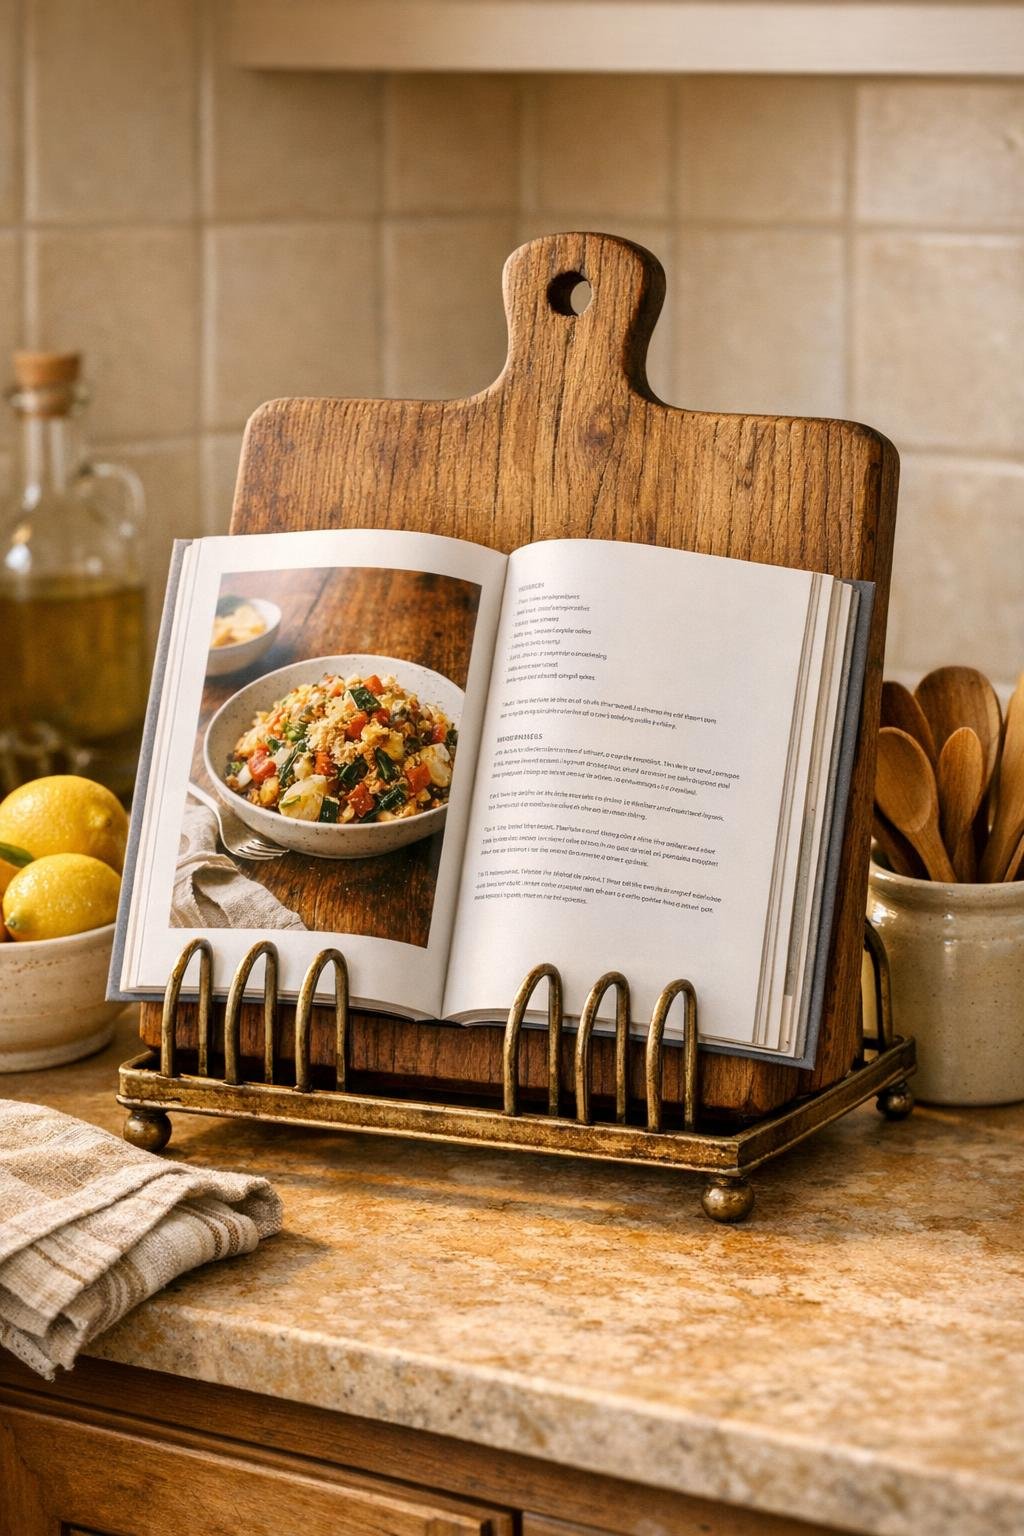
This little kitchen project is exactly the kind of clever fix I love most: simple, useful, and charming enough to leave out on the counter full-time. By sliding a wooden cutting board into a vintage brass toast rack, you can create a sturdy cookbook stand with almost no building required, and the mix of warm wood and aged metal gives it that collected, old-house kitchen feel that never goes out of style.
I’m especially fond of projects like this because they solve a real cooking problem without turning the kitchen into a workshop. If you follow recipes from heavy cookbooks, tablet screens, or handwritten cards, this stand keeps everything upright and easy to read while you cook. It’s perfect for beginners, renters, thrift lovers, and honestly anyone who enjoys a smart kitchen shortcut that looks polished once it’s finished.
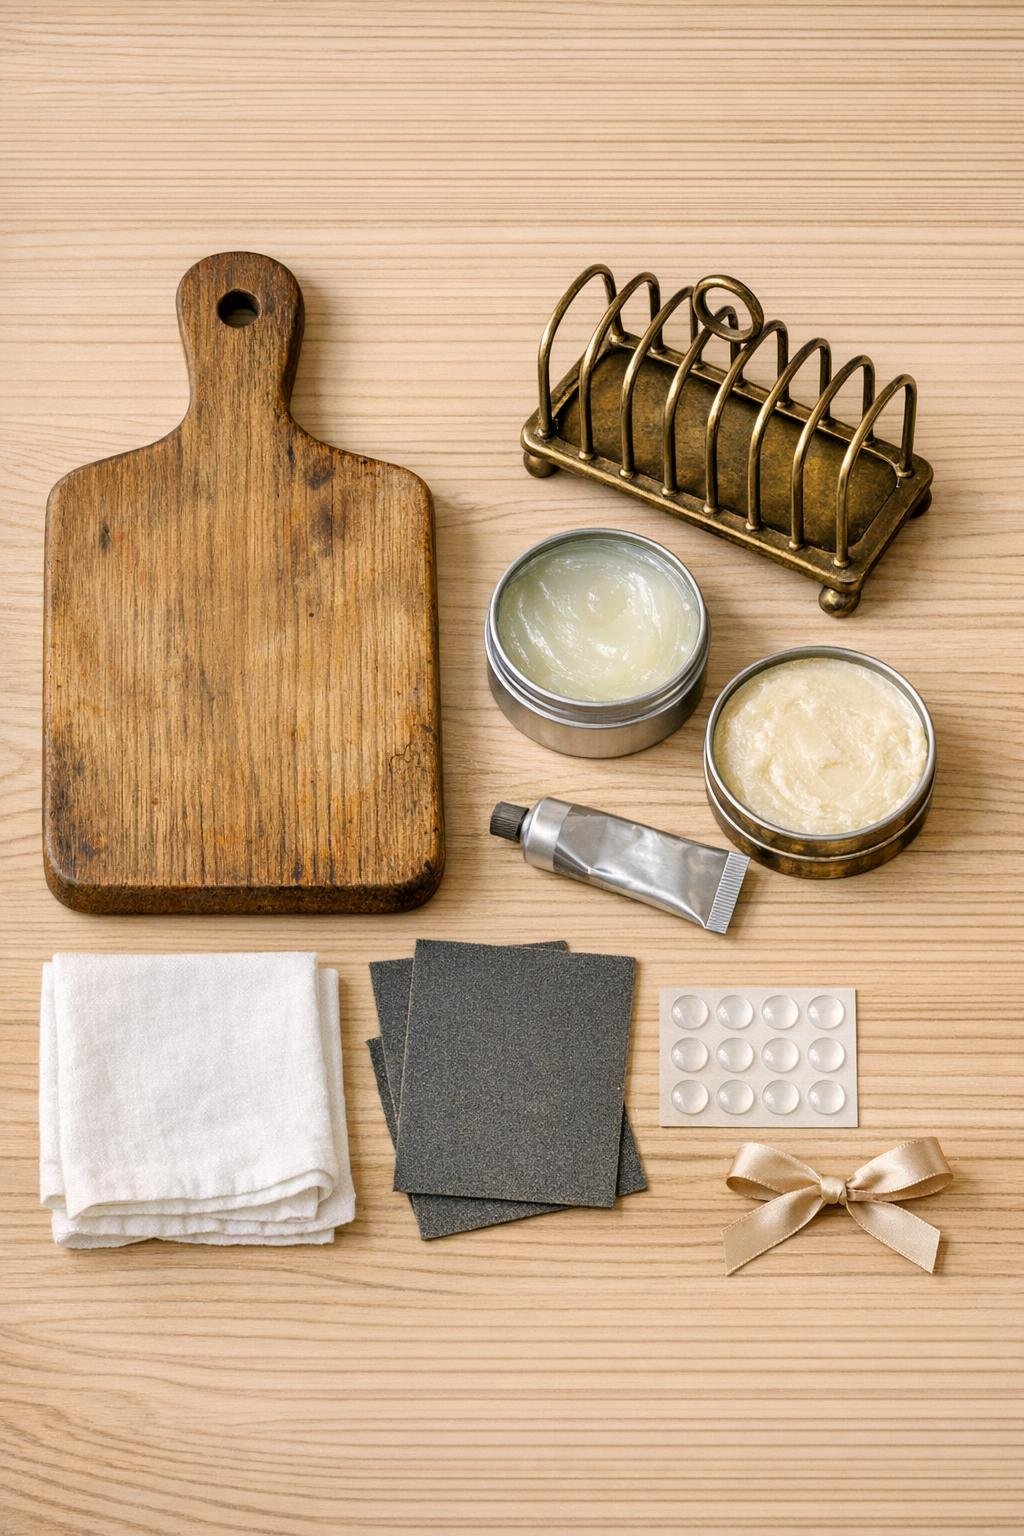
Materials
Instructions
1. Choose a wooden cutting board that slides snugly into one center slot of the vintage toast rack without forcing it; the board should stand upright with a slight backward lean for easy reading.
2. Wipe the toast rack and cutting board clean, then lightly sand any rough spots on the cutting board edges and handle with 220-grit sandpaper until smooth to the touch.
3. Polish the brass toast rack with a small amount of brass polish on a cotton cloth, removing tarnish while keeping a little age and character if you like the vintage look.
4. Rub a thin coat of clear furniture wax or food-safe board wax over the entire cutting board, let it sit for a few minutes, then buff it with a clean cloth to deepen the wood tone and give it a finished sheen.
5. Turn the toast rack upside down and place two clear silicone bumper dots under each outer corner of the base so the stand grips the counter and does not slide while you turn pages.
6. Set the toast rack upright again and slide the cutting board into a center slot, handle at the top, adjusting the position until the board sits straight and feels balanced.
7. Test the stand with your heaviest cookbook or a tablet, opening it on the board and resting the bottom edge on the rack base to make sure the setup stays secure during use.
8. Tie a narrow ribbon or leather tie through the cutting board handle if you want a softer finished touch, then place the stand on the counter where you usually prep ingredients.
Variations & Tips
For heavier cookbooks: Choose a toast rack with a wider, flatter base and use a thicker cutting board, around 3/4 inch thick, for the most stable setup.
For a brighter finish: Polish the brass to a full shine instead of leaving patina; it looks especially pretty in kitchens with white cabinets or marble-look counters.
For a rustic farmhouse look: Use a deeply grained board with worn edges and leave some of the brass darkened so the stand feels collected rather than newly made.
For tablet use: Add two extra silicone bumper dots along the lower front edge of the rack base to keep a tablet from slipping while you swipe the screen.
Thrift-store tip: When I shop for toast racks, I bring a small measuring tape because slot width matters more than overall rack size; a beautiful rack is only useful if the cutting board actually fits.
Countertop protection: If your counters scratch easily, use slightly thicker clear bumpers or a thin strip of cork under the rack base for extra cushioning.
Easy care: Rewax the cutting board every few months and buff the brass occasionally to keep the stand looking intentional and kitchen-ready instead of dusty.