
I’m the kind of person who starts plugging in the hot glue gun “just to fix one thing” and somehow ends up making half the room look prettier by bedtime. If you’ve ever stared at a blob of clear glue and thought, surely that can’t turn into something actually gorgeous, this list is for you. These are the projects I’d pull out on a weeknight after work when I want something creative, fast, and weirdly satisfying.
Every idea here is built with hot glue, and they range from quick practical fixes to holiday decor that honestly looks far fancier than it should for the cost. I kept the projects specific, realistic, and scroll-stopping, with sizes, timing, and placement so you can actually make them instead of just pinning them and forgetting them.
1. Hot Glue Drip Candle Holder
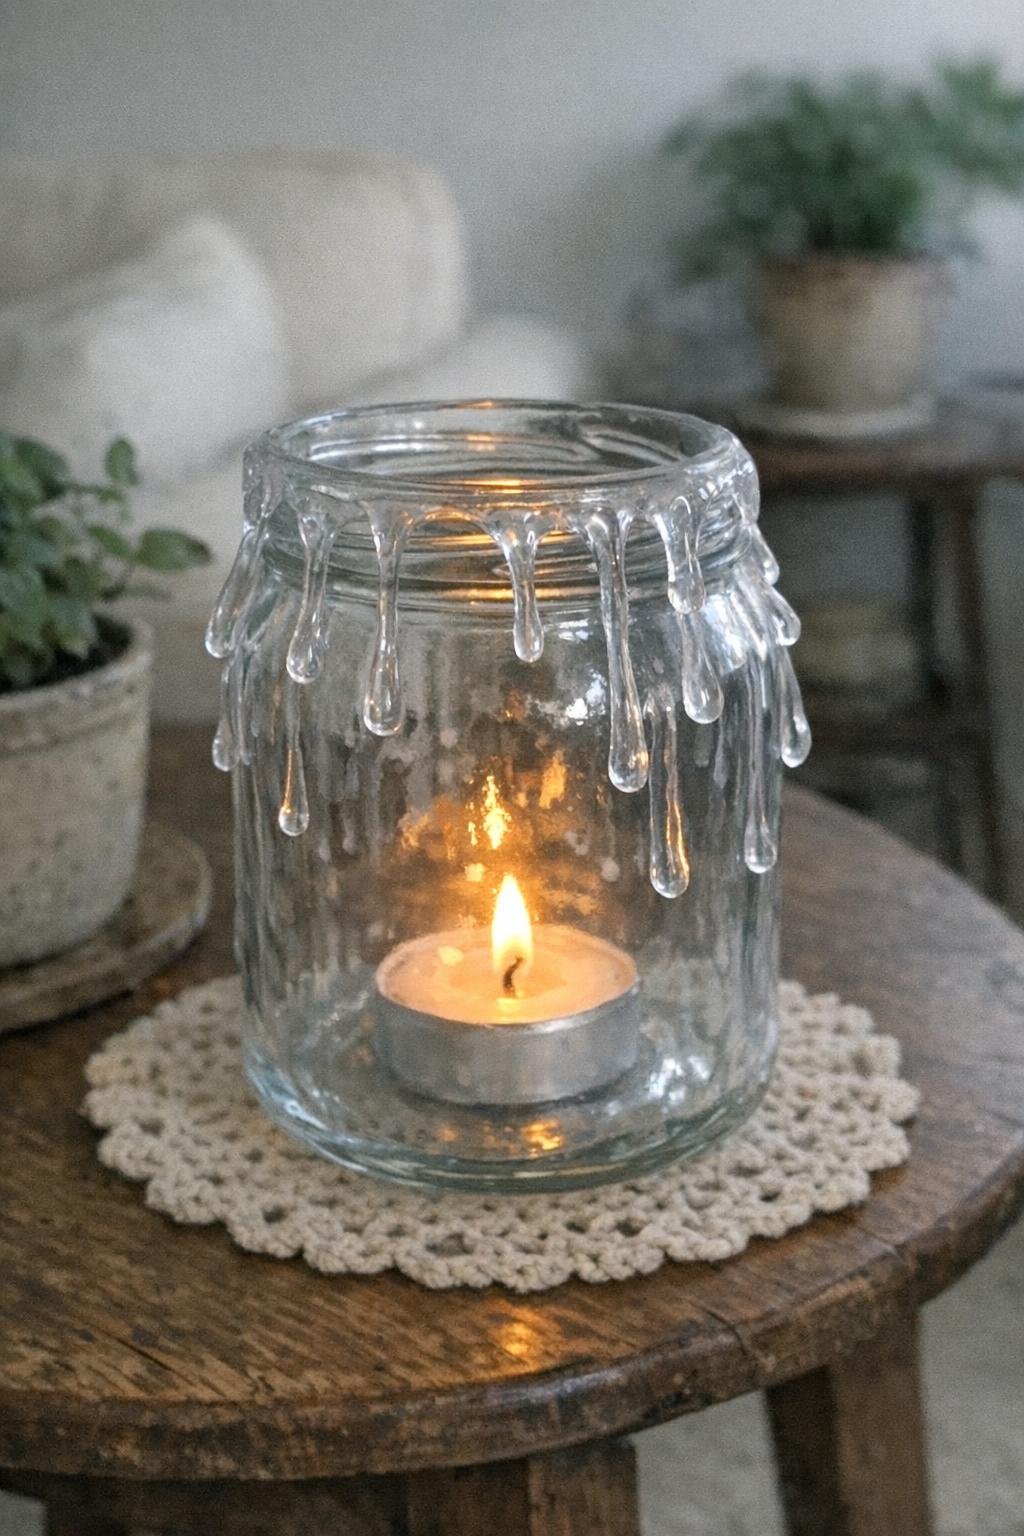
You’ll build this with a hot glue gun and 3 to 5 clear glue sticks, plus one plain glass jar, a battery tea light or votive cup, and optional white or ivory spray paint for a wax-like finish. I like using a jar about 5 to 7 inches tall with smooth sides so the drips show up cleanly.
Warm the glue gun fully, then hold the jar upright and pipe glue from the rim straight down in uneven drips, making some lines 1 inch long and some 3 inches long so it looks natural. Let it cool 10 minutes, then leave it clear for an icy look or lightly mist it with paint from 10 to 12 inches away. Drop in a tea light and style it on a mantel, entry table, or holiday centerpiece; the long glossy drips catch light in a way that looks like melted wax from an expensive boutique candle.
2. Faux Stained Glass Jar
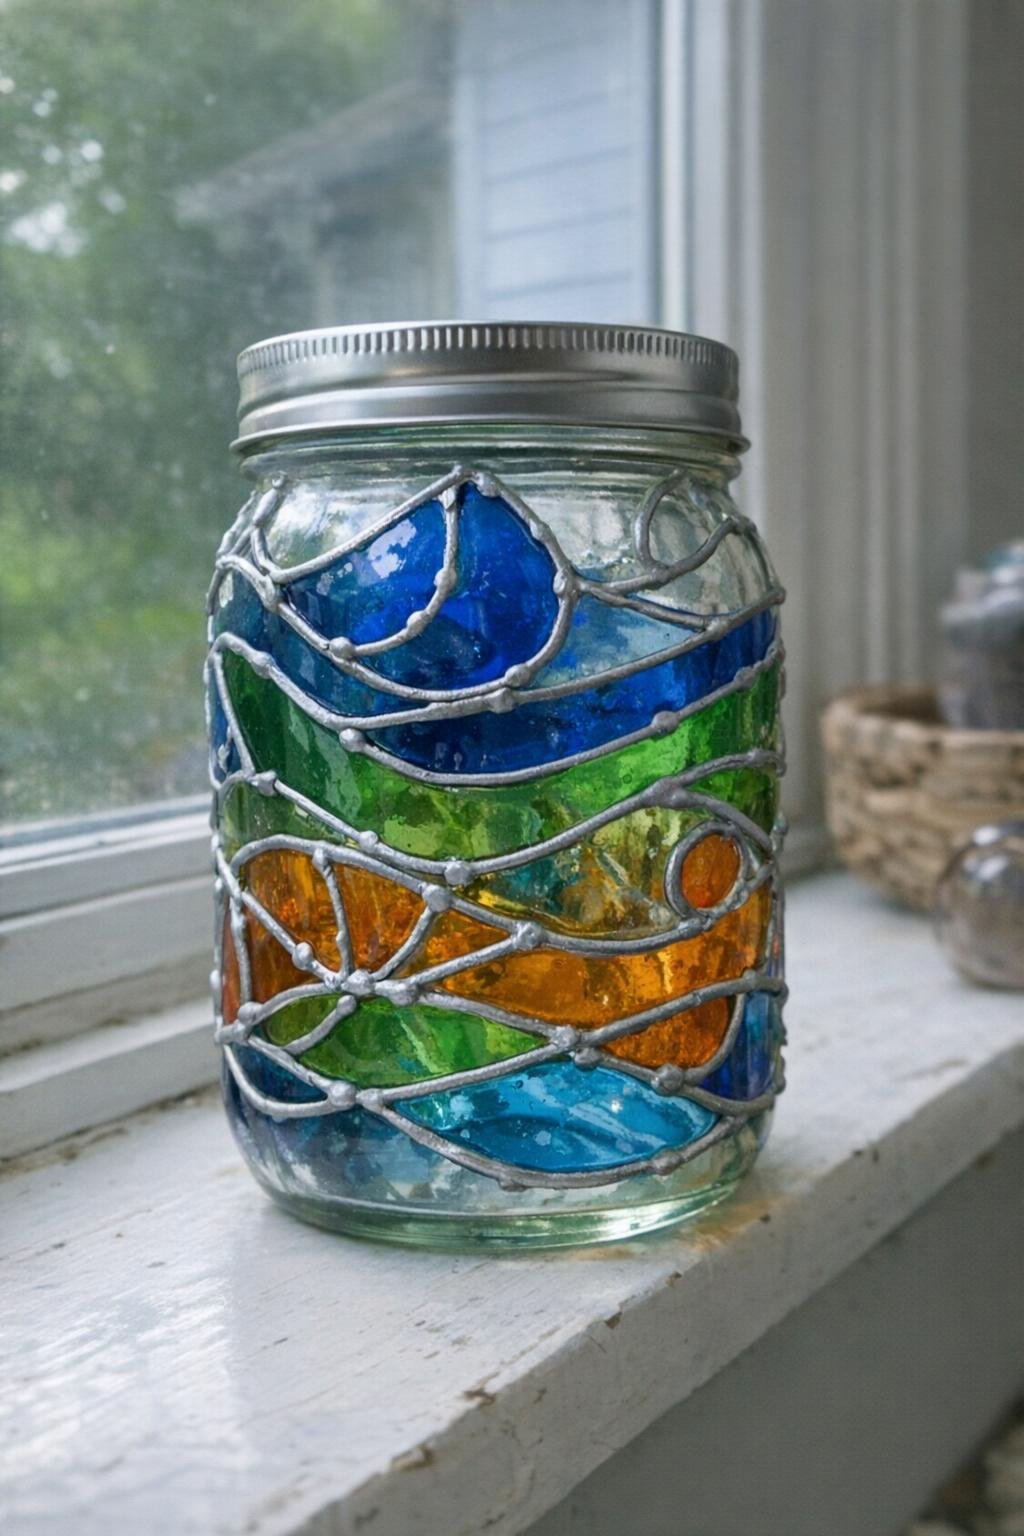
You’ll build this with a hot glue gun and 2 to 4 clear glue sticks, plus one smooth glass jar, 2 or 3 alcohol-ink colors, and a small brush or cotton swab. A jar around quart size works well because it gives you enough surface area to make a pattern without the sections getting too tiny.
Pipe hot glue directly onto the outside of the jar in irregular leading-style shapes, like little mosaic windows, and let the outlines cool for 8 minutes. Add drops of ink inside each section and blend lightly before it dries, then let the whole jar sit 20 minutes. Pop in fairy lights or a battery candle and set it on a windowsill or bookshelf; the raised glue lines and jewel-tone color make it glow like stained glass when light comes through.
3. Lace-Pattern Vase
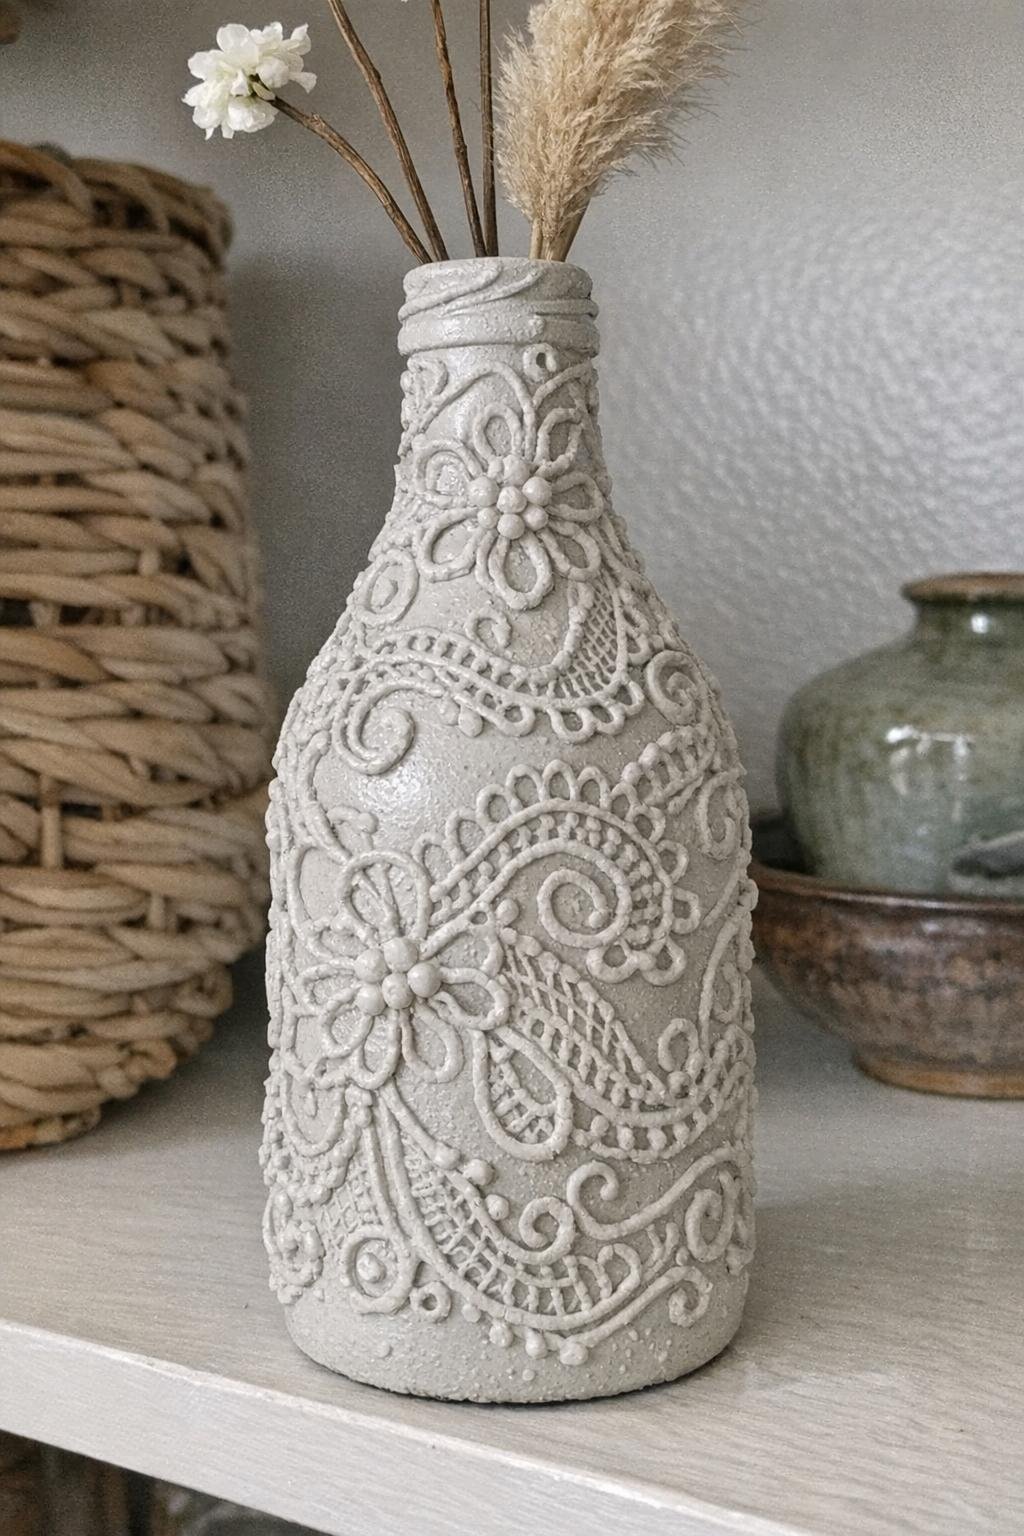
You’ll build this with a hot glue gun and 4 to 6 clear glue sticks, plus one glass bottle or straight vase, spray paint, and optional pearl pins or a printed lace reference nearby. I like a wine-bottle shape or a bottle about 10 inches tall because the long neck makes the pattern look elegant.
Pipe looping lace shapes, tiny dots, and scallops directly over the bottle, working in bands from top to bottom, then let the glue cool for 15 minutes. Spray paint the whole piece in one color, usually matte white, soft beige, or metallic champagne, using 2 light coats with 15 minutes between them. Once dry, add a few stems of eucalyptus or faux flowers and place it on a dining table or bathroom shelf; the raised pattern makes a plain bottle look like carved ceramic from a distance.
4. No-Slip Rug Corners and Hanger Shoulders
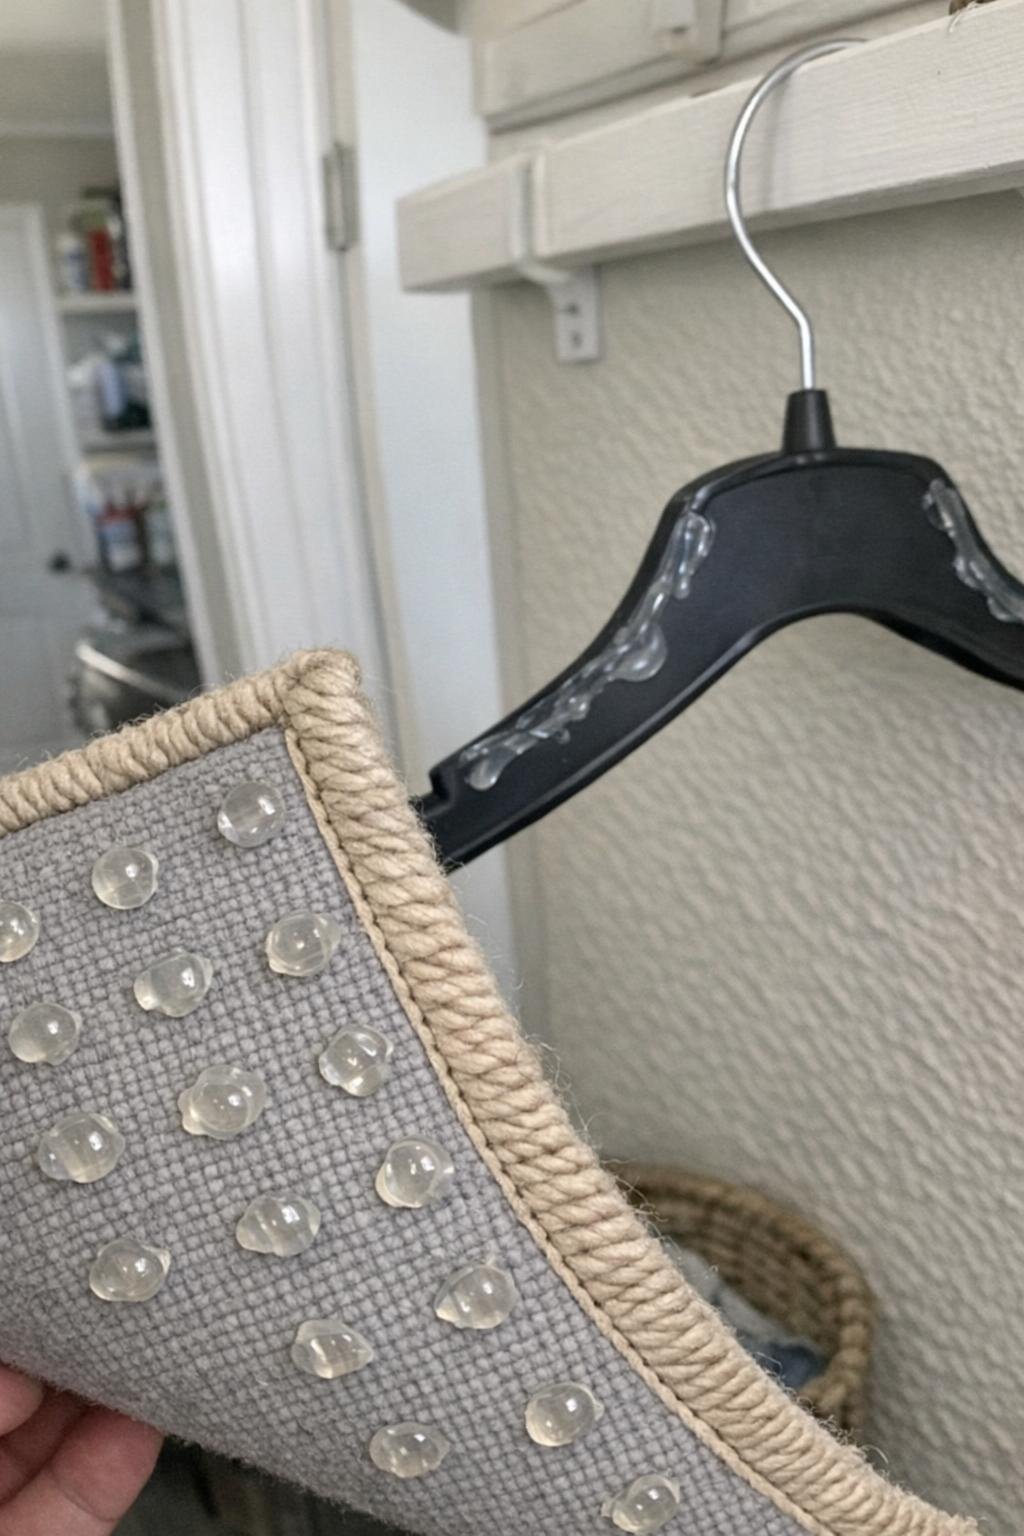
You’ll build this with a hot glue gun and 2 to 3 clear glue sticks, plus a small area rug and several clothing hangers. This is one of those practical projects I wish I had done sooner, especially after fighting with hallway rug corners and silky blouses that always slid off hangers.
Flip the rug over and add rows of glue dots or short zigzags on each corner, covering about a 3-by-3-inch area per corner, then let it cool flat for 10 minutes before putting it back down. For hangers, run a thin bead or dotted line across the top 4 inches of each shoulder and let them cool 5 minutes. The finish is subtle, but the raised grip texture is what makes this one so satisfying because things stay exactly where you put them.
5. Snowflake Window Clings
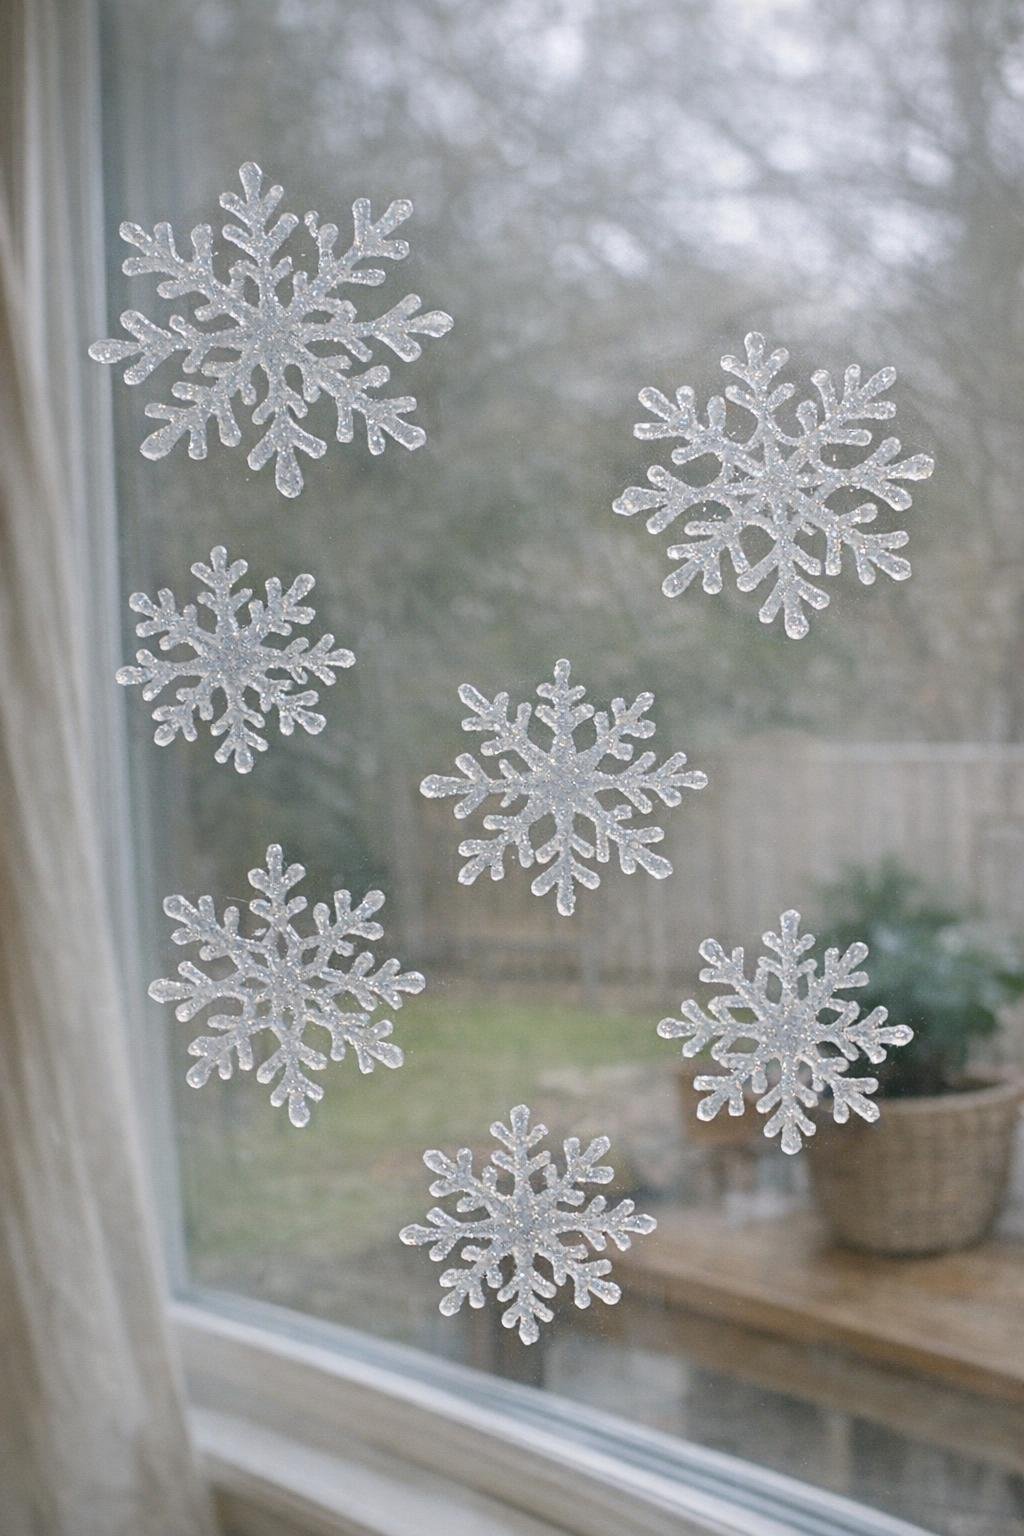
You’ll build this with a hot glue gun and 3 to 4 clear or glitter glue sticks, plus a clear plastic sheet protector, fine glitter if you want extra sparkle, and thin thread for hanging extras. I make these around 3 to 5 inches wide so they show up well on a window without looking bulky.
Lay the plastic sheet protector flat and draw snowflakes directly onto it with hot glue, starting with crossed lines and branching out with short angled arms. Sprinkle glitter onto the wet glue if using, let them cool 8 to 10 minutes, then peel them off and press them onto clean glass with a tiny breath of moisture if needed. They’re perfect for kitchen or front windows, and the translucent glue catches winter light in a way that looks delicate and frosty.
6. Glue-Textured Picture Frame
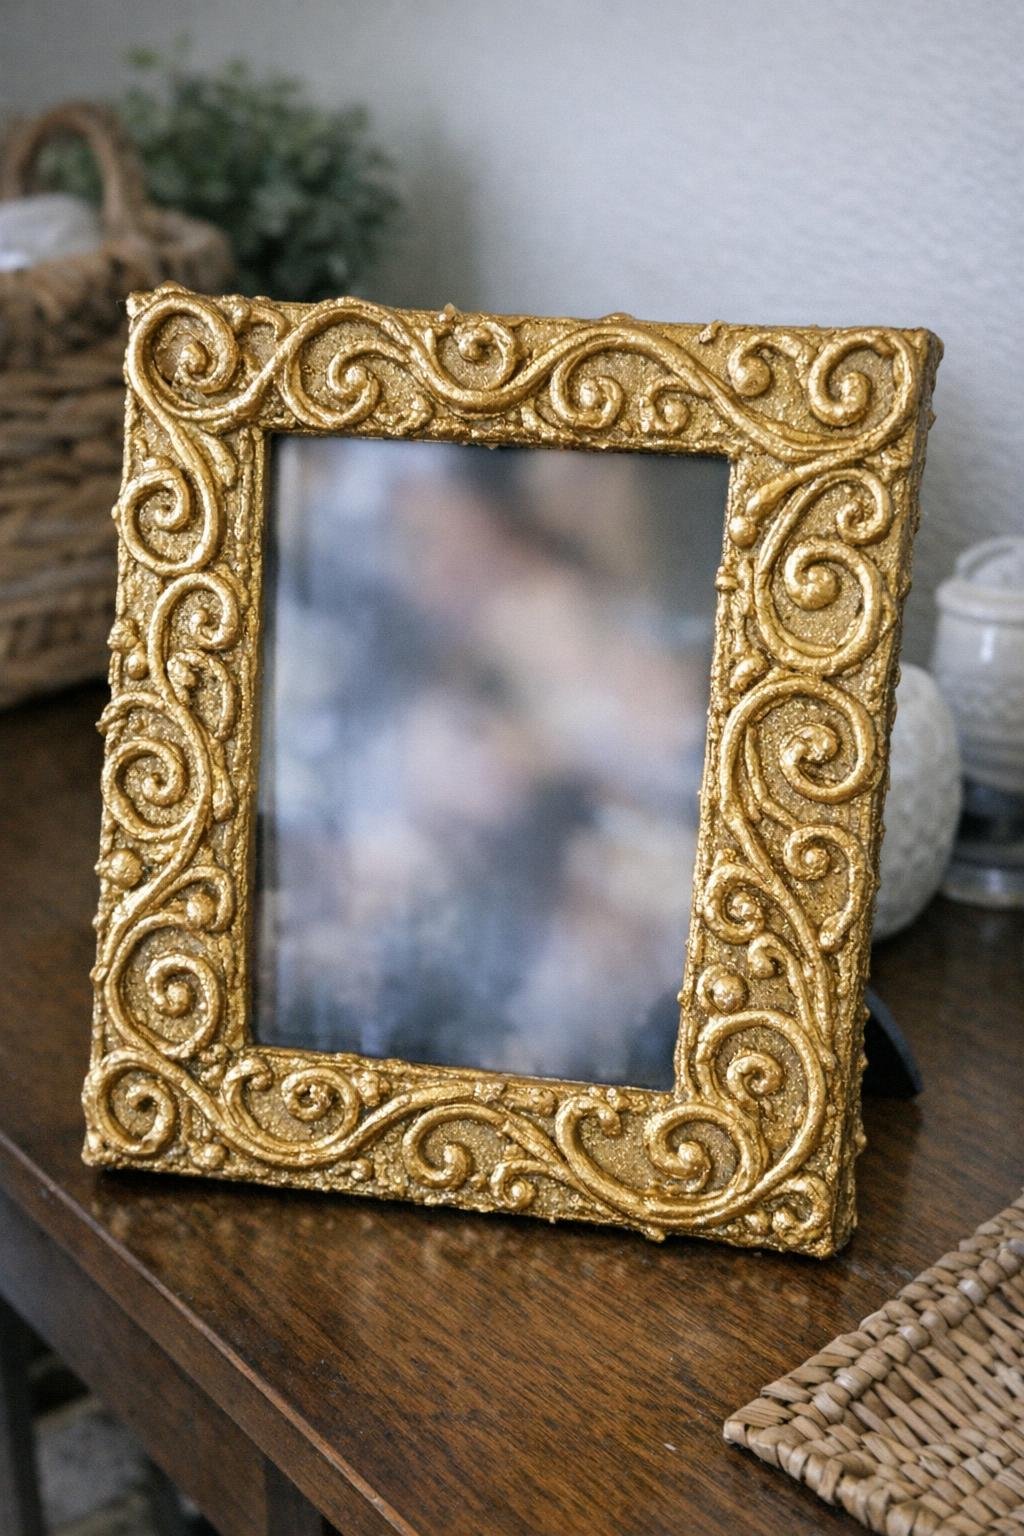
You’ll build this with a hot glue gun and 2 to 4 clear glue sticks, plus one plain wood or plastic picture frame, acrylic or spray paint in gold, and a small brush if you want to antique the finish. A 5-by-7 or 8-by-10 frame is easiest because you can finish it in one sitting.
Pipe swirls, scrolls, dots, and little floral loops straight onto the frame front, keeping the design raised but not so thick that it blocks the photo opening, then let it cool for 10 minutes. Paint over the entire frame, let it dry, and brush a little darker color into the crevices if you want extra depth. Put in a favorite family photo and set it on a dresser or console table; the thick ornate texture makes a cheap frame look almost vintage metal.
7. Hot Glue Icicle Garland
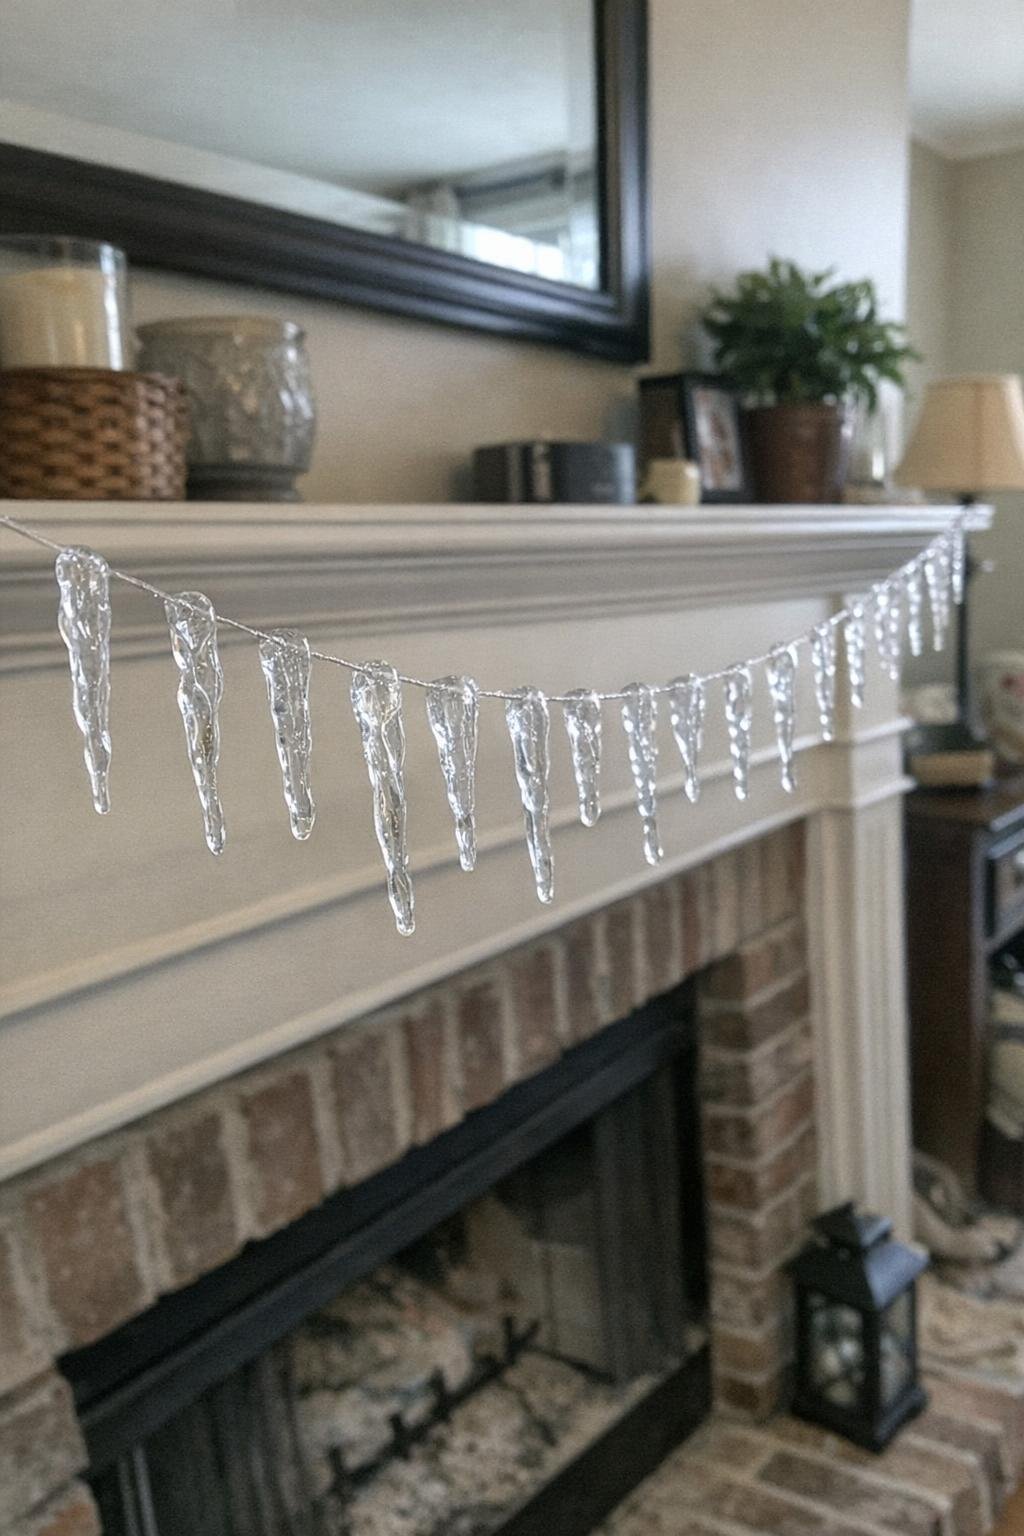
You’ll build this with a hot glue gun and 5 to 7 clear glue sticks, plus cotton string or clear fishing line about 5 to 6 feet long, and two chairs or hooks to hold the line taut while you work. I usually make the hanging icicles between 4 and 8 inches long for the best effect.
Stretch the string tightly between two chairs, then drip hot glue downward from the string in thin uneven lengths, building each icicle with 2 or 3 passes and spacing them about 2 inches apart. Let the garland cool completely for 12 minutes before moving it to a mantel, window, or stair rail. It looks especially striking because the clear glue catches room light like real ice but still feels handmade and cozy.
8. Baking Sheet Snowflake Ornaments
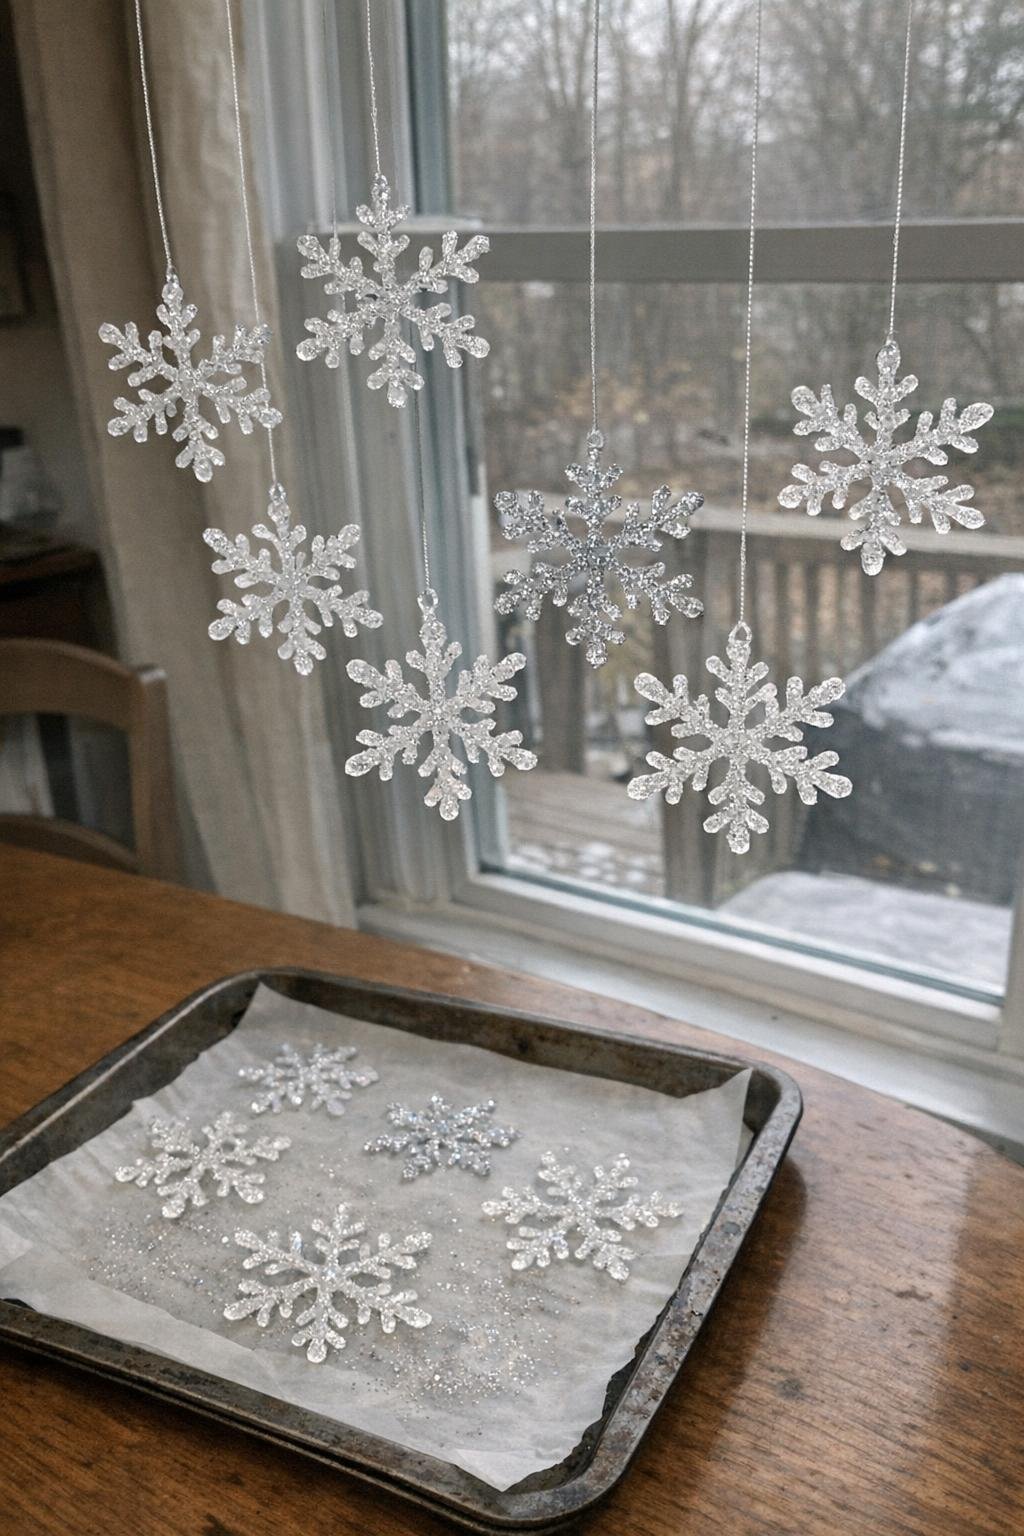
You’ll build this with a hot glue gun and clear glue sticks, a baking sheet, parchment paper, fine white or silver glitter, and thin ribbon or fishing line. This is the first project here that uses a baking sheet, and I like making a whole batch of six at once since each snowflake is only about 3 inches across.
Line the baking sheet with parchment paper, then draw a six-pointed snowflake freehand in hot glue by crossing two lines, adding a third, and piping small branches on each arm. Sprinkle glitter over the wet glue, let it cool 10 minutes, peel it off the parchment, and tie a loop of ribbon through one arm to hang it on the tree or in the window. You can trace a printed snowflake under the parchment, use glow-in-the-dark glue sticks, or spray with silver paint instead of glitter; the finished ornaments look striking because they’re airy, icy, and bright without being heavy.
9. Hot Glue Cookie-Cutter Ornaments
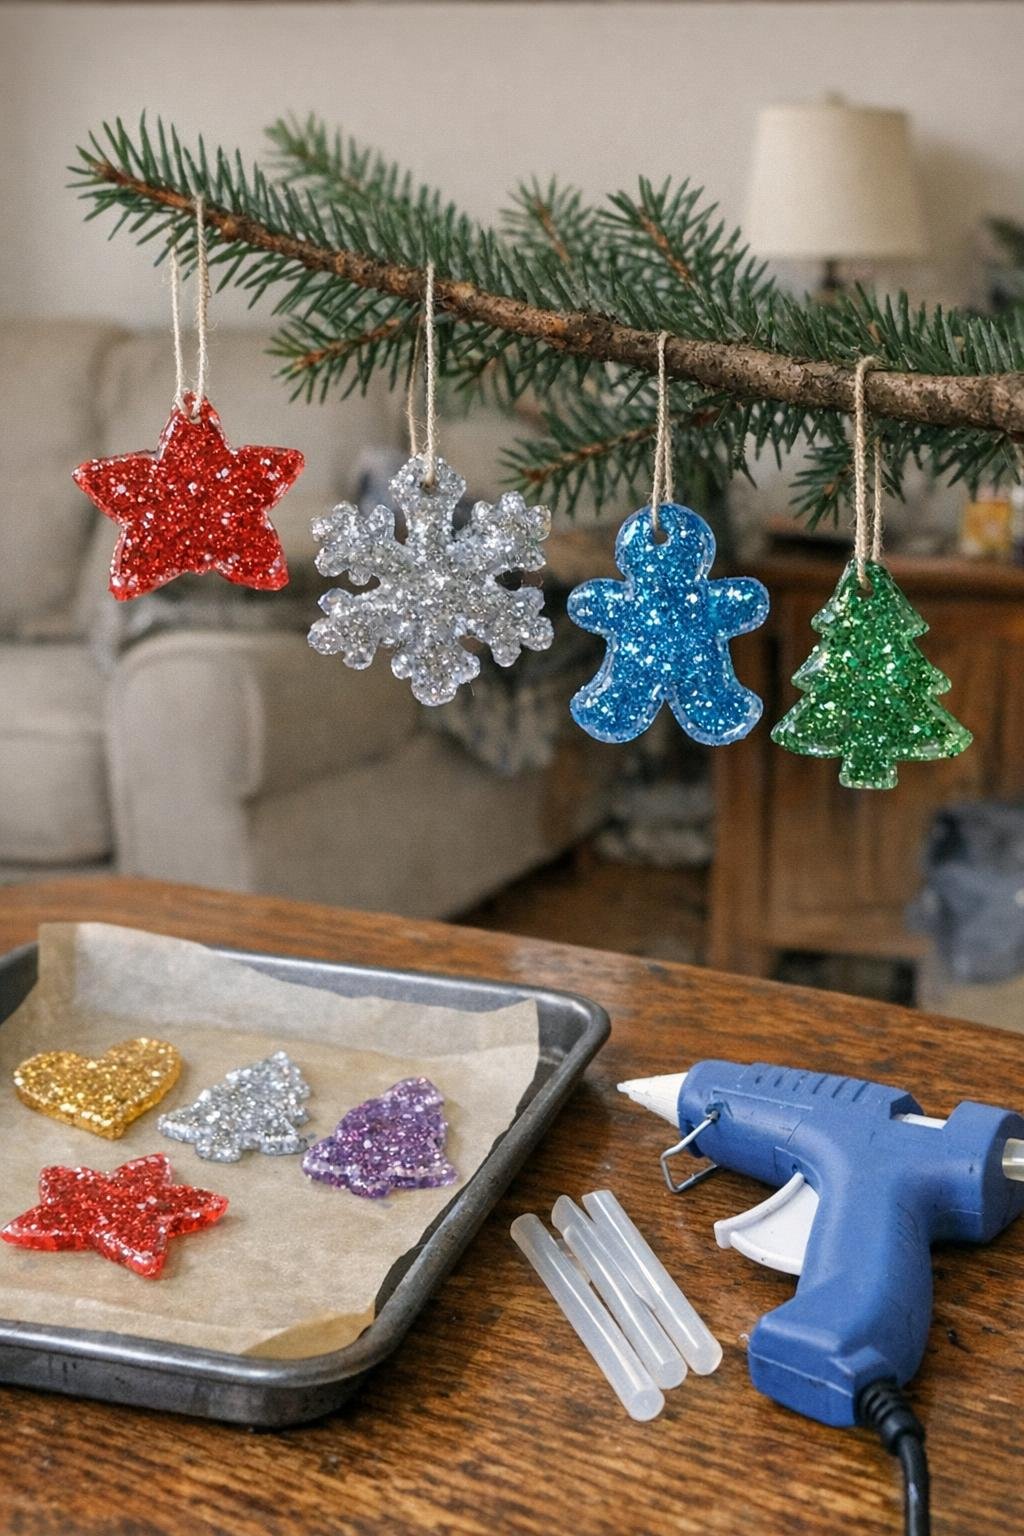
You’ll build this with a hot glue gun and 4 to 6 clear glue sticks, plus metal cookie cutters, a parchment-lined sheet, loose glitter or faux snow, and ribbon for hanging. Small cutters around 3 to 4 inches wide work best because the ornaments stay lightweight and easy to peel out.
Set the cookie cutters on the lined surface, fill the inside with hot glue in a steady swirl, and sprinkle glitter into the glue before it cools; add a short loop of ribbon at the top edge while it is still soft. Let them cool 12 minutes, then gently pop each ornament out and hang them on a tree, wreath, or cabinet knob. They look bold and polished because the crisp cookie-cutter shape keeps the handmade glue looking intentional.
10. Mason Jar Luminaries With Glue Lace
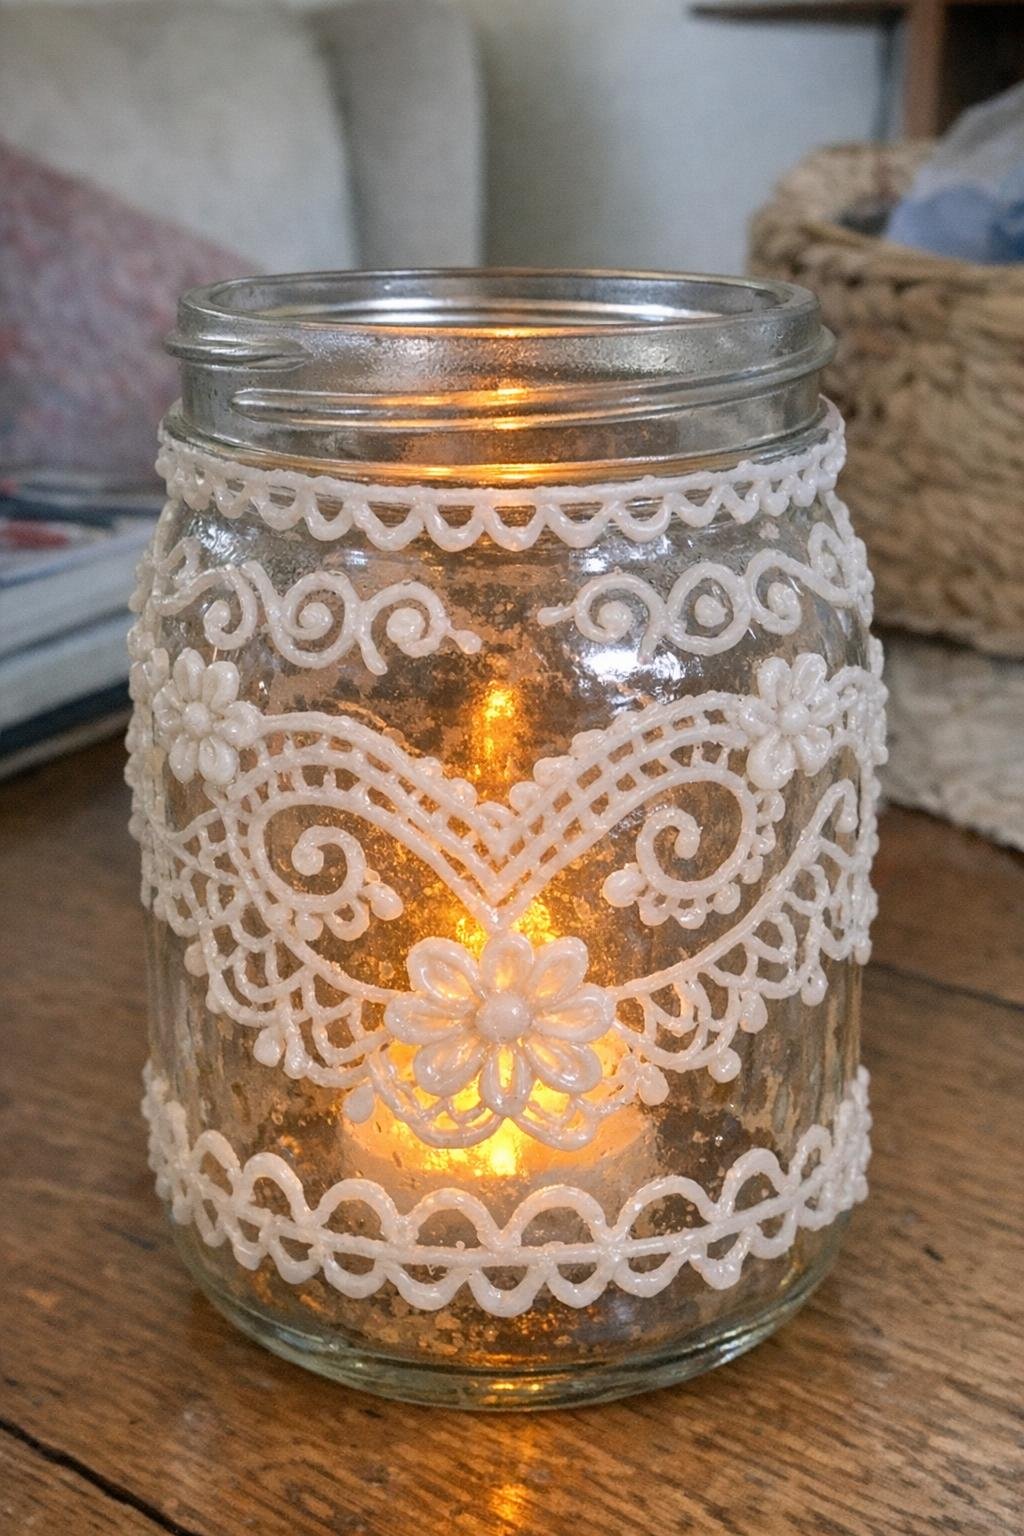
You’ll build this with a hot glue gun and 3 to 5 clear glue sticks, plus 1 or 2 mason jars, a battery tea light for each, and white paint or frosted spray if you want a softer finish. Pint jars are my favorite here because they glow well without taking over the table.
Pipe lace-like loops, dots, and floral shapes directly around the outside of each jar, concentrating the pattern around the upper half or making a full wrap, then let them cool for 10 minutes. Leave the glue clear for a glassy texture or frost the jar lightly before adding the tea light inside. Put them on a porch table, bathroom counter, or dinner centerpiece; when lit, the raised glue pattern casts tiny shadows that make the jar look far more intricate than it is.
11. Faux Wax Seals for Christmas Cards
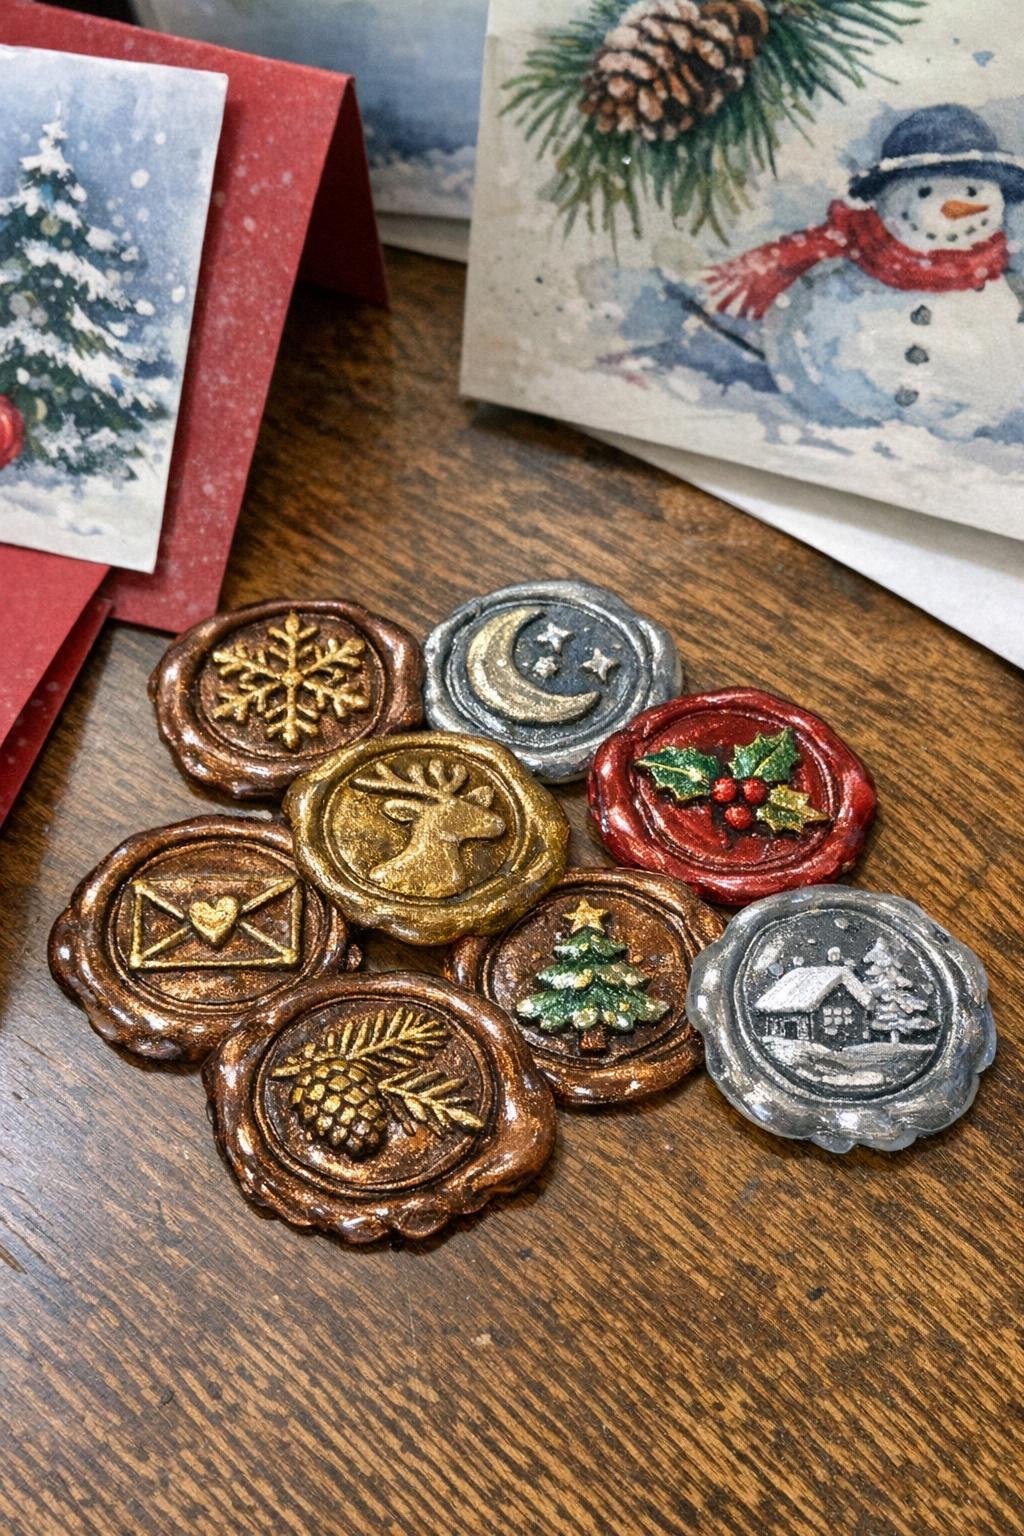
You’ll build this with a hot glue gun and 2 to 3 clear or colored glue sticks, plus a small stamp with a simple design, metallic paint, and card envelopes. I usually make each seal about 1 inch wide so it fits the flap neatly without overpowering the card.
Pipe a coin-sized puddle of hot glue onto a silicone mat or lined surface, wait about 10 seconds so it is not too runny, then press the stamp in gently and lift after another 20 seconds. Let the seals cool fully, dry-brush metallic paint over the raised design, and attach them to envelopes with a dot of fresh hot glue. They’re tiny, but the crisp raised impression makes them look old-fashioned and expensive in holiday card stacks.
12. Frosted Glue Vase
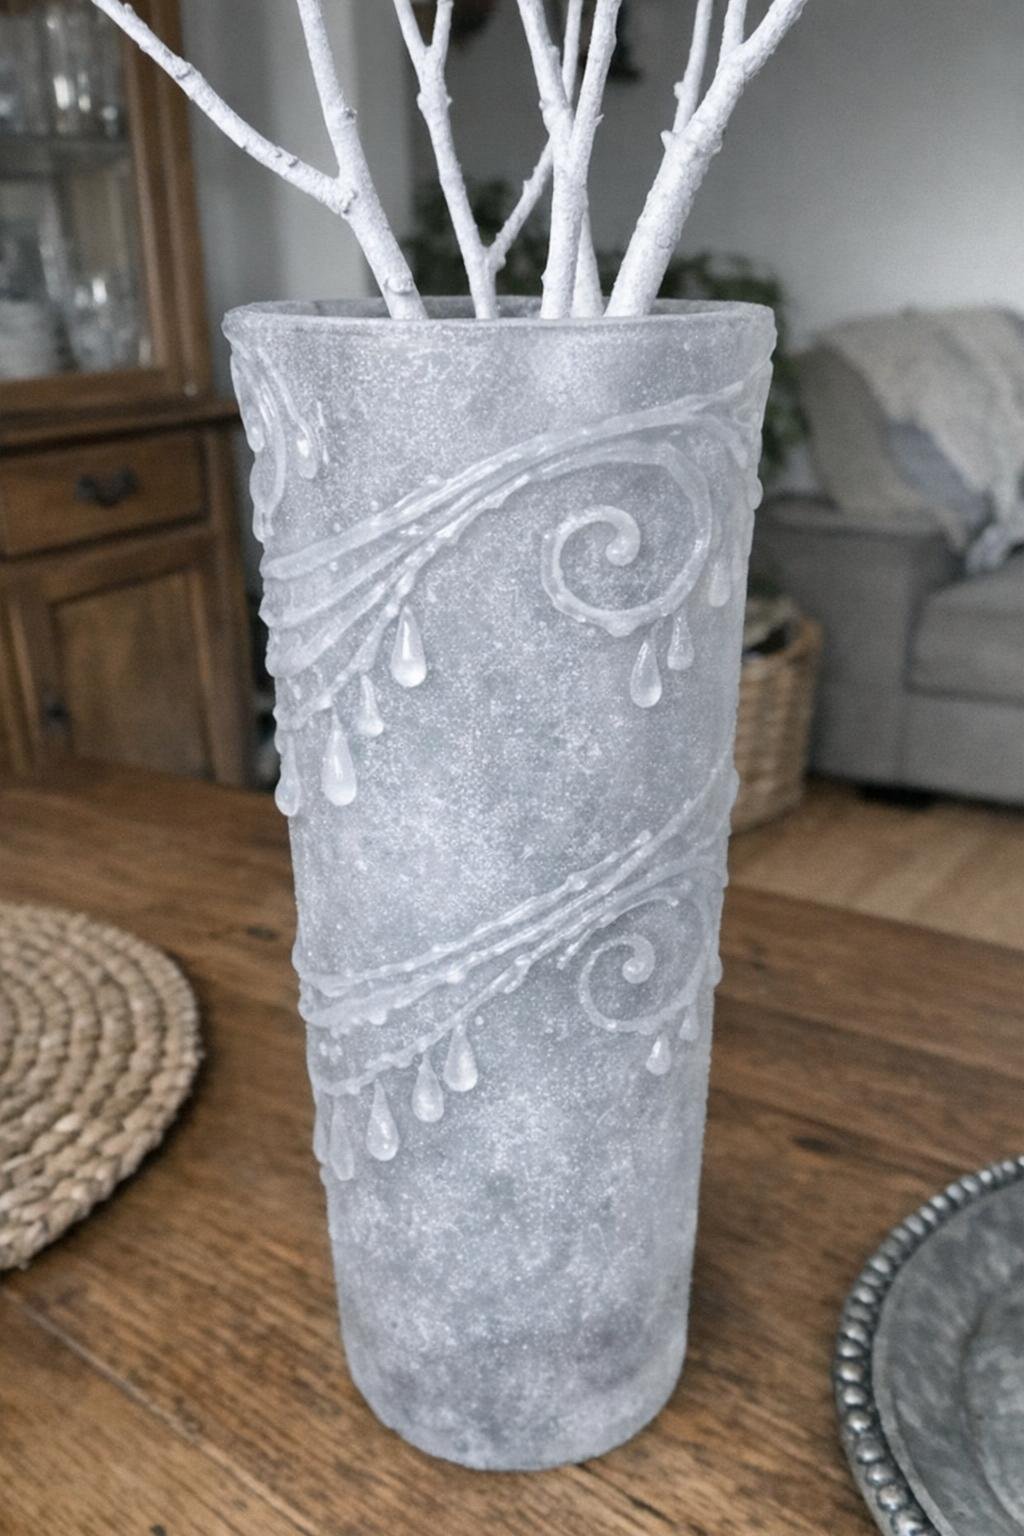
You’ll build this with a hot glue gun and 3 to 5 clear glue sticks, plus one tall glass vase and frosted spray or matte white paint. A cylinder vase around 8 to 10 inches tall gives enough room for the pattern to read from across the room.
Pipe vertical trails, clustered dots, or jagged icy lines around the vase, leaving some clear glass between them, and let the glue set for 10 minutes. Spray a light frosted coat over the whole surface so the glue texture shows through but the glass turns cloudy. Add white branches or simple greenery and place it on a dining table or hearth; the layered texture makes it look like frozen glass pulled from a winter display window.
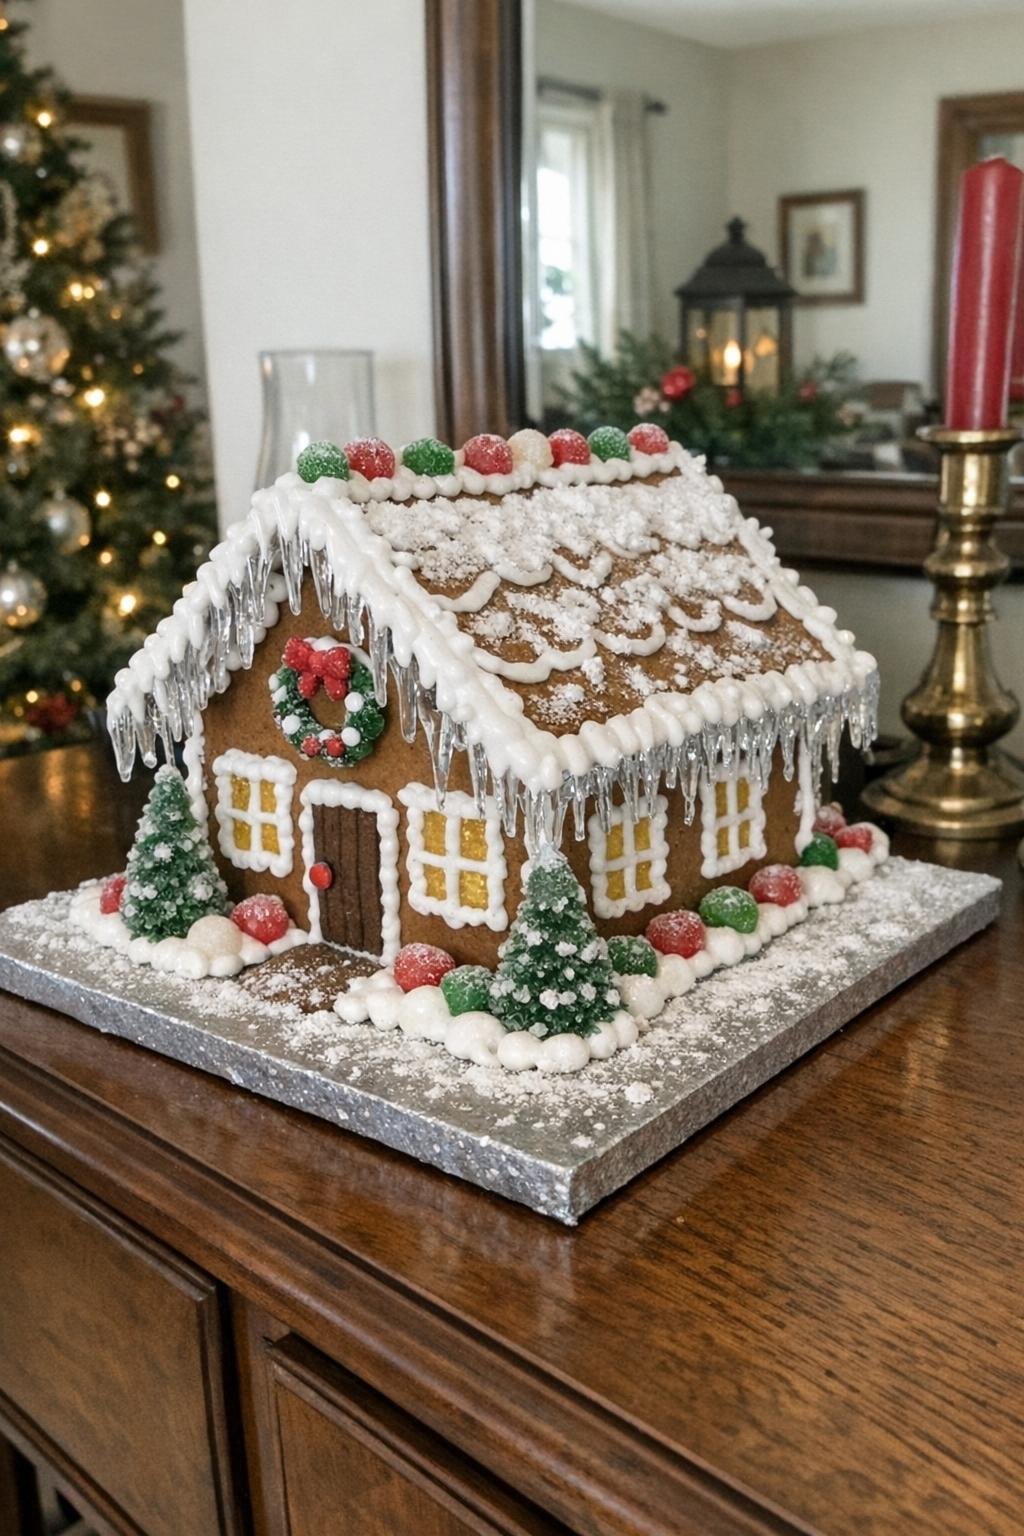
13. Hot Glue Gingerbread House Trim and Icicles
You’ll build this with a hot glue gun and 4 to 6 clear glue sticks, plus a decorative gingerbread house, white paint or glitter if desired, and a protected work surface. This works on cardboard, wood, or faux gingerbread houses that need a little extra drama around the roofline.
Pipe hot glue along roof edges to form icing-like trim, then pull the glue downward in spots to create short icicles 1 to 2 inches long. Let the trim cool for 10 minutes and brush with white paint or glitter if you want a sugared look. Set the house on a sideboard or entry table, and the glossy drips make it look like frosted candy architecture even if the base house is very simple.
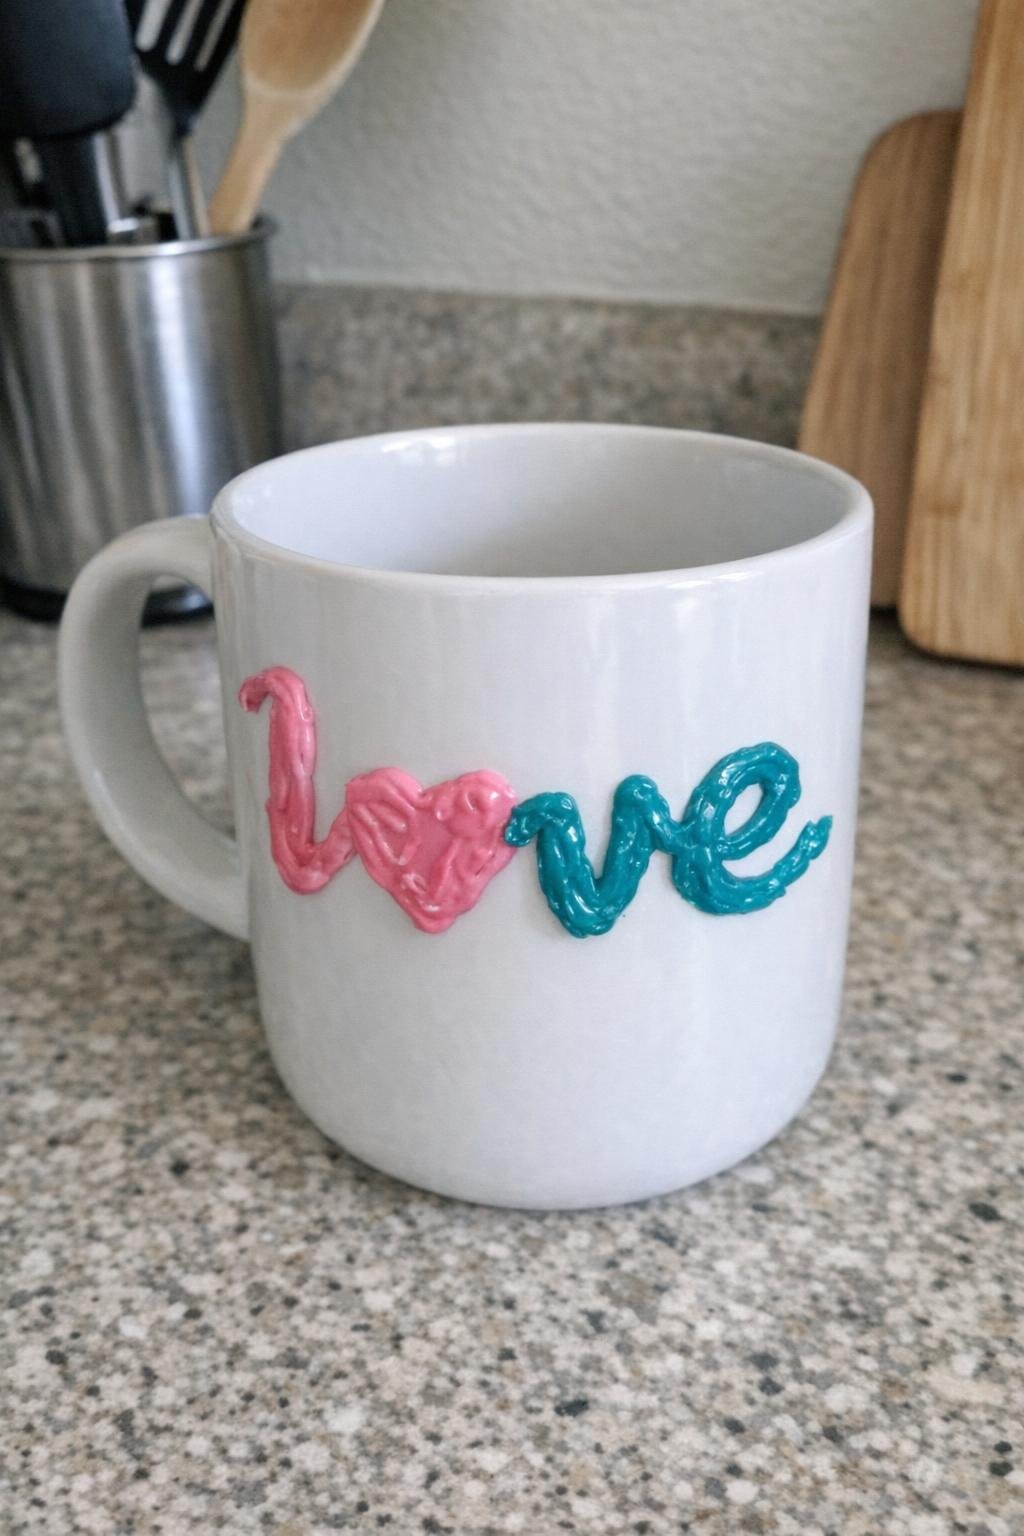
14. Personalized Glue-Lettered Mugs
You’ll build this with a hot glue gun and 2 to 3 clear glue sticks, plus a plain ceramic mug, paint, and a food-safe clear sealer for the outside decorative area only. Keep the design on the outer wall and away from the rim and interior so it stays purely decorative.
Pipe a name, initials, or a simple word in glue onto the mug, keeping the letters about 1 inch tall and letting the lines cool for 8 minutes before painting them. Add 1 or 2 thin coats of paint and seal the dry lettering on the outside only. Use the mug as a pen cup, cocoa station accent, or gift container; the raised lettering pops against the smooth ceramic and gives a basic mug a custom boutique feel.
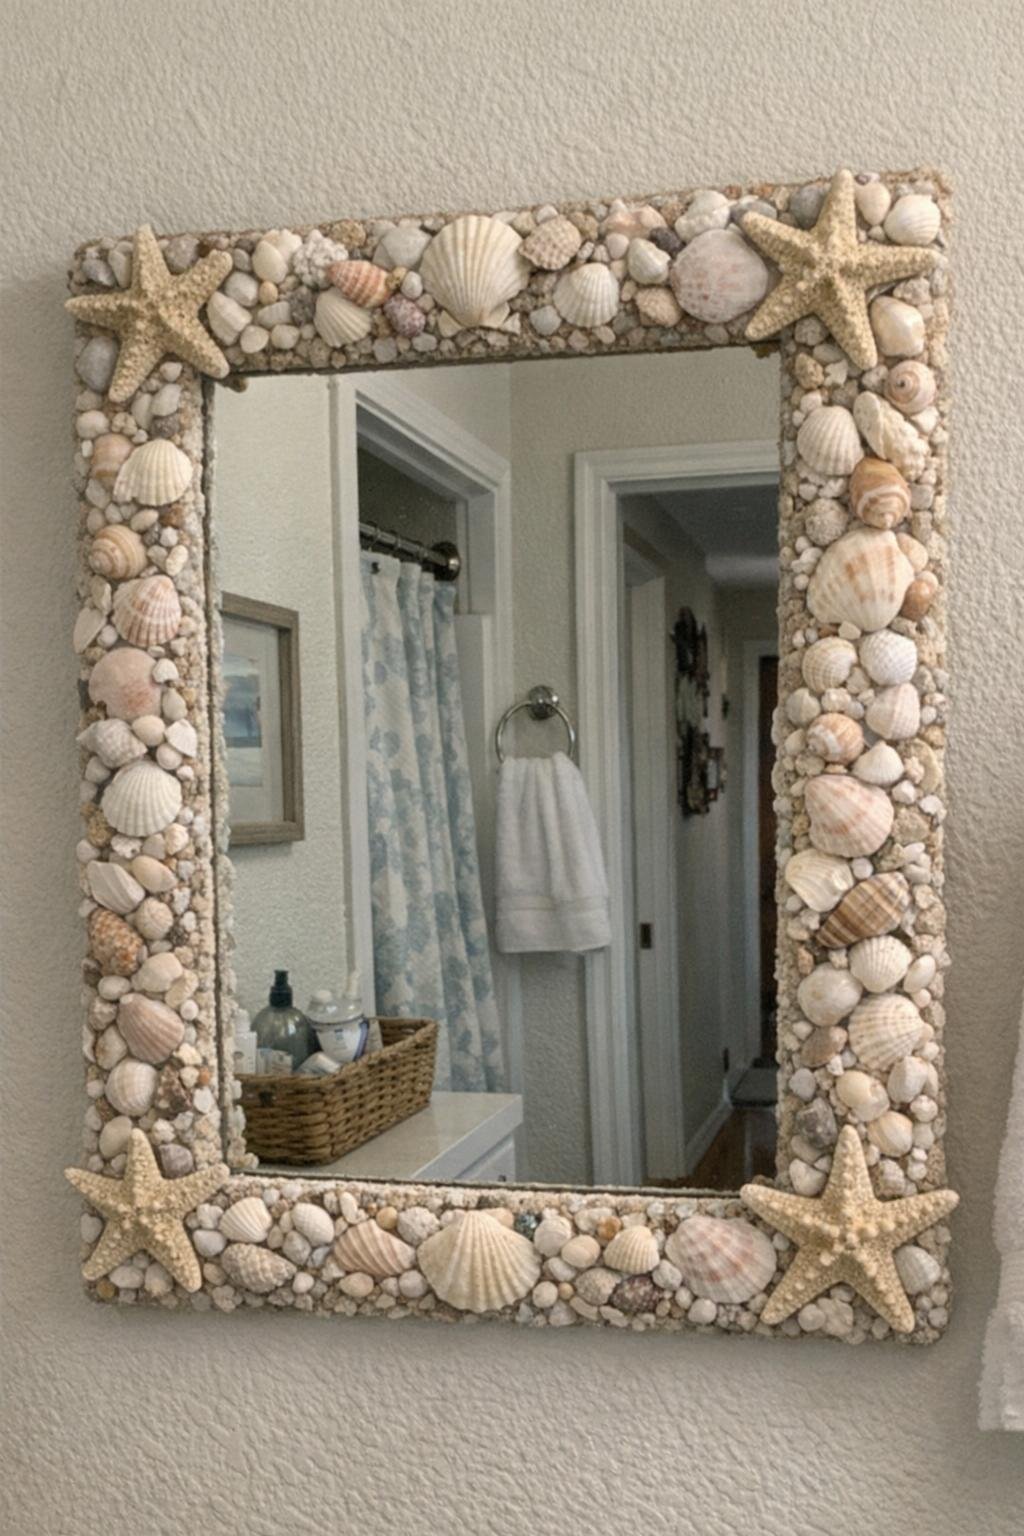
15. Hot Glue Starfish and Seashell Mirror Frame
You’ll build this with a hot glue gun and 5 to 8 clear glue sticks, plus a round or rectangular mirror frame, small shells, and paint in sandy, white, or pearly tones. A mirror around 12 to 16 inches wide is a nice size for a bathroom or entry without needing a mountain of shells.
Arrange the shells first, then hot glue them in clusters around the frame and fill gaps with piped starfish shapes or little bead-like glue dots for texture. Let everything cool for 15 minutes, then paint the whole frame or dry-brush just the glue details to blend it together. Hang it in a bathroom, guest room, or lake-house corner; the mix of real shell texture and sculpted glue shapes makes it look layered and coastal instead of crafty.
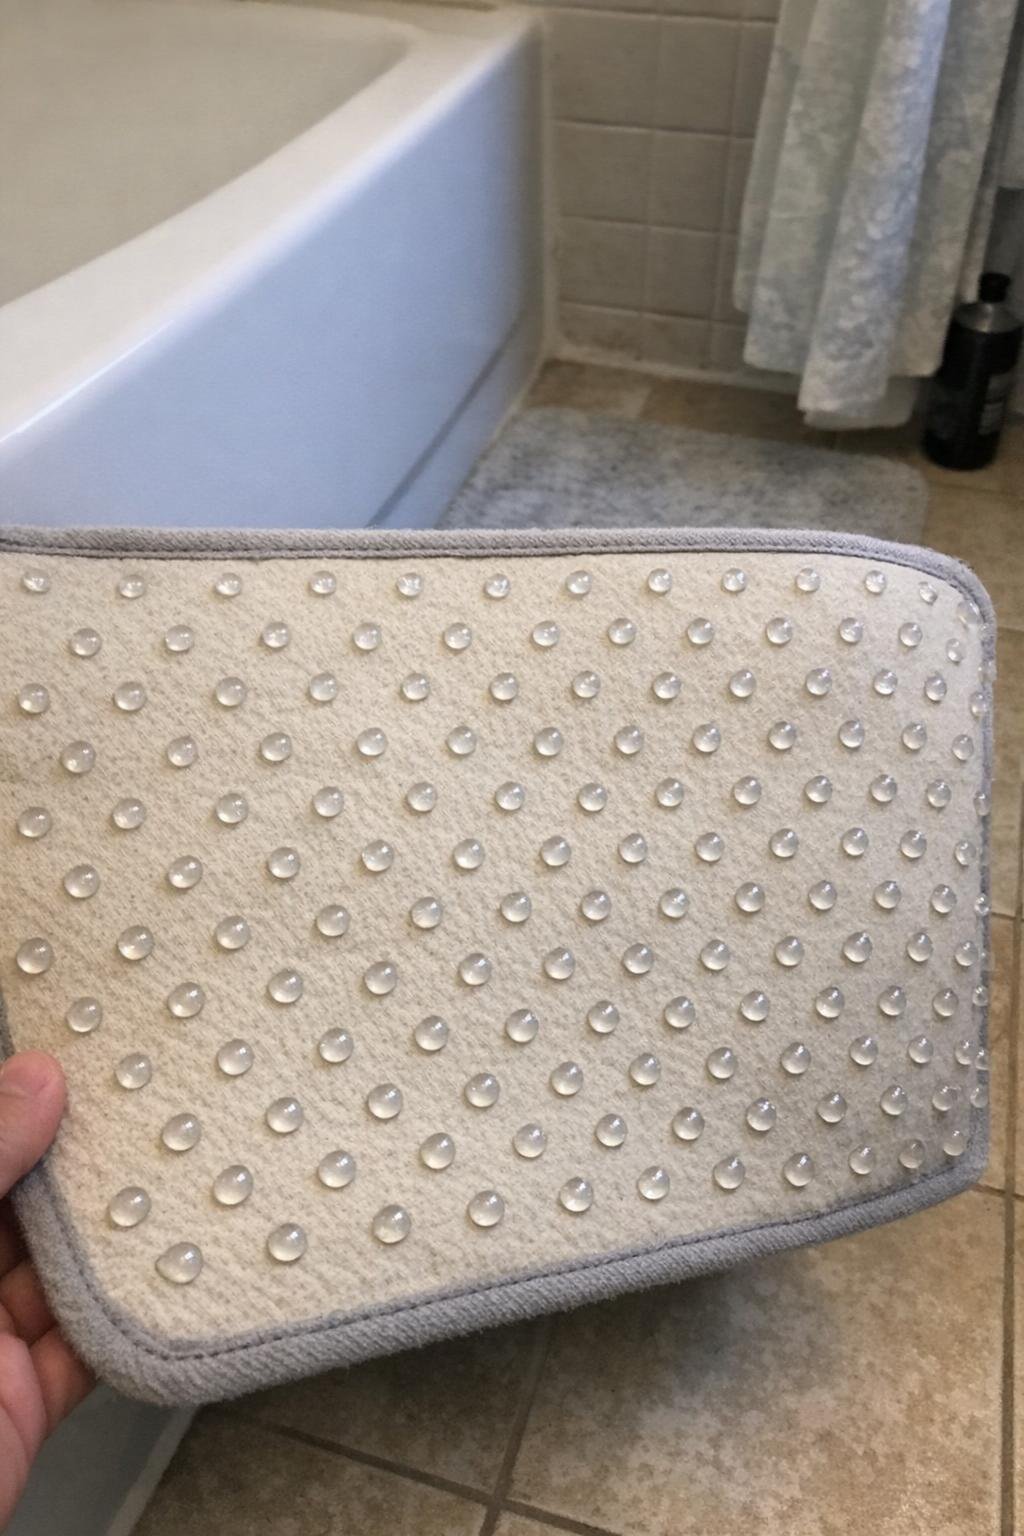
16. Glue-Dot Bath Mat for a Slippery Tub
You’ll build this with a hot glue gun and 6 to 8 clear glue sticks, plus a plain rubber or foam bath mat, or even the underside of a lightweight tub mat that needs more grip. This is another practical one, and I’d test a small corner first if your mat material is delicate.
Flip the mat over and pipe hot glue dots in neat rows, spacing them about 1 inch apart across the full underside, then let it cool flat for 15 minutes. Once cured, place it back in the tub or just outside it where slipping happens most. It’s not flashy, but the dense raised texture makes a huge difference and feels like a clever fix you’d be oddly proud to show someone.
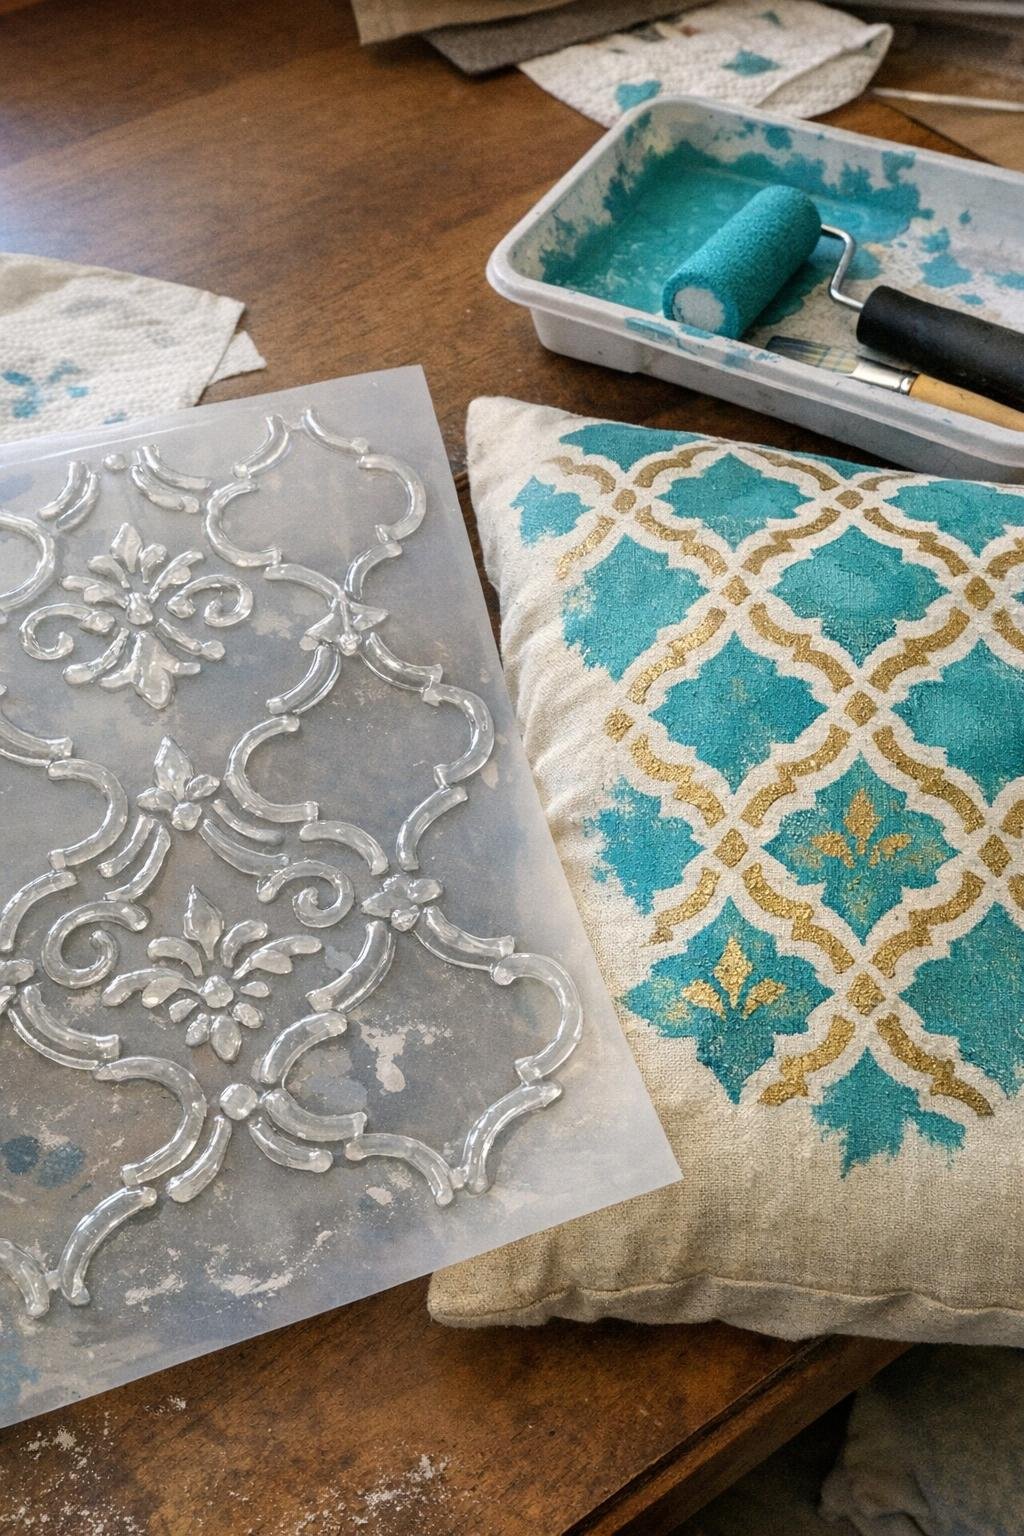
17. Hot Glue Raised-Pattern Stencil
You’ll build this with a hot glue gun and 3 to 5 clear glue sticks, plus a flexible plastic sheet, craft knife or scissors, and paint for walls or fabric. I usually make repeating motifs around 4 inches tall so they are easy to line up and don’t overwhelm a pillow or small wall section.
Pipe a raised pattern onto the plastic sheet, such as Moroccan curves, leaves, or little arches, and let it cool completely before cutting the stencil to size. Use it with a foam roller or nearly dry stencil brush to apply paint lightly over the raised design on pillows, furniture, or a single accent wall section. The finished look is striking because the handmade stencil pattern has more depth and variation than a flat store-bought stencil.
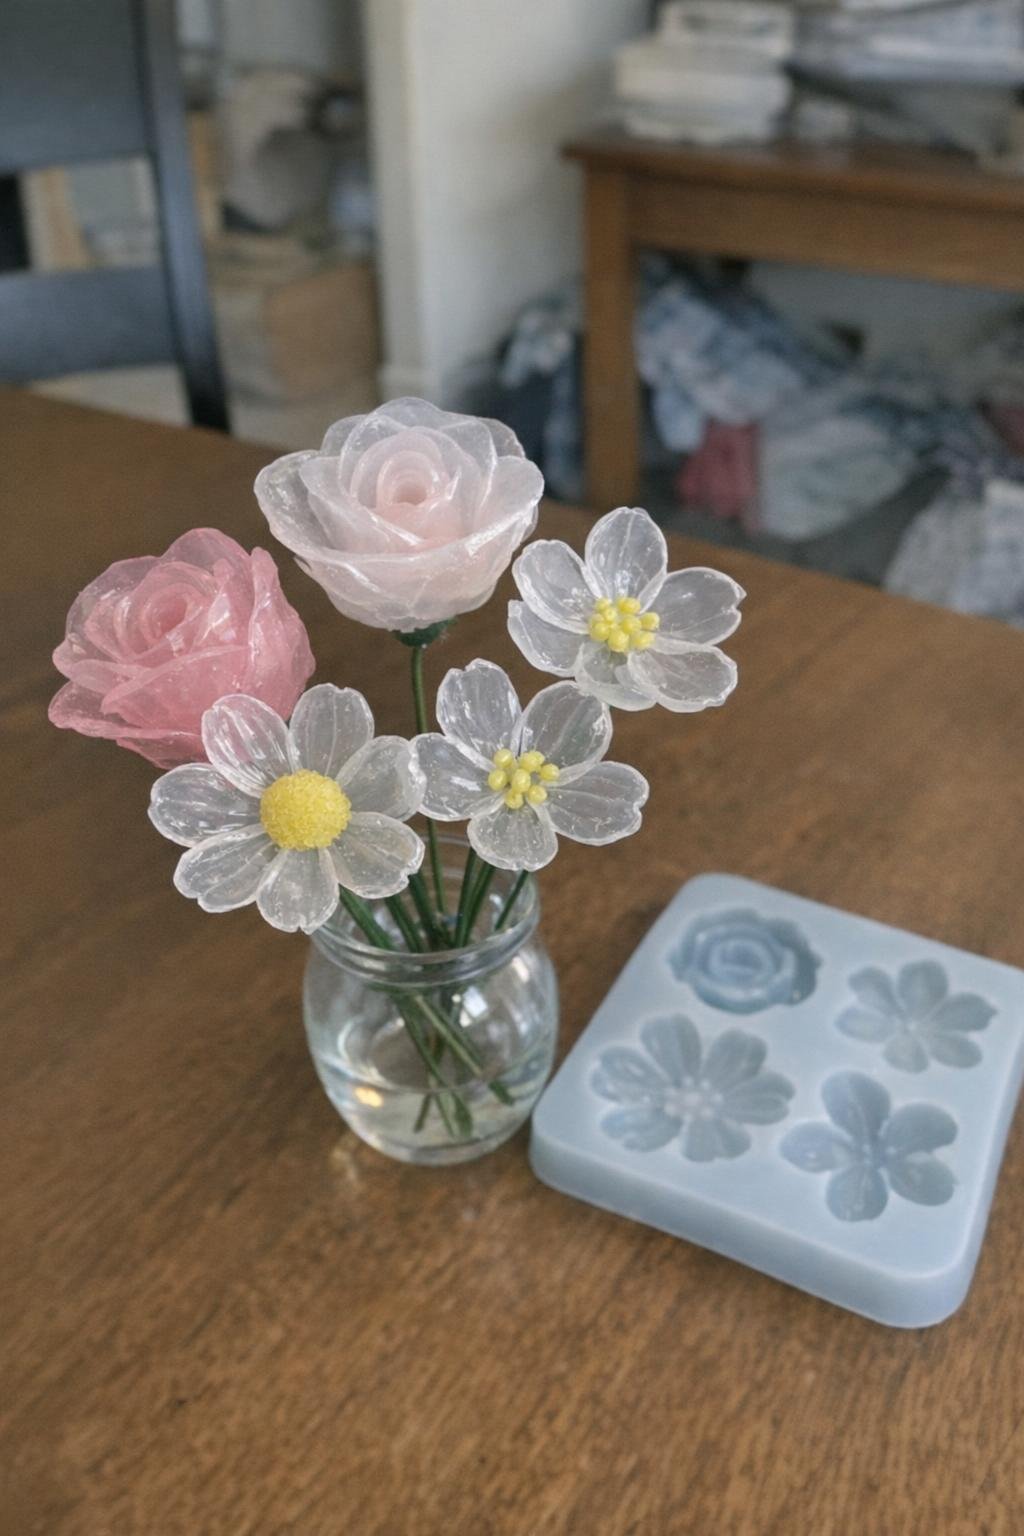
18. Hot Glue Flower Stems From a Silicone Mold
You’ll build this with a hot glue gun and 4 to 6 clear or colored glue sticks, plus a silicone flower mold, floral wire or skewers for stems, and optional paint. Small blossoms 2 to 3 inches across look nicest grouped in bunches of 5 or 7.
Fill the silicone mold cavities with hot glue, lay a stem into the back before the glue fully sets, and let each flower cool for 10 minutes before unmolding. Paint the petals if desired and arrange the finished stems in a bud vase or bundle them with ribbon. They’re eye-catching because the translucent petals pick up light like resin flowers but take a fraction of the effort.
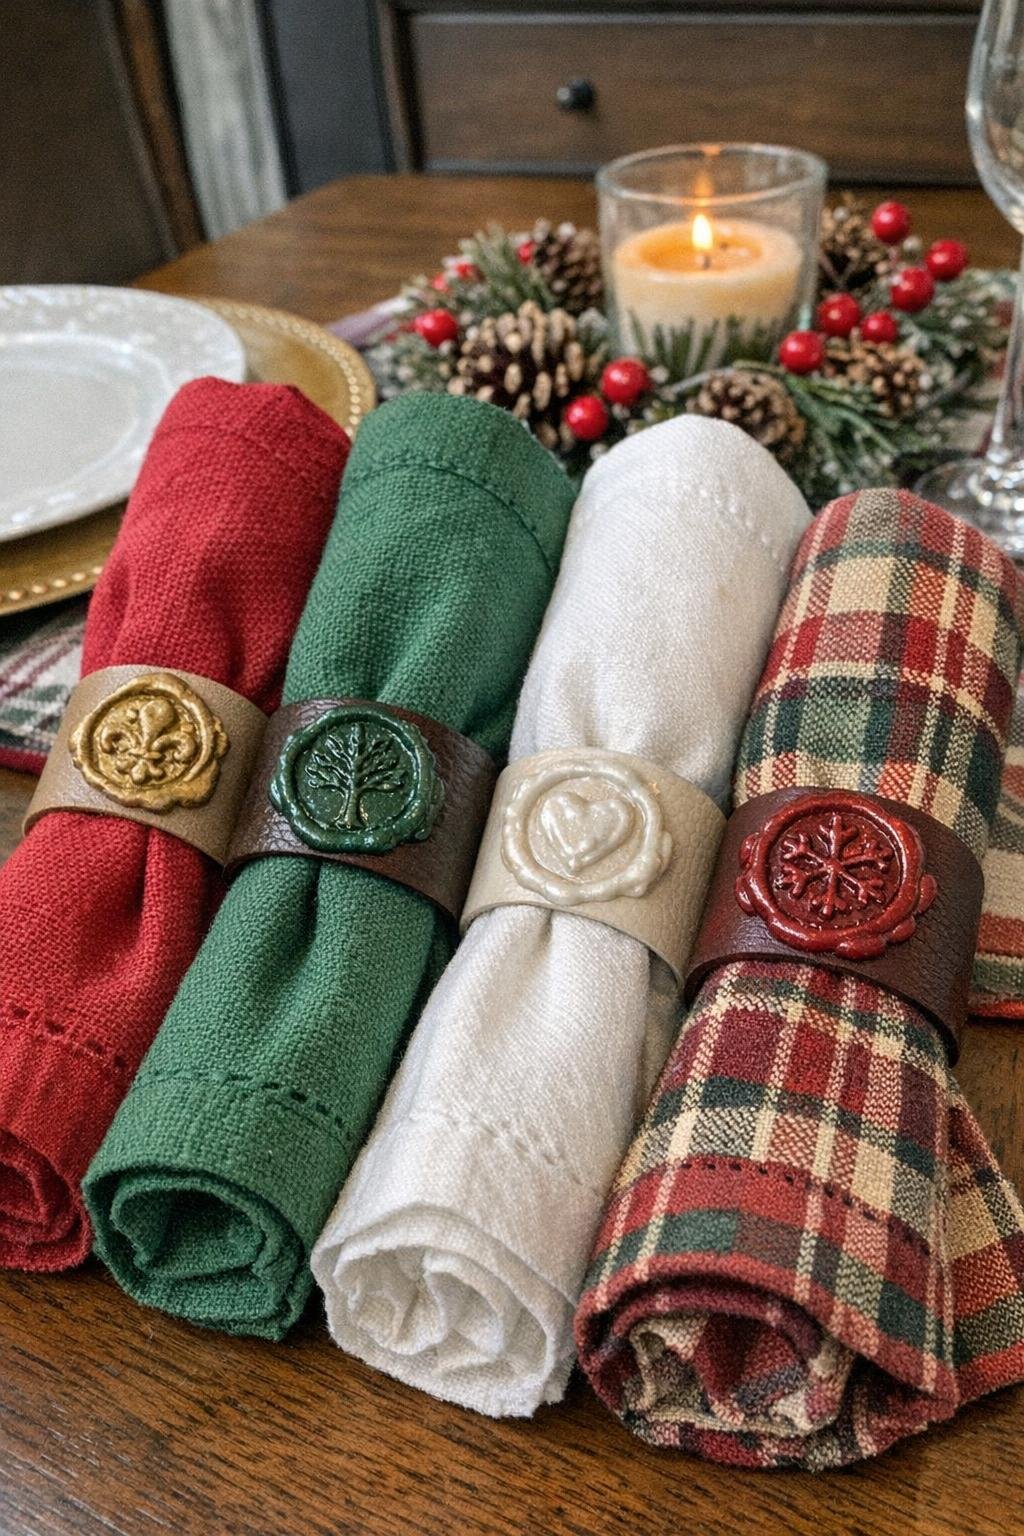
19. Glue Wax-Seal Napkin Rings
You’ll build this with a hot glue gun and 3 to 4 clear or colored glue sticks, plus plain napkin rings or strips formed into rings, a small stamp, and metallic paint. I like making the seals about 1 1/4 inches wide so they feel substantial on a folded cloth napkin.
Pipe a round of hot glue onto each ring front or onto a lined surface to attach later, press in the stamp after a few seconds, and let the seals cool for 5 minutes. Add a little metallic paint to highlight the design and wrap the rings around holiday napkins for the table. They stand out because the raised seal adds that old-world formal touch without needing anything fancy underneath.
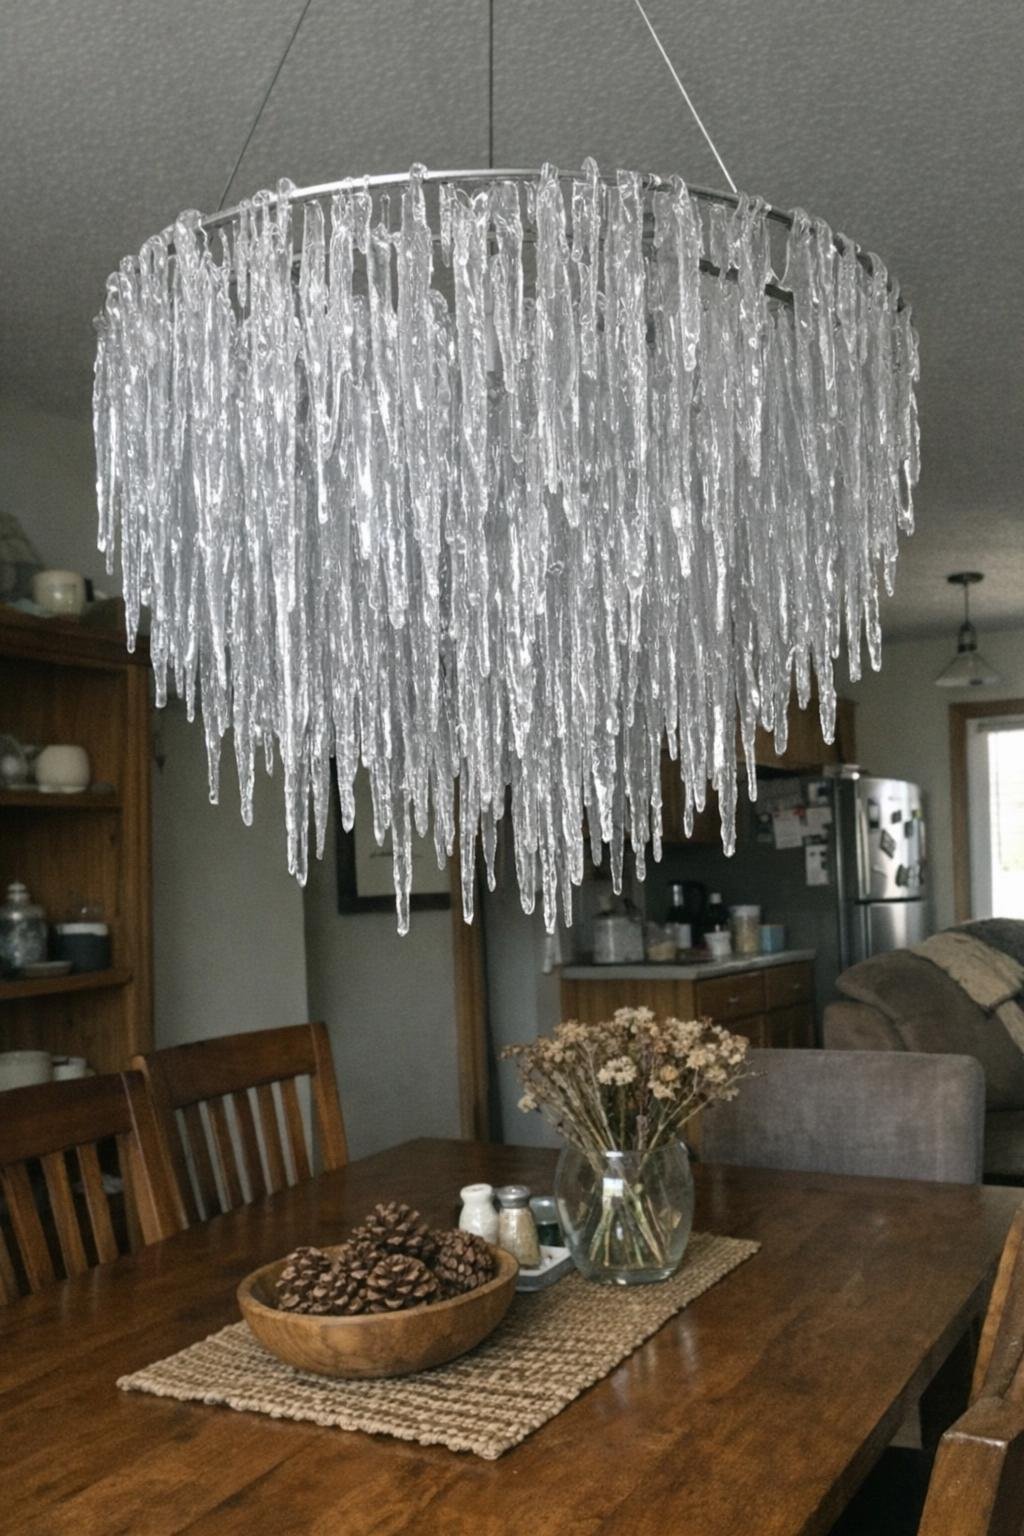
20. Hot Glue Chandelier of Icicles
You’ll build this with a hot glue gun and 10 to 15 clear glue sticks, plus an old lampshade frame or wreath ring, fishing line, ceiling-safe hanging hardware, and optional fairy lights. This is the biggest project on the list, but it’s still mostly repetitive work, which I actually find kind of relaxing.
Create dozens of separate hot glue icicles on a lined surface, making them 4 to 9 inches long and letting them cool 12 minutes before peeling them up. Tie them at varied lengths around the ring with fishing line, then hang the piece above a dining table, breakfast nook, or party buffet where the light can hit it. The layered curtain of clear icicles looks dramatic and surprisingly elegant, almost like a winter installation piece in a much fancier house.
If you have a hot glue gun, a little patience, and one open evening, you can make something here that looks far more impressive than the supply list suggests. Honestly, those are my favorite kinds of DIYs: low-risk, affordable, and pretty enough that people ask where you bought them.