
There are some projects that look almost too simple on paper, and this is one of them. You start with a stack of plain white grocery bags and a basic wire hanger, and with a little scrunching and arranging, they turn into something so full and textured that it barely reads as its humble beginnings. I love crafts like this because they give you a big visual payoff without needing a craft room full of tools or a whole free weekend.
This is a great project for anyone who wants a budget-friendly seasonal door decoration that still feels soft, polished, and festive. I’m a big fan of easy evening projects I can work on at the kitchen table after dinner, and this one fits that category perfectly—simple, repetitive, and honestly kind of relaxing once you get going.
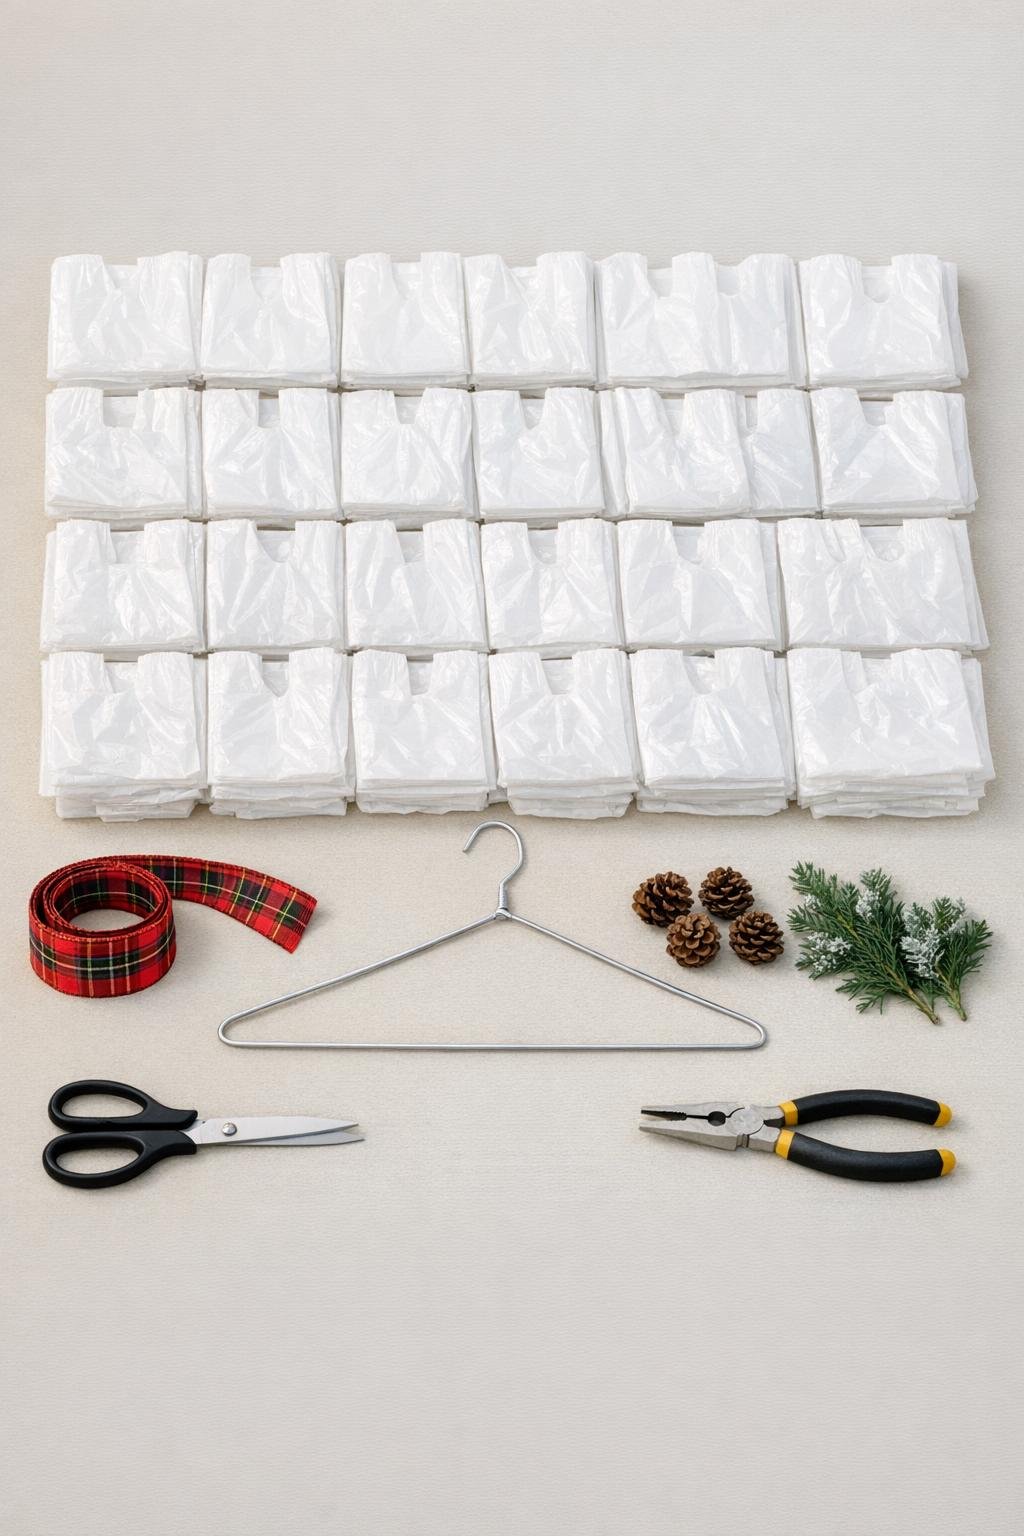
Materials
60 white plastic grocery bags
Instructions
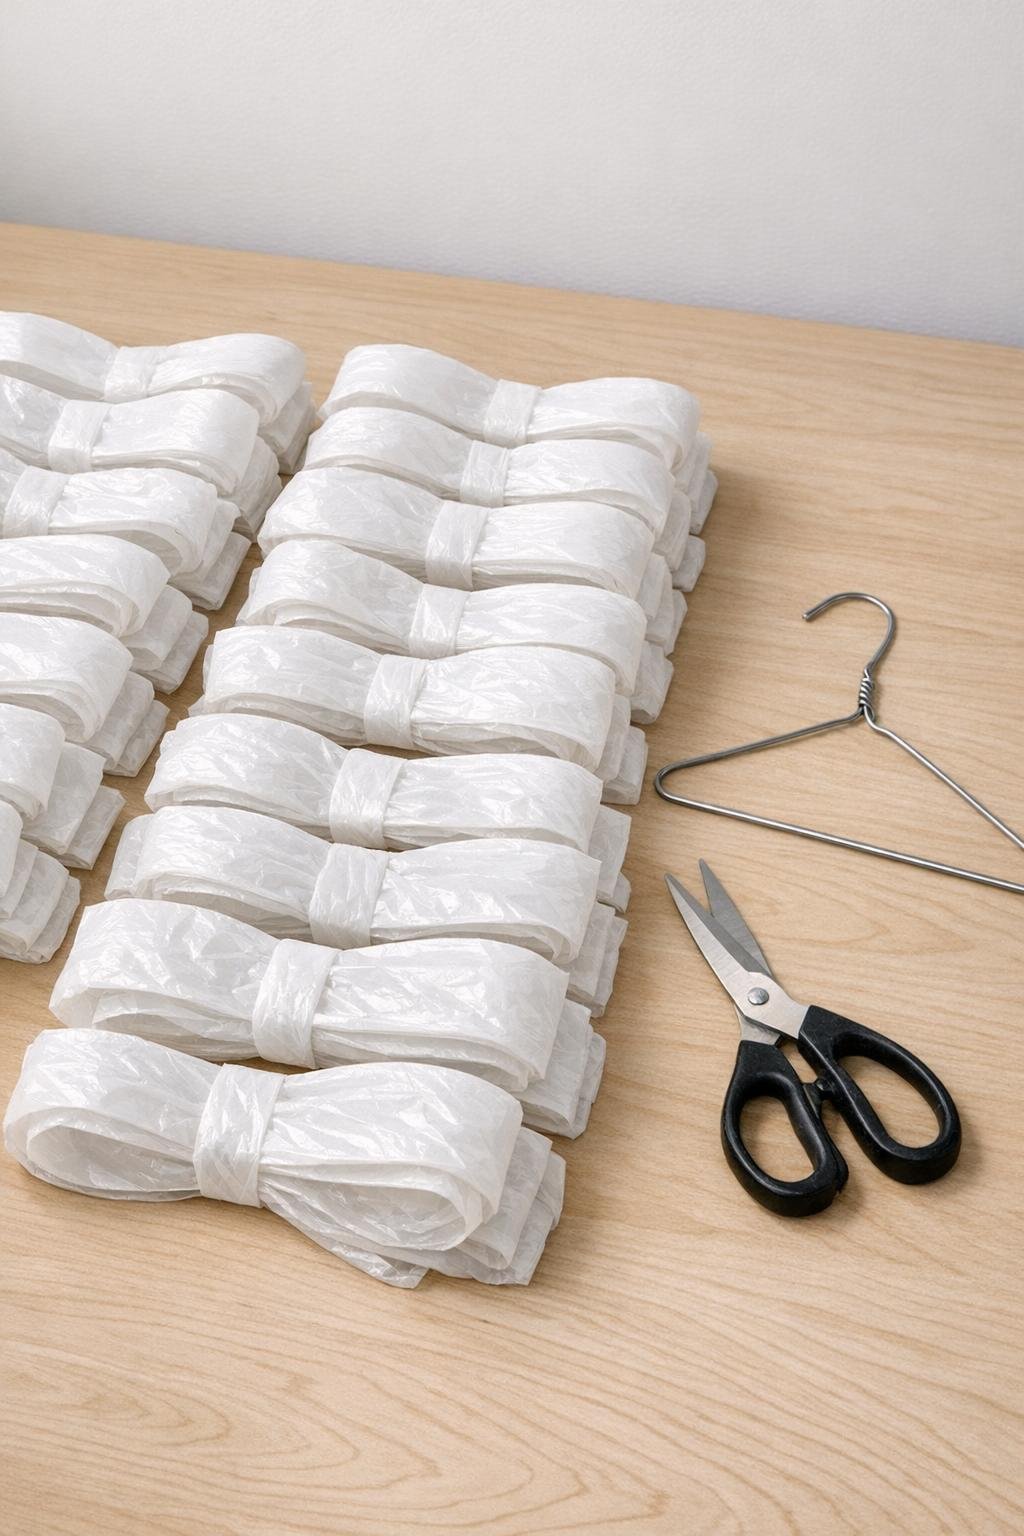
1. Cut off the handles and the bottom seam from all 60 grocery bags, then cut each bag once through the middle to make a long plastic strip or tube section. Flatten the strips and stack them so they’re easy to grab as you work.
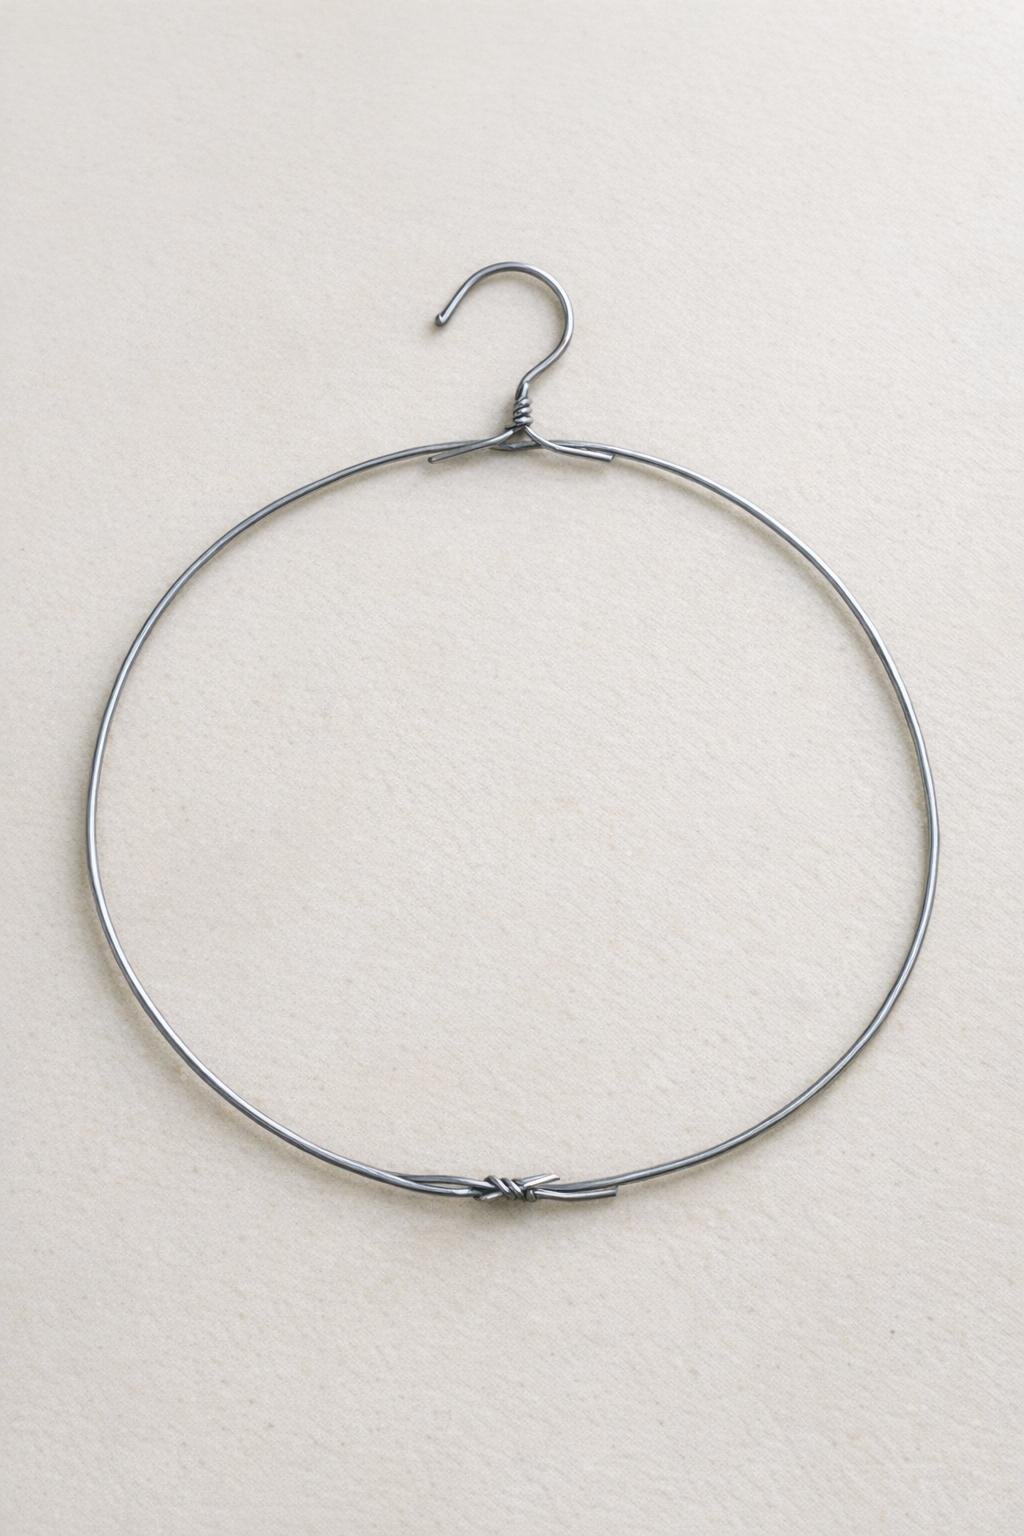
2. Use the pliers to untwist the hanger hook and open the hanger into one long wire piece, keeping the hook intact at the top. Bend the wire into a large circle about 14 to 16 inches across, leaving the hook centered for hanging.
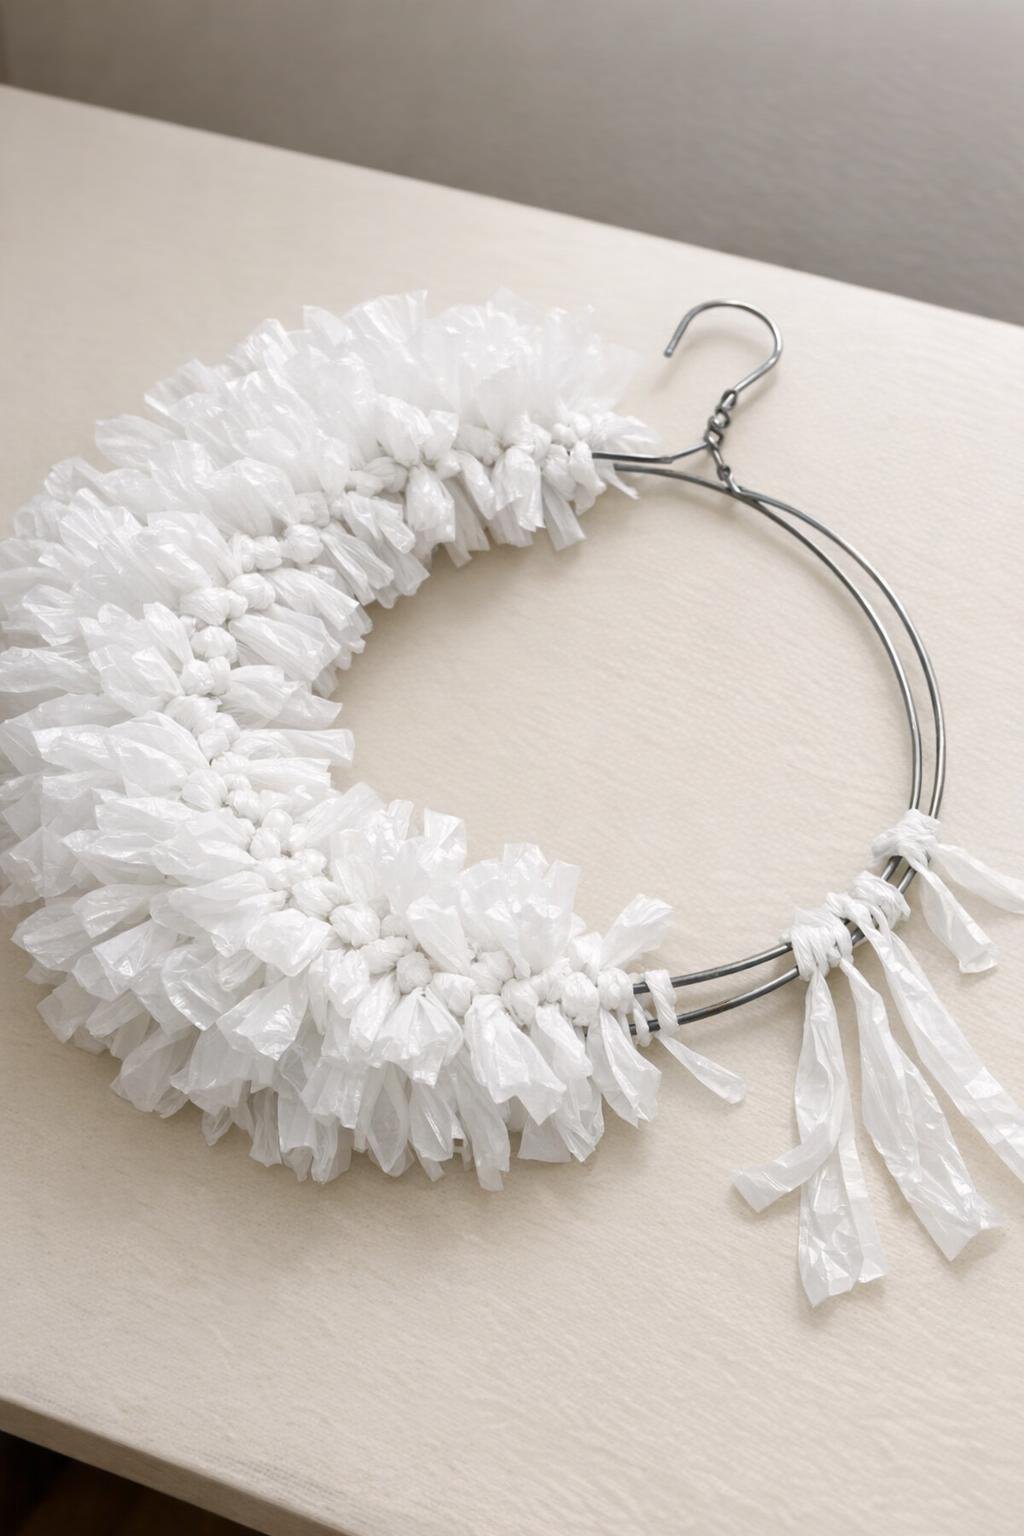
3. Take one plastic strip, gather it at the center, and tie it tightly around the wire with a firm double knot so the ends puff outward. Repeat with a second strip right beside it to start building a full, fluffy cluster.
4. Continue tying the plastic strips all around the wire circle, pushing each knot snugly against the last one. Rotate the wreath as you go so the fullness stays even and the wire gets completely covered.
5. Once all 60 strips are attached, fluff and separate the plastic ends with your fingers to hide any gaps and create a soft rounded shape. If one area looks flat, loosen and rotate a few knots so the fullness spreads more evenly.
6. Twist the wire ends back together securely with the pliers, then adjust the circle until it looks balanced and nicely round. Tug a few of the outer pieces forward to soften the outline and give it that snowy, piled-up look.
7. Make a bow with the red plaid ribbon using about 18 to 24 inches, then trim the tails at an angle. Tie or knot the bow onto the lower side or bottom center of the wreath, wherever it looks most balanced to you.
8. Tuck the faux greenery behind the bow and attach the 3 pinecones so they sit in a small clustered arrangement. Nestle them into the plastic layers so the accents look anchored instead of just sitting on top.

9. Hang the piece by the hanger hook and give it one final fluffing, especially around the top and sides. Trim any awkwardly long plastic ends if needed, but keep most of the texture for a full, snowdrift effect.

Variations & Tips
For extra fullness: If your grocery bags are on the thin side, use 70 to 80 bags instead of 60. I’ve found that a little extra density makes the finished piece look much more luxurious on the door.
For a cleaner shape: After tying everything on, press the wreath lightly against the table and rotate it as you fluff. That helps you spot any uneven spots before you hang it up.
For a more festive look: Swap the red plaid ribbon for velvet, burlap, or a metallic ribbon depending on your holiday style. A wider ribbon gives the whole project a more finished, intentional feel.
For secure decorating: Tuck greenery stems deep into the tied plastic layers before fastening them in place. The dense scrunched bags do a surprisingly good job of gripping stems and keeping the accents from shifting.
For indoor or sheltered use: This holds up best on a covered front door, porch wall, or inside entryway. Since it’s made from lightweight plastic bags, I’d avoid hanging it where strong wind or heavy weather will batter it.
For easy storage: Hang it on a clothes hanger or large hook in a closet instead of flattening it into a bin. That keeps all the fluffy texture intact for next season, which is always my favorite kind of low-maintenance decorating.