
There are a few winter projects I come back to because they look far more impressive than the amount of effort they actually take, and this is absolutely one of them. If you can fill a pan with water and stack a few frozen blocks, you can make a beautiful glowing outdoor accent that feels straight out of a holiday display.
I love projects like this during busy weeks because the freezer does most of the work for me. With a handful of simple grocery-store and dollar-store supplies, you get a dramatic icy centerpiece for your porch that looks especially pretty at dusk, and it’s a fun one if you want something seasonal without committing to a complicated craft.
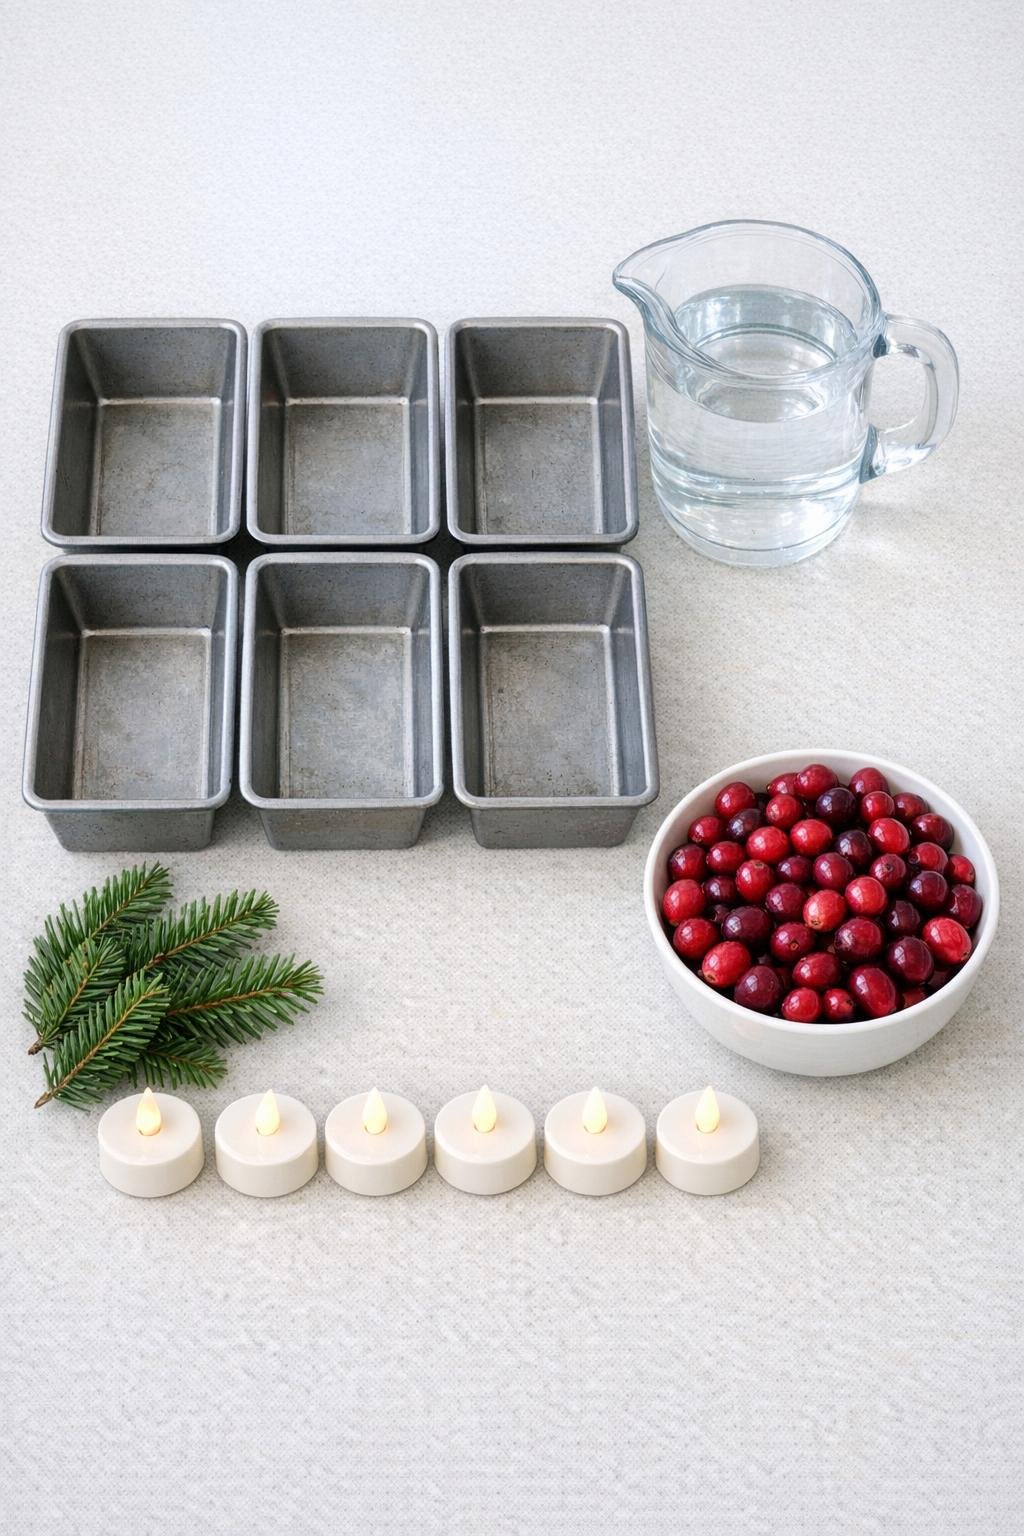
Materials
6 metal loaf pans, standard 8 1/2 x 4 1/2 inch size
Instructions
1. Clear a flat space in your freezer that can hold all 6 loaf pans side by side without tilting. Set the pans on a tray if that makes them easier to move without spilling.
2. Divide the evergreen sprigs and cranberries evenly among the 6 loaf pans, aiming for 3 to 4 sprigs and a small handful of cranberries in each pan. Spread them out so every brick will have color and texture all the way through instead of one heavy clump in the middle.
3. Pour 3 cups of water into each loaf pan, filling them about three-quarters full so the bricks are thick and sturdy but still easy to unmold. Nudge any floating greenery back into place with your fingers or the end of a spoon.
4. Freeze the pans for 12 to 18 hours, or until the blocks are completely solid all the way through. If your freezer runs full like mine usually does after a grocery trip, give them the full overnight-plus stretch so the centers are rock hard.
5. Take the pans out one or two at a time and let them sit at room temperature for 1 to 2 minutes. Run a little cool water over the outside of each pan if needed, then gently loosen and slide out the ice bricks onto your tray.
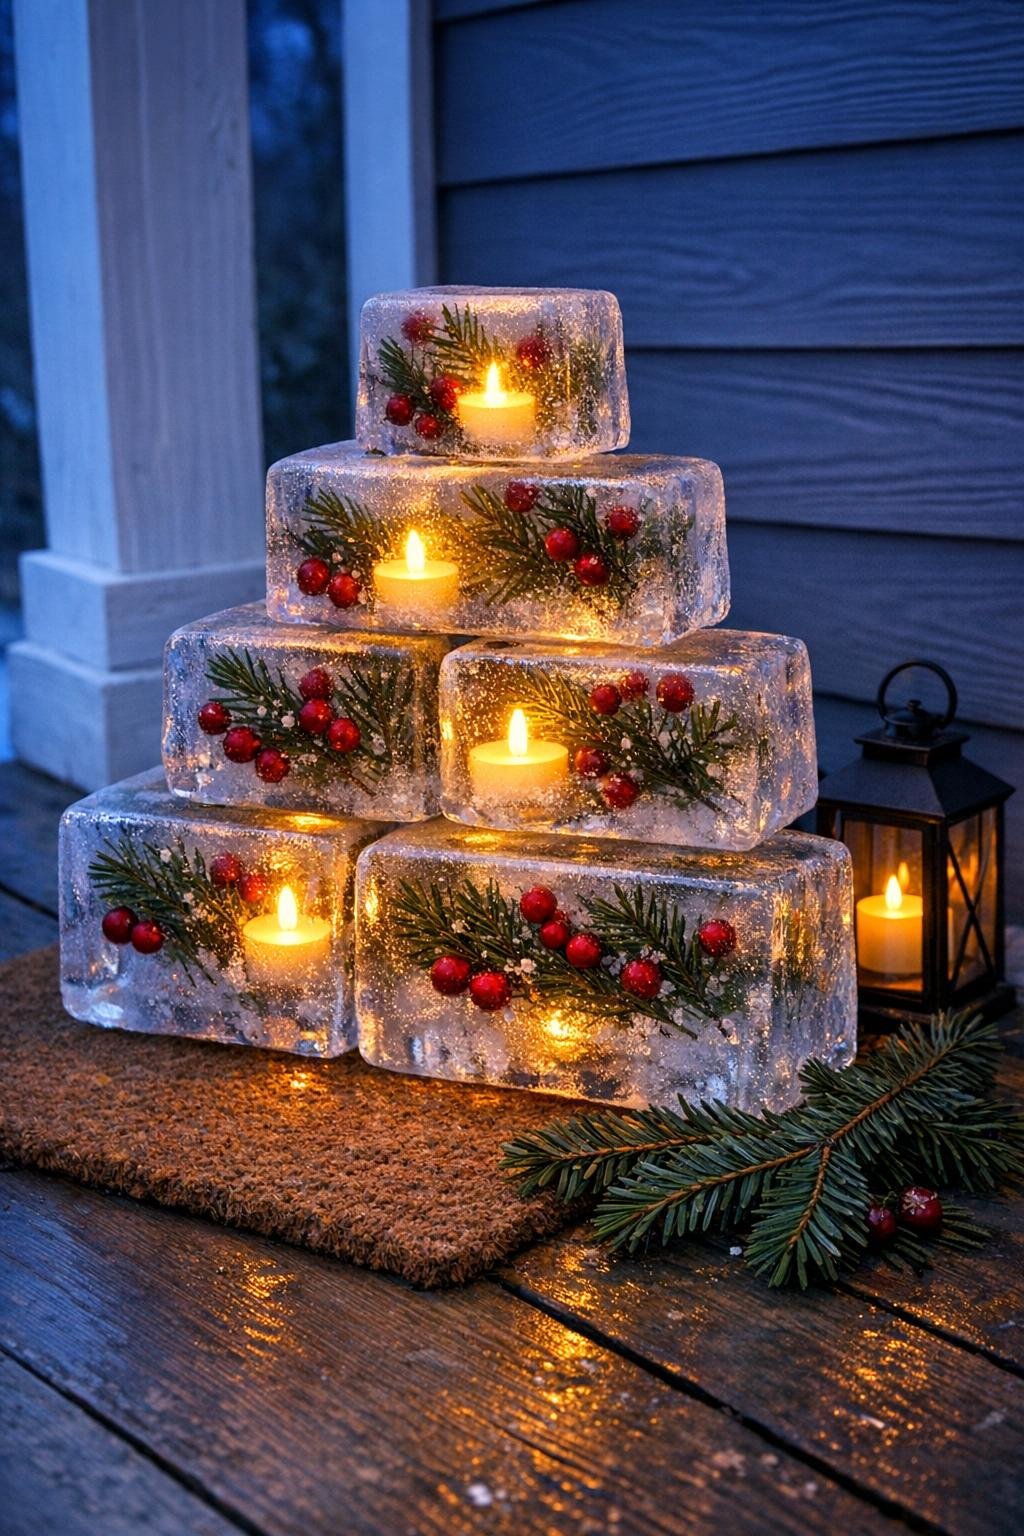
6. Carry the bricks outside right away and build the base of your display on a flat porch surface in cold weather. Stand 2 bricks upright with a tea light between them, then repeat with 2 more bricks to form a square base that glows from the center.
7. Add the next 2 bricks across the top, leaning them together slightly to create a simple peaked tree shape. Tuck the remaining tea lights inside the openings and around the base so the whole piece glows through the clear ice and lights up the cranberries and greenery.
Variations & Tips
For stronger bricks: If your weather is hovering near freezing, use slightly less water per pan, about 2 1/2 cups, for faster freezing and easier unmolding. Thicker-looking bricks are lovely, but fully frozen bricks matter more than overfilled pans.
For a fuller look: Pack in extra evergreen tips around the edges of each pan before freezing so the finished blocks look lush from every angle. I like pressing the prettiest pieces against the sides where they’ll show best once the ice is unmolded.
For easier stacking: Make the display directly where you want it to stay. Once the bricks are out of the pans, they’re sturdy but slippery, and I’ve learned the hard way that rebuilding after carrying them across the porch is not nearly as fun.
For more glow: Use warm white tea lights instead of cool white for a softer candlelit look. Adding one or two extra lights behind the tree gives the ice even more sparkle without changing the simple design.
Weather tip: This project is best made when outdoor temperatures are below freezing. If the sun hits your porch strongly in the afternoon, place the display in a shaded corner so it lasts longer.
Ingredient swap: If you don’t have cranberries, small red winter berries from the floral section work well, and cedar or pine clippings can stand in for mixed evergreen sprigs. Just keep the pieces short enough to fit neatly in the loaf pans.
Make-ahead tip: Freeze the bricks the night before you want to display them. For busy workweeks, I love doing the prep after dinner so the only job the next day is the quick, satisfying outdoor assembly.