
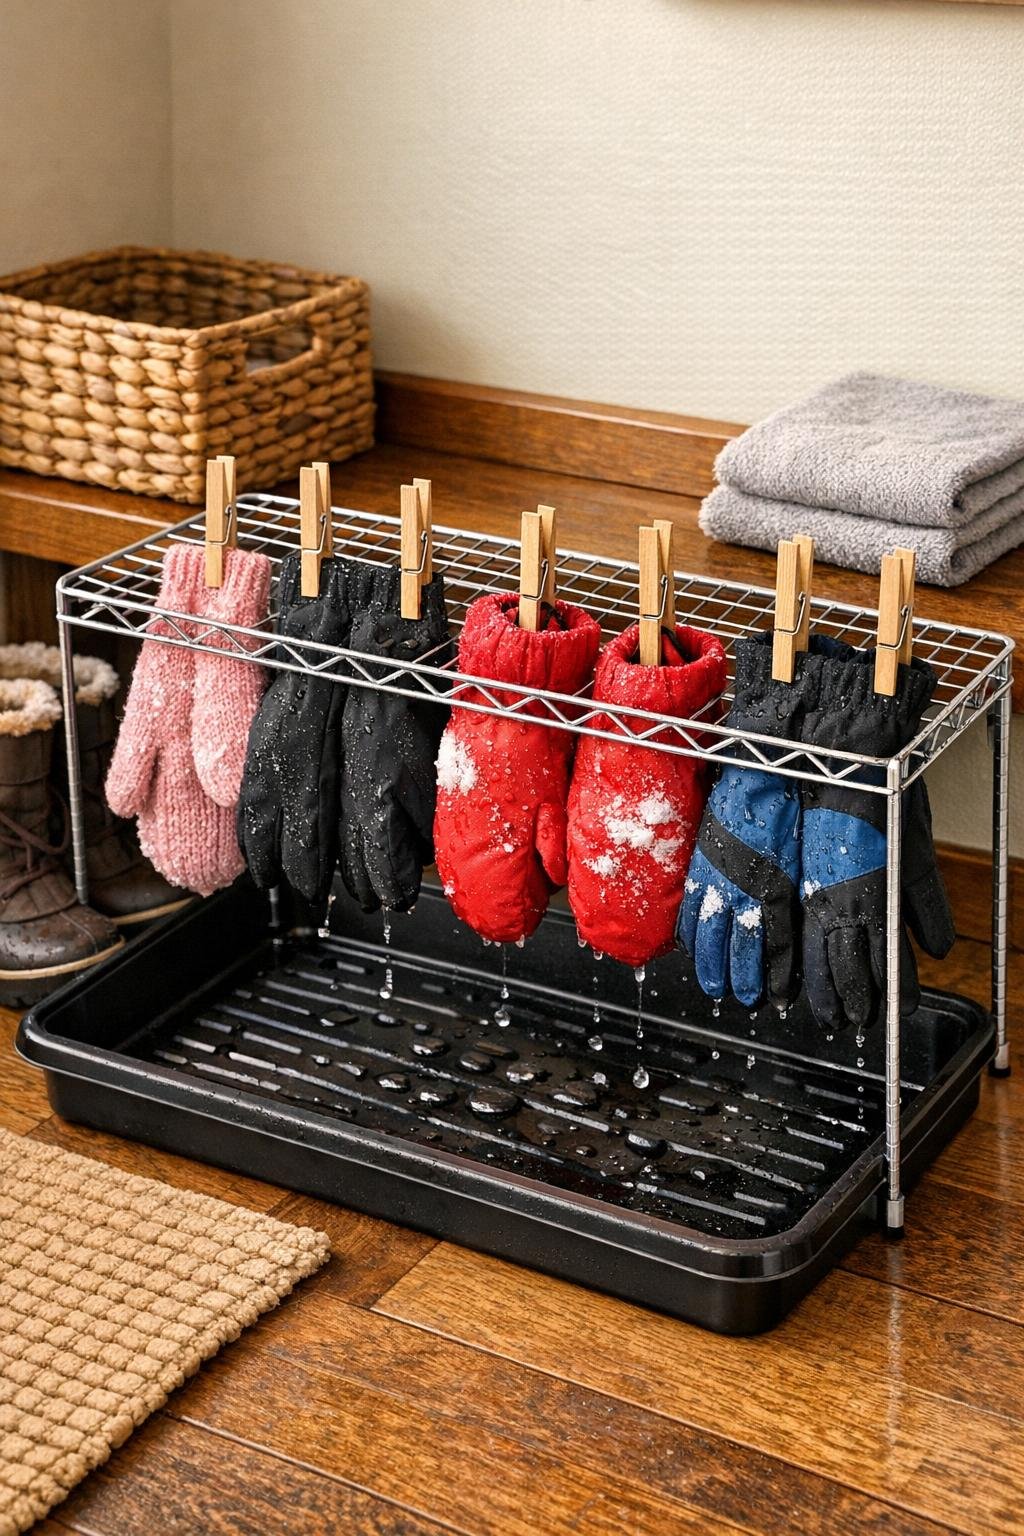
In a small entryway, winter clutter can pile up faster than supper dishes after Sunday dinner. Wet mittens, damp gloves, and drippy little hats always seem to land in a heap right by the door, and before long you have puddles on the floor and no dry pair ready for the next trip outside. This simple mitten dryer solves that in the plainest, most sensible way: a metal cooling rack propped over a plastic boot tray so the water drips down neatly while everything gets air all around it.
I’m fond of projects like this because they use ordinary household things in a smarter way, which is how a lot of good Midwestern homemaking has always worked. If you’ve got a narrow hallway, mudroom corner, or just a sliver of floor by the back door, this little setup gives you a tidy drying station without asking for tools, carpentry, or much money at all.
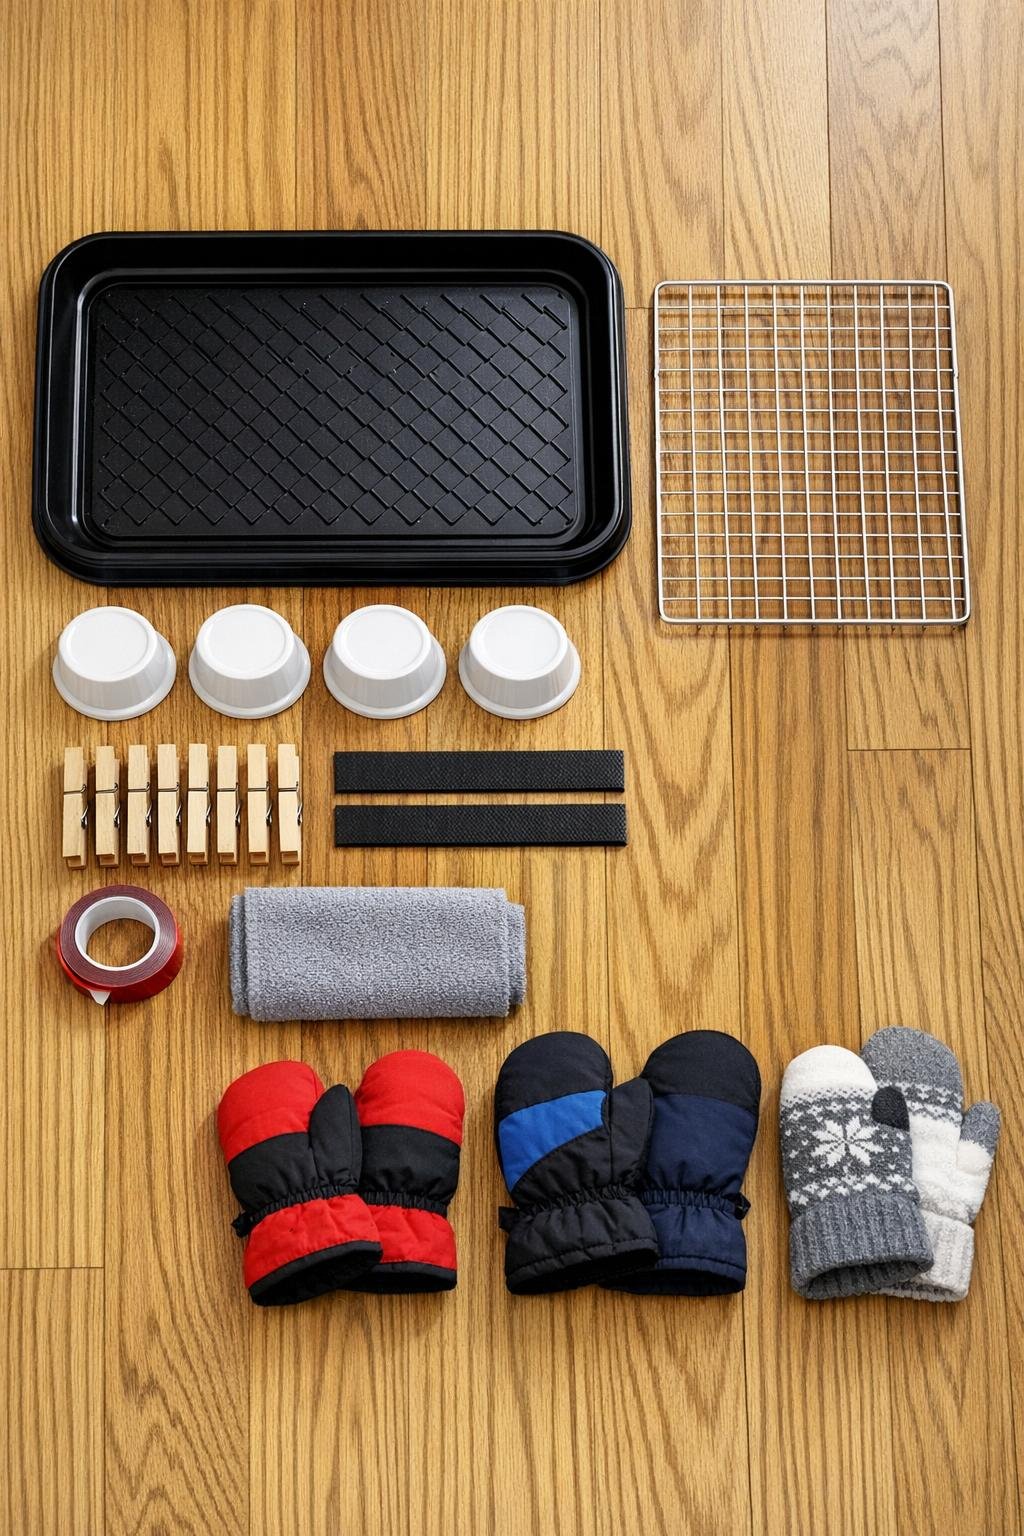
Materials
Instructions
1. Wash and dry the boot tray, cooling rack, and ramekins so the setup starts clean and the adhesive will stick properly.
2. Place the boot tray lengthwise against the wall in your entryway, leaving 2 to 3 inches of space behind it so air can circulate a little.
3. Set one ramekin upside down near each corner inside the tray, keeping them about 1 inch in from the tray edges so they sit steady and don’t wobble.
4. Cut the rubber shelf-grip strips and press one onto the top of each pair of ramekins where the cooling rack will rest; this keeps the metal from sliding and softens the contact.
5. Lay the metal cooling rack across the four ramekins so it bridges the tray securely, with the long side of the rack running the same direction as the tray.
6. Test the rack with both hands and press gently on the center; if it shifts, add small pieces of mounting tape between the ramekins and tray to hold the risers in place.
7. Fold the hand towel in thirds and place it under the front edge of the tray or beside it to catch any stray drips and to give you a quick spot for wiping boots or little hands.
8. Clip wet mittens and gloves to the cooling rack with clothespins, spacing them so each item hangs open and has breathing room instead of touching the next one.
9. Put heavier mittens near the outer edges of the rack and lighter gloves toward the middle so the setup stays balanced and easy to reach.
10. After each use, empty the tray, wipe it dry, and leave the rack in place so your drying station is always ready for the next snowy trip in and out.
Variations & Tips
For a narrower space: Use a quarter-sheet cooling rack and a shorter tray if your doorway is especially tight. The idea is the same, just scaled down so nobody is tripping over it on the way in.
For more drying room: Keep a second cooling rack nearby and swap it in when the children tumble in with extra gloves, knit hats, and scarf ends. On snowy weeks, that little bit of extra capacity is a blessing.
For sturdier risers: Small bricks, canned goods, or short wood blocks can stand in for ramekins if they’re all the same height and fit safely inside the tray.
To help things dry faster: Turn mittens inside out partway if they’re very soaked, and rotate them once after an hour or two. More open air means less of that cold, clammy feeling the next morning.
To keep it looking neat: Match your clothespins, tray, and towel in simple black, white, or natural wood tones. Even a hardworking little station feels nicer when it looks intentional.
Easy seasonal use: This setup is handy for more than mittens. I’ve used the same sort of rack-and-tray idea for drying rain gloves, knit caps, and even muddy garden gloves by the back door come spring.