
I love a project that takes something overlooked and turns it into the kind of decor people stop and ask about, and this one absolutely does that. If you have a stash of vintage jello molds from a thrift store, flea market, or a box from a relative’s basement, this is such a satisfying way to use them without permanently changing them.
This DIY is perfect if you want holiday wall decor that feels collected, charming, and a little unexpected, but is still easy to put together after work or over a weekend afternoon. I’m a big fan of projects that look far more complicated than they really are, and this one delivers that payoff in a big way.
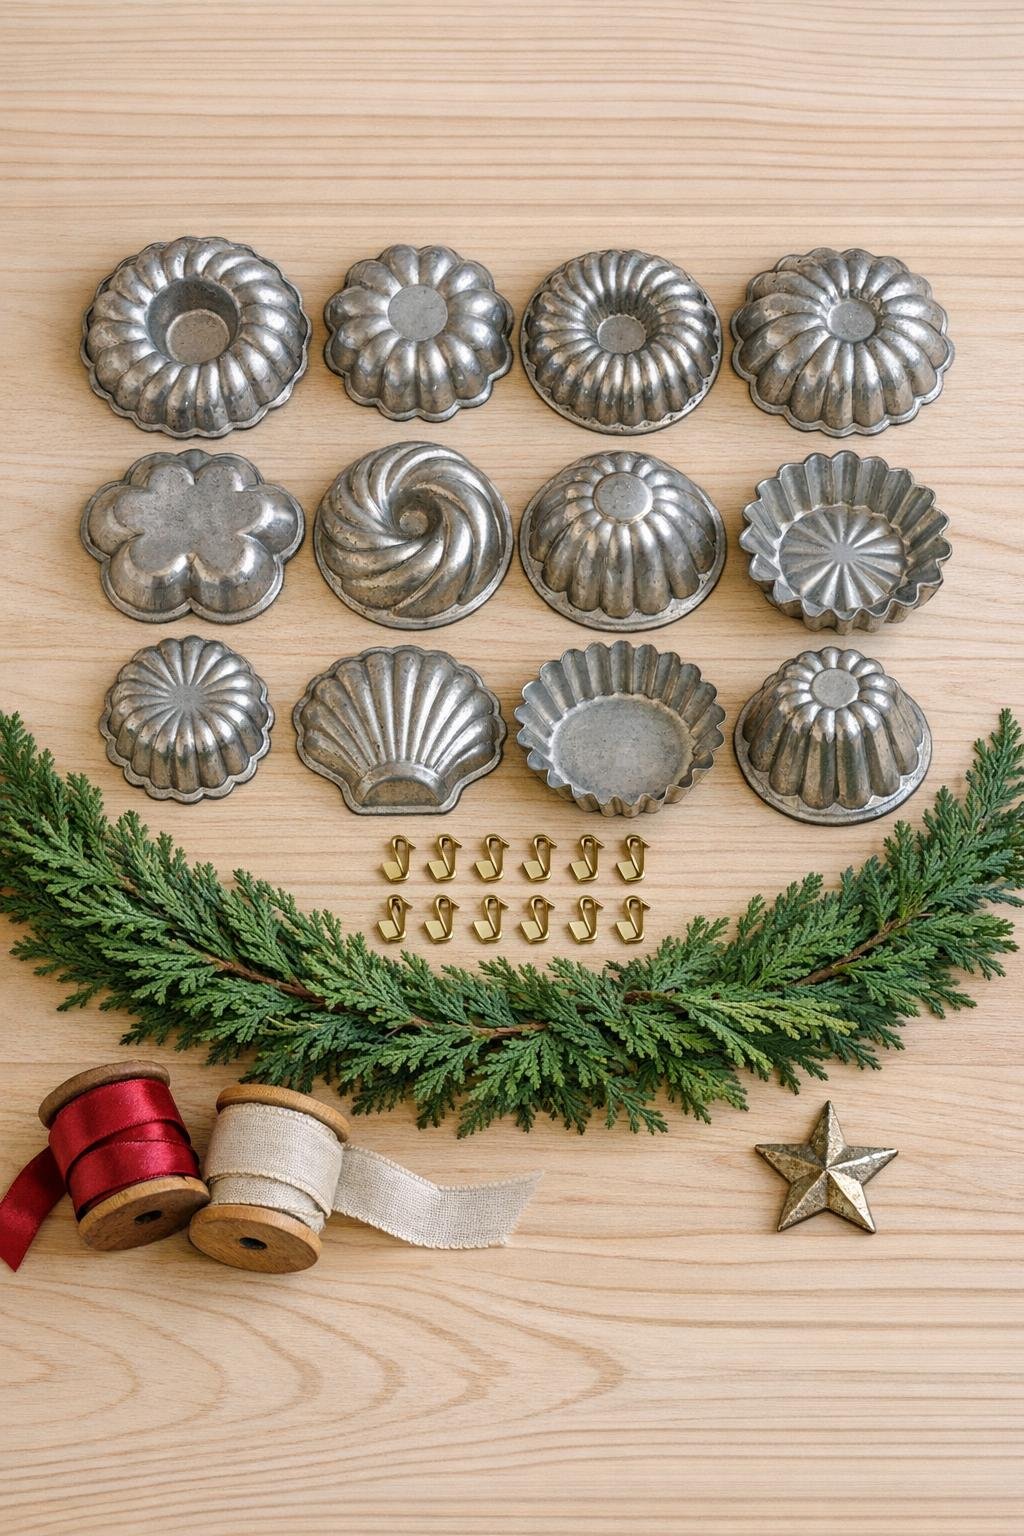
Materials
12 vintage jello molds, assorted shapes, 2 1/2 to 5 inches wide
Instructions
1. Lay all 12 jello molds out on the floor or a large table and sort them from largest to smallest, mixing shapes so the arrangement feels collected instead of too matched.
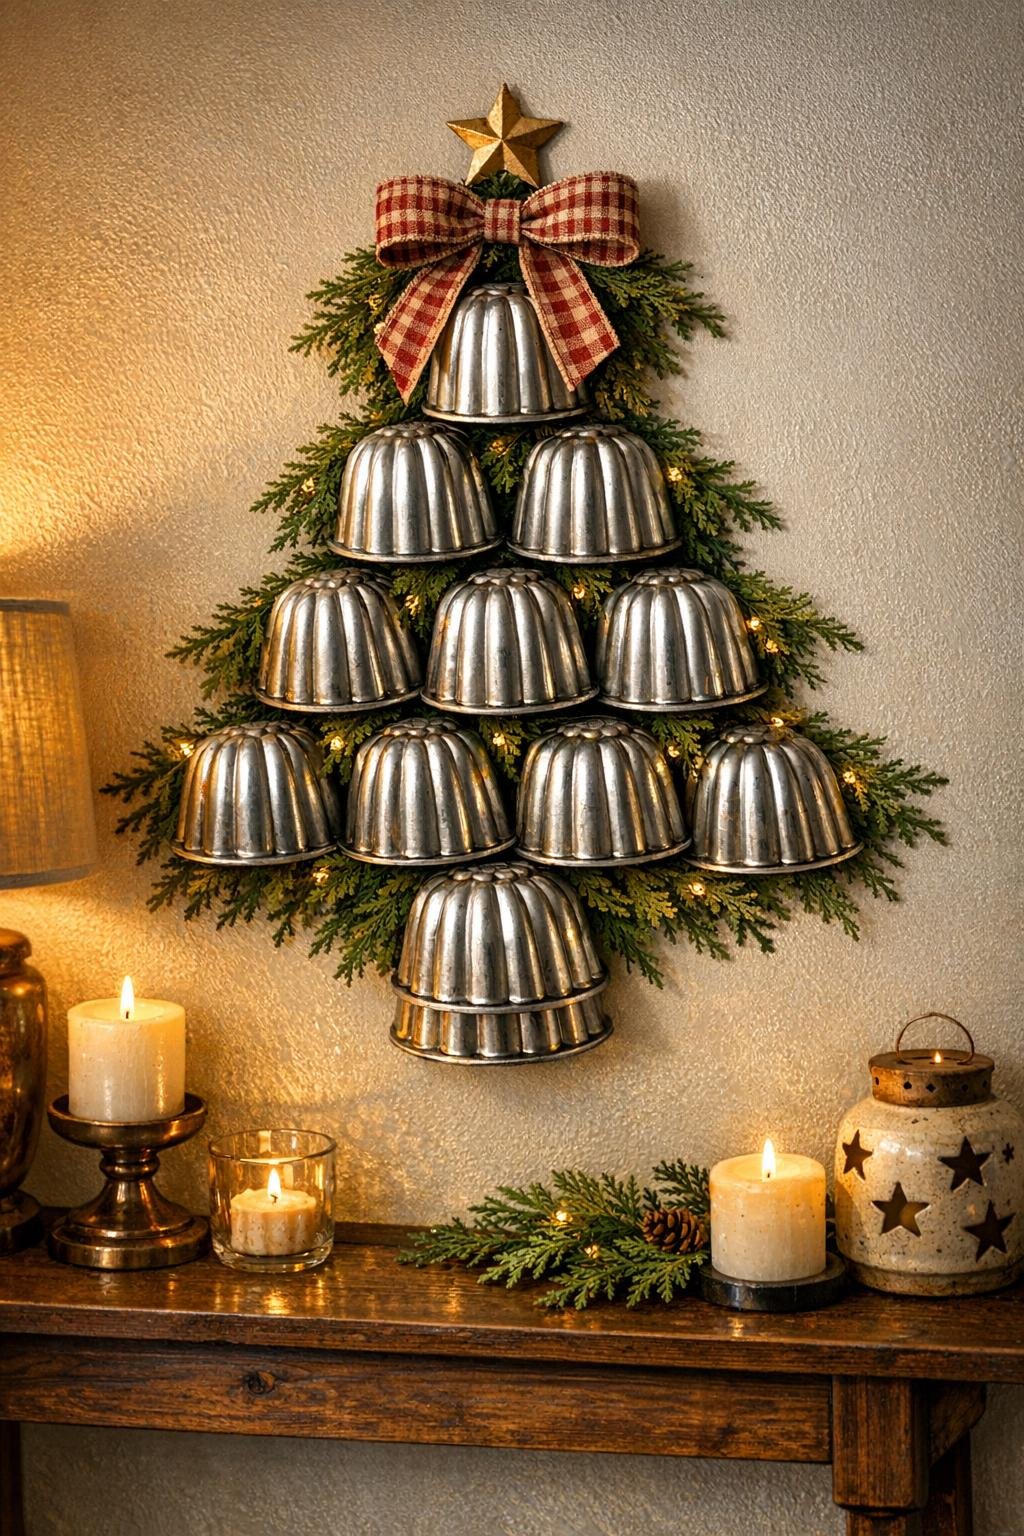
2. Build a tree shape before you hang anything: place 1 mold at the top, then rows of 2, 3, 3, and 3 underneath, leaving 1 to 2 inches between pieces so the wall color shows through and defines the shape.
3. Measure the full layout width and height, then mark the center point on your wall with pencil so you can keep the tree balanced as you work upward.
4. Start at the top and install the first picture hook, then hang the smallest mold from its center opening or lip, adjusting it until it sits straight.
5. Add the next row of hooks and molds one row at a time, stepping back after each row to check spacing and keep the outer edges angled like a tree instead of turning boxy.
6. Install the lowest row last, using your largest molds along the bottom to give the tree a fuller base and a more dramatic finished silhouette.
7. Attach the small star at the top with a picture hook or a removable mounting dot, centered just above the top mold with a tiny gap between them.
8. Cut the faux garland into shorter sections if needed, then tuck and secure pieces around the outside edges of the mold arrangement with clear glue dots or tiny zip ties hidden behind the molds.
9. Fill any bare spots with the extra faux greenery picks, especially between rows and near the bottom corners, so the tree looks lush and finished instead of sparse.
10. Tie a generous bow from the wide ribbon and attach it near the top third of the tree or at the base of the star for a soft vintage touch.
11. Cut the narrow ribbon or twine into 4 to 6 short lengths and tie simple loops or tiny bows onto a few molds, spacing them evenly so the accents feel intentional but not busy.
12. Make final adjustments by rotating any crooked molds, fluffing the greenery outward, and checking that the whole shape reads clearly from across the room.
Variations & Tips
For a more vintage look: Use all silver-tone molds and choose velvet or satin ribbon in deep red, forest green, or champagne. I’d skip anything too bright if you want that collected heirloom feel.
If your molds are very shallow: Hang them on small cup hooks or narrow nails instead of standard picture hooks so they sit closer to the wall and stay from tilting forward.
For renters: Build the same arrangement on a large painted plywood panel or foam display board, then hang the board with fewer wall holes. It gives you the same look with much easier cleanup later.
To make it fuller: Add more small greenery picks between every row and around the base. In my experience, extra fill is what takes this from “cute idea” to “wow, where did you get that?”
For a little sparkle: Tuck in a few tiny battery fairy lights through the greenery, keeping the wire hidden behind the molds. Warm white lights look especially pretty against the aged metal.
When arranging the molds: Alternate round, oval, and fluted designs so your eye moves around the tree. Too many matching shapes side by side can make the display feel flat.
Storage tip: Take a quick photo of your finished layout before packing it away after the holidays. Future-you will be very grateful when it’s time to hang it again on a busy weeknight.