
There’s something mighty satisfying about taking the plainest little craft-store finds and turning them into something that looks like it belongs tucked into a holiday memory. Tiny terra cotta pots are one of those supplies I always seem to have on hand, and when you turn them upside down and dress them up a bit, they take on a whole new charm without a lick of fuss.
This is the sort of project I’d set out on the kitchen table with a cup of coffee nearby and finish in one easy sitting. It’s especially good for anyone who likes simple seasonal decorating, handmade ornaments, or little rustic touches that don’t cost much but still feel thoughtful and polished.
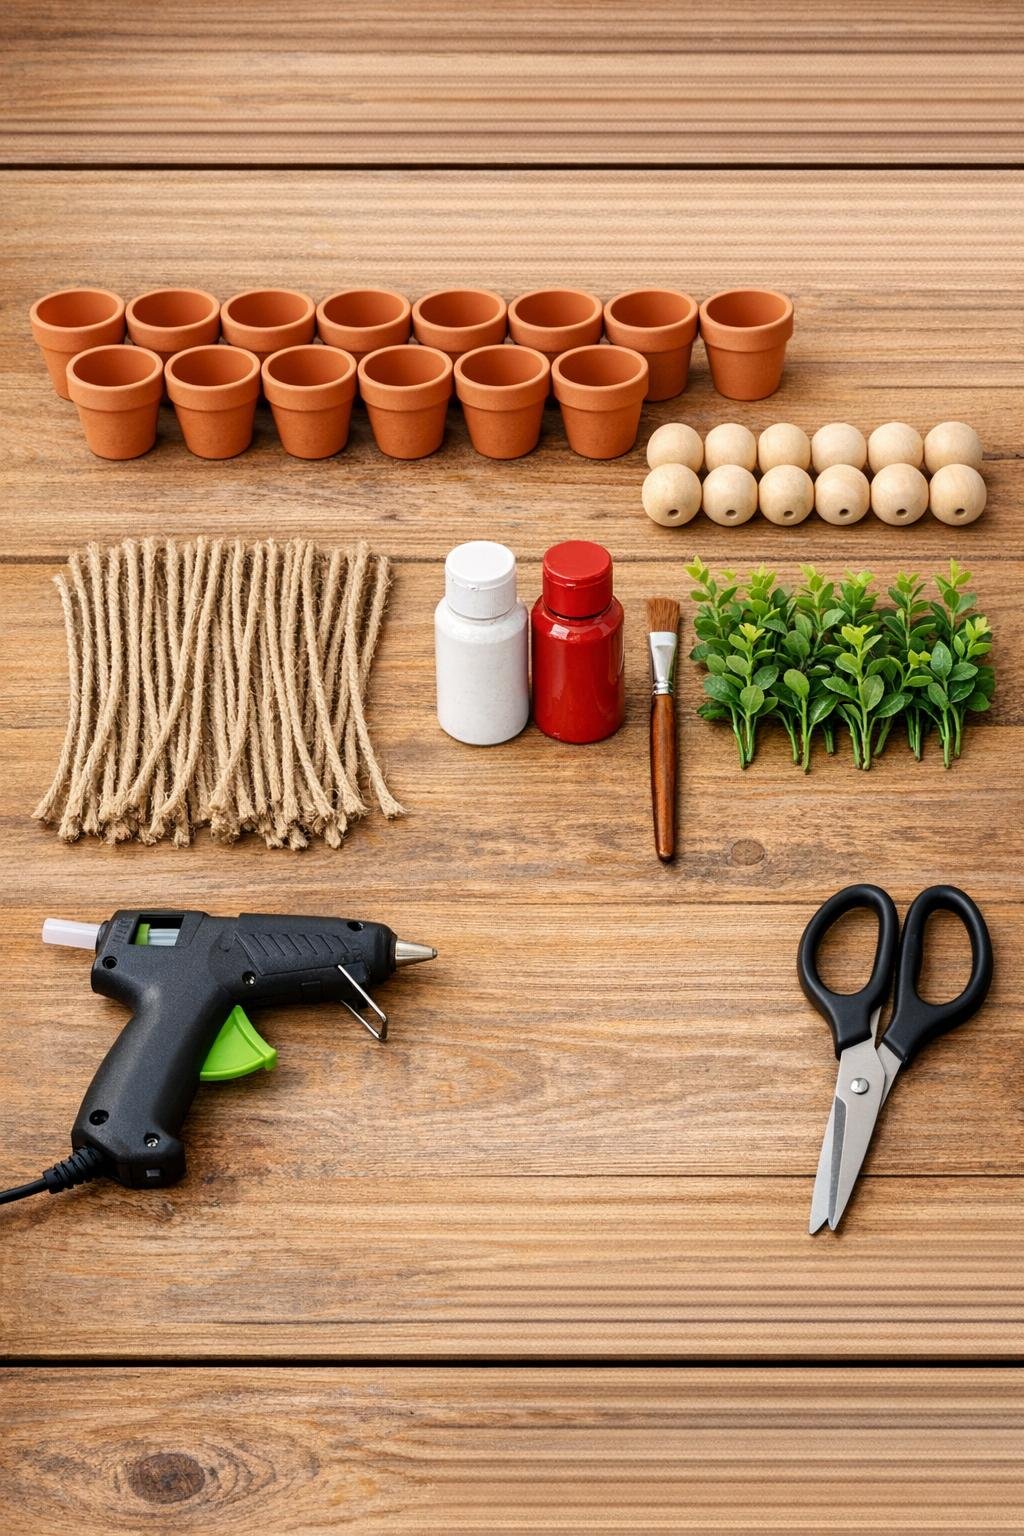
Materials
12 tiny terra cotta pots, 2 inches wide each
Instructions
1. Cover your work surface with wax paper or craft paper, then set all 12 terra cotta pots upside down so the drainage holes face up. This keeps the painting and assembly moving along nice and smoothly.
2. Paint the outside of all 12 upside-down pots with white chalk paint, covering the sides and the flat top surface but leaving the inside unpainted. Let them dry fully, then add a second coat if the terra cotta still shows through too much.
3. Dip the brush lightly into red acrylic paint and add a simple red band around the lower rim of each pot. If you like, soften the line with a dry brush so the finish feels a little timeworn instead of too crisp.
4. Thread one 12-inch piece of jute twine down through the top hole of one pot so the twine hangs out below the bell shape. Tie a knot on the inside near the hole so the twine stays anchored when you pull it snug.
5. Slide one wooden bead onto the hanging end of the twine below the pot, then tie a knot underneath the bead so it sits like the clapper of a bell. Trim the twine tail to about 1 inch below the bead.
6. Repeat the twine-and-bead assembly for the remaining 11 pots, keeping the bead height fairly even so the finished set looks tidy together. A little variation is fine; in fact, that handmade look is part of the sweetness.
7. Put a small dab of hot glue at the top hole area of each pot and press in one small faux greenery sprig so it fans out neatly above the bell. Hold it for a few seconds until set, and angle the greenery so each bell looks full instead of skimpy.
8. Arrange the 12 finished bells together as a grouped holiday display, or add hanging loops with leftover twine if you want to use them as ornaments. Fluff the greenery, check for stray glue strings, and touch up any paint spots so the whole set looks finished and gift-worthy.
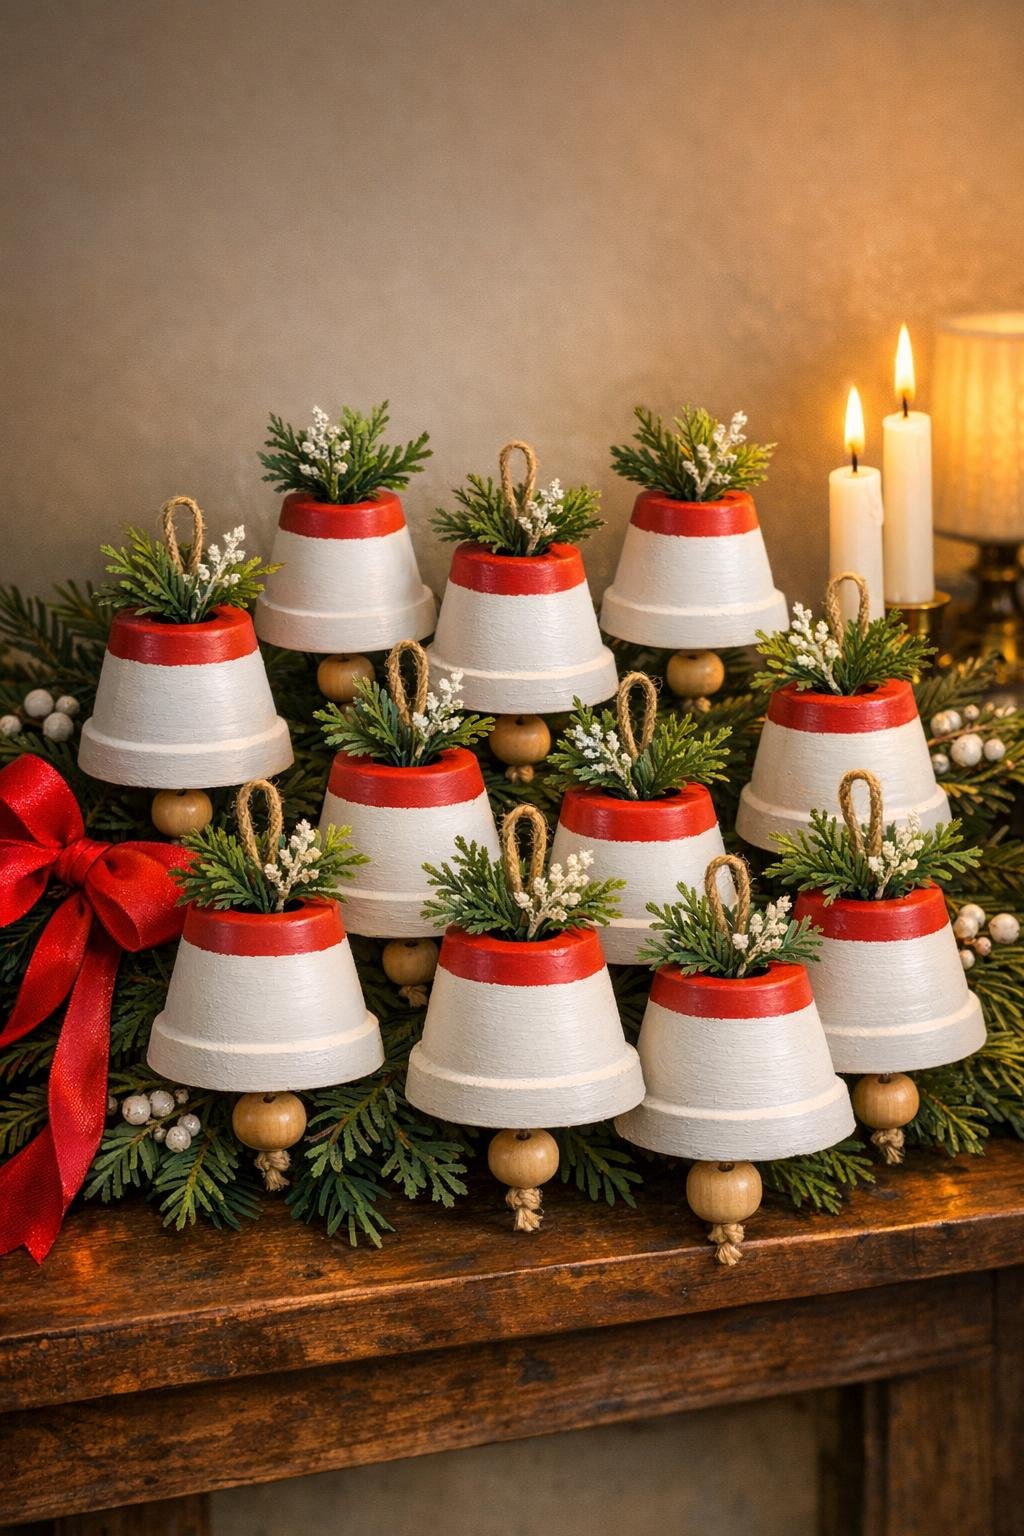
Variations & Tips
For ornaments: Tie a 4-inch loop at the top of each bell before adding the greenery, and hang them on the tree. They’re lightweight and especially pretty tucked in among deeper green branches.
For a more weathered look: Dry-brush a whisper of brown or tan paint over the white once it’s dry. I often do this when I want that old farmhouse feel, like something that could’ve sat in a holiday box for generations.
For a fuller finish: Use two tiny snippets of faux greenery per pot instead of one if your sprigs are sparse. Dense little tufts make these look much richer and more intentional.
For a hanging cluster: Gather 3 to 5 finished bells onto a longer piece of jute and knot them at staggered heights for a door peg, cabinet knob, or wreath accent. That grouped look gives you a little more drama without any extra difficulty.
Hot glue tip: Use just enough glue to hold the greenery in place and pull away any strings while the glue is still warm. A clean finish makes homemade projects look polished in a hurry.
Paint tip: Chalk paint grips terra cotta beautifully, but let it dry all the way before adding the red trim. If you rush that step, the brush can drag and muddy the color.