
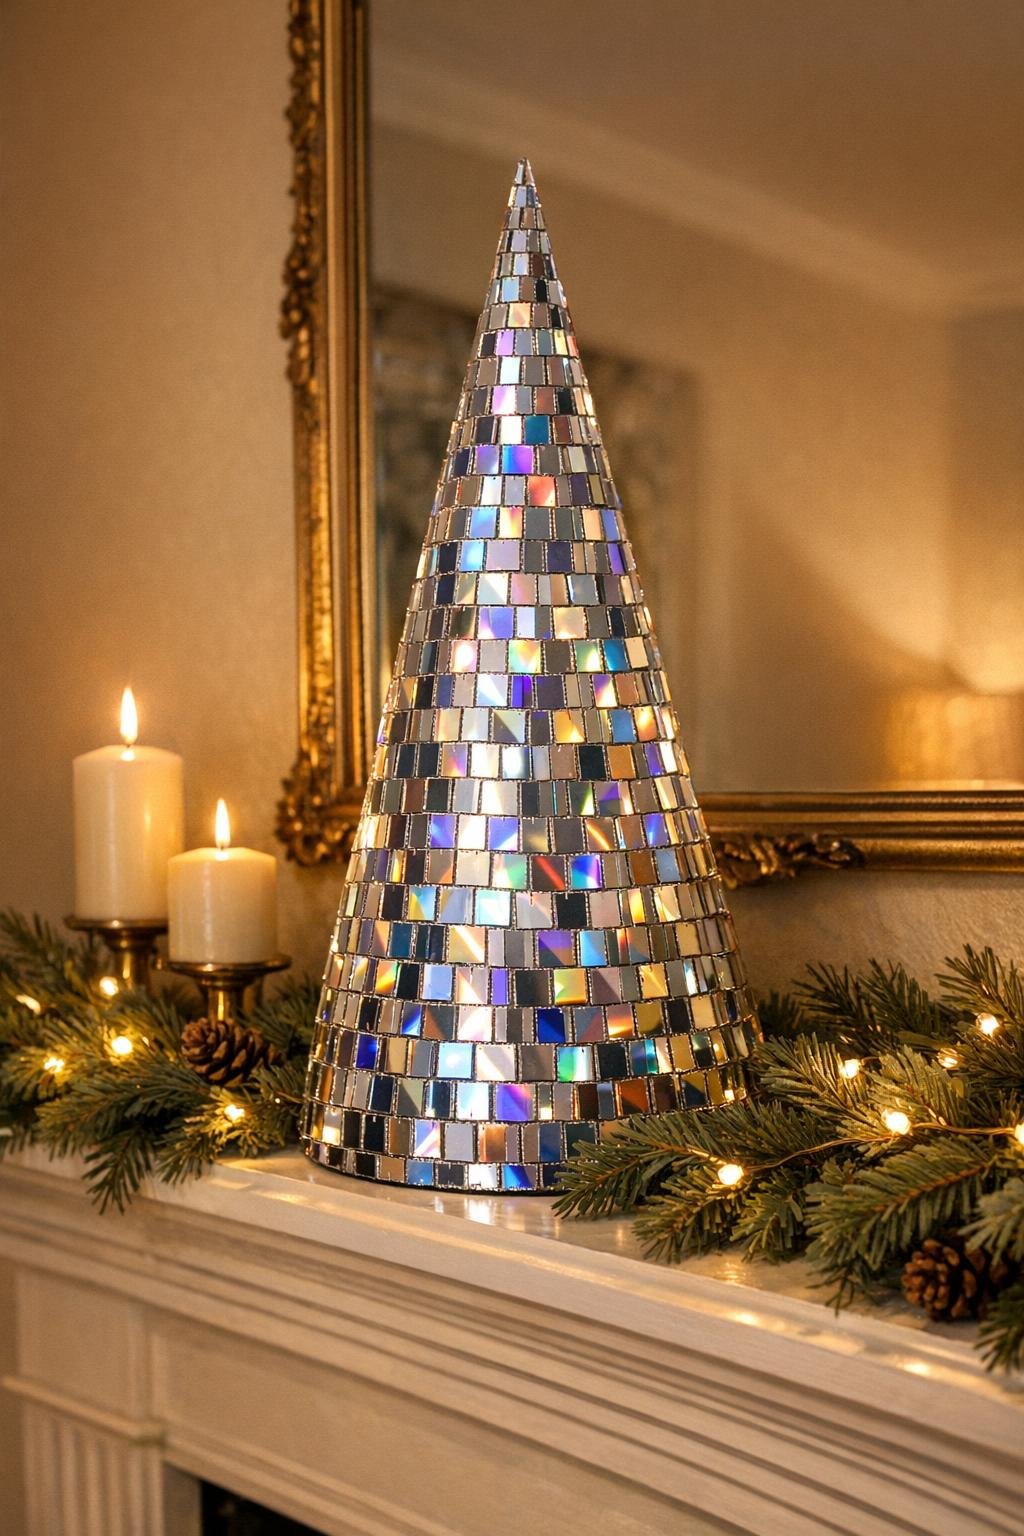
I love a project that turns a past-its-prime household item into something unexpectedly glamorous, and old CDs are perfect for that. Their mirror finish catches light beautifully, and once you cut them into little tiles, they behave a lot like tiny mosaic pieces without requiring any specialty supplies.
This is a wonderfully satisfying craft for anyone who wants a dramatic holiday or winter mantel accent without fussing with complicated tools. You’re starting with a simple foam form and a stack of discs most of us have tucked away somewhere, and with a little snipping and gluing, you get a sparkling, high-impact piece that looks far fancier than the effort involved.

Materials
Instructions
1. Cover your work surface with parchment paper or a silicone mat, then put on gloves to protect your hands while cutting the CDs. Set the foam cone, glue gun, and bowl within easy reach so you can work assembly-line style.
2. Cut each CD into small squares and rectangles about 1/4 to 1/2 inch wide, letting the pieces vary slightly for a more natural mosaic look. Trim roughly 350 to 450 pieces total from the 10 CDs, and drop them into the bowl as you go.
3. Paint the entire foam cone silver, including the base edge, using a thin even coat. Let it dry completely so any tiny gaps between the CD pieces will blend in and still look intentional.
4. Plug in the hot glue gun and let it heat fully, then start at the bottom edge of the cone. Glue on the first ring of CD squares with the shiny side facing out, keeping the pieces close together but not perfectly aligned.
5. Continue upward in rows, overlapping the next row just enough to hide the foam and create a fuller, scaled effect. Work in sections 3 to 4 inches tall so the glue stays hot and the pieces adhere quickly.
6. Rotate the cone often and mix square, narrow, and slightly angled pieces as you go to avoid visible seams. If a gap appears, tuck in a smaller shard-shaped piece to keep the surface looking dense and mirror-like.
7. As you reach the upper third, use slightly smaller pieces so the curve stays smooth and the top doesn’t look bulky. Press each tile in place for a few seconds before moving on.
8. Finish the tip with the tiniest pieces, arranging them like a tight cap so the point looks polished rather than flat. Add any final filler pieces wherever the silver base still peeks through more than you’d like.
9. Let the glue cool for 10 minutes, then inspect the tree from every angle under good light. Snip and glue a few extra tiny pieces into any sparse spots so the surface looks richly covered and evenly reflective.
10. Place the finished piece on your mantel or shelf where it can catch lamplight, candlelight, or daylight from a nearby window. The more angles of light it gets, the more dramatic the shimmer becomes.
Variations & Tips
For extra sparkle: Mix in a handful of even smaller CD fragments near the top third of the cone to create a faceted, jewel-like finish that catches light from more angles.
If your CDs crack unevenly: That’s completely fine for this project. I actually like a mix of crisp squares and slightly irregular pieces because the finished surface looks more lively and less manufactured.
Size option: Use a 9-inch foam cone if you want a quicker version, but keep the same dense coverage approach so the finished piece still looks lush and intentional rather than skimpy.
Color tip: Silver paint is my first choice because it disappears behind the mirrored pieces, but a pale icy blue undercoat can be lovely if you want the tiniest cool-toned glints to show through.
Display advice: This looks best grouped with objects of different heights, so I like placing it beside candles or a second smaller cone for that layered mantel styling you see in store windows.
Safety note: Old CDs can leave sharp edges after cutting, so handle the cut pieces from the sides and keep this craft away from small children and pets while you work.