
Every seed-saving season, I end up with little paper packets tucked into cookbooks, wedged into mugs, or sliding around in the junk drawer until I can’t remember what’s what. This easy envelope rack solves that in the most satisfying way: three ordinary wire coat hangers get baked, bent, and joined into one roomy garden organizer that holds a whole stack of seed-saving envelopes right where you need them.
I designed this version to use just three shed-friendly basics and still look surprisingly polished on a potting bench or garage wall. If you save flower, herb, or vegetable seeds and want a simple system that keeps envelopes upright, visible, and easy to grab, this is the kind of practical little project that earns its spot fast.
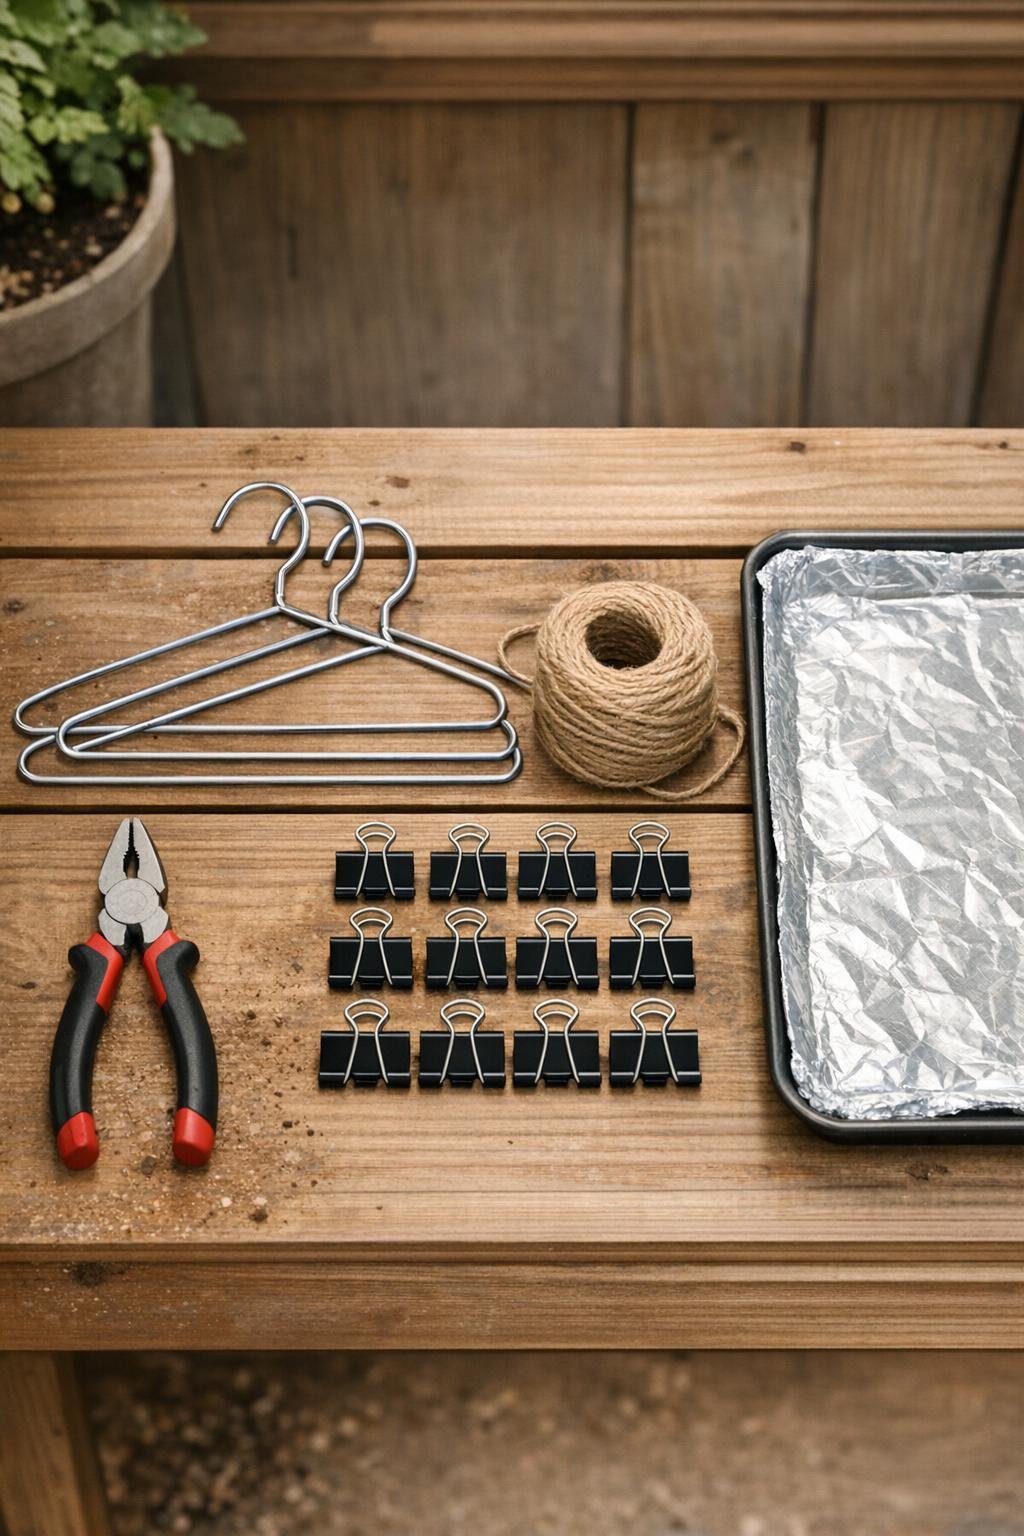
Materials
Instructions
1. Line a baking sheet with aluminum foil and preheat your oven to 200°F so the hanger wire warms slightly and becomes easier to reshape without fighting you.
2. Place the three wire coat hangers on the foil-lined sheet and bake them for 8 to 10 minutes, just until warm, then remove the tray carefully and set it on a protected potting bench or sturdy table.
3. Use pliers to untwist each hanger neck and open the triangle into a long length of wire, leaving the hook attached to one end of each piece.
4. Bend the first wire into a wide horizontal rectangle about 12 inches tall and 9 inches wide, overlapping the ends by 2 inches and twisting them tightly together with pliers to make the back frame.
5. Shape the second wire into a slightly smaller rectangle about 10 inches tall and 7 inches wide, then flatten the bottom edge so it sits straight; this will become the front pocket support.
6. Form the third wire into a deep U-shape with a 7-inch flat bottom and 4-inch sides, then curve the top ends outward into short tabs that can lash onto the larger frame.
7. Center the smaller rectangle over the large rectangle so it sits about 1 1/2 inches in from each side and 2 inches up from the bottom, then tie the two shapes together at all four corners with 10-inch lengths of jute twine knotted tightly.
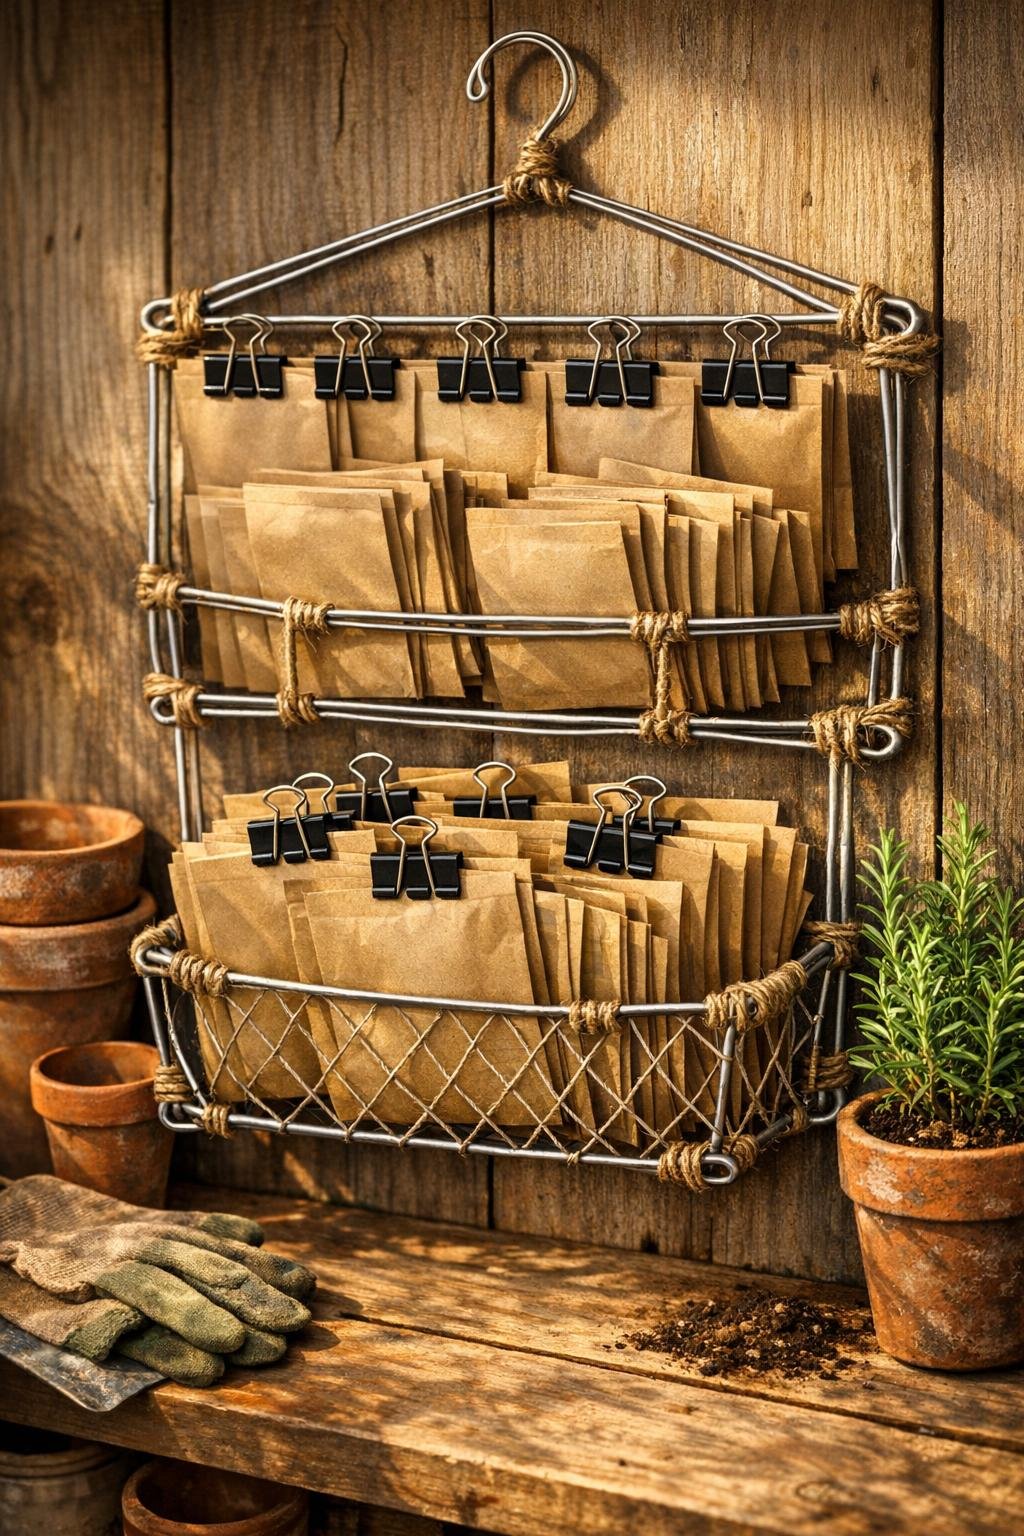
8. Lash the U-shaped wire to the bottom front of the smaller rectangle, tying both top tabs and both lower corners so the pocket projects outward 2 1/2 to 3 inches and creates a generous basket for envelopes.
9. Wrap extra jute twine around each tied joint several times and knot it off neatly; this strengthens the rack and gives the whole piece a tidier, more finished handmade look.
10. Bend the top hook of the large back frame downward into a loop for hanging, or curl it into a decorative spiral if you want a prettier silhouette on the wall.
11. Clip six binder clips evenly across the top front wire and six across the inner support wire so you have two easy rows for sorting packets by flowers, herbs, and vegetables.
12. Fill the lower pocket with your thickest stack of seed-saving envelopes, then clip additional packets to the front rows so labels stay visible and the rack looks full, organized, and ready for the season.
Variations & Tips
For picky organizers: If your family likes things extra clear and sorted, dedicate one row to vegetables, one to herbs, and the bottom pocket to flowers or empty envelopes waiting to be filled.
If your wire feels stubborn: Warm hangers bend more willingly, but if one cools off too fast, pop it back in the oven for 3 to 4 minutes instead of forcing it and making a kink.
For a fuller rack: This design looks best when it’s generously packed, so I like to save a stack of blank kraft packets in the pocket too; it keeps the shape nice and makes the rack feel intentional instead of skimpy.
Rustic finish option: Wrap the side uprights and pocket edge with more jute twine for a softer garden-shed look and a little extra grip that helps envelopes stay put.
Wall-friendly hanging: If you’re mounting this on a painted wall or inside a cabinet door, add a small adhesive bumper or felt dot behind the lower corners so the wire doesn’t scuff the surface.
Best envelope size: Packets around 3 x 4 inches to 4 x 6 inches fit especially well because they show nicely above the clips and don’t sag deep into the pocket.