
There are some projects that make me laugh the minute I see the starting supply, and this is one of them. A plain dollar store toilet plunger does not look like much sitting on the table, but turned upside down and dressed just right, it becomes the kind of Christmas porch piece that makes folks stop, smile, and ask where on earth you bought it. Those are my favorite kinds of homemade decorations—the ones that feel clever, useful, and just a little bit whimsical.
I especially love this project for anyone who wants a big holiday look without much fuss or expense. The shape is already there for you, so all you're really doing is covering, fluffing, and adding those sweet finishing details that make it feel polished. It goes together quickly, and because the base is sturdy, it stands up beautifully on a porch, entry bench, or hearth all through the season.
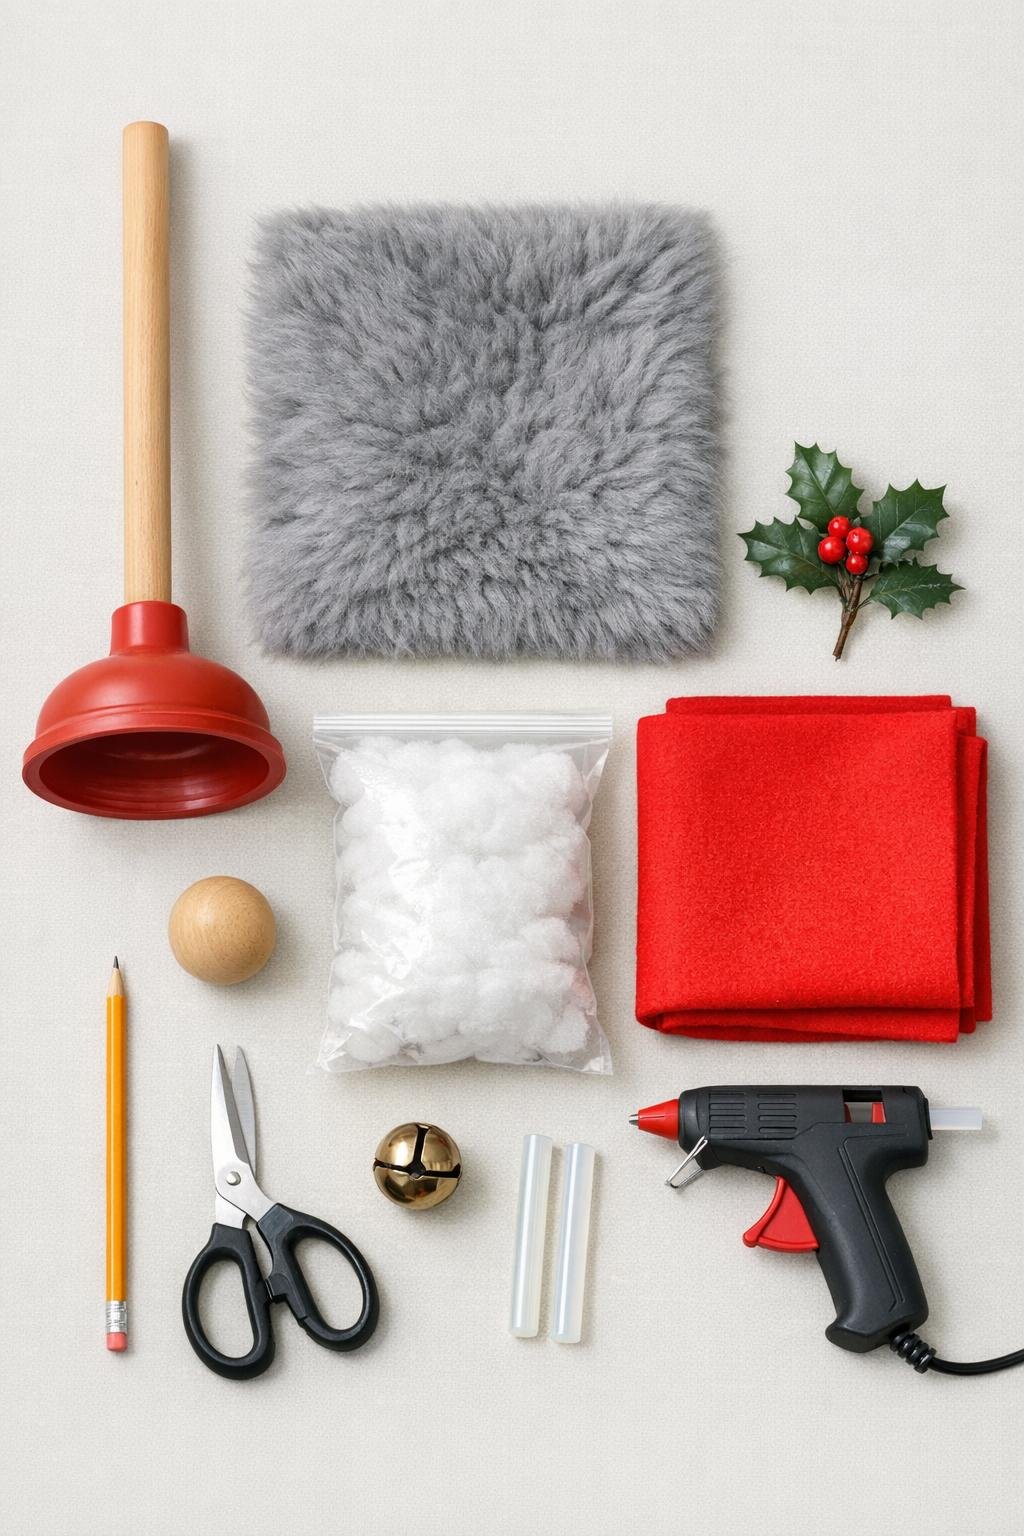
Materials
1 new dollar store toilet plunger with red rubber cup and wooden handle, standard size
Instructions
1. Set the new plunger upside down with the red rubber cup flat on the table and the wooden handle pointing straight up, then wipe off any dust so the glue will grab well.
2. Draw a large half-circle on the back of the red felt using the pencil, making it about 22 to 24 inches across so it will wrap into a tall, full hat that covers the handle.
3. Cut out the felt half-circle, roll it into a cone, and test it over the handle until the opening sits low enough to hide the top edge of the rubber cup while still leaving room for a full beard and nose.
4. Hot glue the felt cone along the seam, then lightly stuff the hat with small handfuls of fiberfill so it looks soft and plump instead of limp.
5. Glue the hat onto the plunger by running a bead of hot glue around the upper edge of the rubber cup and pressing the felt down so the cone sits securely in place.
6. Cut the faux fur into a long rounded beard shape about 8 to 10 inches tall and 7 to 8 inches wide, trimming from the backing side if you can so the fur stays full at the edges.
7. Glue the top of the beard to the front of the plunger just under the hat line, centering it so the fur drapes over the red rubber cup and covers most of the front.
8. Add the wooden ball or red pom-pom nose right at the top center of the beard, tucking it slightly under the hat brim so it looks nestled in naturally.
9. Bend the tip of the hat over a little for a storybook look, then glue the faux holly sprig and jingle bell near the bent tip to give it that finished Christmas touch.
10. Fluff the beard with your fingers, trim any uneven fur strands, and check that the hat seam is turned toward the back so the whole piece looks tidy from the front.

Variations & Tips
Use a white beard for a brighter look: Gray faux fur feels a little woodsy and old-fashioned, which I love, but white faux fur gives a snowy Christmas look that really pops against the red hat.
Make the hat extra full: If your felt is soft and wants to collapse, add a little more fiberfill near the top third of the cone. I find that just a small amount makes it look much richer and more finished.
Try a pom-pom nose for ease: A wooden ball gives a nice smooth nose, but a red pom-pom is quick, light, and easy to glue. If you use a pom-pom, choose one that is dense and round so it does not disappear into the beard.
Stabilize it for windy porches: The plunger base is already sturdier than you might think, but if your porch gets a lot of winter wind, add a little extra hot glue where the beard meets the cup and place the finished piece beside a planter or wall for shelter.
Add simple companions: One of these is charming, but a pair in two heights looks especially sweet by a front door. If you want a second one, make the hat slightly taller or trim the beard a bit shorter so they look related but not identical.
Keep the finish neat: Hot glue strings like to follow me around the craft table this time of year. Let the project cool for a minute, then gently pull away any glue threads before setting it out, and it will look surprisingly polished for such a humble beginning.