
I’m always looking for a way to turn thrift-store glass into something that feels festive and a little bit magical without taking over my whole weekend. If you’ve got a small stack of old glass plates and a few candlesticks hiding in a cabinet or coming home with you from a secondhand shop, this is one of those projects that looks far fancier than the effort it takes. The best part is that the glass does all the heavy lifting—once it’s stacked, glued, and dressed up with a few simple details, it catches light beautifully.
This is a great project for anyone who loves holiday decorating, vintage-inspired décor, or easy upcycles that still feel polished. I like projects like this during busy weeks because I can do the cleaning and glue-up in short bursts after dinner, then add the finishing touches the next day with coffee in hand. The end result has plenty of sparkle, height, and presence, so it reads like a real statement piece instead of a quick craft.
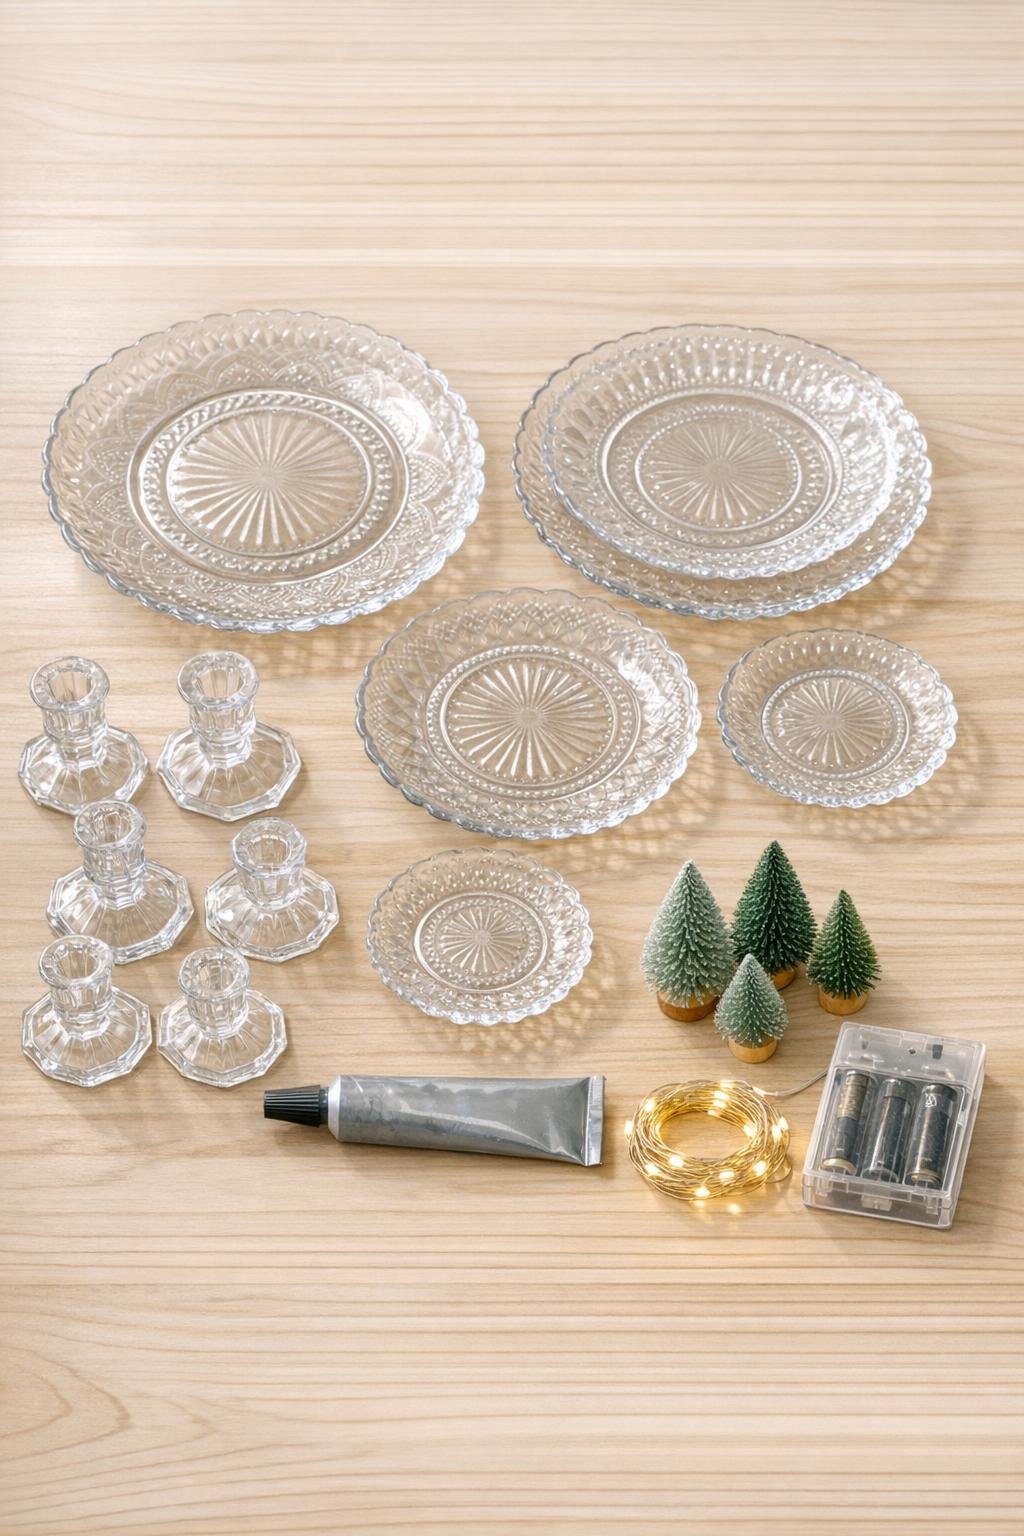
Materials
Instructions
1. Wash all seven glass plates and the six candlesticks with warm soapy water, then dry them completely. Wipe every spot that will be glued with rubbing alcohol so the adhesive grabs clean glass.
2. Lay out your plates from largest to smallest and arrange the candlesticks by height before you glue anything. I like to build a tree shape that gets gradually narrower toward the top, with the tallest candlesticks lower down for a fuller, balanced silhouette.
3. Start with the largest dinner plate as the base and glue one tall candlestick centered underneath it so the plate becomes a raised pedestal. Let it sit upright for a minute so the candlestick stays centered and doesn’t slide.
4. Glue a second candlestick upright in the center of the top side of that base plate, then place one 9-inch plate on top of it. Check the stack from all sides and nudge it straight before the glue begins to set.
5. Repeat the layering pattern—candlestick, plate, candlestick, plate—using the second 9-inch plate, both 7-inch plates, and both small saucers until all seven plates are stacked into a tall tapered form. Keep each plate centered so the edges create even “branches” all the way around.
6. Leave the full stack undisturbed to cure according to the E6000 directions, ideally overnight. If any plate feels slightly wobbly, steady it with a loop of painter’s tape while the adhesive dries.
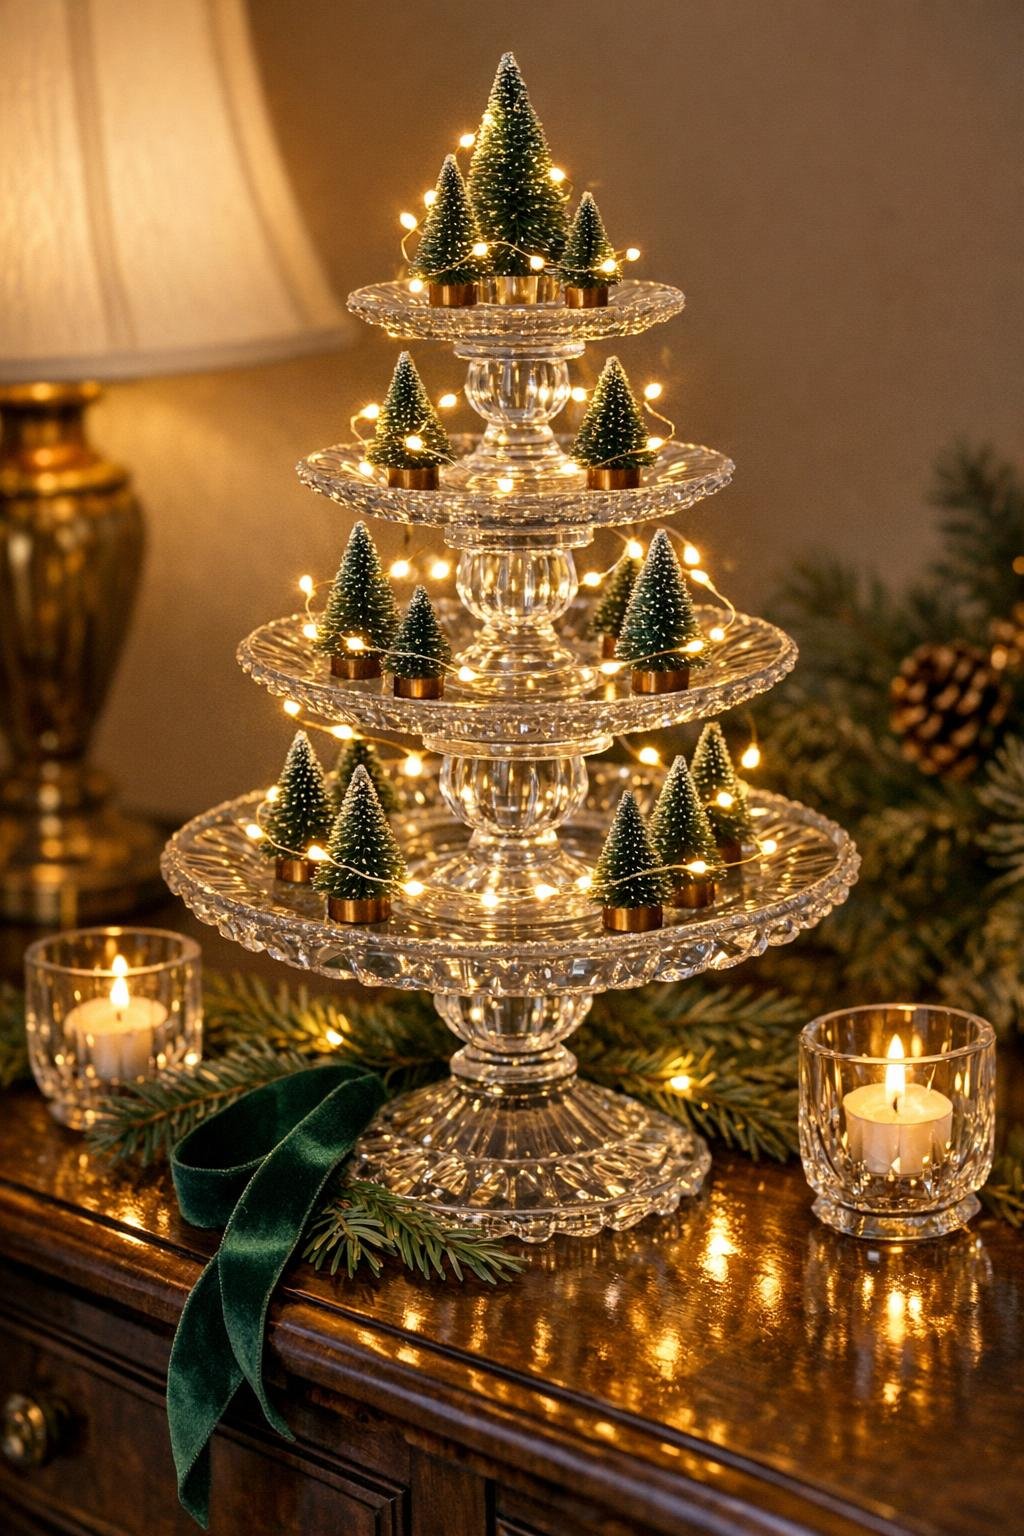
7. Once cured, wrap the fairy lights around the candlesticks and through the plate layers, tucking the wire close to the center so the glass still shines. Leave the battery pack resting behind the base where it’s easy to reach but not obvious from the front.
8. Place the largest bottle-brush tree on the top saucer and secure it with a glue dot or a small bit of museum putty. Set the medium and small trees on two lower plate levels, spacing them so the arrangement looks full from every angle.
9. Turn on the lights and make small adjustments so the wire disappears into the sparkle of the glass. If you want a fuller look, coil extra light clusters onto the middle tiers instead of leaving them all near the base.
10. Style the finished piece on a mantel, entry table, or dining sideboard where the light can bounce off the glass. Give the whole project one final wipe with a soft cloth so every plate edge looks crystal clear.
Variations & Tips
Plate mix tip: Pressed glass, cut-look glass, and even lightly patterned clear plates all work together beautifully. I actually prefer a mix because the different textures catch the fairy lights and make the whole piece look richer.
Height adjustment: If your candlesticks vary a lot in size, put the tallest ones near the bottom third and the shortest at the top. That keeps the profile tree-shaped instead of turning into a straight tower.
Color variation: For a softer look, use white flocked bottle-brush trees or pale green ones instead of deep green. Warm white lights keep it classic, but cool white lights make the glass feel more icy and wintry.
Stability tip: Keep the base plate wide and heavy, and always center each candlestick carefully before moving to the next level. If you’re decorating on a rushed weeknight like I usually am, letting each couple of layers set for 10 to 15 minutes before continuing makes the whole stack less stressful.
Holiday styling: Tuck a little faux cedar or fresh evergreen around the bottom to frame the base without hiding the glass. A narrow ribbon bow near the battery pack is also a simple way to disguise it and make the display look finished.
Year-round idea: You can swap the bottle-brush trees for small pastel eggs in spring, mini pumpkins in fall, or ornaments in winter. The glass pedestal structure is neutral enough to restyle season after season, which is exactly why I love making something like this from secondhand pieces.