
There’s something especially sweet about turning the simplest household leftovers into a holiday project that feels thoughtful and charming. When I can make something festive from supplies I already have on hand, I’m all in, and this one is the kind of easy craft that looks far more special than it is complicated. It’s perfect for families, for anyone decorating on a budget, or for those of us who like our Christmas projects to feel handmade and full of heart.
I also love that this project gives you a chance to tuck in little surprises without spending a fortune. You can fill each pocket with candy, tiny toys, notes, or a mix of treats, and because the base is sturdy, the finished piece has enough presence to become part of your holiday decor instead of looking like a last-minute craft.
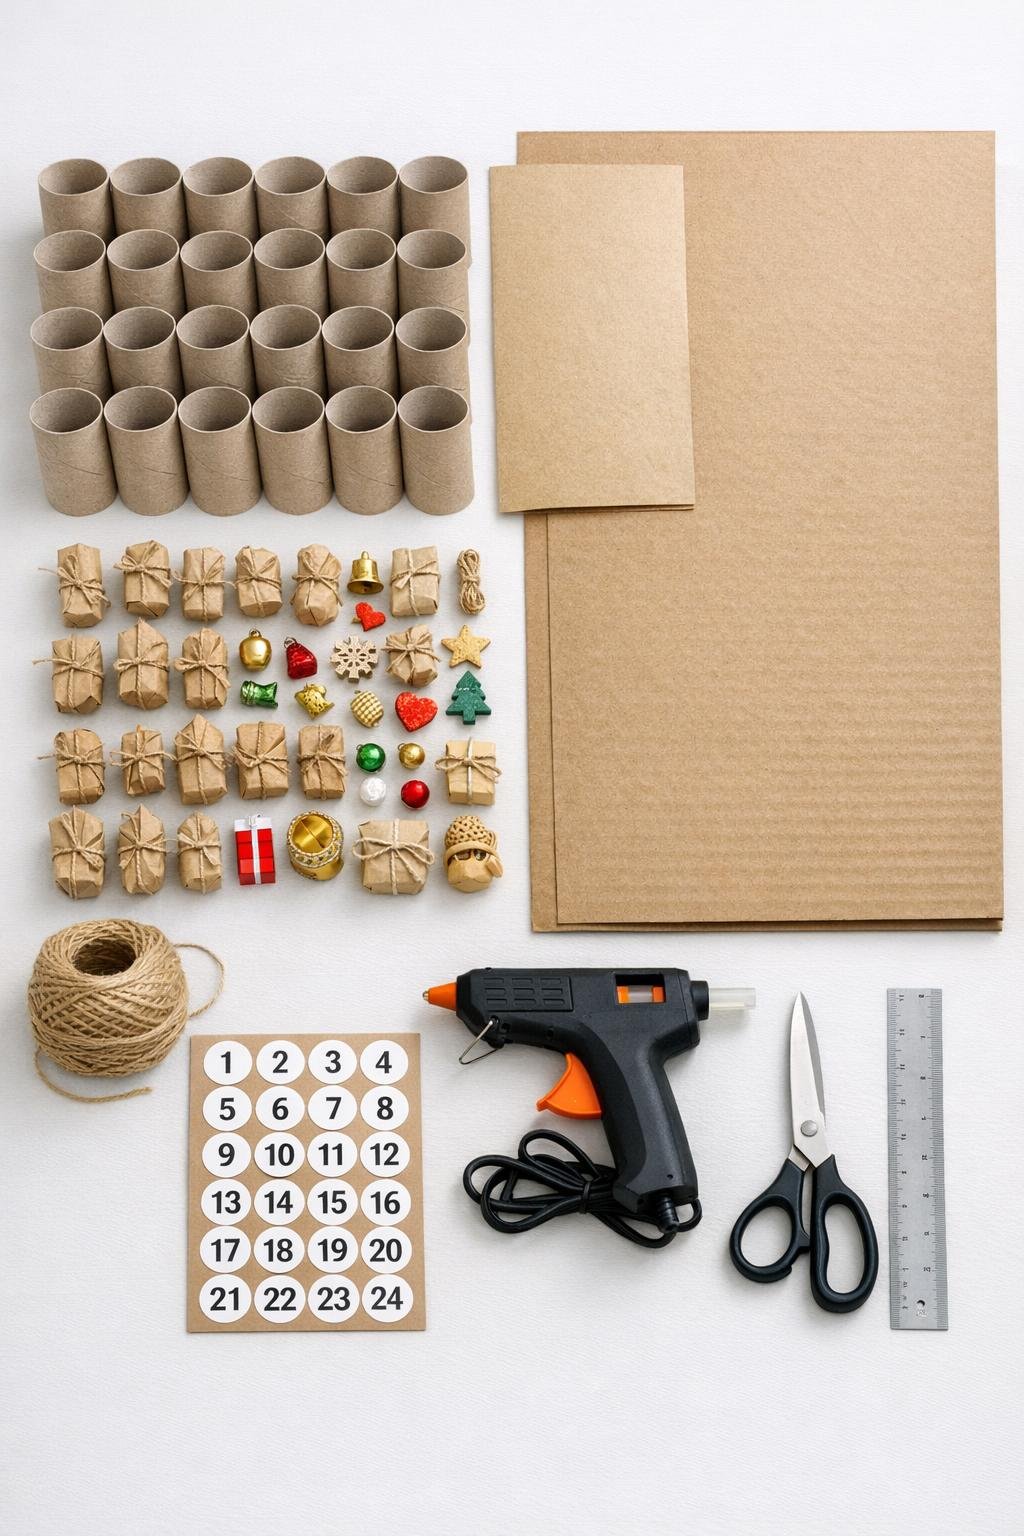
Materials
Instructions
1. Cover the front of the cardboard backing with the kraft paper or wrapping paper, smoothing it flat and gluing the edges neatly around the back.
2. Pinch one end of each toilet paper roll closed, pressing the cardboard firmly so the end forms a clean curved seam like a little pillow box.
3. Place one small treat or trinket into each roll, keeping bulky items toward the center so the rolls stay easy to close.
4. Pinch the open end of each filled roll shut in the opposite direction from the first seam so every roll becomes a closed packet.
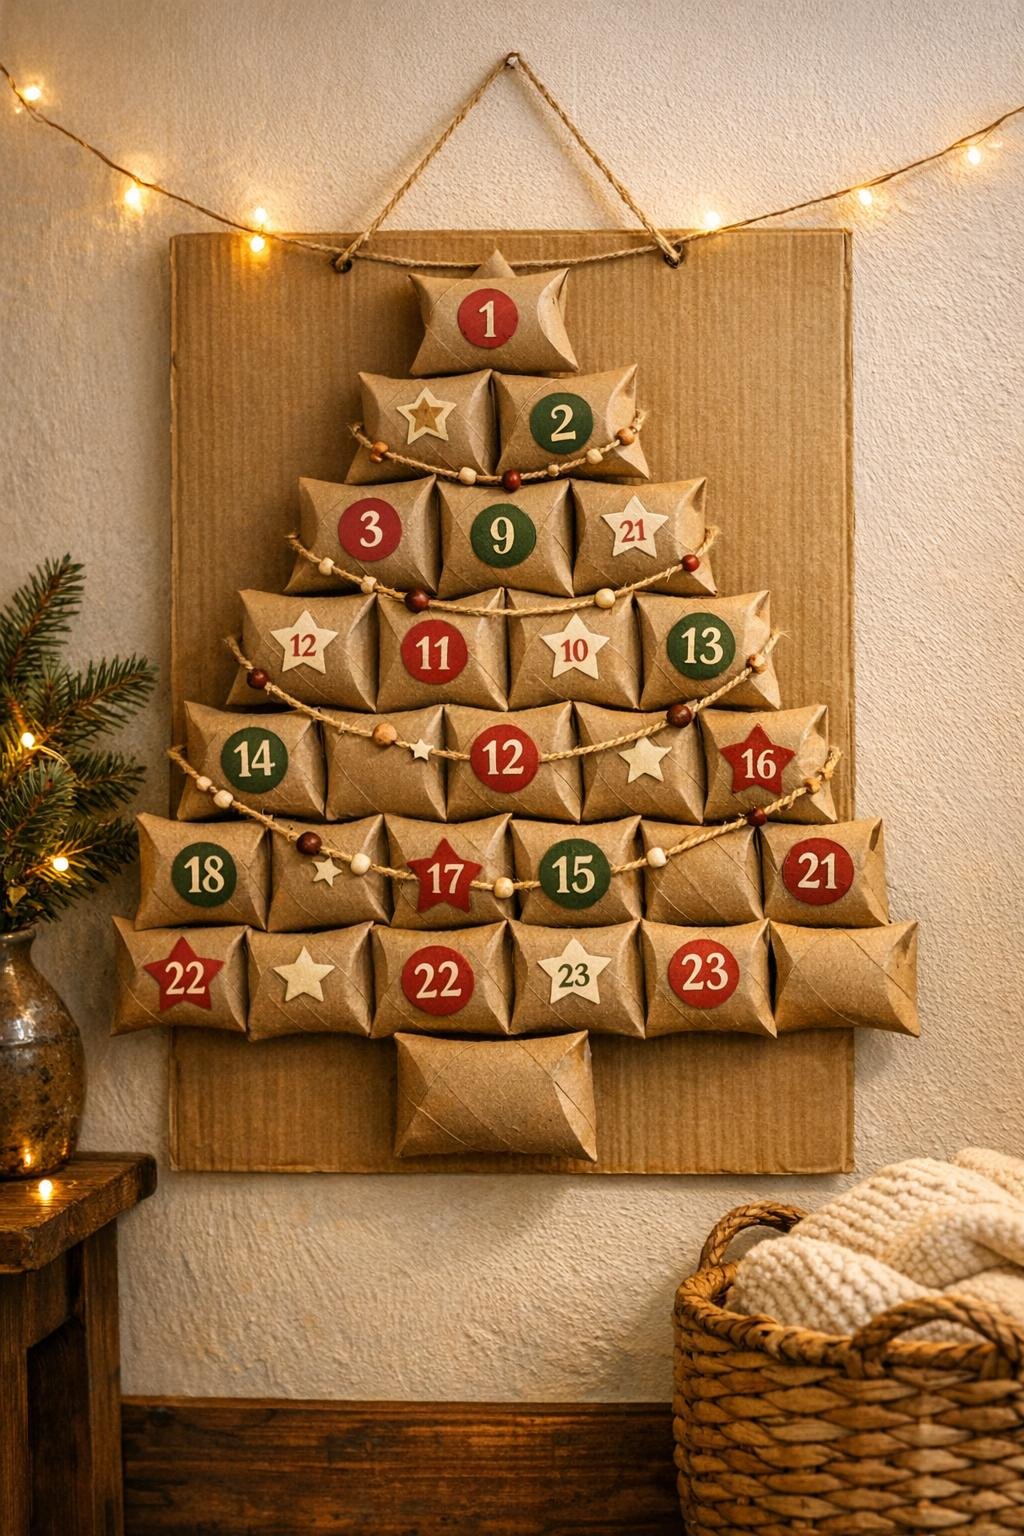
5. Arrange the 24 closed rolls on the covered cardboard in the shape of a Christmas tree: 1 at the top, then rows of 2, 3, 4, 5, and 6, with 3 rolls across the bottom as a trunk.
6. Use the ruler to keep the rows centered and snug, leaving just enough space between rolls so each packet still keeps its shape.
7. Hot-glue the back of each roll to the cardboard one at a time, starting at the bottom row and working upward so the tree stays aligned and sturdy.
8. Add the number stickers to the fronts of the rolls, placing them in a mixed order from 1 to 24 so opening each day feels like a surprise.
9. Cut a length of twine about 24 inches long, form it into a loop, and glue the ends securely to the back top corners of the cardboard for hanging.
10. Cut two shorter pieces of twine, about 18 inches each, and glue them as simple garlands draped across the tree rows for a soft finished touch.
11. Check that every roll is firmly attached, press down any lifted paper edges, and trim away any visible glue strings with scissors.
Variations & Tips
For picky eaters: If your family doesn’t get excited about the same treats, mix the compartments with chocolates, stickers, small erasers, coins, and handwritten coupons for things like choosing dessert or picking the family movie.
Pretty paper option: Kraft paper gives this project a warm rustic look, but wrapping the backing in classic holiday paper makes it feel brighter and more playful for kids’ spaces.
Make it easier to open: Don’t overfill the rolls, or the ends will be too tight for little hands; small flat candies and tiny trinkets work best.
Keep the shape crisp: Pinch each end firmly and crease it with your fingers before gluing the rolls down, because neat seams make the whole finished piece look much more polished.
Use what you have: If you don’t have number stickers, cut small circles or squares from paper, write the numbers by hand, and glue them on.
Display tip: This looks especially nice hung in an entryway, breakfast nook, or hallway where the family passes by every day; it becomes part decoration, part little daily tradition.