
I love a yard project that uses what I already have on hand and solves a real problem before winter shows up. This little mulch-anchor ring is exactly that: a simple way to keep loose mulch tucked in around a perennial bed after the first frosts and windy fall days start lifting it and scattering it across the lawn. Because the cans stay visible and decorative, the finished piece looks intentional instead of makeshift, which is probably why people end up assuming it came from a garden shop.
If you’ve got a few empty aluminum soup cans and a basic roll of garden twine, you can make a surprisingly polished border in one afternoon. I’m always looking for practical projects I can squeeze in between work and getting dinner on the table, and this one checks every box: cheap, fast, useful, and cute enough that it doesn’t scream “I made this from recycling.”
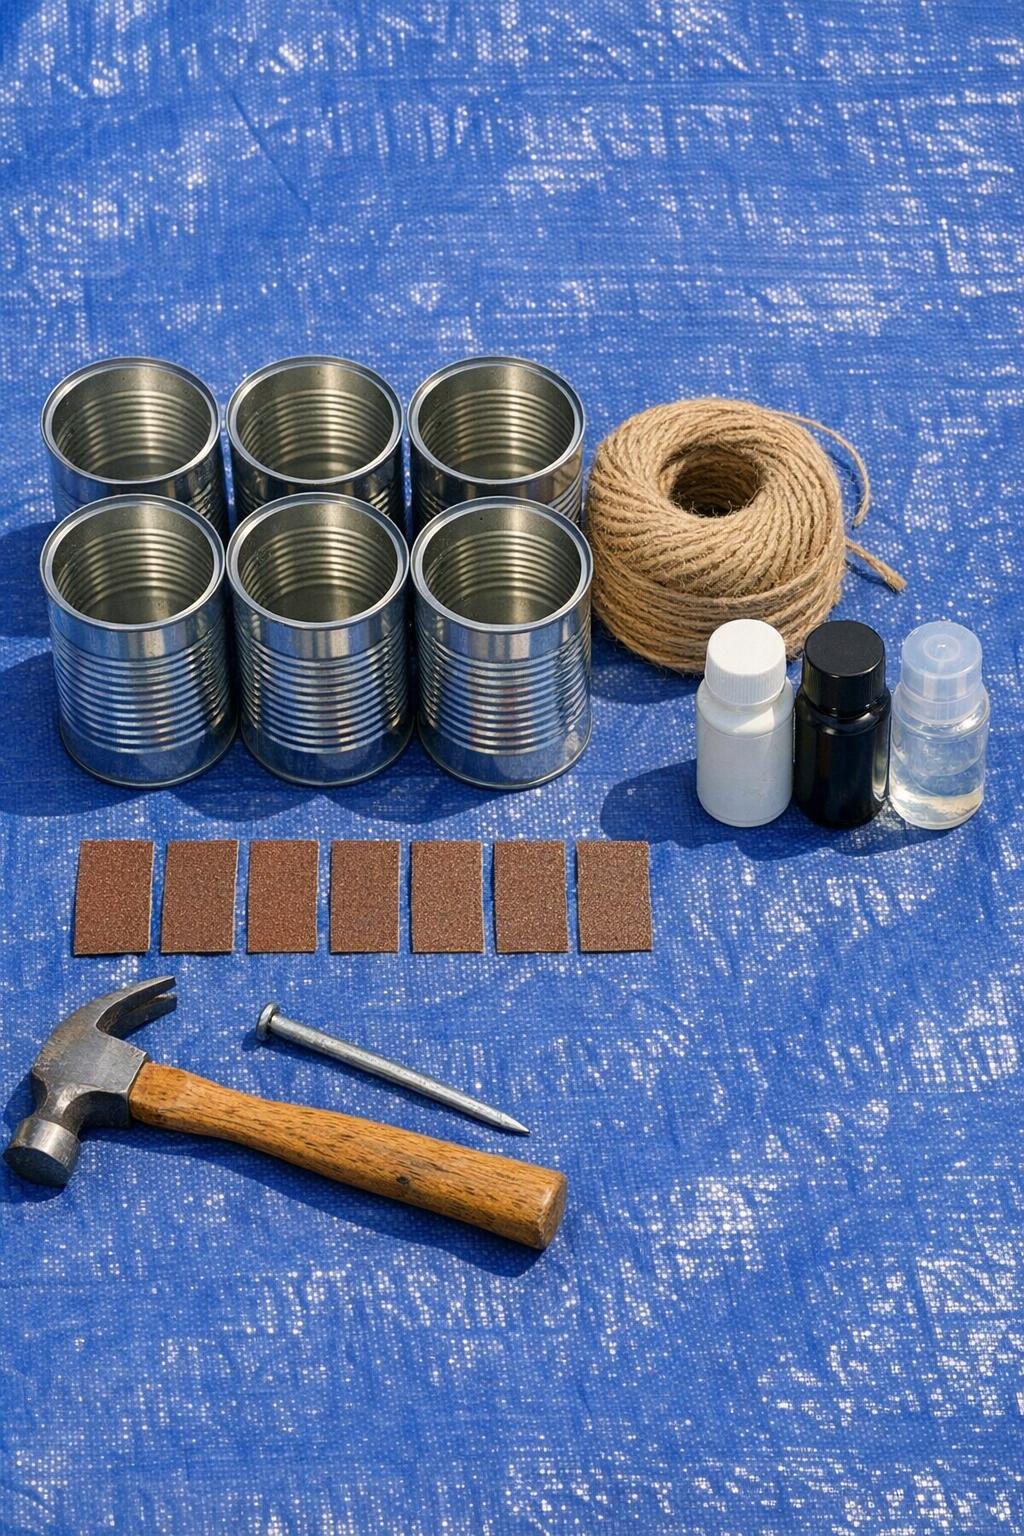
Materials
Instructions
1. Wash the soup cans, remove all paper and glue, and let them dry completely so the finish will stick cleanly.
2. Lightly sand the outside of each can to dull the shiny finish and smooth any rough spots around the rims.
3. Mark two rows of holes around each can, spacing the holes about 1 inch apart and keeping the rows roughly 1 inch and 2 1/2 inches up from the bottom.
4. Set each can on its side over a folded towel or piece of scrap wood, then use a large nail and hammer to punch the marked holes all the way through.
5. Tap down or sand any sharp metal burrs around the holes so the twine won’t snag when you thread it.
6. Spray the cans with one light coat of metal primer and let them dry according to the can directions.
7. Apply two light coats of matte black outdoor spray paint, letting the cans dry between coats so the finish stays smooth and even.
8. Seal the painted cans with a light coat of clear outdoor sealer for extra weather resistance, then let them cure fully.
9. Cut two lengths of jute twine, each 12 feet long, which is enough to string six cans with generous spacing for a full-looking border section.
10. Thread one length of twine through the lower row of holes on all six cans and the second length through the upper row, keeping the cans upright and spacing them 4 to 5 inches apart.
11. Tie a large knot at both ends of each twine run and pull everything snug so the cans stay aligned like a flexible garland.
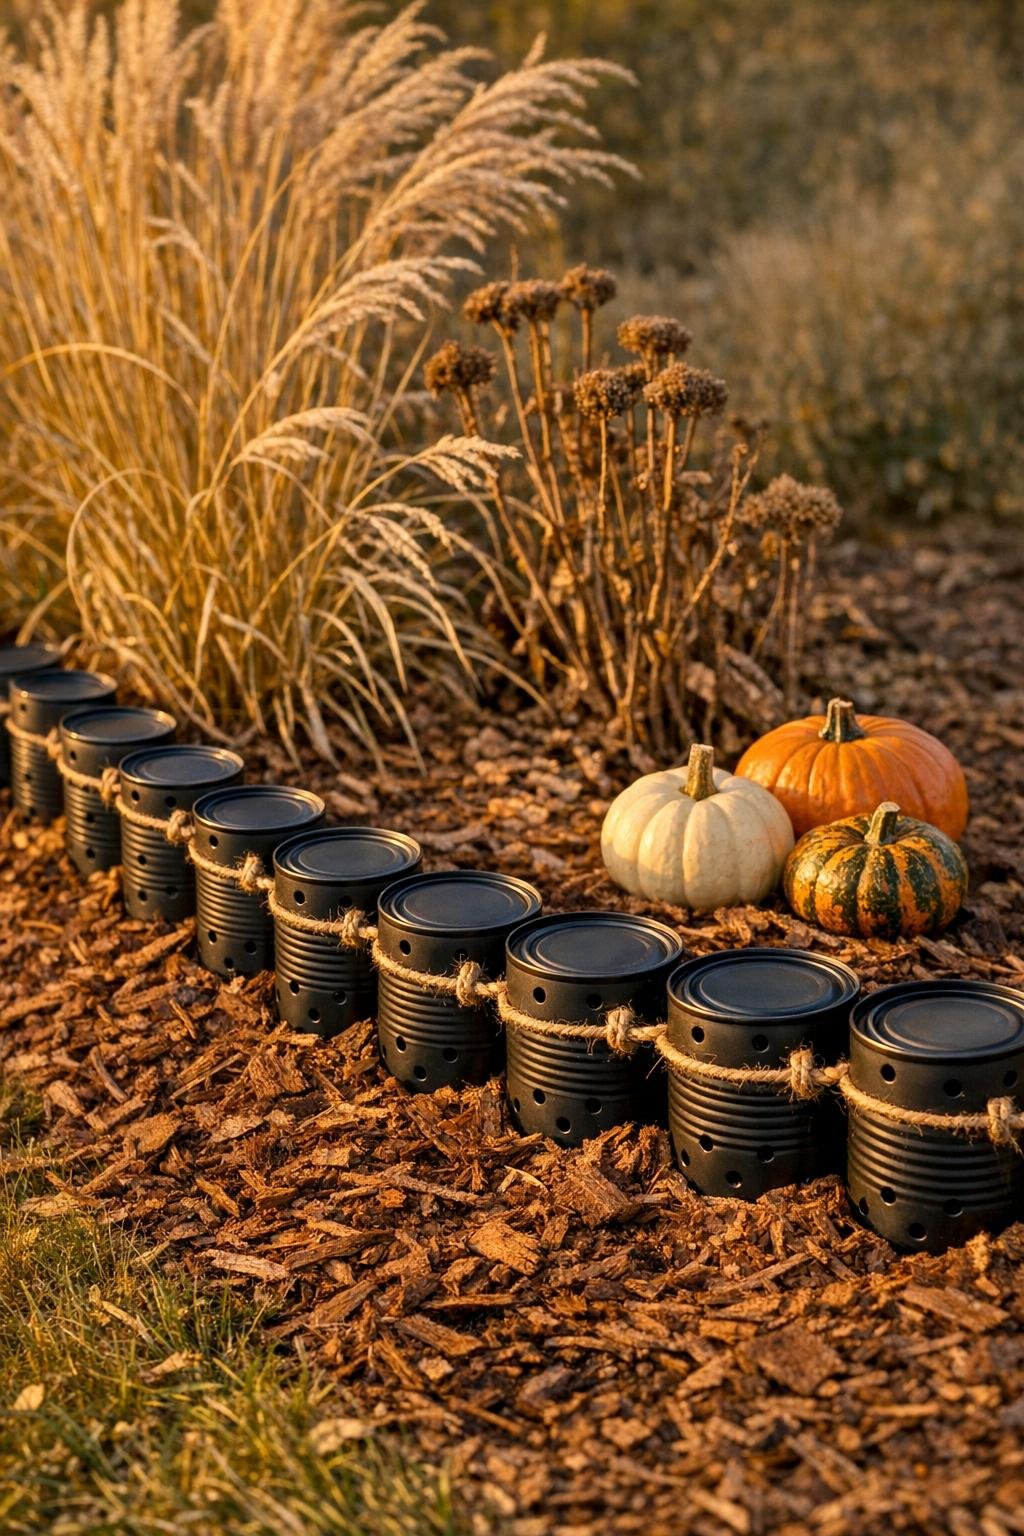
12. Lay the finished strand along the front edge of your perennial bed, curve it gently to fit the shape, and press the cans lightly into the mulch so the weight of the cans helps hold the mulch in place before frost and winter wind arrive.
Variations & Tips
Natural look: Skip the black paint and use just clear sealer if you like the silvery aluminum finish. It reads a little more rustic and catches the light nicely in a fall garden.
Longer border: Make two or three strands and overlap the ends by one can for a fuller, more substantial edge around a bigger bed. That’s the version I like best because it looks the most intentional from the street.
Twine substitute: If your bed gets very wet or windy, swap the jute for 1/8-inch synthetic landscape cord for extra durability. It won’t rot as quickly over winter.
Color choice: Matte black looks clean and classic, but dark bronze, deep green, or warm copper also blend beautifully with fall mulch and perennial stems.
Placement tip: Set the strand in after you fluff and level your mulch, not before. I’ve found that trying to tuck it in first just means I end up moving everything twice.
Safety tip: Wear gloves when punching and sanding the cans, and take your time smoothing the holes well. A few extra minutes here makes the finished piece much easier to handle and much nicer to use next season.