
I never look at an old wooden ladder and see trash. I see good bones, useful scale, and the kind of character you simply cannot buy new without paying a small fortune for it. This project turns that humble find into a dramatic holiday centerpiece that fills the room, adds warm light, and makes the whole space feel thoughtfully decorated without asking you to build anything complicated from scratch.
If you want a Christmas project with a big visual payoff, this is one of my favorites. It is especially good for anyone with a dining table, kitchen island, or open entryway that needs something festive overhead, and it is simple enough that the real work is more about styling than construction. I love projects like this because, much like cooking for a crowd, a few familiar ingredients layered well can create something that feels far more special than the effort suggests.
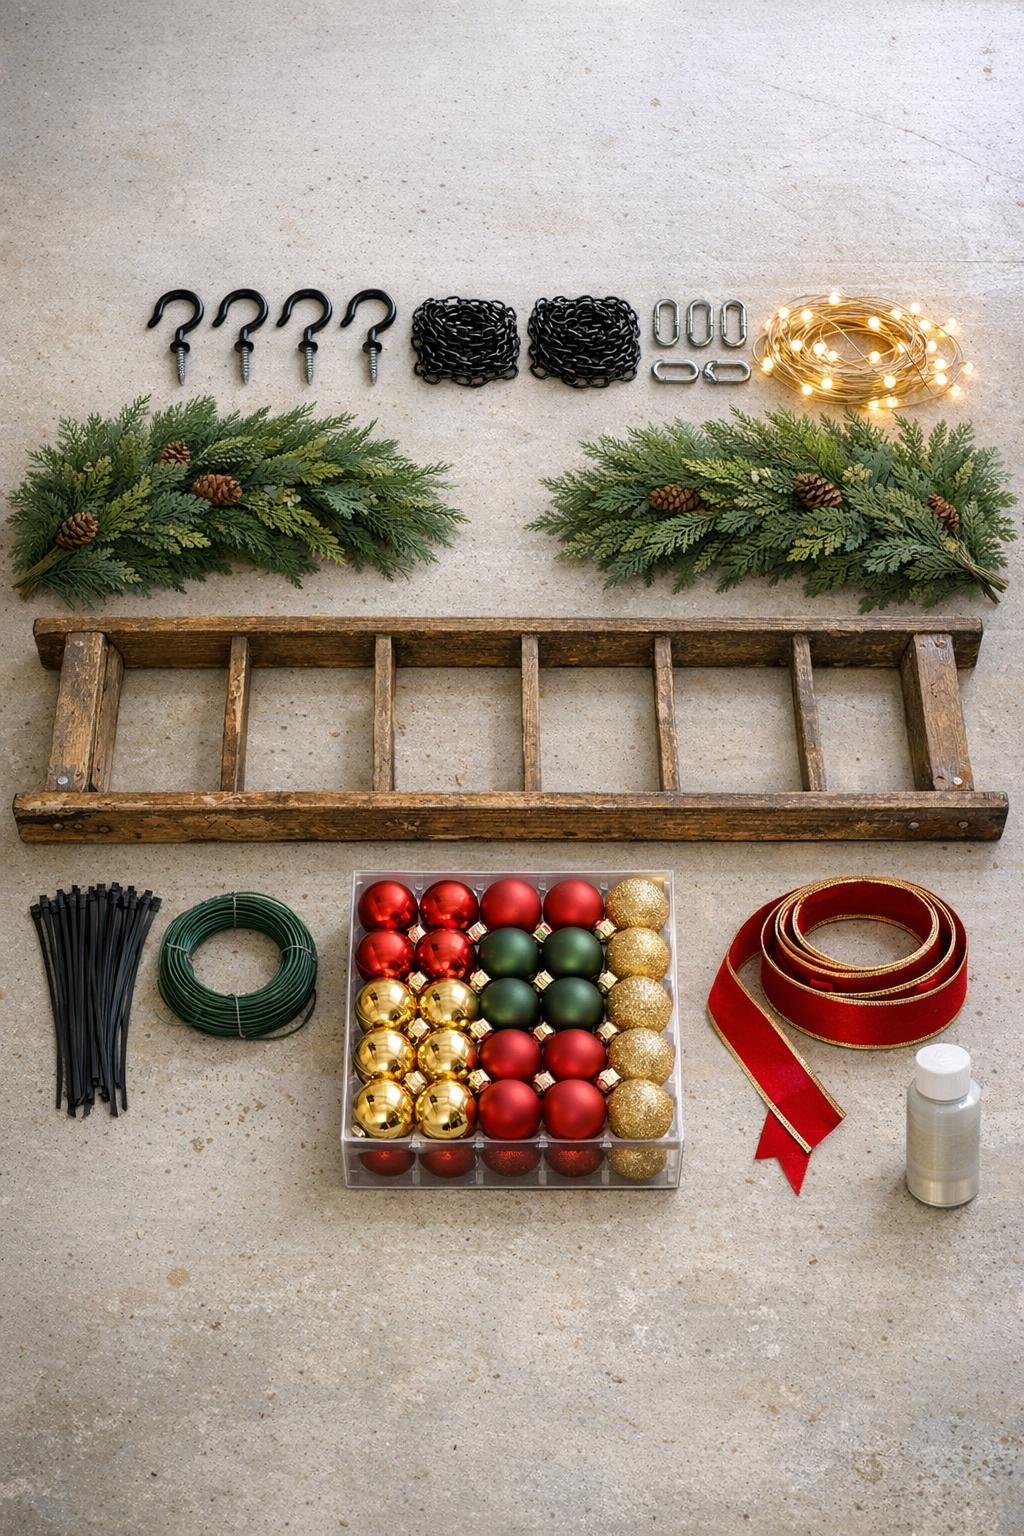
1. Clean the old wooden ladder with a dry microfiber cloth and tighten or remove any loose hardware so it is sturdy and safe to hang.
2. If the wood is extra dry or flaky, brush on a light coat of matte clear sealer and let it dry fully; this keeps the vintage look while cutting down on dust overhead.
3. Decide where the piece will hang, ideally centered over a dining table, kitchen island, or entry bench, and make sure there is at least 30 to 36 inches of clearance below it.
4. Measure the ladder length and width, then mark four ceiling hook points that align roughly with the ladder’s corners so it will hang level and balanced.
5. Drill pilot holes and install the four heavy-duty ceiling hooks securely, checking that each one is firmly seated and rated for overhead use.
6. Attach one length of chain to each ceiling hook with a quick link, then hold the ladder up and connect the lower end of each chain to the ladder rails near the four corners.
7. Step back and adjust the chain links until the ladder hangs level from side to side and end to end; this little pause makes the finished styling look intentional rather than crooked.
8. Wrap the first garland along one side rail and weave it over and under the rungs, securing it with green floral wire or zip ties every 8 to 10 inches.
9. Add the second garland on the opposite side, then use the extra length to thicken the center and both ends so the greenery looks full from every angle below.
10. Tuck and fluff the branches until the ladder shape is still visible but generously framed with greenery along the rails and rungs.
11. Wind the two LED light strands through the greenery and around the rungs, spreading the bulbs evenly so you see warm points of light across the whole length instead of just at the ends.
12. Hide the battery packs or cord path along the top of the ladder rail and secure them with zip ties, keeping all wiring neat and hard to notice from below.
13. Hang the larger ornaments first from the rungs and inner garland sections, spacing them evenly from one end to the other to create a balanced base layer.
14. Fill in with the smaller ornaments, placing some slightly lower and some tucked deeper into the greenery so the arrangement feels layered and rich instead of flat.
15. Tie one or two ribbon bows at the center or near both ends, or thread ribbon loosely through a few rungs for a softer finishing touch that connects the whole design.
16. Turn on the lights, check the view from all sides, and make final adjustments so the ornaments hang at varied heights and the greenery stays dense, even, and polished.
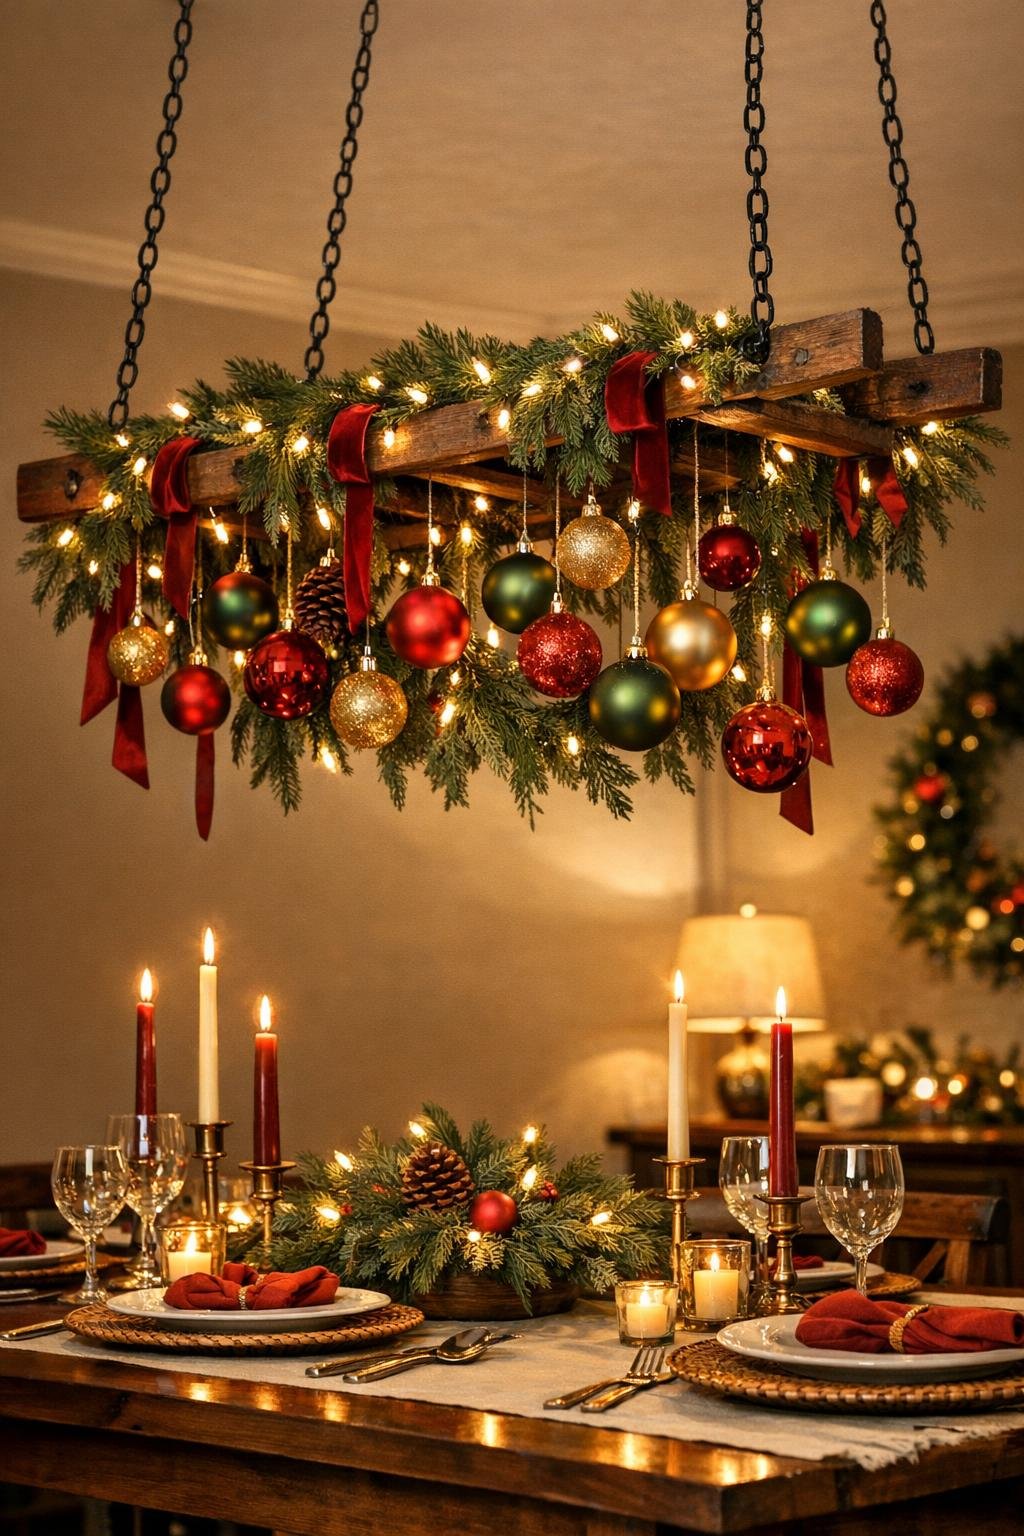
For a more rustic look: Use burlap ribbon, pinecones, and mostly matte ornaments to lean into the weathered wood instead of dressing it up too formally.
For a more elegant look: Stick to one metal tone like gold or champagne and use velvet ribbon with ornaments in two finishes, such as matte and glossy, for a collected but refined palette.
If your ceiling is high: Add 6 to 12 inches more chain on each corner so the piece drops low enough to feel intentional and not lost overhead.
If you want less visual weight: Use one garland instead of two, but wrap it thickly around the center and ornament the rungs more heavily so the design still feels full.
Best lighting choice: Warm white lights are the most flattering here because they soften the wood and make the ornaments glow instead of looking harsh or bluish.
Safety tip: Always use lightweight shatterproof ornaments and hardware rated for overhead hanging; an old ladder is charming, but once decorated it can get heavy fast.
Easy seasonal swap: After Christmas, remove the ornaments and ribbon and keep the hanging ladder up with eucalyptus, lanterns, or faux florals for winter and spring.
My styling rule: I treat this the same way I plate a holiday table: repeat colors evenly, vary the heights, and stop only when it looks generous from every angle, not just from directly underneath.