
A compact hot cocoa station is one of those little kitchen setups that feels far fancier than the effort it takes, and this version is especially practical because it uses pieces you may already have or can grab in one shopping trip: a wooden tiered cake stand for height, ceramic mugs for instant serving, and a metal napkin holder to corral cocoa packets so they do not slide all over the counter. I love projects like this because they make a busy kitchen feel pulled together without asking for any power tools, paint fumes, or a whole Saturday afternoon.
When work gets hectic, I lean hard on simple systems that make everyday routines easier, and this is exactly that kind of project. It is perfect for anyone who wants a cozy drink station on the counter for family, guests, or winter movie nights, but still wants it to look tidy and intentional instead of like a pile of boxes and mugs.
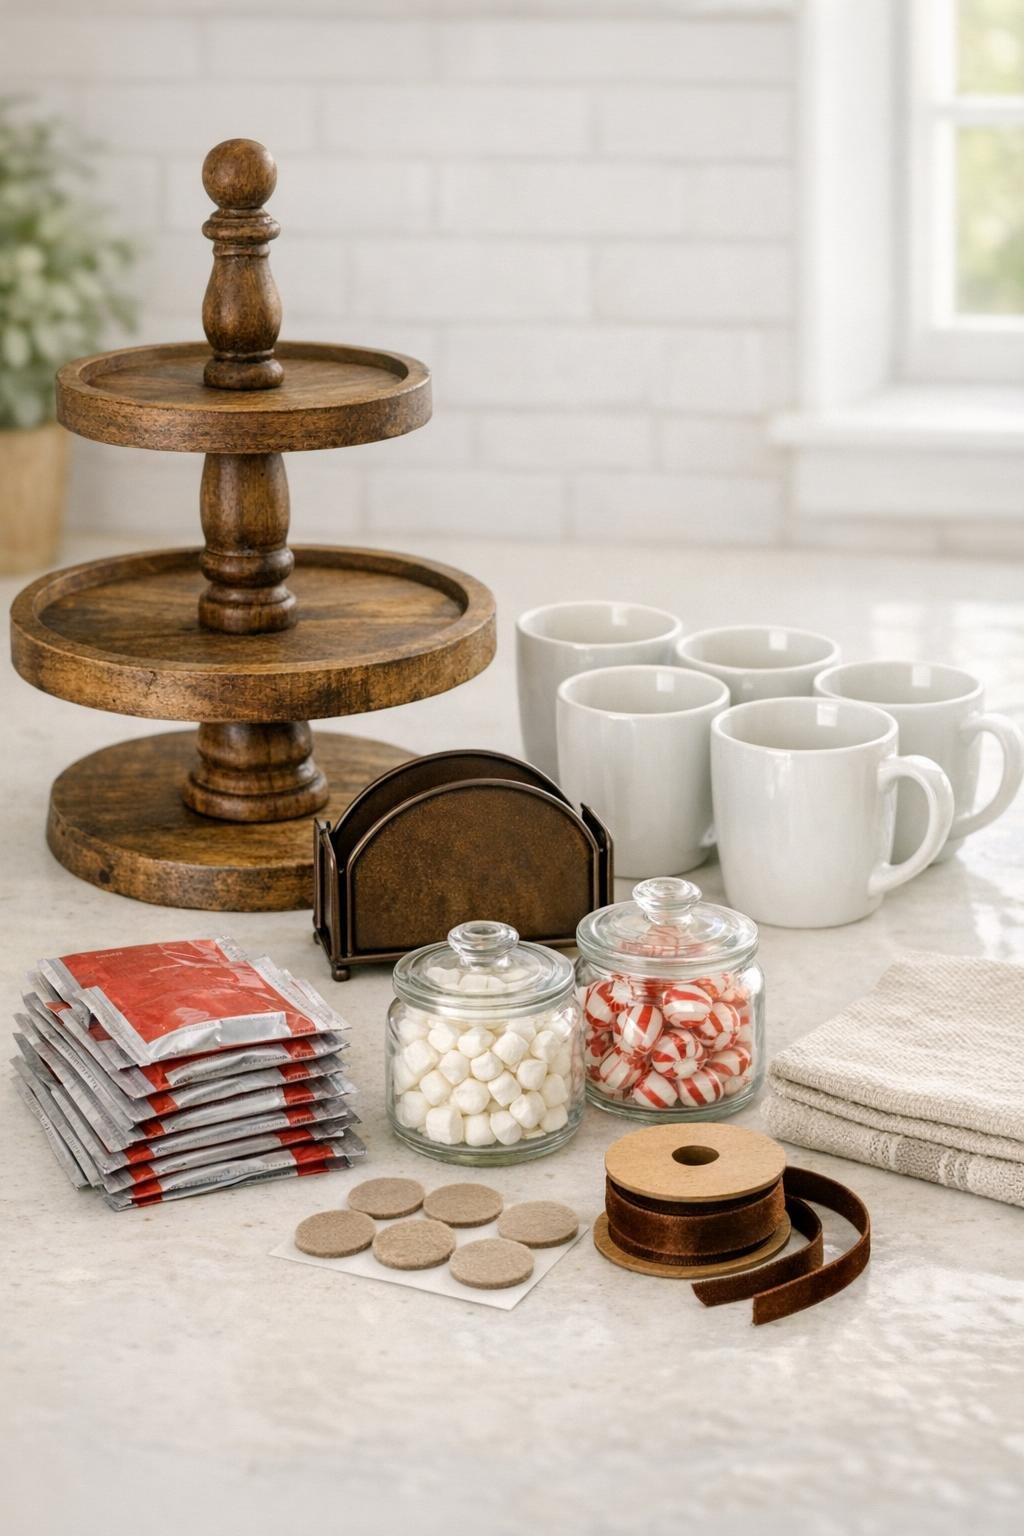
Materials
Instructions
1. Wipe down the wooden tiered cake stand, mugs, and metal napkin holder with a damp microfiber cloth so the whole station starts clean and polished.
2. Add adhesive felt pads to the underside of the cake stand base and the napkin holder if needed, especially if you are placing everything on a countertop you want to protect.
3. Set the wooden tiered cake stand in the spot where you want your cocoa station to live, leaving about 6 to 8 inches of space beside it for the packet holder.
4. Fold the kitchen towel into a neat rectangle and place it under or just in front of the stand to visually ground the setup and catch any drips from mugs or toppings.
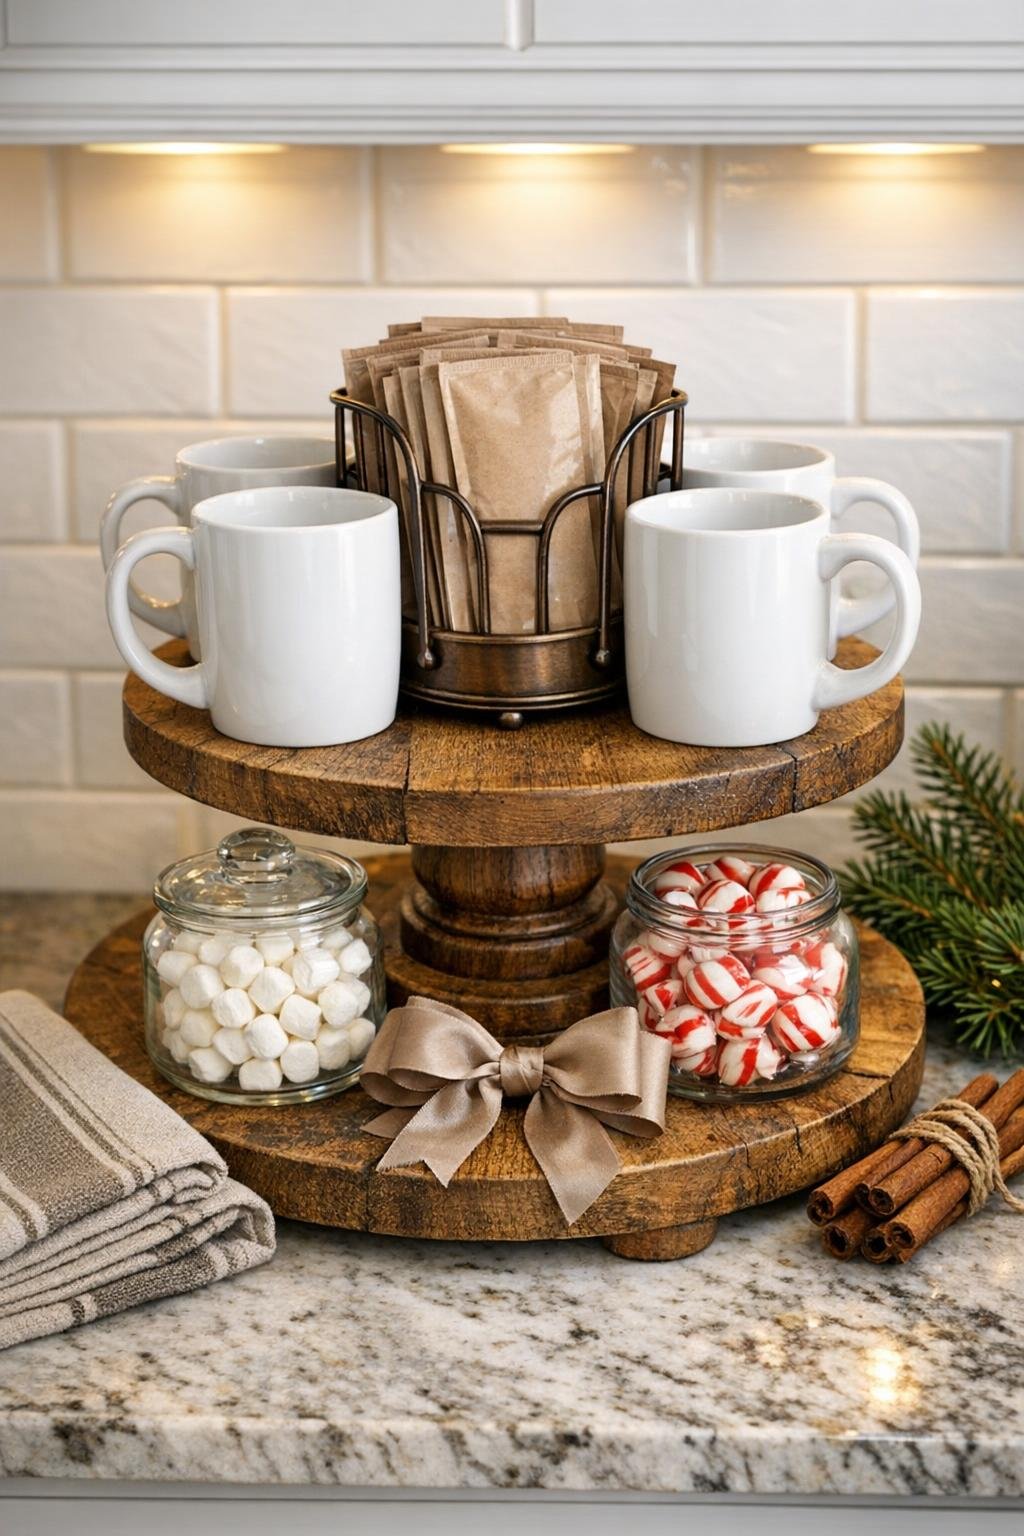
5. Arrange 2 white ceramic mugs on the bottom tier, placing the handles angled outward so they are easy to grab and the stand still looks balanced.
6. Place the remaining 2 mugs on the top tier, spacing them evenly and turning the handles slightly to the sides so the arrangement feels full but not crowded.
7. Fill the bronze metal napkin holder with the hot cocoa packets, stacking them upright and facing the same direction so they look orderly and are easy to pull out one at a time.
8. Set the filled napkin holder right beside the cake stand, close enough to read as one station but with a little breathing room so the pieces do not feel crammed together.
9. Add the jar of mini marshmallows and the jar of peppermint candies or stirring spoons beside the stand or tucked near the front, keeping the shorter jar in front and the taller one toward the back for a layered look.
10. Tie the ribbon into a simple bow around the center post or handle area of the wooden stand, keeping it snug and neat so it adds softness without getting in the way of the mugs.
11. Step back and rotate the mugs, packets, and jars slightly until the station looks balanced from the front and everything is easy to reach in real life.
12. Restock the station with fresh cocoa packets and clean mugs as needed, and keep it ready for everyday use or guests throughout the colder months.
Variations & Tips
Family-size version: If you have a larger tiered stand, use 6 mugs instead of 4 and increase to 24 cocoa packets so the station still looks abundant and useful.
Flavor mix: I like to mix classic cocoa, dark chocolate, and peppermint cocoa packets together so everyone can grab a favorite without needing extra boxes on the counter.
Countertop-friendly tip: Felt pads are worth the extra minute, especially on stone counters, because the stand and metal holder can scratch when they get moved during cleanup.
Guest-ready styling: For gatherings, add a small spoon cup or a short jar of cinnamon sticks, but keep the extra pieces low so the mugs and packet holder still stay the stars.
Small-kitchen option: If your counter space is tight, place the topping jars on the top tier between the mugs and keep all the packets in the separate holder beside it.
Easy upkeep: I usually refill mine during my Sunday kitchen reset, because taking two minutes to restock the mugs and packets keeps the whole setup looking intentional all week.