
I love a project that takes something most of us would pass right by at the thrift store or pull out of the garage cleanout pile and turns it into something people stop and ask about. This one does exactly that. If you have a pair of old glass light covers and a few basic supplies, you can make a statement piece that looks polished, festive, and surprisingly expensive without a long supply run or a complicated build.
What I especially like about this project is that it works for busy people. I’m usually squeezing DIY time in after work or on a Saturday between groceries and meal prep, so I appreciate anything that gives a big visual payoff without requiring power tools or a full craft-room setup. If you’re comfortable cleaning glass, gluing carefully, and adding a simple hanger, you can absolutely pull this off.
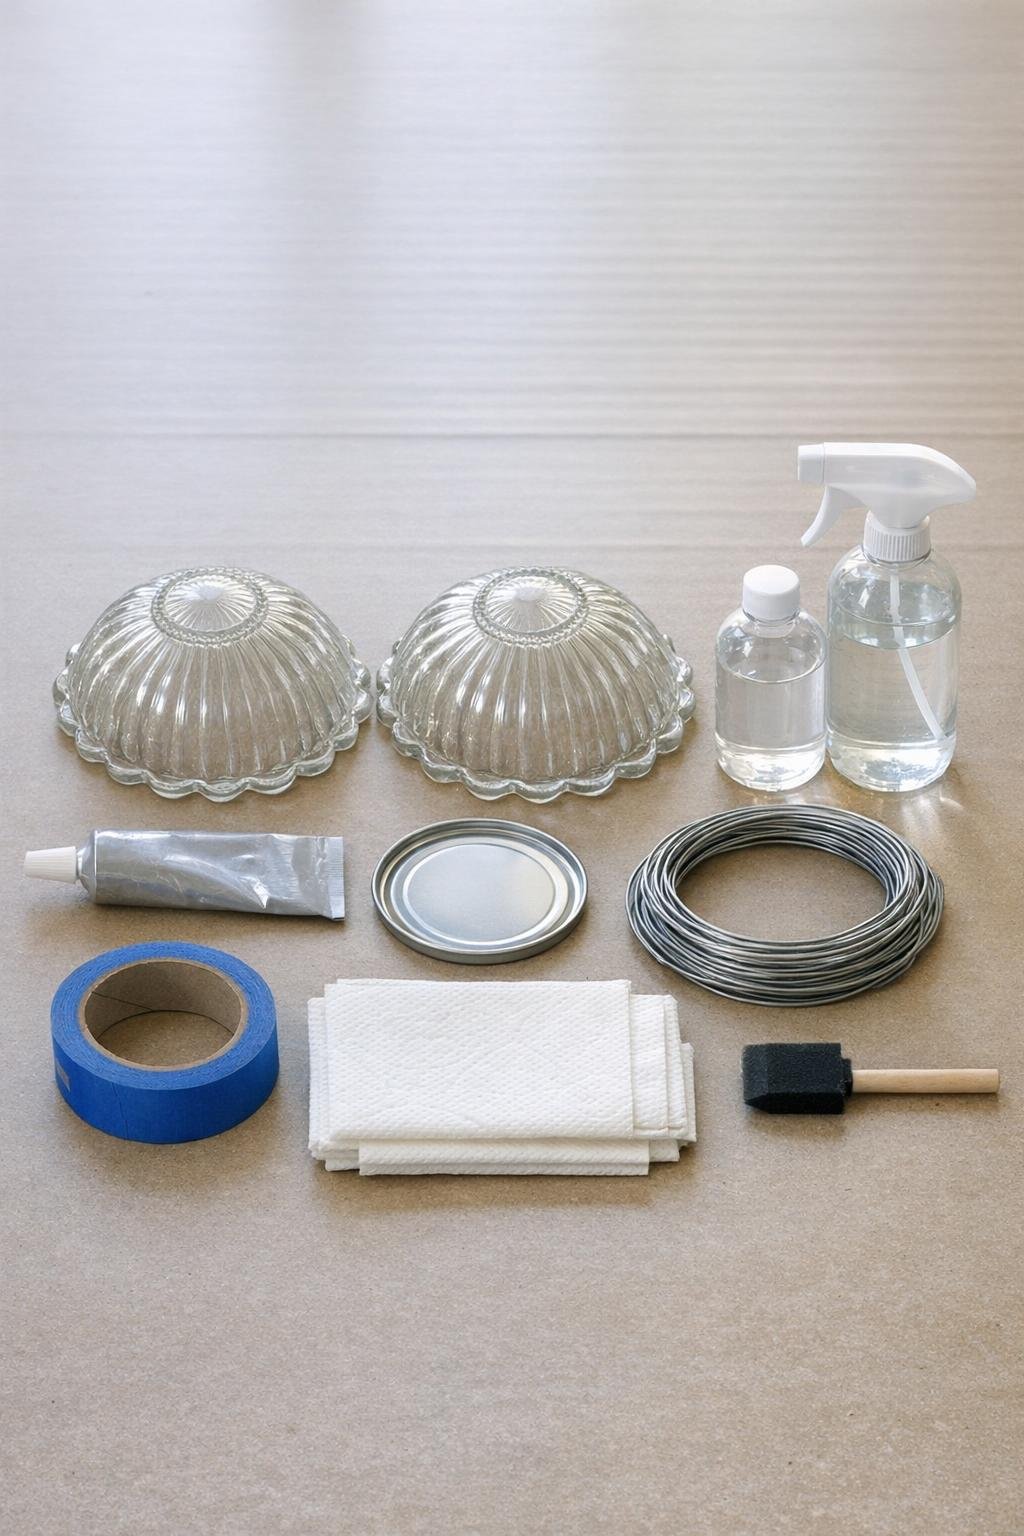
Materials
2 matching glass light covers, 10 to 12 inches wide each
Instructions
1. Wash both glass light covers with warm soapy water, then spray them with vinegar cleaner and wipe them completely dry. Finish by wiping the rims with rubbing alcohol so the glue bonds to a squeaky-clean surface.
2. Set the light covers rim-up on a towel and check that the rims meet evenly all the way around. If one has tiny rough spots, rotate the pieces until you find the best fit before adding any glue.
3. Apply a continuous bead of E6000 around the full rim of one glass cover, staying about 1/8 inch in from the edge so it will spread without oozing too far out. Press the second cover on top, rim to rim, and gently twist just a hair to seat the glue.
4. Wrap short pieces of painter’s tape across the seam in 4 to 6 places to keep the halves from shifting while they cure. Let the glued glass sit undisturbed for at least 24 hours, or according to the glue directions, until fully firm.
5. Clean the tin can lid thoroughly and dry it, then use the foam brush to spread a thin coat of E6000 around the outer edge that will contact the glass. Center it over the opening at the top of the joined glass shape and press it in place as the ornament cap.
6. Cut the wire and form a loop about 2 inches tall, twisting the ends together tightly for 2 inches to create a secure hanger stem. If your can lid has a natural groove or small center opening, thread the twisted end through it; if not, glue the twisted stem flat onto the top of the lid in a tight coil shape for a strong anchor.
7. Add a little extra glue around the base of the wire where it meets the lid, and let that cure completely. For an extra-finished look, run a very thin line of clear silicone or glue around the lid edge where it meets the glass and smooth it with a gloved finger.
8. Inspect the center seam and scrape away any dried glue strings with your fingernail or a plastic scraper. Wipe the whole piece again with vinegar spray so the glass looks crystal clear and reflective.
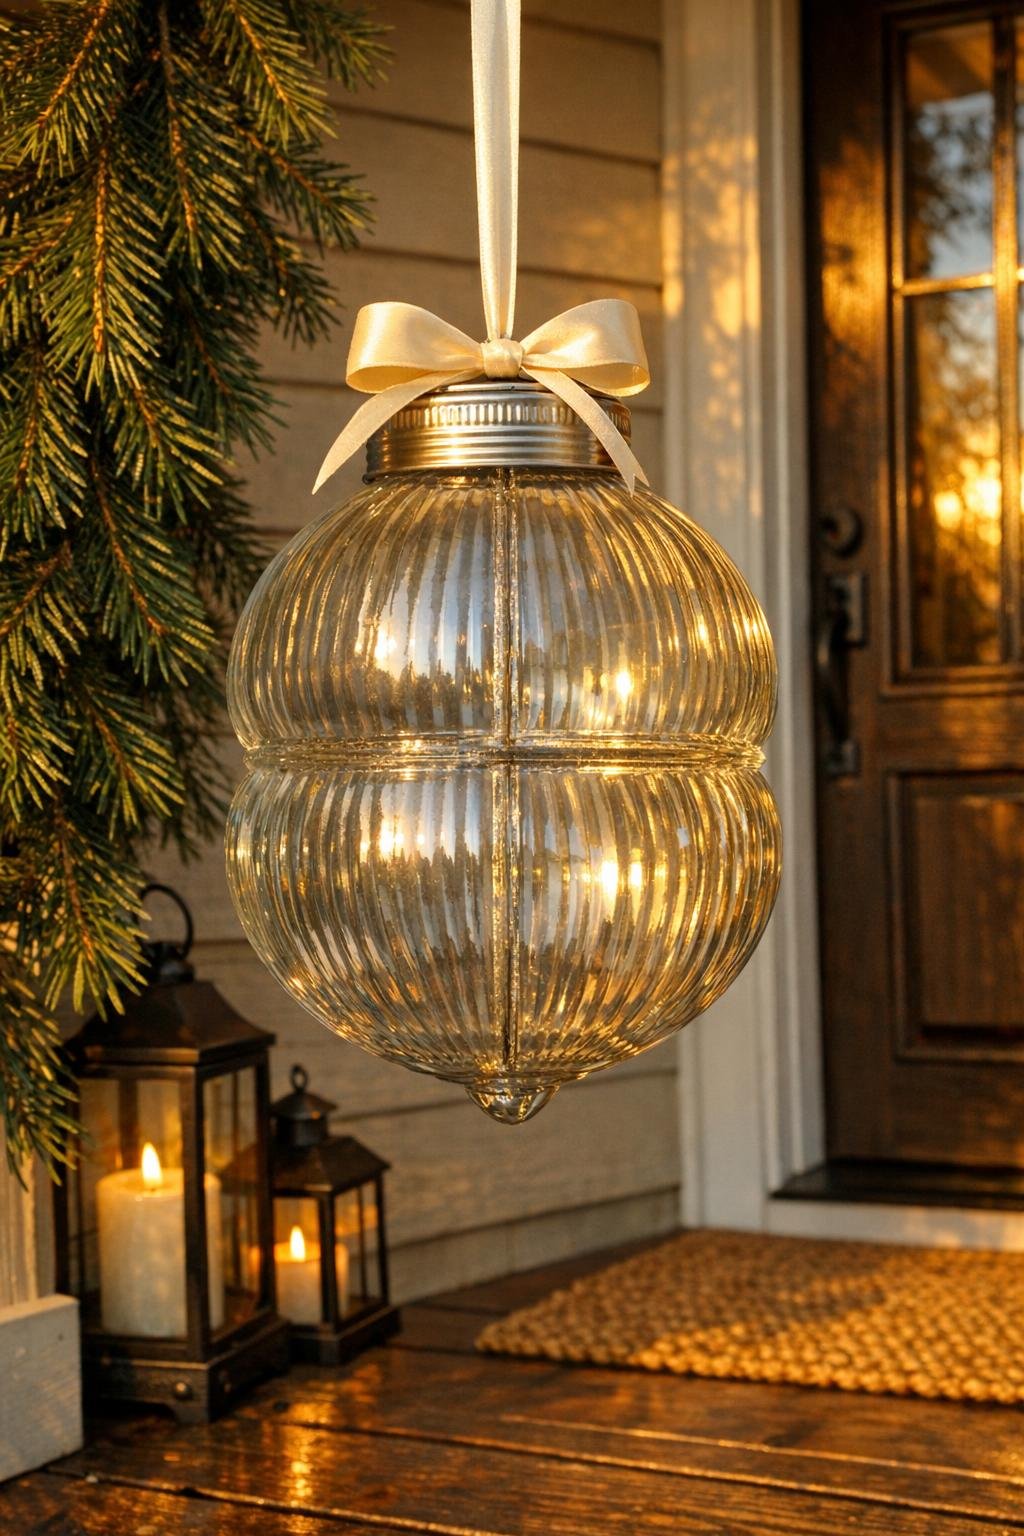
9. If you want a dressier finish, tie a generous ribbon bow around the wire loop or just under the metal cap. I like a wide weather-resistant ribbon here because it makes the scale feel intentional and gives the piece that “where did you buy that?” look.
10. Hang or nestle the finished piece securely on a covered porch where it won’t bang into railings or doors. Place it where natural light can hit the glass, because that’s what really makes the finished project shine.
Variations & Tips
For a frosted look: Lightly spray the outside with frosted glass spray after the glue has fully cured if you want a softer, wintry finish. I’d still leave a little clear glass showing so the original light covers are recognizable and catch the light.
For holiday color: Add a weatherproof bow in red, gold, silver, or plaid to change the whole mood without changing the build. This is my favorite kind of decorating shortcut because you can store one ornament and swap the ribbon seasonally.
For stability: If your porch gets windy, display the ornament in a large urn, tucked into sturdy greenery, instead of hanging it freely. That gives you the same oversized impact with a little less movement.
When thrifting glass covers: Look for pairs with matching diameter and similar curve so the ornament looks balanced. Slightly shallow bowl shapes usually make the cleanest seam and the nicest oversized ornament silhouette.
Glue patience matters: E6000 needs real cure time, and this is not the project to rush. I know it’s tempting to move it early—I’ve definitely learned that lesson the annoying way—but waiting the full cure time gives you a much stronger finished piece.
Safe display tip: Keep the finished ornament in a covered spot away from rough play, slamming doors, or spots where it could be knocked down. Since it’s glass, placement is part of the project’s success.