
There are a few household materials I hate to waste, and newspaper is high on that list. Once you learn how to roll it into sturdy tubes, it stops feeling like yesterday’s paper and starts acting more like a flexible craft supply that can be shaped, woven, stained, and polished into something that looks far more expensive than it is. This project is especially satisfying because the transformation is dramatic, but the process itself is simple and repetitive in the best possible way.
If you enjoy easy handwork you can do at the kitchen table with a cup of coffee nearby, this is a great one to try. I love projects like this because they reward patience more than perfection, and with just a handful of basic supplies you can turn a stack of old newspapers into a full, richly textured piece that looks right at home on a front door.
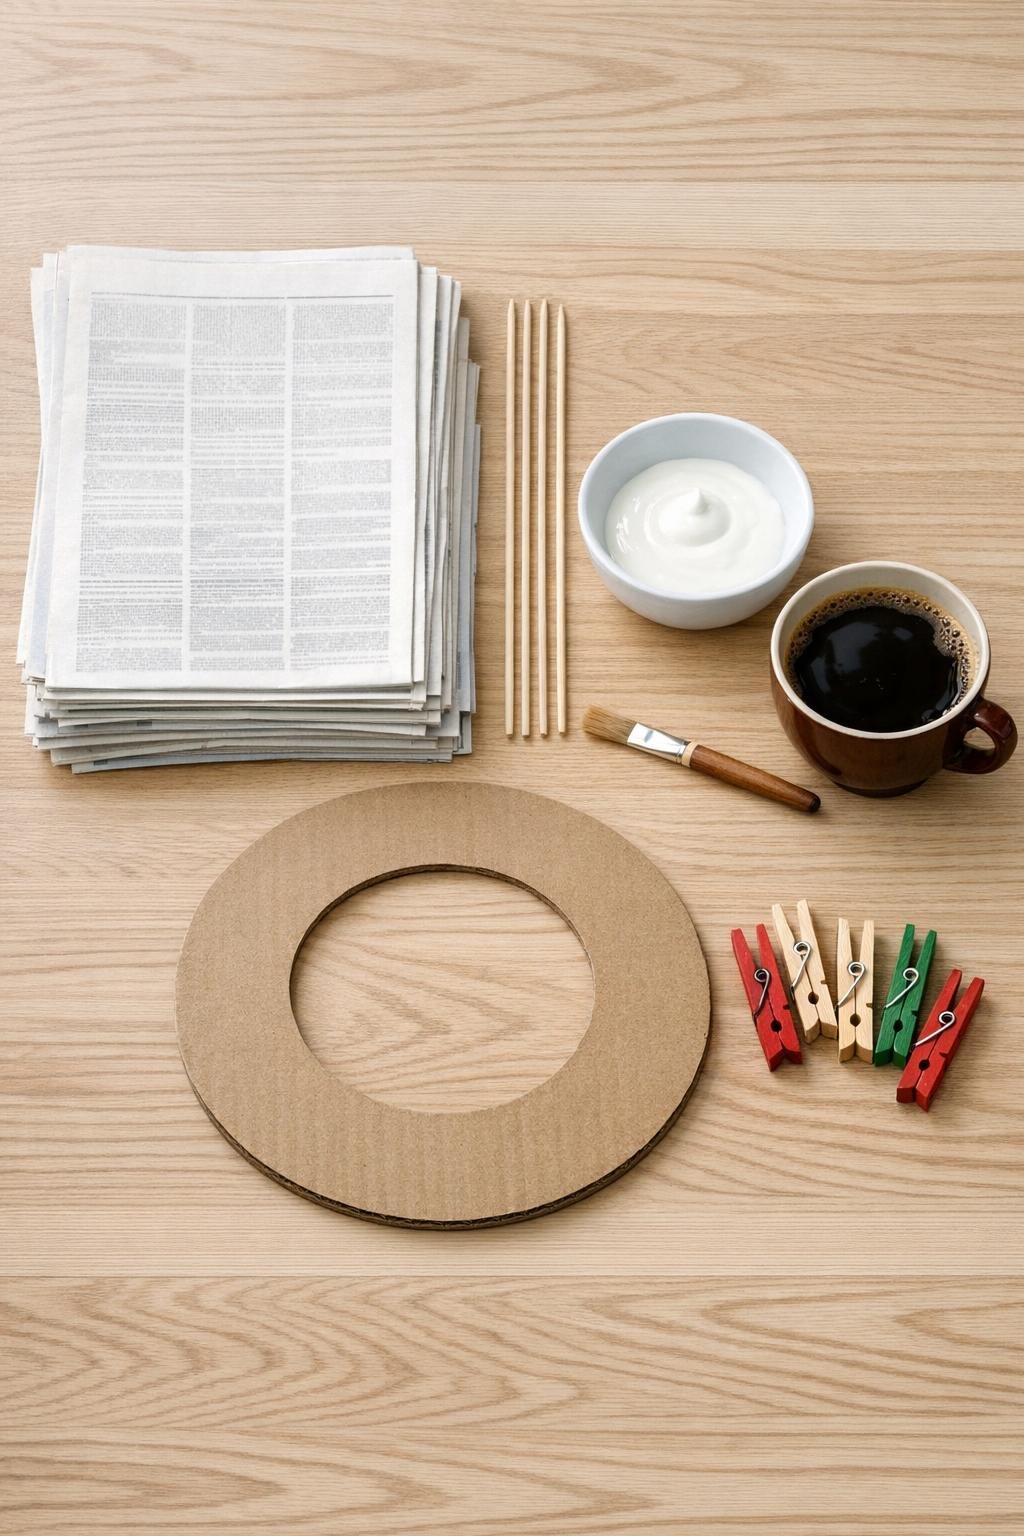
1. Protect your work surface and roll each newspaper sheet diagonally around a wooden skewer, starting from one corner and keeping the tube as tight and even as you can. Dab a little white glue on the last corner to seal each tube, then slide out the skewer.
2. Let the 40 tubes dry for 10 to 15 minutes so they hold their shape firmly before weaving. If any tube loosens, add a touch more glue and roll it back into place.
3. Flatten 12 tubes gently with your fingers or by pressing them under a book for a minute; these will bend more easily around the ring. Keep the remaining 28 tubes round so the finished weaving has that wicker-like texture.
4. Brush a light coat of glue around the cardboard ring and wrap 8 of the flattened tubes around it, slightly overlapping the ends to cover the cardboard completely. Clip the ends in place with clothespins and let the base set for 10 minutes.
5. Attach 8 more flattened tubes evenly around the ring so they span from the inner edge to the outer edge like spokes, gluing one end on the back first and then bringing each tube across the front and around. Space them evenly to create a balanced framework for the weaving.
6. Start weaving with a round tube by tucking one end onto the back of the ring with glue, then bring the tube over one spoke and under the next all the way around. Keep the weaving snug but not so tight that it warps the ring.
7. When you reach the end of a tube, pinch the tip slightly and slide it into the open end of the next tube with a dot of glue to extend it. Continue weaving with 12 to 14 round tubes until the ring begins to look full and basket-like.
8. Add a second woven pass in any thin areas by going back around and filling gaps, especially along the outer edge where fullness makes the biggest visual difference. This is the step that gives the wreath that generous, layered look instead of a skimpy one.
9. Use the remaining round tubes to wrap and finish the inner and outer edges wherever the cardboard or spoke ends still show. Tuck every end onto the back or into nearby weaving with glue so the front looks clean and continuous.
10. Brush the entire wreath lightly with strong coffee, working it into the paper but not soaking it to the point of sagging. Let it dry completely, then add a second light coat if you want a deeper warm brown wicker tone.
11. Once dry, brush a very thin coat of diluted white glue over the surface to stiffen and seal the tubes with a subtle low-sheen finish. Let the wreath dry flat until it feels crisp and sturdy.
12. Tie a loop of twine or ribbon to the back top of the wreath for hanging, fluff any slightly flattened sections with your fingers, and trim away any stray paper ends. The finished piece should look full, even, and richly woven all the way around.
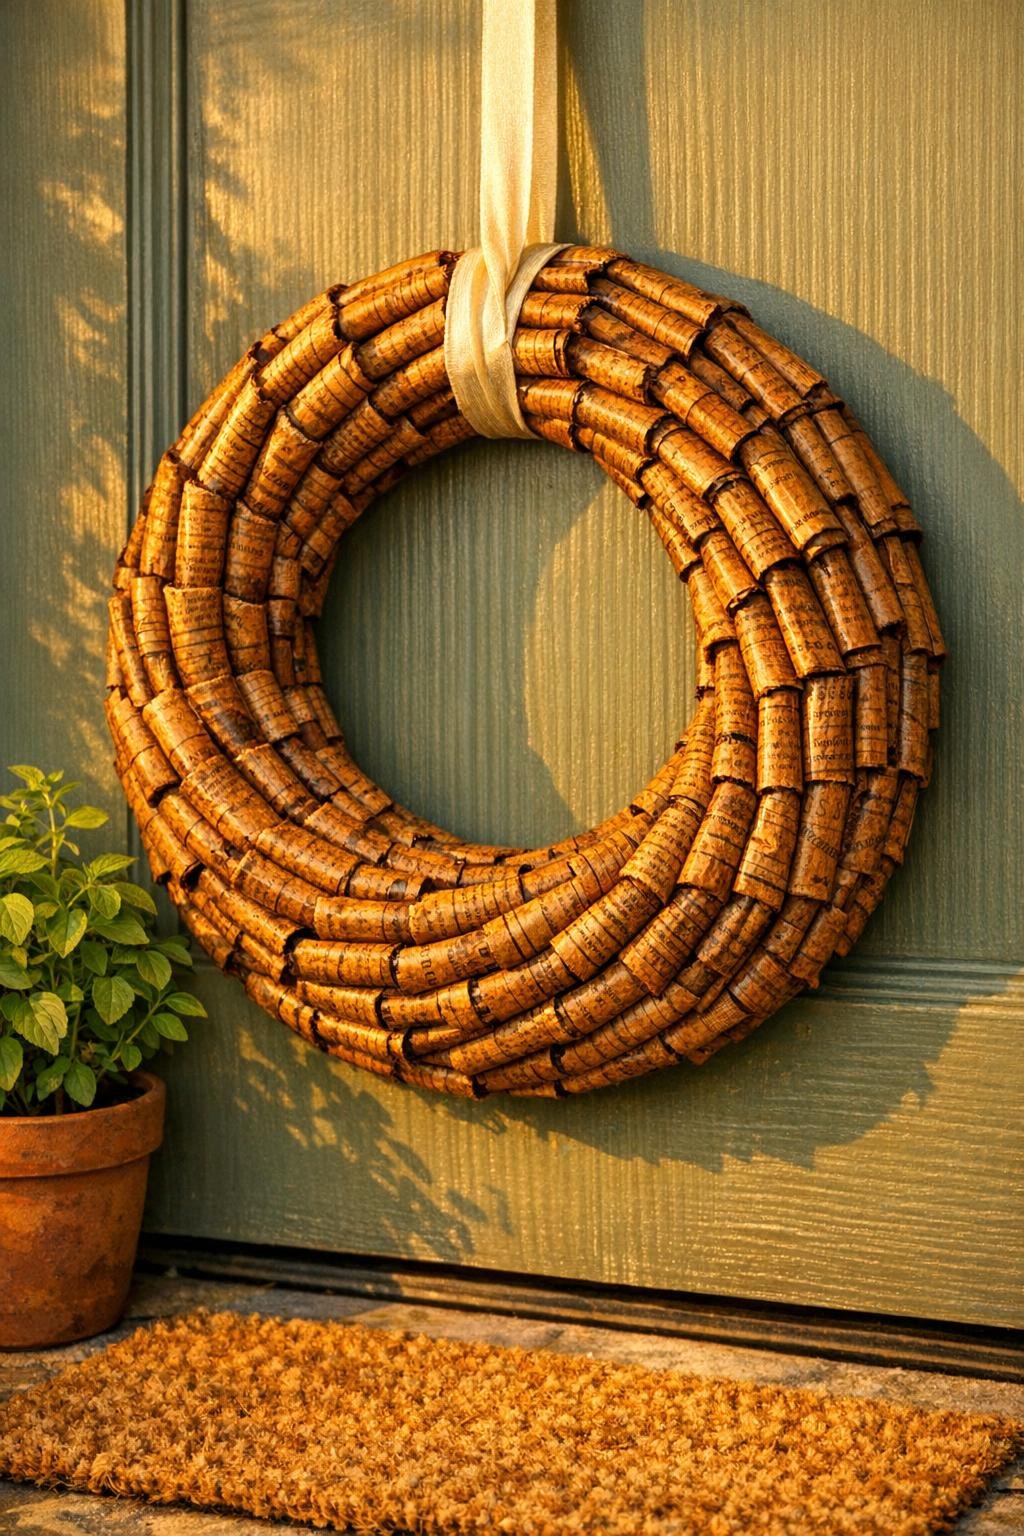
For a darker wicker look: Brew the coffee extra strong or apply two light coats instead of one heavy coat. I prefer building color gradually because paper can soften quickly if it gets too wet.
If your tubes keep unrolling: Roll at a sharper diagonal and keep tension on the paper from the very first corner. This is a lot like rolling a tight cigar-shaped pastry in the kitchen: the beginning determines the shape of everything that follows.
For a thicker wreath: Cut and stack two cardboard rings together before wrapping them. That extra depth makes the finished piece look more substantial on a larger door.
For a neater finish: Save your slimmest, most even tubes for the final outer-edge wraps. Those visible top layers make the whole wreath look more polished.
For added durability: Keep the wreath on a covered door or indoors on a pantry, mudroom, or kitchen door. Even sealed paper crafts hold up best when they stay out of direct rain and heavy humidity.
To decorate it seasonally: Tuck in a ribbon bow, a few faux leaves, or small dried flowers with a dot of glue. I like keeping the base neutral and changing only the accents, the same way I rely on a good pantry staple and dress it up differently from season to season.