
Late-season garlic is one of those little country chores that pays you back twice: once when you tuck the cloves in and feel like next year is already underway, and again when those sturdy green shoots poke up after winter and promise a good harvest ahead. When critters are bold and the weather turns rough, though, a simple planting bed can get scratched up in a hurry. This easy wire planting cage gives your garlic a fighting chance without turning the job into a full-blown construction project.
I like projects like this because they use plain materials, go together fast, and solve a real garden problem. If you've got a small garlic patch, a raised bed corner, or even a tidy row you want to protect from squirrels, stray cats, rabbits, or enthusiastic chickens, this is the sort of no-fuss fix that feels downright satisfying by supper time.
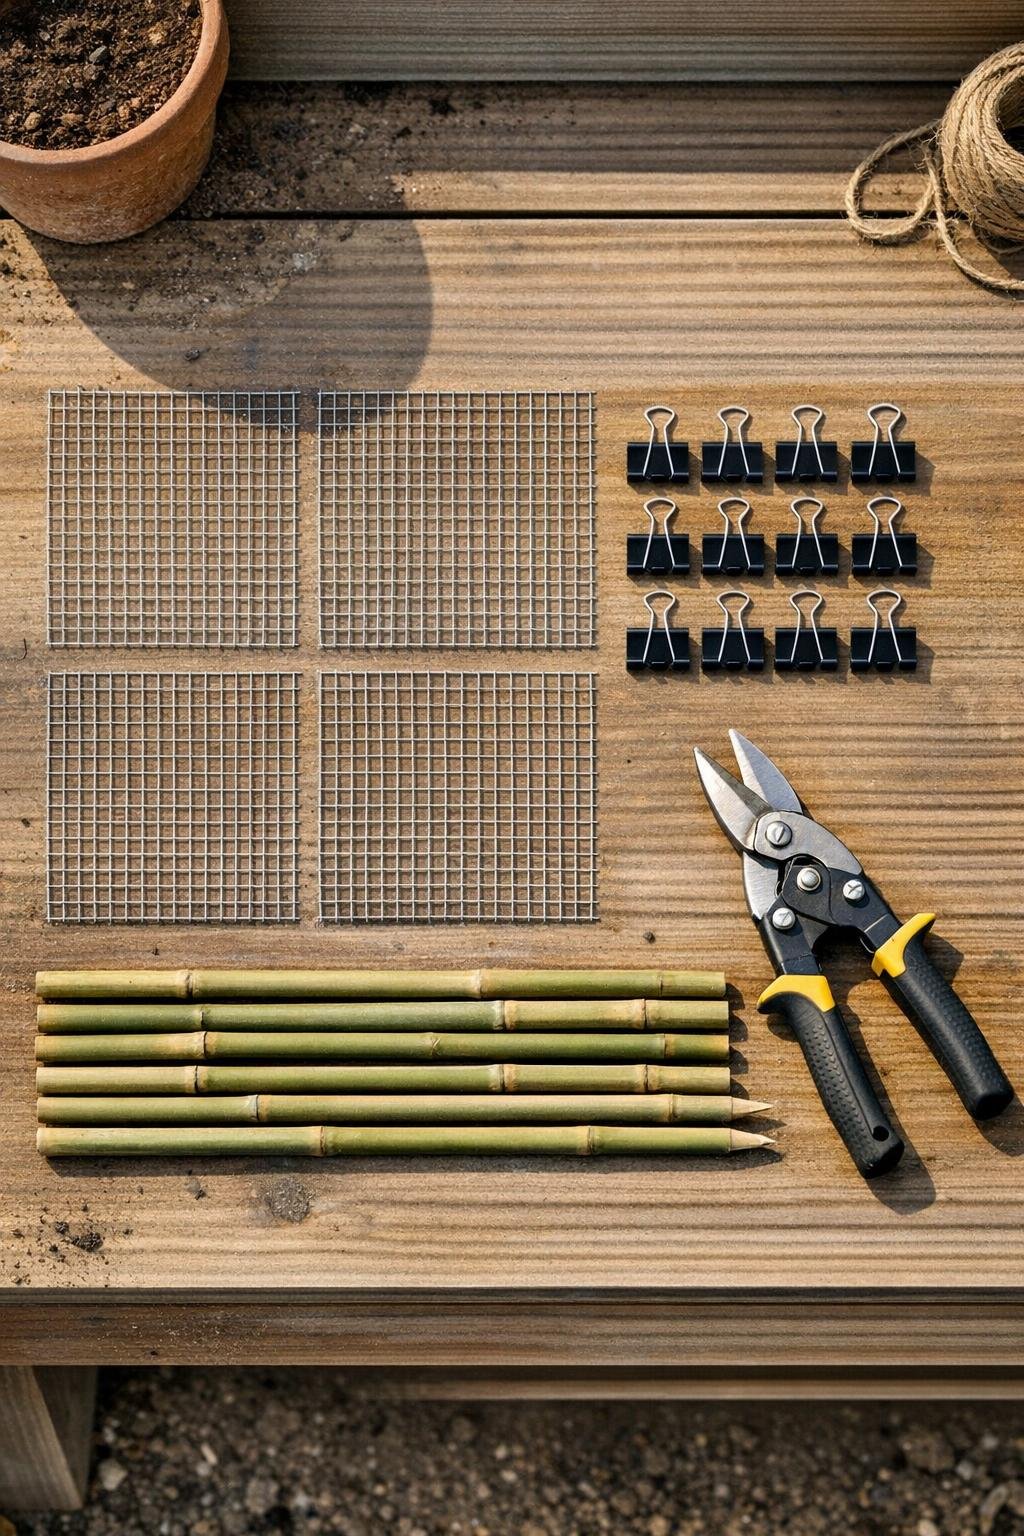
Materials
Instructions
1. Cut or gather 4 matching pieces of hardware cloth measuring 18 x 24 inches so the cage goes together evenly and sits square over a small garlic bed.
2. Plant your garlic cloves first if the bed is still empty, spacing them about 4 to 6 inches apart in a roughly 16 x 16-inch patch and covering them with 2 to 3 inches of soil.
3. Lay two hardware cloth pieces on top of each other and bend both gently along the long center line to make a shallow peaked panel, like a low roof.
4. Repeat with the other two pieces so you have four peaked panels total; these layered panels make the cage sturdier and keep the shape from collapsing into the bed.
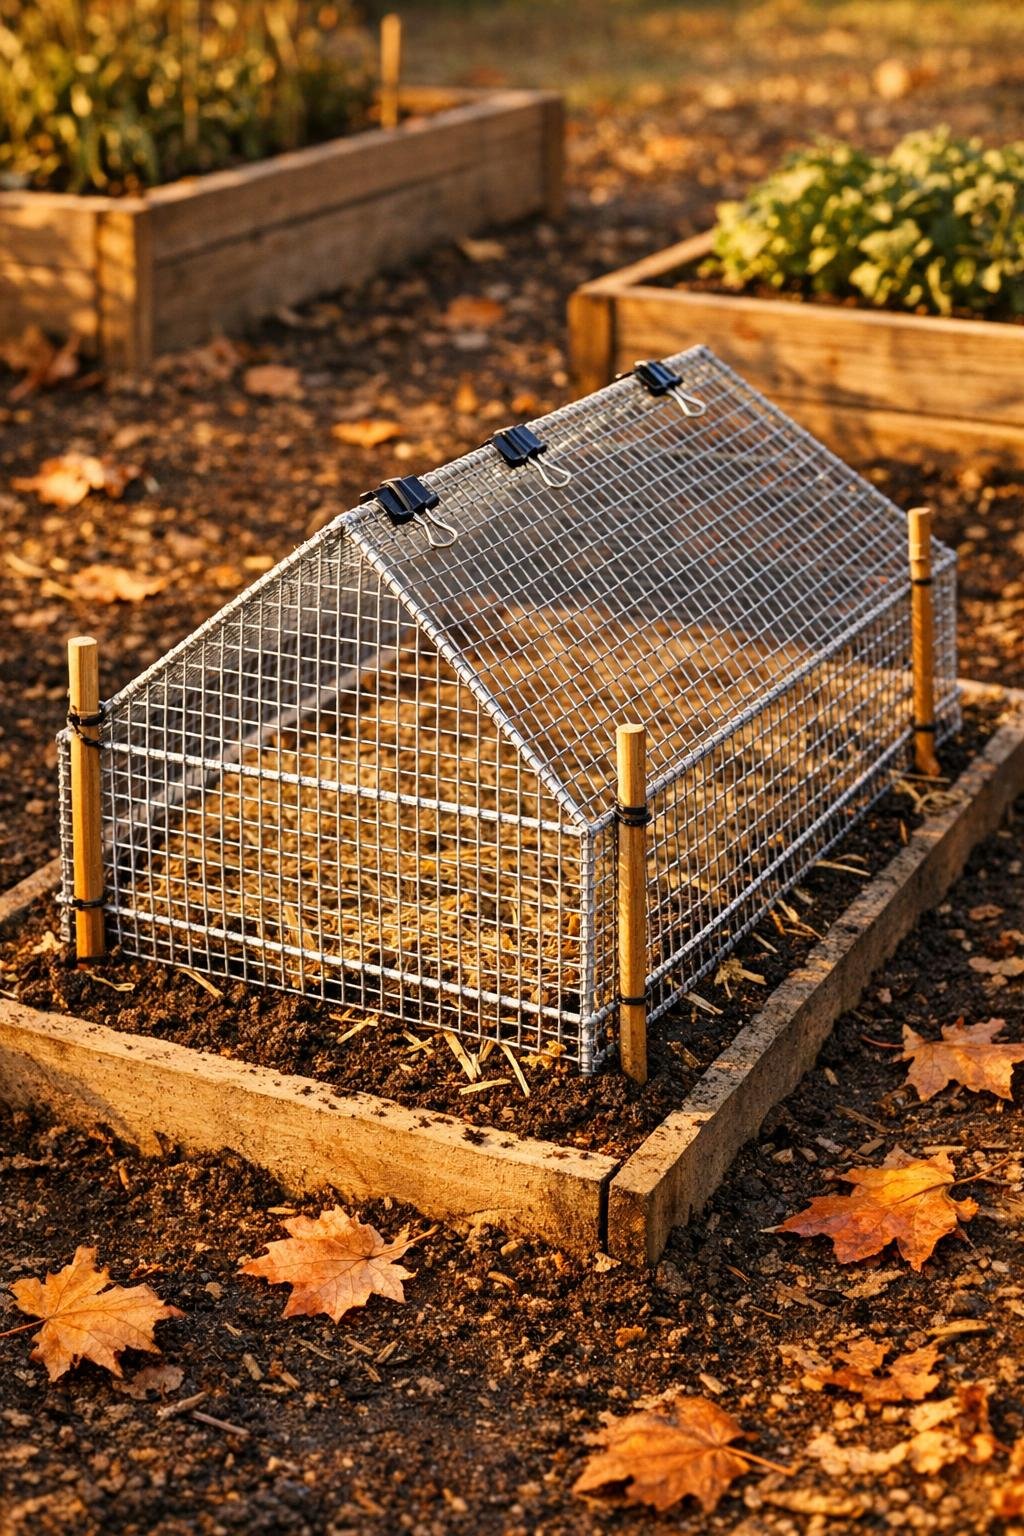
5. Stand two panels opposite each other over the garlic bed to form the long sides of a little tunnel, then overlap their top edges by one grid square and secure them together with 3 binder clips spaced evenly from end to end.
6. Add the other two panels at the remaining sides, overlapping the wire edges by one to two grid squares, and clip all four corners and ridge joins until you have a roomy rectangular cage with a peaked top.
7. Press 2 bamboo stakes along each long side of the cage, slipping them through the outer wire grid and down into the soil 5 to 6 inches to pin the cage in place.
8. Add 1 bamboo stake at each short end if your bed is exposed or your soil is loose, then tighten the cage against the ground so there are no easy gaps for animals to nose under.
9. If you're using mulch, tuck a light layer of straw or loose mulch inside the cage around the planted area, keeping it airy rather than packed down.
10. In windy weather, loop jute twine once over the cage from side to side and tie it to opposite stakes so the whole cover stays put through fall storms and winter gusts.
11. Check that the cage lifts off easily by unclipping one side or simply pulling the stakes when it's time to weed, mulch heavier, or admire those first spring shoots.
Variations & Tips
For a longer garlic row: Make two or three cages and set them end to end instead of building one oversized cover; smaller sections are easier to lift and less likely to sag in the middle.
For heavier animal pressure: Double the hardware cloth on the sides by clipping an extra panel over the most vulnerable edge, especially if squirrels or chickens are persistent diggers.
For raised beds: Let the cage sit just inside the bed frame and angle the bamboo stakes outward slightly; that little trick holds especially well in fluffy amended soil.
For easier spring access: Use binder clips on one whole side as a makeshift hinge-and-door arrangement, leaving the opposite side staked down so you can open the cage quickly for weeding.
My best timing tip: I like to build the cage the same day I plant garlic, before the neighborhood critters notice I've stirred up fresh soil. Around here, if the dirt looks newly turned, every creature in the county seems to think I've prepared them a buffet.
To keep it looking tidy: Snip away any sharp wire points and turn them outward or fold them under with pliers before setting the cage in place; it's safer on gloves, sleeves, and hands when you're in a hurry on a chilly afternoon.