
There is something so satisfying about turning the simplest little household basics into a front-entry piece that looks cheerful, full, and put together. I have always loved a project that starts with a neat stack from the dollar store and ends up looking like you fussed far more than you really did. This one is especially nice because the steps are repetitive in the best way, easy enough to do at the kitchen table while visiting with family or listening to the evening news.
If you enjoy low-cost decorating, need something with a little height for a porch or entry corner, or just appreciate a project that comes together from everyday materials, this is a good one to try. The process is simple, the supplies are easy to find, and with a ribbon and a few finishing touches, the whole thing comes together in a way that feels downright charming.
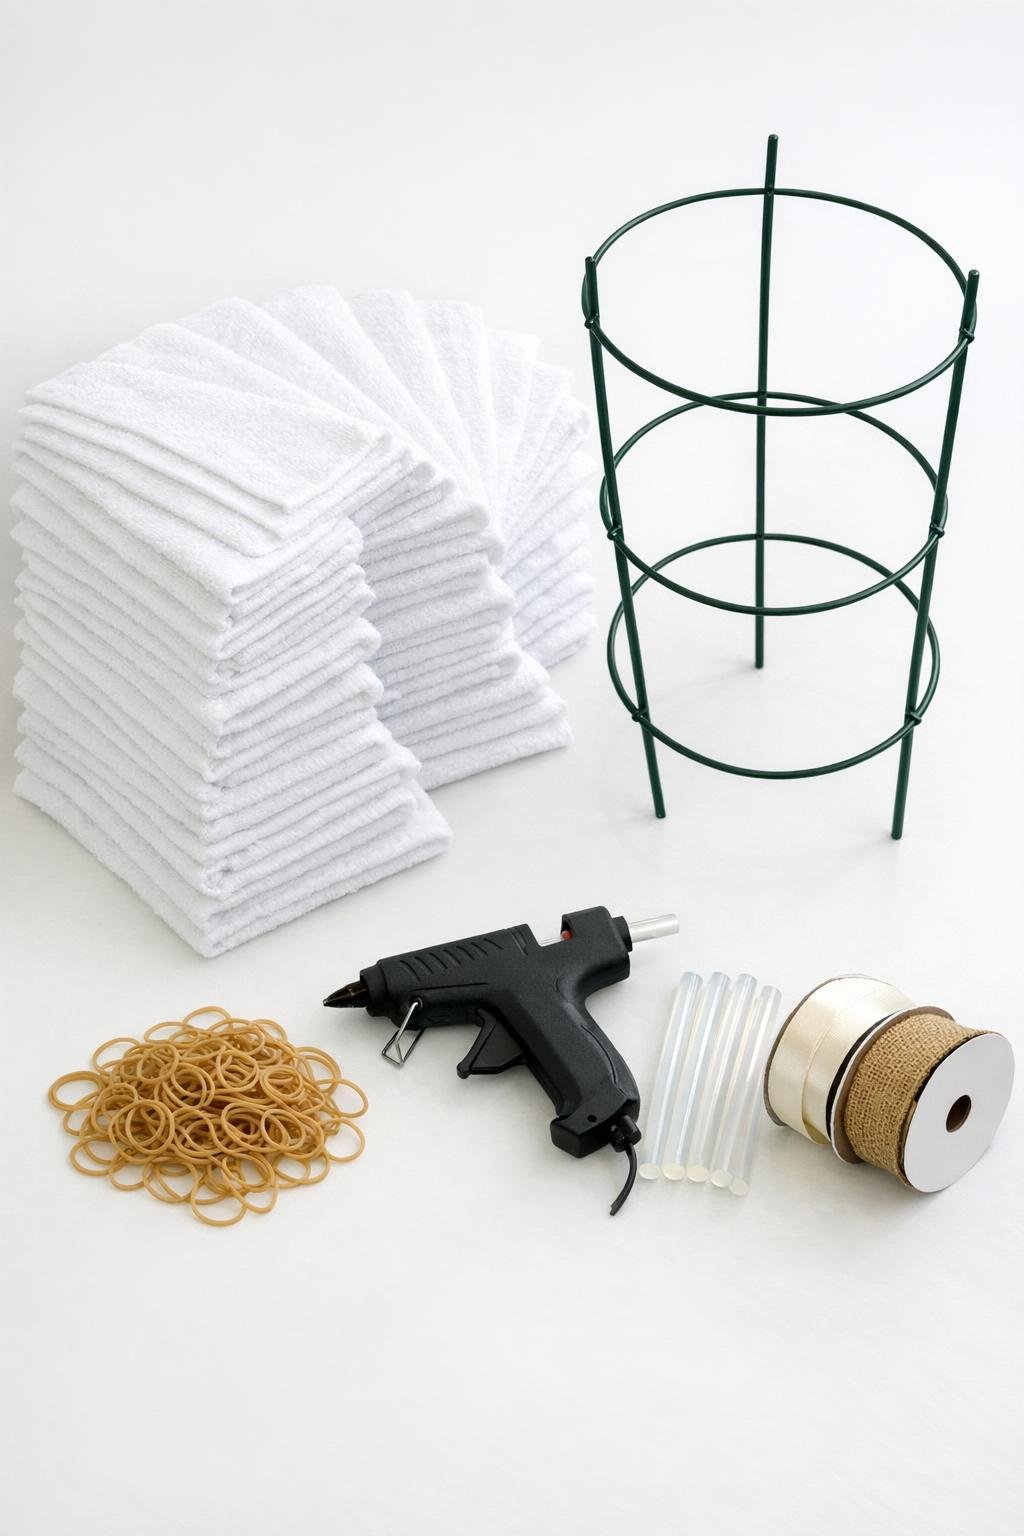
Materials
Instructions
1. Wash and dry all 60 washcloths if they feel stiff from the package, then smooth and fold them into neat squares so they are easy to roll evenly.
2. Turn the tomato cage upside down so the wide ring becomes the base and the three wire legs point upward, then bring those three top wires together and secure them tightly with ribbon or a rubber band to form a tall cone.
3. If the very top point looks too tall or uneven, trim a little off the wire ends with cutters and bend the tips inward with pliers so the top is tidy and safe to handle.
4. Roll each washcloth tightly from one edge into a firm little log, then snap a rubber band around the center of each one so it holds its shape.
5. Sort the rolled washcloths into groups for the cage: about 24 for the bottom third, 20 for the middle, and 16 for the upper section, which helps you keep the shape full without crowding the top.
6. Starting at the bottom ring of the cage, place a line of hot glue on one rolled washcloth and press it horizontally against the wire so the rubber-banded center sits snugly on the frame; hold for a few seconds until it grips.
7. Continue gluing washcloth rolls all around the bottom, placing them side by side with the rounded ends facing outward and the seams turned inward so the outside looks soft and uniform.
8. Build the second row directly above the first, staggering the rolls so each one lands between two below it; this layered placement gives better coverage and makes the whole form look plush and full.
9. Keep adding rows upward, following the narrowing cone and checking from all sides every few rows so the spacing stays even and no green wire shows through from the front.
10. As you reach the middle and upper sections, angle the rolls slightly upward to follow the shape of the cage and fill any small gaps with an extra dab of glue where needed.
11. Glue the final upper rolls in place, packing them closely so the top stays nicely shaped and generous rather than skimpy; leave only a small opening at the very tip for the topper.
12. Cover the cardboard circle with your scrap ribbon or fabric using hot glue, then glue that finished cap over the top opening to hide the wire ends and create a clean finished point.
13. Make a full bow from the wide ribbon using 2 1/2 to 3 yards, fluff the loops, and glue it near the top front; use the narrow ribbon for an extra tie, tail, or small knot at the very top if you like.
14. Weave the remaining ribbon lightly down the tree in a loose spiral or tuck short ribbon tails into a few spots for softness, being careful not to cover so much that you lose the pretty rolled texture.
15. Set the finished piece into a planter, basket, or on a wood round at your entry, and turn it until the fullest side faces forward for the nicest display.
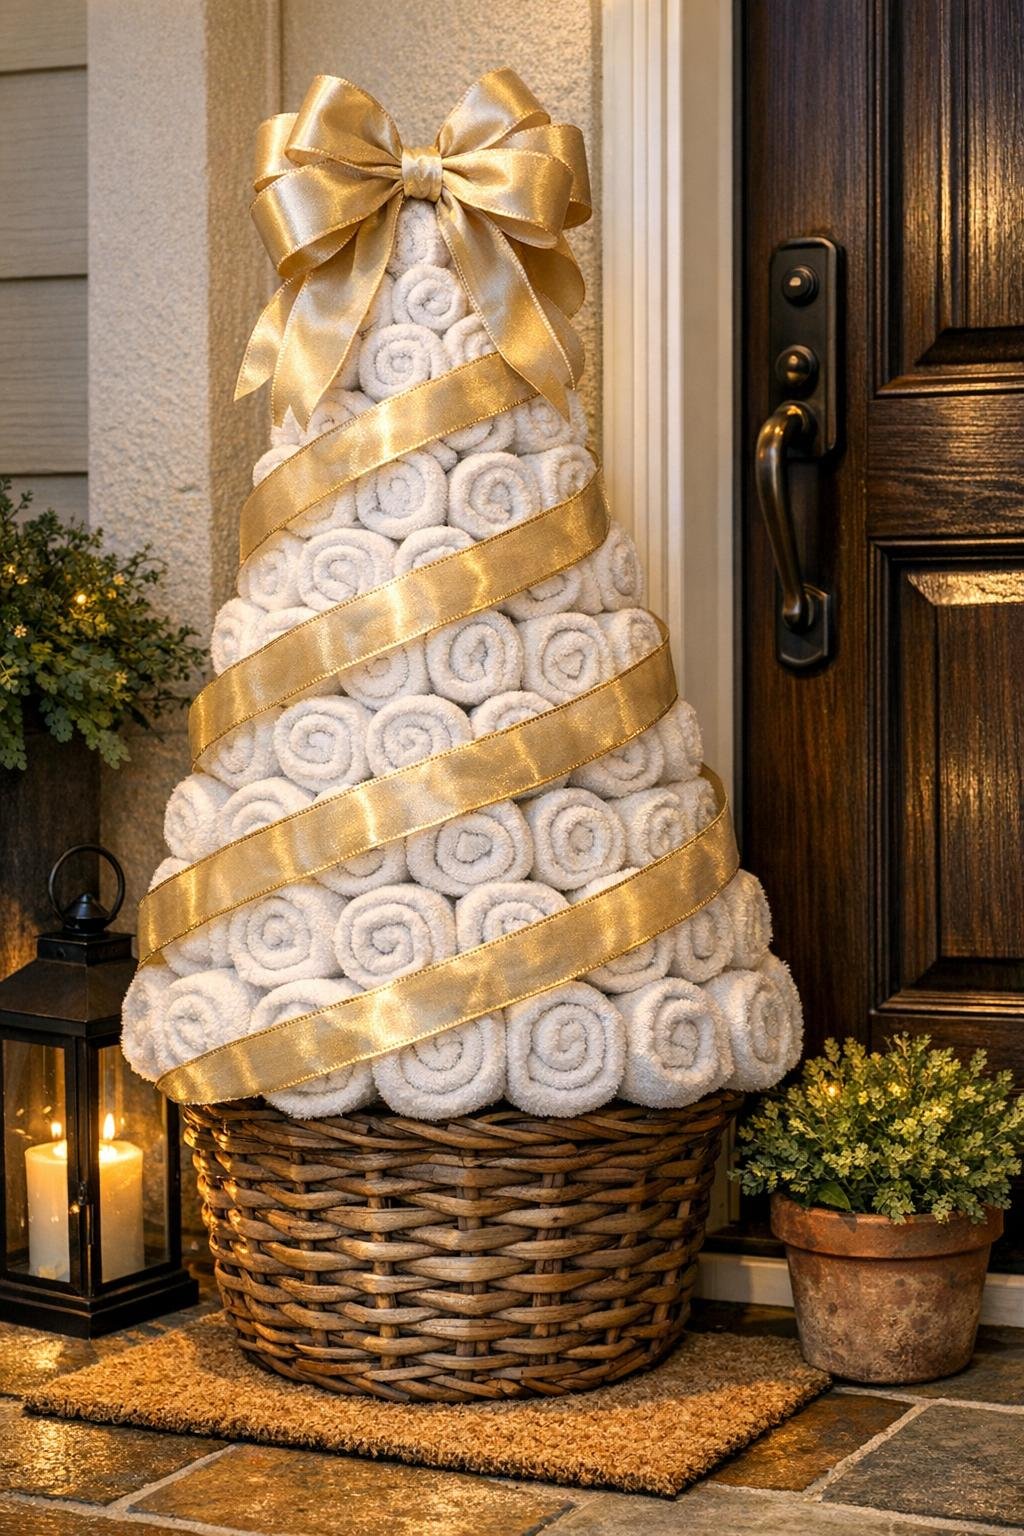
Variations & Tips
Use one color for a clean look: The all-white washcloths have a fresh, tidy look that reminds me of stacked linens drying in a farmhouse laundry room. If you want the most polished finish, stick with one color and let the ribbon do the decorating.
Try seasonal ribbon: Change the bow and ribbon to match the season without rebuilding the whole piece. Red velvet is lovely for winter, buffalo check suits fall, and a soft floral ribbon feels sweet in spring.
Keep the rows dense: The secret to making this look abundant is close placement. If you can see much of the frame from the front, shift a few rolls before the glue fully hardens and stagger the next row more tightly.
Make gluing easier: I like to work in sections of one row at a time rather than hopping around. It is steadier, less messy, and helps the shape stay balanced all the way up.
Add a sturdier base: If your porch gets bumped by boots, packages, or grandkids rushing in, nest the base inside a weighted planter with a folded towel or crumpled paper tucked around it to keep it from wobbling.
Save it for later: Store it upright in a large box or tall trash bag in a dry closet so the washcloth rolls keep their shape. A little care at the end of the season makes next year’s decorating wonderfully easy.