
I love a backyard upgrade that looks custom without requiring custom-furniture money. Around here, I’m usually trying to make our outdoor space feel a little more fun and a lot more usable between workdays, weeknight dinners, and the handful of warm months when everyone in the Midwest suddenly wants to be outside all the time.
These are 20 backyard DIY ideas I’d actually make, with realistic materials, rough costs, sizes, and build times so you can figure out what’s worth tackling first. I kept the projects practical, visually impressive, and doable with basic tools, because in my experience the best backyard compliments usually start with, “Wait, you made that yourself?”
1. DIY outdoor movie screen
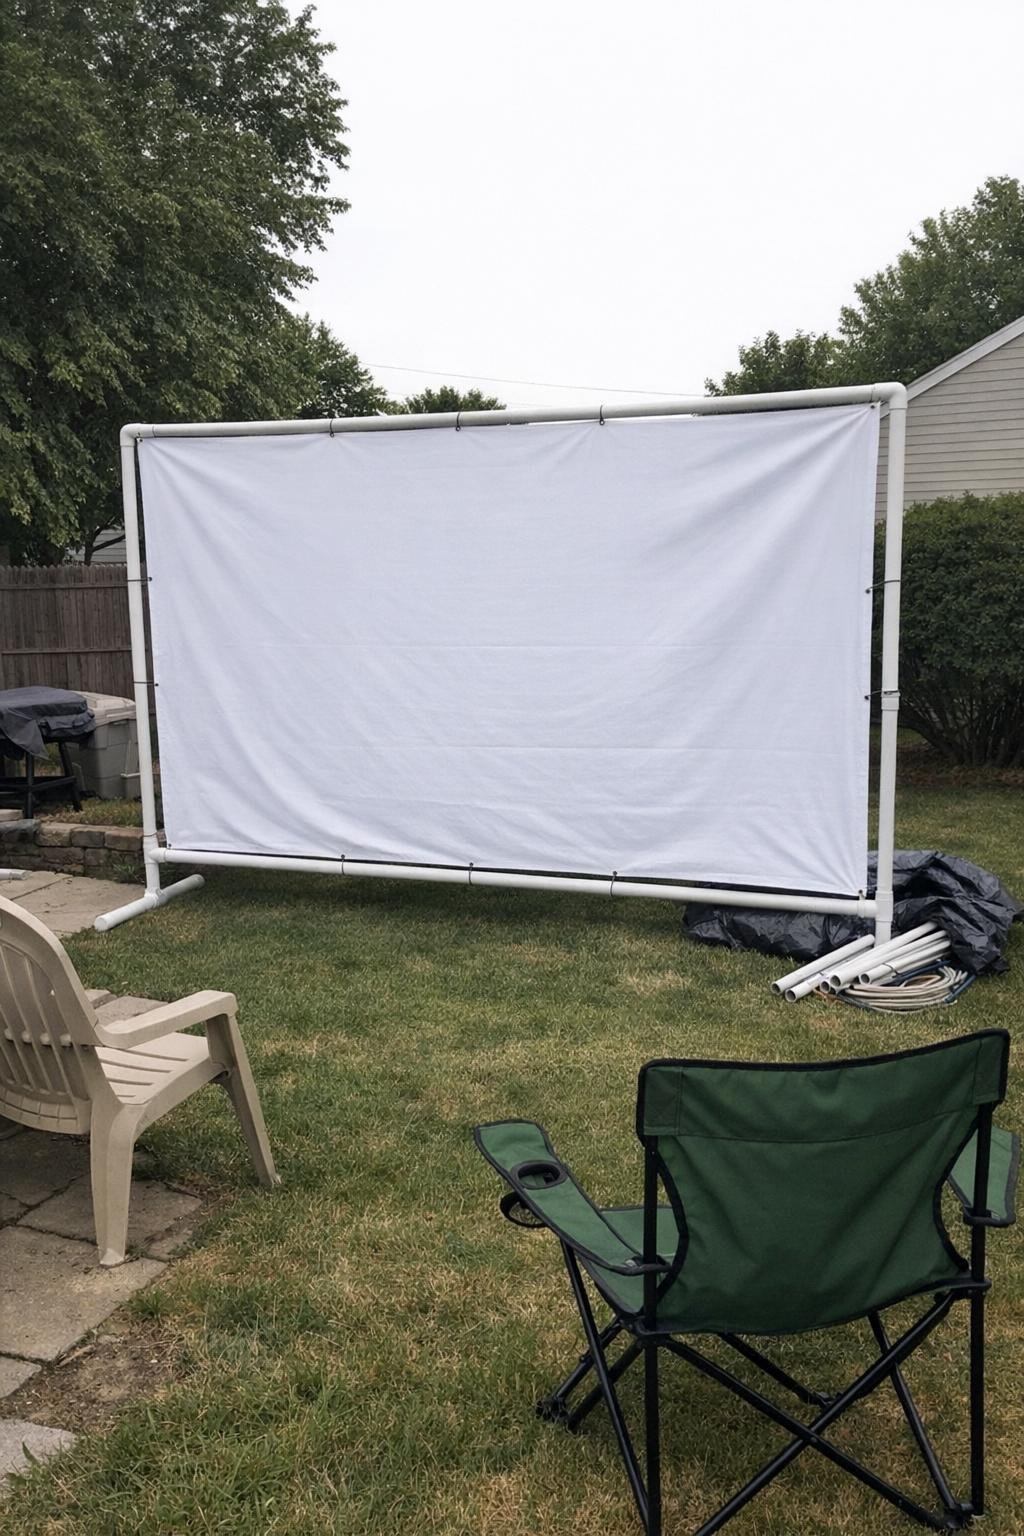
This is one of my favorite backyard projects because it instantly makes a regular patio feel like an event. I’d make a screen about 8 feet wide by 4 1/2 to 5 feet tall using either 1-inch PVC pipe with corner fittings or a simple wood frame from 1x3s, then stretch a white blackout curtain panel or blackout fabric over it with clips, staples, or grommets. Materials usually run about $45 to $90 depending on whether you already have the sheet and whether you choose PVC or wood.
The key steps are building the frame, pulling the fabric tight so it doesn’t wrinkle, and anchoring the screen so wind doesn’t turn movie night into chaos. I like to use ground stakes or sandbags at the base, and I’ve learned that setting it 12 to 15 feet from the projector gives a nice big picture without needing a huge yard. Plan on 1 to 2 hours, and my best tip is to use blackout fabric instead of a regular bedsheet because the image looks noticeably sharper at dusk.
2. DIY firepit and curved bench
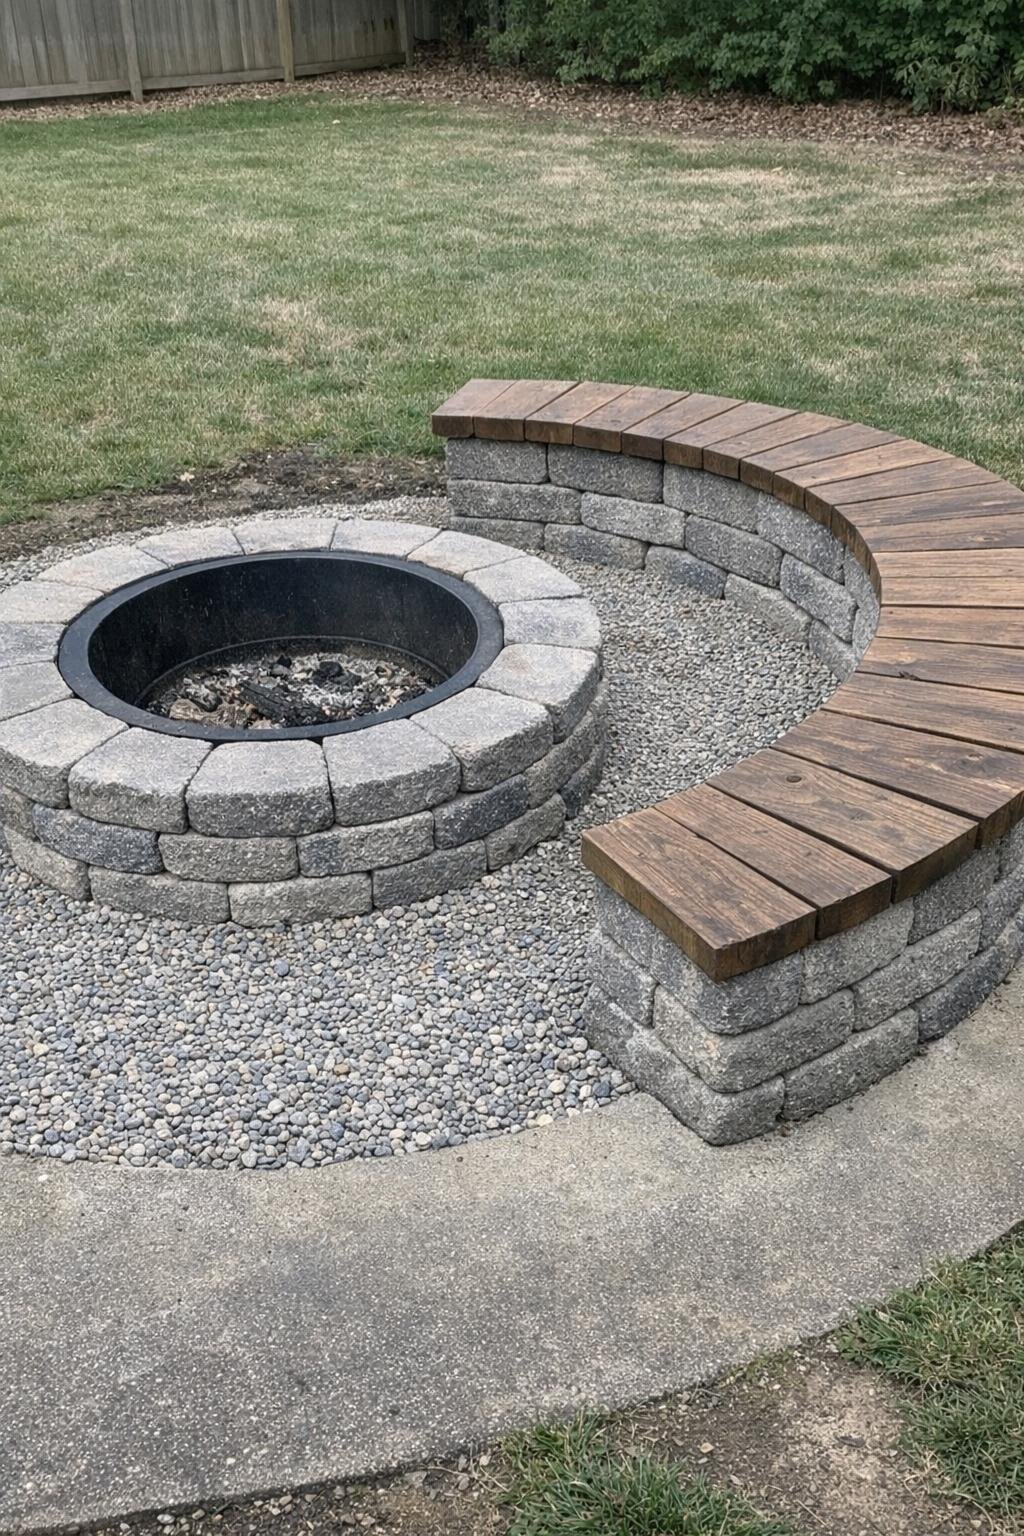
If you want the backyard to become the hangout spot, this project does it fast. A simple circular firepit made from 24 to 36 retaining-wall or cinder-style blocks can be built at about 36 to 44 inches across, and then you can add a curved bench a few feet back using stacked blocks and a wood seat. The firepit itself can cost $100 to $180, and the bench around $125 if you keep the seat design straightforward with pressure-treated boards.
You’ll need to level the ground, lay a compacted gravel base, stack the blocks evenly, and leave at least 6 to 7 feet of clearance around the pit. For the bench, I’d keep the seat around 16 to 18 inches high and 16 inches deep so it’s actually comfortable for adults. This is a half-day to full-day job, and my biggest tip is to dry-fit the curve with your blocks before you commit, because a bench that follows the firepit shape neatly looks so much more intentional.
3. DIY bar cart
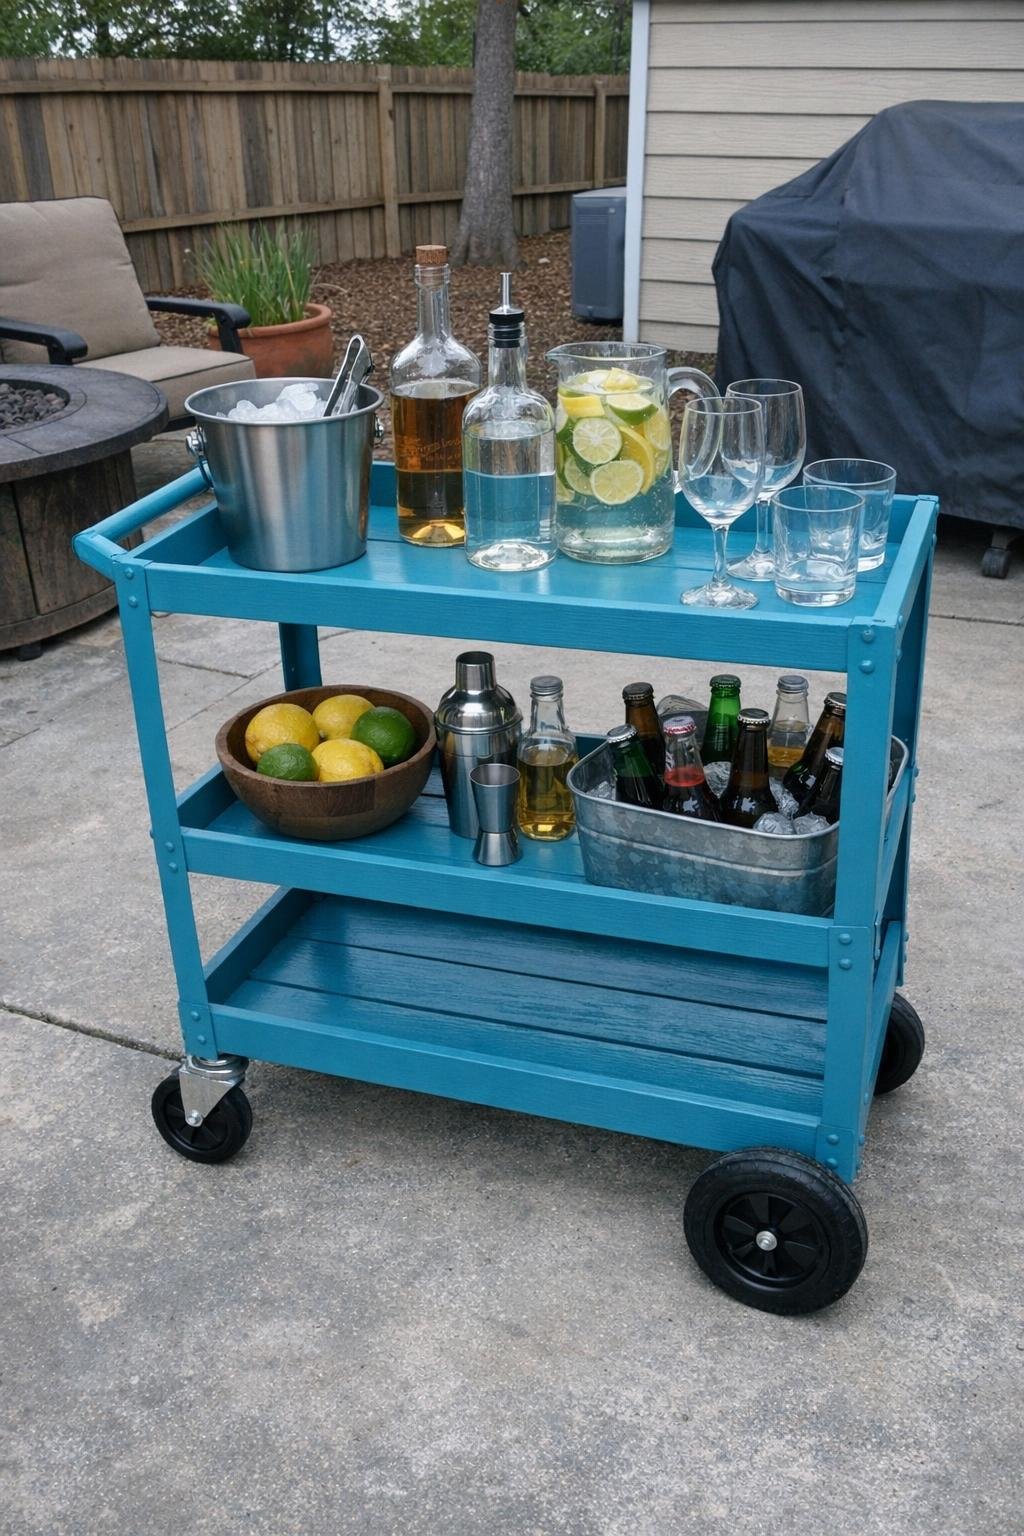
This is such a satisfying weekend refresh because you can start with something old and slightly sad-looking and end up with a really useful outdoor piece. I’d use a metal or wood rolling cart from a thrift store or garage sale, sand it down, prime it if needed, and give it 2 coats of exterior spray paint or porch paint. Most of the time, this costs about $20 to $60 total including the cart, paint, and new casters if the old ones are wobbly.
The main steps are cleaning it thoroughly, sanding off rust or peeling finish, painting, and sealing or replacing the shelves if they’ll hold ice buckets and drink pitchers. A cart around 30 to 36 inches tall is ideal because it works for serving without feeling bulky on a patio. It’s a 2- to 3-hour project plus drying time, and my tip is to add a removable tray on the top shelf so you can carry everything back inside in one trip at the end of the night.
4. DIY patio
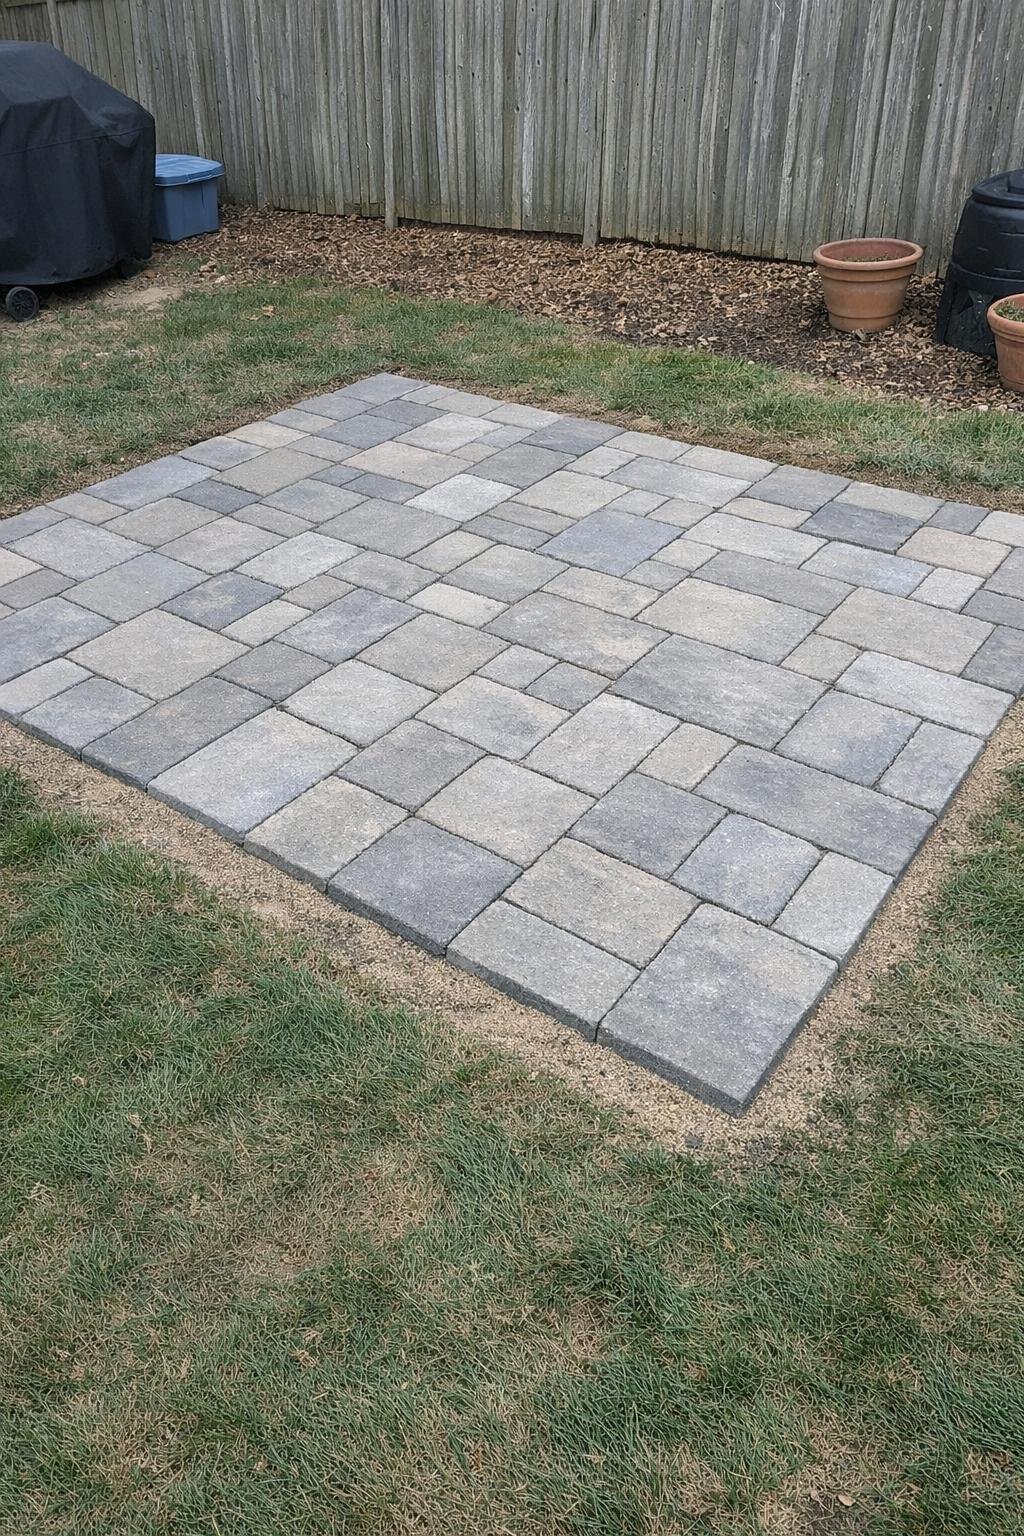
A basic paver patio is one of those projects that looks expensive when it’s done right, but it’s really about prep more than fancy materials. For a small seating zone, I’d do an area about 10 by 10 feet using concrete pavers over 4 inches of compacted gravel and 1 inch of leveling sand. Depending on the paver style, this usually lands around $250 to $600, which is still way less than hiring it out.
The most important steps are digging down about 5 to 6 inches, compacting the base in layers, screeding the sand level, and keeping the paver lines straight as you go. I always think edging is worth it because it keeps everything from shifting after a freeze-thaw season. This is a full weekend project, and my tip is to buy 10 percent extra pavers so you’re not stressed if a few crack during cuts or if you want to save matching pieces for future repairs.
5. DIY hammock
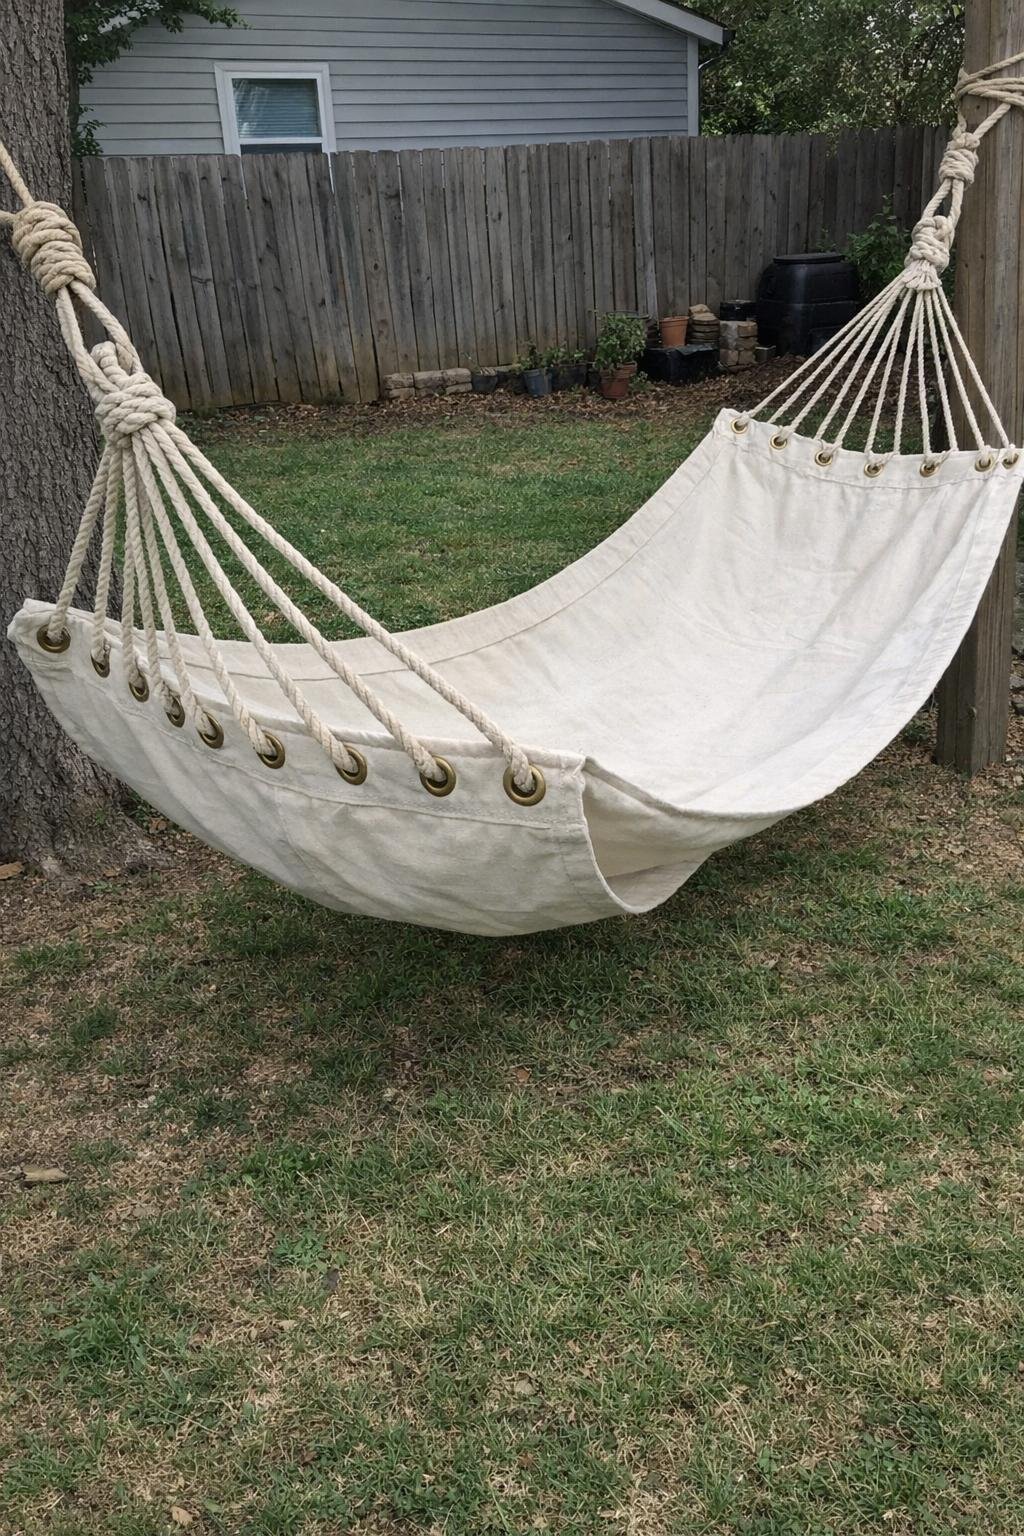
I’m always surprised by how easy a simple backyard hammock can be if you keep the design basic. A sturdy version can be made from a piece of heavy canvas about 55 to 60 inches wide and 80 to 90 inches long, plus rope, dowels if you want a spreader style, and two solid anchor points like posts or mature trees. Expect roughly $35 to $75 in materials.
You basically hem the edges, create channels or reinforced loops at both ends, thread the rope through, and hang it so the center sits about 18 inches off the ground when weighted. If you use trees, I’d absolutely add tree straps to protect the bark and make hanging simpler. You can finish it in 1 to 2 hours, and my tip is to test it first with a few sandbags or a careful low sit before you fully trust your afternoon nap to it.
6. Garden patio table from an old tire
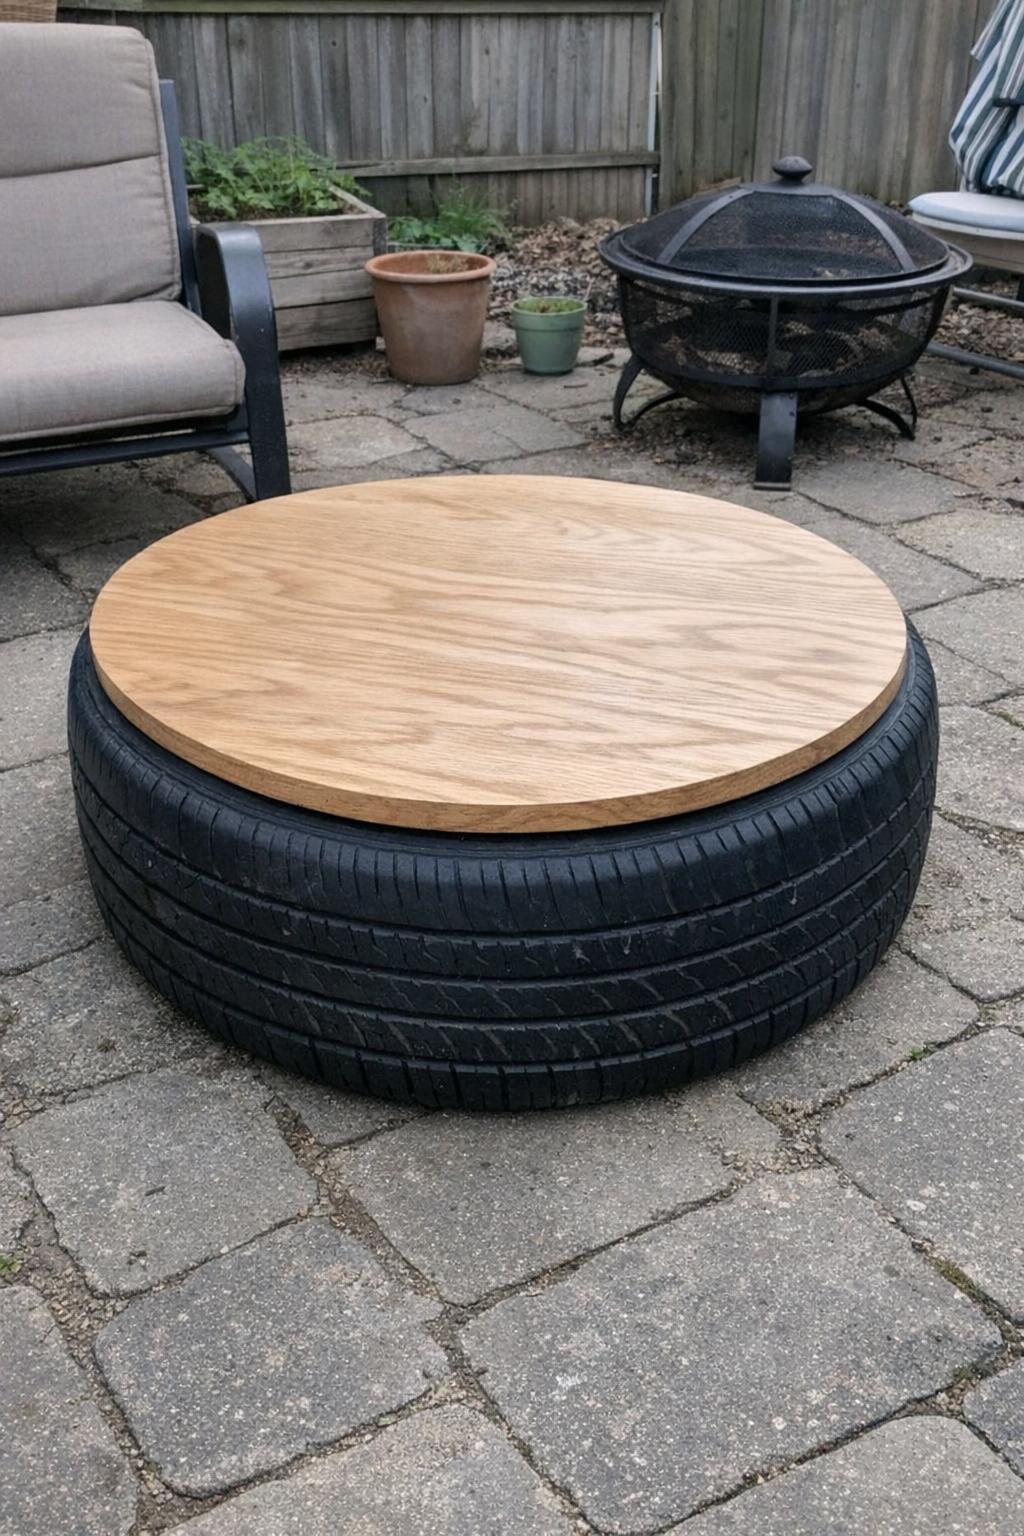
This is one of those upcycles that sounds a little odd until you see it finished. I’d clean an old tire really well, wrap it in rope or paint it for a cleaner look, and top it with a round wood piece or glass top around 24 to 30 inches across to create a casual patio table. If you can source the tire for free, you can often make the whole thing for $30 to $80.
The basic process is washing and drying the tire, attaching rope with heavy-duty adhesive or screws for the tabletop base, then securing the top so it doesn’t shift. You can also add short furniture feet or hidden casters underneath if the patio gets moved around a lot. This takes about 2 to 4 hours depending on finish details, and my tip is to use exterior polyurethane on any wood top so cups, rain, and sunscreen-covered hands don’t wreck it immediately.
7. Pergola
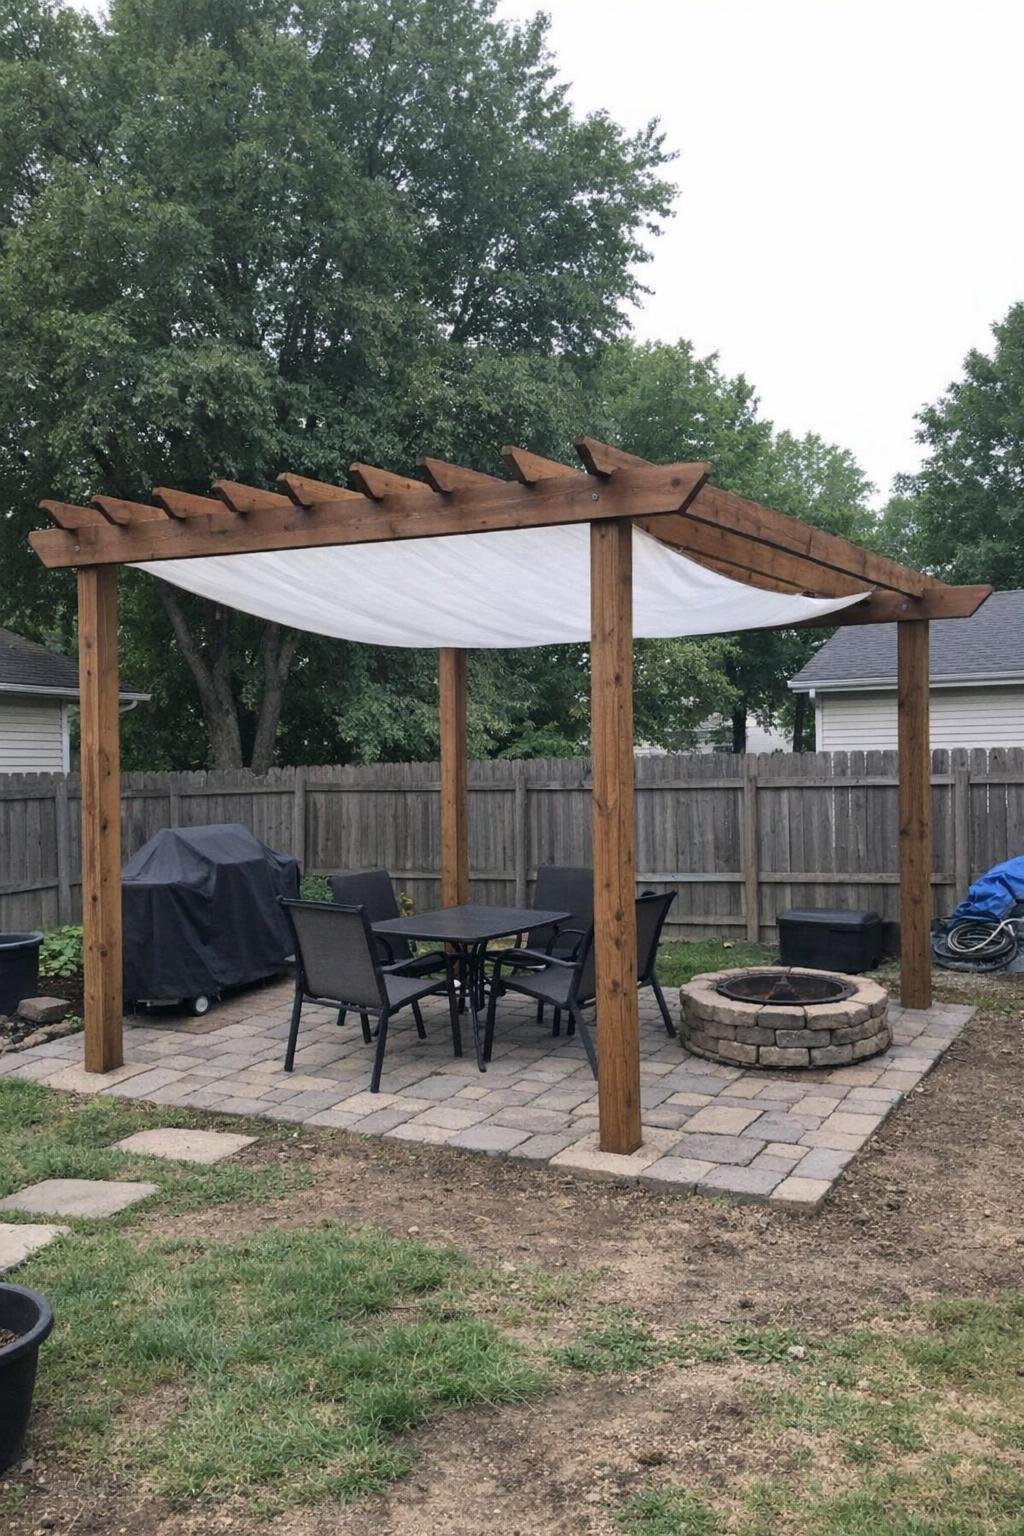
A pergola is a bigger build, but it completely changes the feel of a backyard and makes even basic furniture look nicer. A simple freestanding pergola can be about 8 by 10 feet using four 4x4 posts, 2x6 beams, and 2x2 or 2x4 top slats, with a light outdoor canopy or string-light cover added for softness. Depending on lumber prices, I’d expect around $300 to $700 for a basic version.
The big steps are setting the posts securely in concrete or post bases, squaring the frame carefully, then adding the upper slats and the canopy. I’ve learned the hard way that checking for level in every direction saves a lot of frustration later when the roof lines don’t look right. Plan on a full weekend with help, and my tip is to stain or seal every board before the canopy goes on, because it’s much easier than trying to reach around everything afterward.
8. Outdoor waterbed
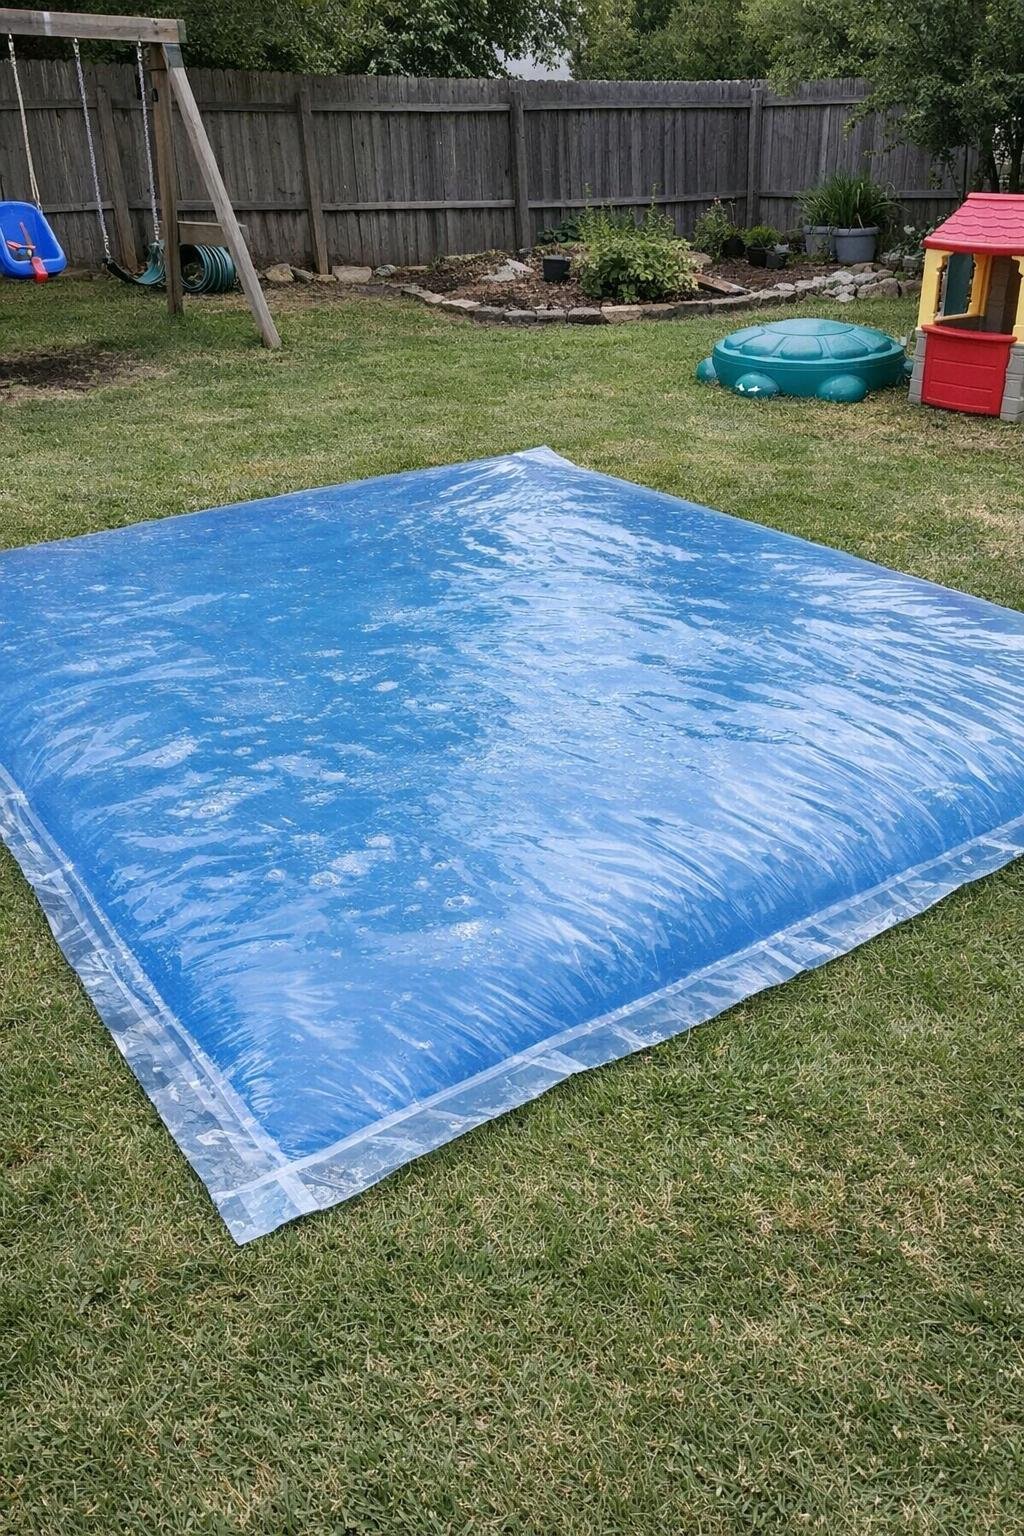
If you have kids around in the summer, this is the kind of backyard project they’ll talk about constantly. The basic idea is a thick plastic sheet or vinyl sheeting sealed into a large flat rectangle, something like 5 by 7 feet, then lightly filled with water so it creates a squishy play surface on grass. Material costs are usually about $25 to $60 depending on the thickness of the plastic and whether you reinforce the seams.
The trick is to keep it low and manageable instead of overfilling it, and to place it on a soft, clear patch of lawn free of sticks and sharp stones. Seal the edges carefully with waterproof tape or heat-sealed seams, test for leaks first, and keep a hose nearby for filling and draining. This is a 1- to 2-hour project, and my tip is to slide a tarp underneath for extra protection if your yard is a little rough.
9. Wallpaper an ugly chair
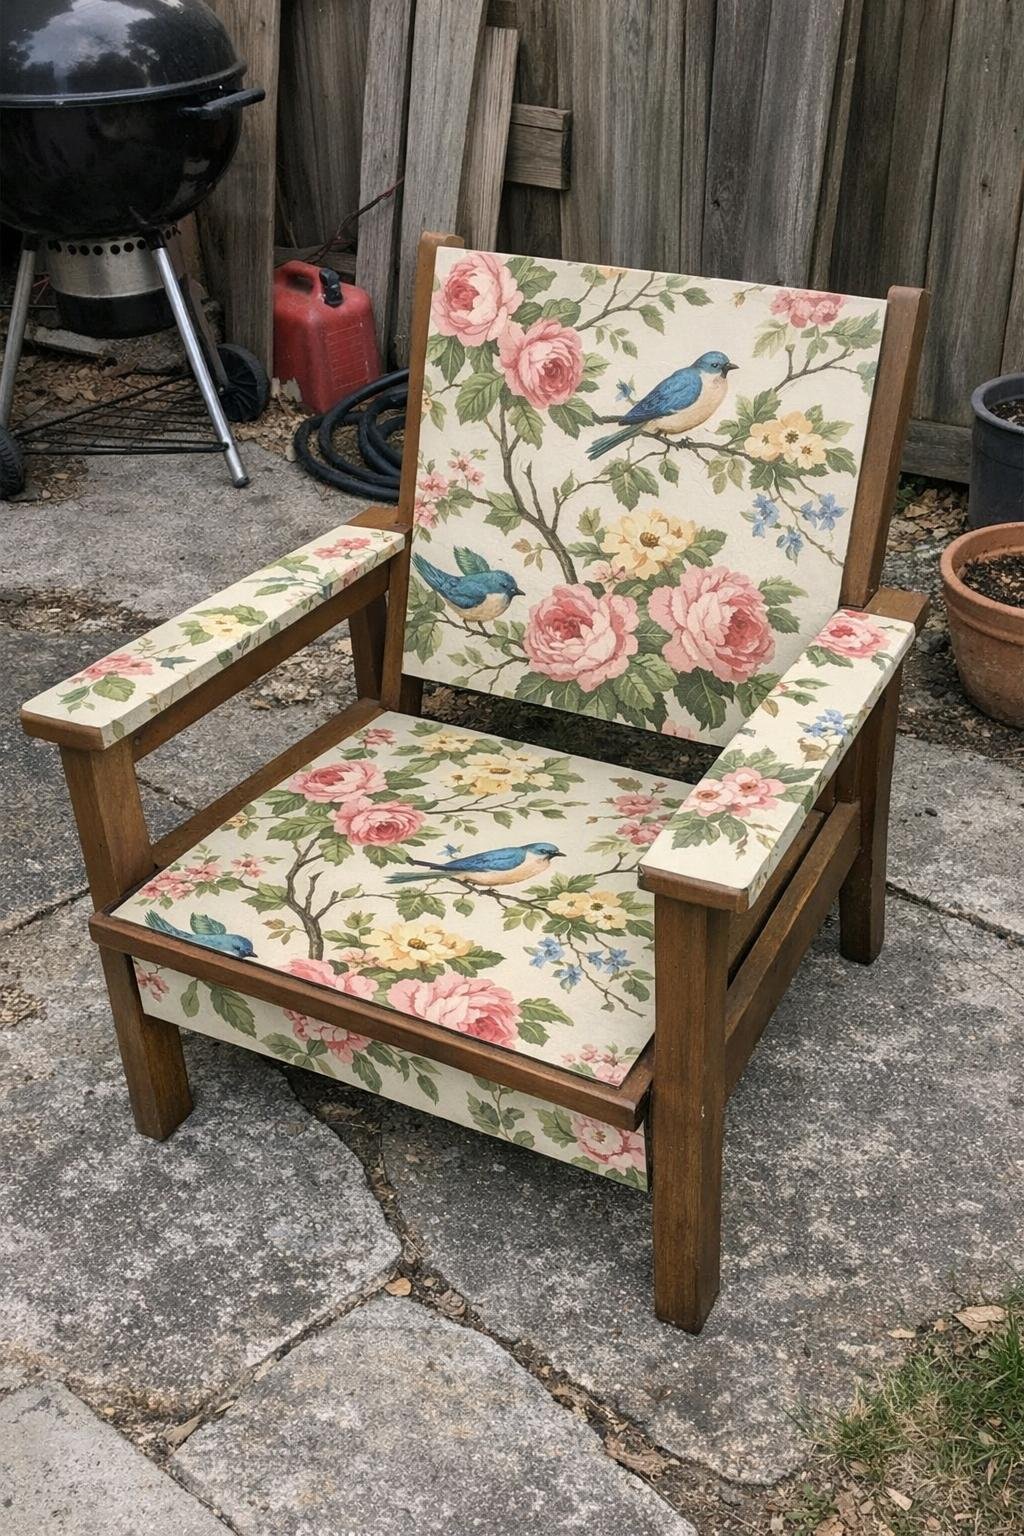
I am fully in favor of rescuing one awkward old patio chair instead of tossing it, especially if the frame is still solid. For this project, I’d use peel-and-stick wallpaper or outdoor-safe decoupage paper on the seat back panels or side inserts of a chair, then seal it with several thin coats of exterior polyurethane or clear spray sealer. If you already own the chair, this can cost as little as $15 to $35.
The main steps are cleaning the chair thoroughly, lightly sanding glossy spots, applying the wallpaper smoothly, trimming the edges with a craft knife, and sealing well so moisture doesn’t lift it. This works best on chairs with flat surfaces rather than woven sling styles. It’s an easy 1-hour upgrade plus drying time, and my tip is to keep the pattern on smaller surfaces only, so the chair looks playful and intentional instead of visually overwhelming the whole patio.
10. DIY outdoor checkers game table
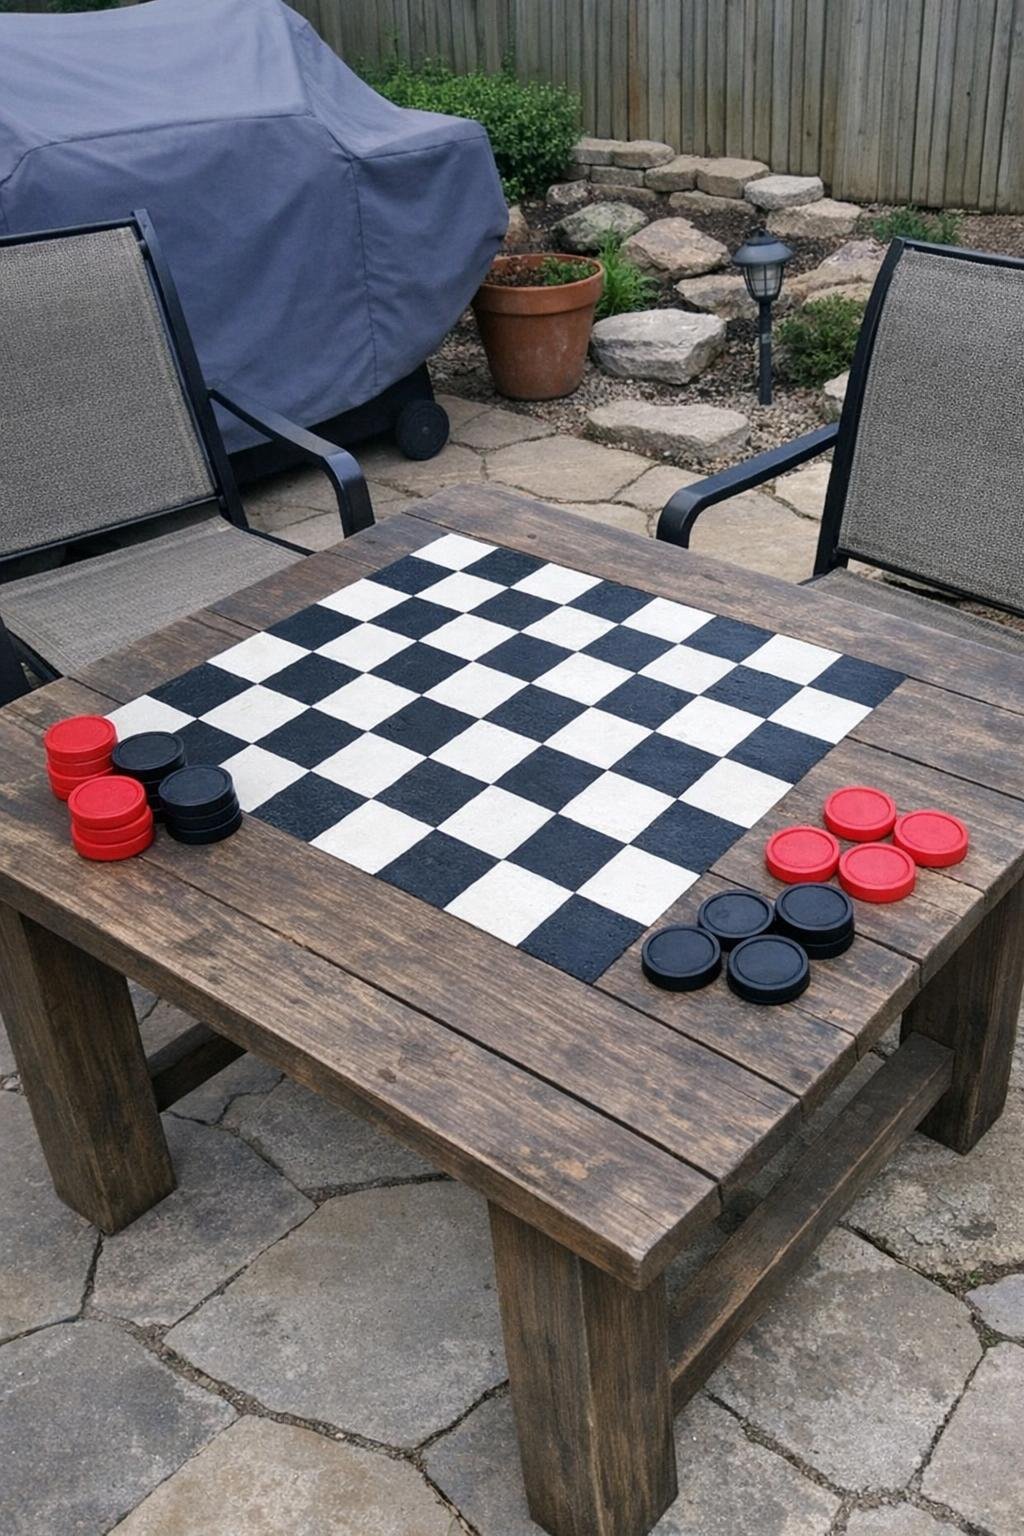
This is the kind of project that makes a patio feel more fun without taking up extra space, because the game is built right into the furniture. I’d start with an old side table or small square coffee table and paint an 8-by-8 checkerboard directly onto the top, with each square about 2 inches wide on a 16-inch board area. Add sealed wood disks or painted round pieces for checkers, and the whole project can be done for $25 to $60.
The process is simple: sand the top, tape off the grid carefully, paint alternating squares, then seal it well with outdoor polyurethane so drinks and weather don’t ruin the finish. A table around 20 to 24 inches high works well next to outdoor chairs. It takes 2 to 3 hours plus dry time, and my tip is to use a pencil and a carpenter’s square for the grid before taping, because tiny measuring errors become very obvious once the pattern is painted.
11. Galvanized washtub drink cooler
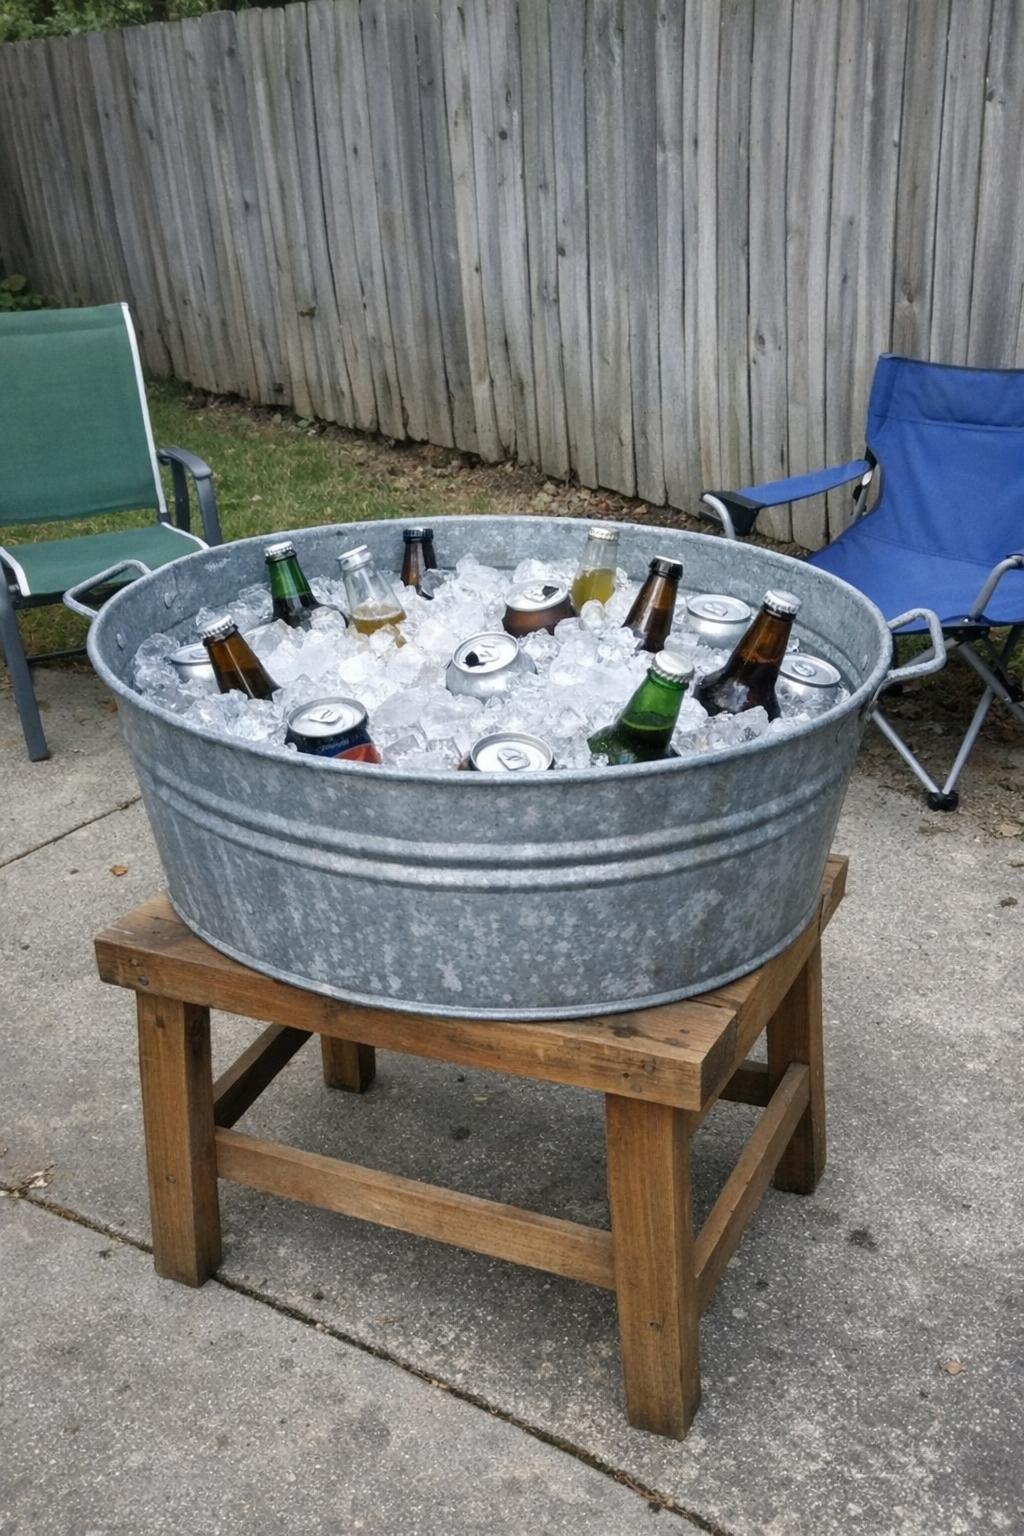
That old galvanized washtub is the easiest party piece in the yard. Set a 15- to 17-gallon tub on a stand (a sawhorse-style wooden frame from two 2x4s, or three cinder blocks) so it sits at hip height, fill it two thirds with ice, and push the bottles and cans in. If the tub is a thrift-store find, scrub it with vinegar and a stiff brush first and let it dry in the sun; a new one runs about $30 to $45.
For a stand that lasts, screw four 2x4 legs to a square frame sized to the tub's rim and brace the legs with a lower rail, about an hour of work and $20 in lumber. Drill a 1/2-inch hole near the base and fit a $6 brass spigot so meltwater drains without tipping the whole thing. My tip is to paint a chalkboard panel on the front of the stand for the drink list and keep a second, smaller tub beside it for the kids' juice boxes.
12. String-light poles in planters
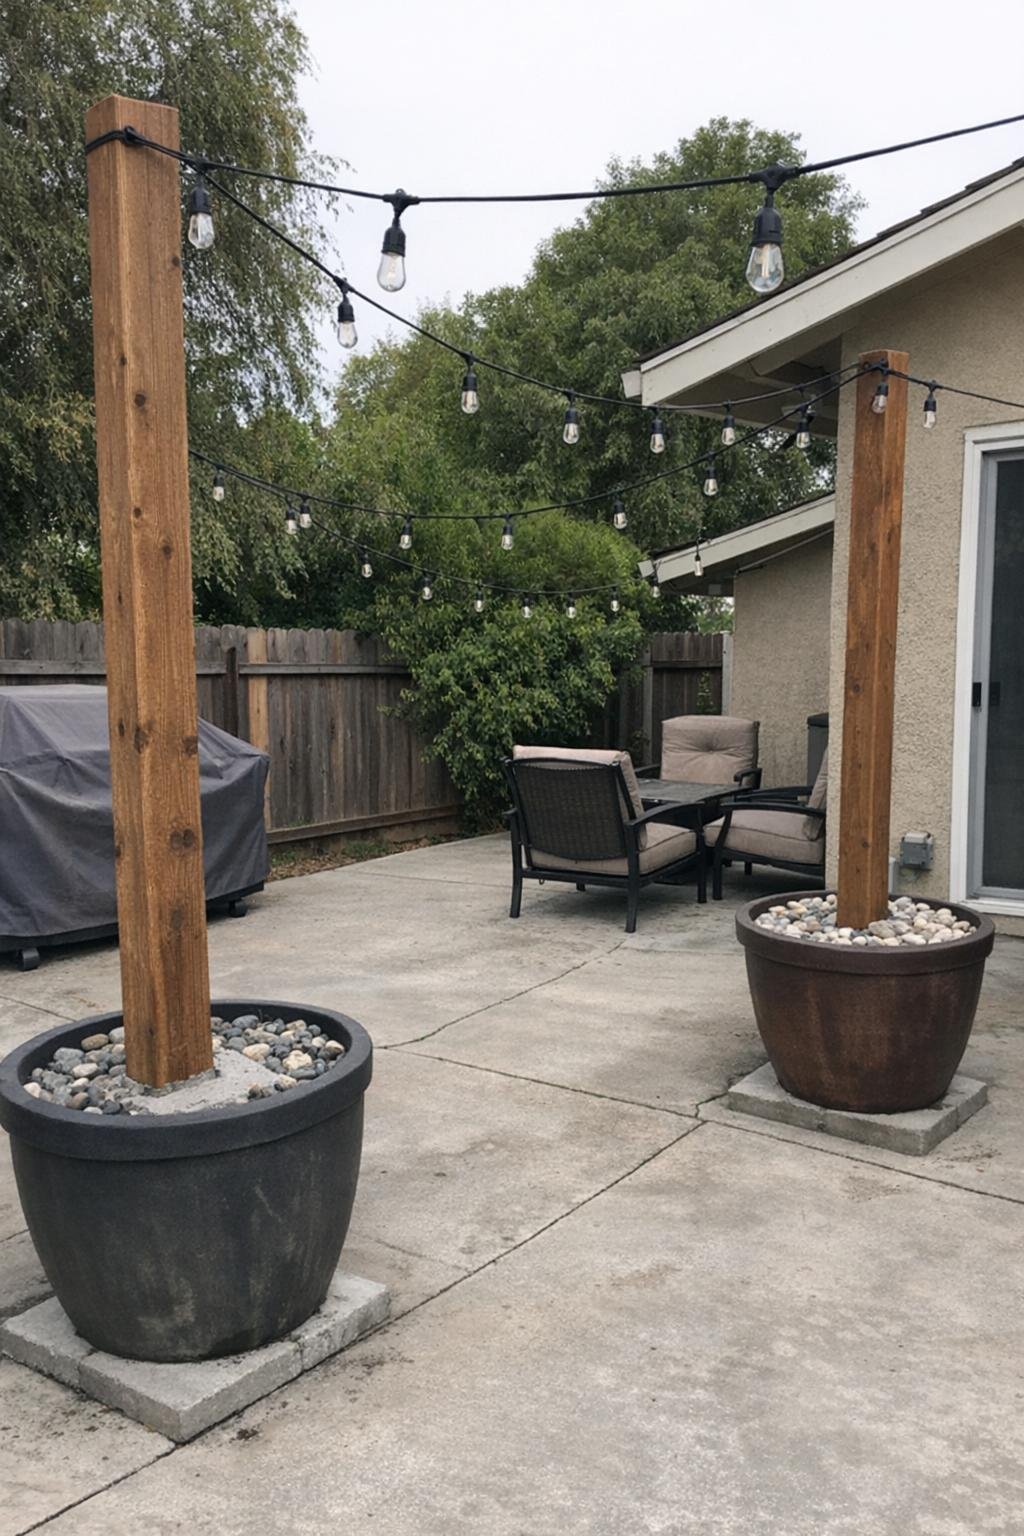
This is one of the easiest ways to make a backyard look polished at night without digging post holes. I’d use large planters or 5-gallon buckets hidden inside decorative pots, set 8-foot 4x4 or 2x2 posts into concrete, then string outdoor lights between them around a patio edge. A set of four usually costs about $120 to $220 including the lights.
You just center each post in the planter, pour in the concrete, let it cure, and then fill the top few inches with soil, mulch, or even faux plants to hide the concrete. I like spacing the poles 8 to 10 feet apart so standard string lights sag nicely without looking droopy. This is a half-day project plus curing time, and my tip is to add small screw hooks at the top before standing the posts upright, because it’s much easier than climbing around later.
13. Giant Jenga from 2x4s
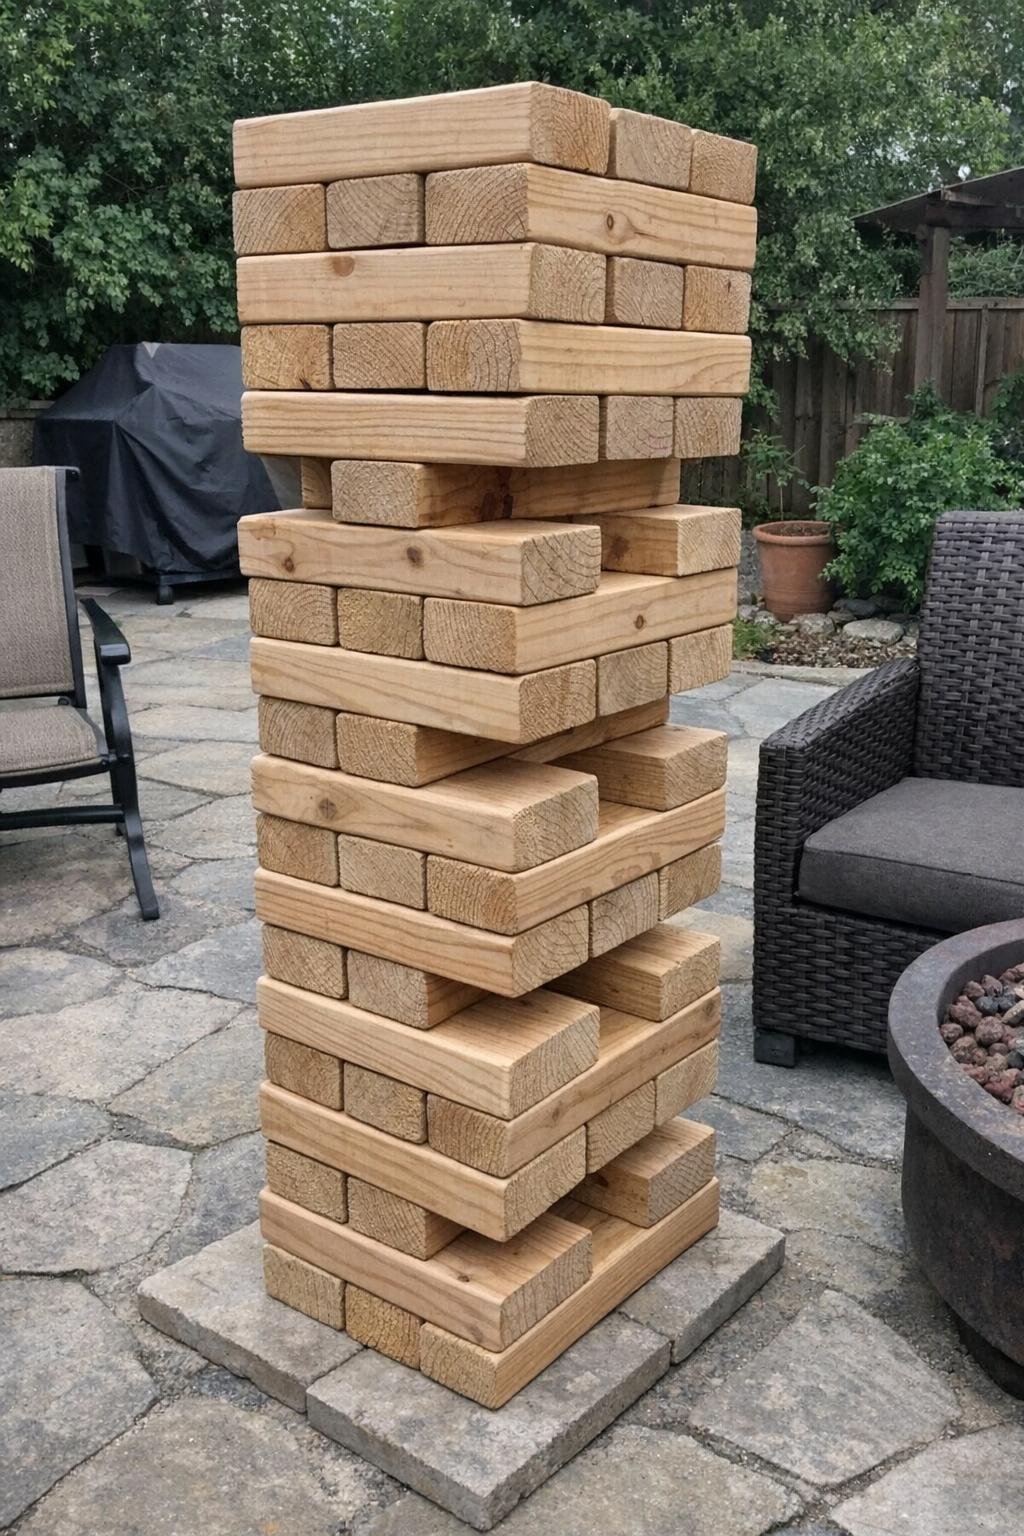
This is one of those backyard builds that gets used way more than you expect. A giant Jenga set can be made from ten 2x4x8 boards cut into 54 blocks, each 10 1/2 inches long, then sanded thoroughly so they slide well. Material cost is usually about $45 to $90 depending on lumber prices and whether you build a storage crate too.
The steps are straightforward: measure and cut accurately, round over the corners with sandpaper, and seal the blocks with exterior polyurethane if you plan to leave them outdoors. I’d store them in a simple crate with handles so they don’t end up scattered across the yard after one party. This is a 2- to 3-hour project, and my tip is to stack a test tower as you work so you catch any blocks that are too rough or cut slightly long before the whole set is finished.
14. Tire swing or tire planter
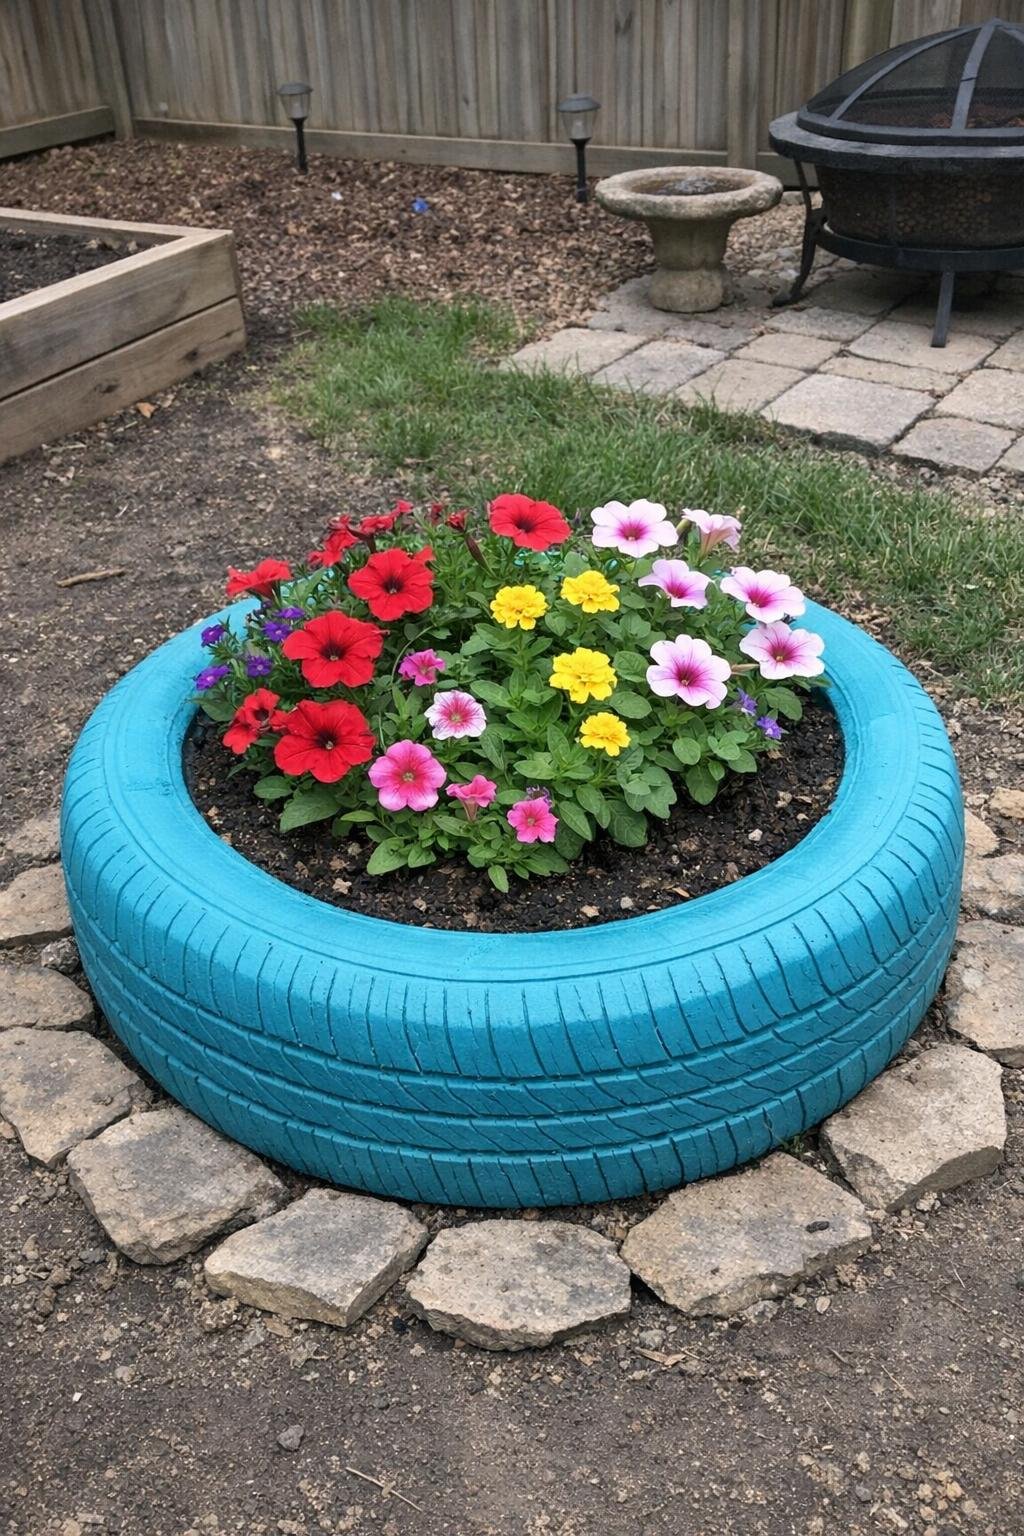
If you have an old tire and a sturdy tree, you can go playful or practical with this one. For a tire swing, I’d use one cleaned tire, heavy eye bolts or drainage holes depending on the style, and strong outdoor rope or chain hung from a thick horizontal branch. For a tire planter, I’d paint the tire, set it flat or upright, and fill it with potting soil and trailing flowers. Either version can cost as little as $20 to $60.
A swing needs careful branch selection, secure hardware, and a hanging height that keeps the tire about 12 to 18 inches off the ground. A planter mostly needs drainage holes, good soil, and a spot where it gets the right sun. You can finish either in 1 to 2 hours, and my tip is to scrub the tire with degreaser and let it dry fully before painting, because paint sticks much better and the finished project looks far less like, well, a tire.
15. Outdoor shower from a hose and a cedar screen
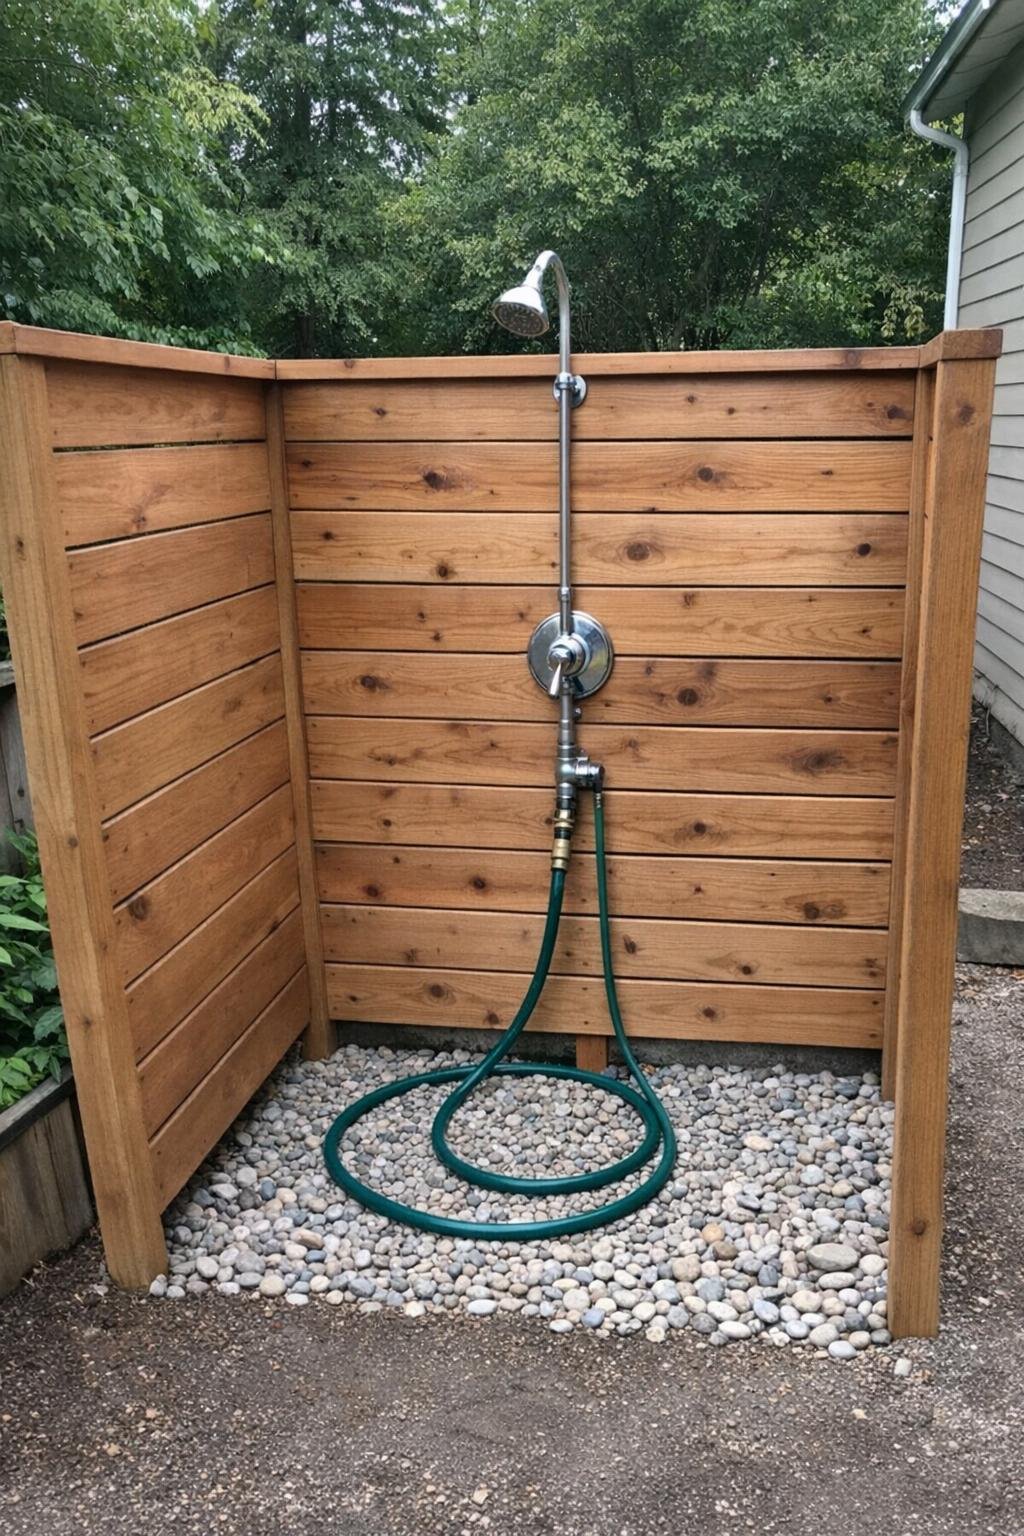
This is such a smart project if you have kids, a pool, muddy dogs, or just a backyard that tends to come indoors with everyone. I’d build a simple cedar privacy screen about 3 feet wide and 6 1/2 feet tall, then attach a basic outdoor shower fixture or hose-fed spray head to a post beside a gravel drainage bed about 3 by 3 feet. Costs can range from $120 to $300 depending on the hardware you choose.
The core steps are making the screen frame, securing it firmly, routing the garden hose neatly, and creating a drainage area with landscape fabric and pea gravel so you don’t end up with a muddy puddle. Cedar holds up well outside and looks nice even unfinished, though I like sealing it. This takes a weekend, and my tip is to place a small hook on the screen for towels or swimsuits, because once you have the shower, people will absolutely use it more than you think.
16. Pallet sofa with cushions
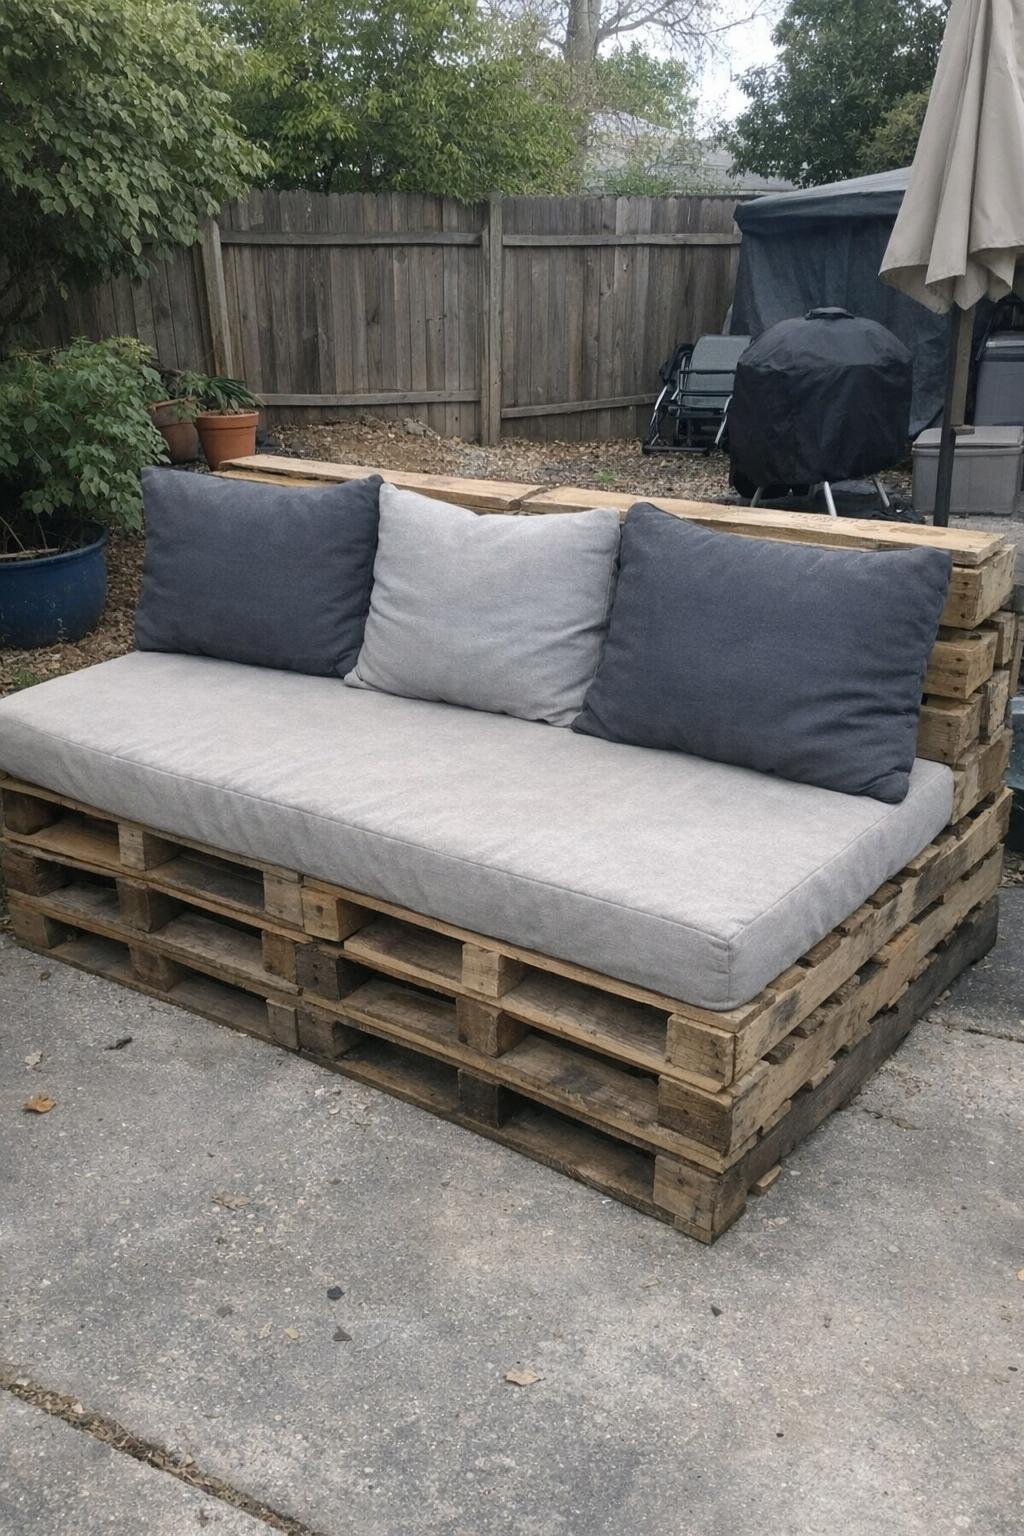
This is one of the best no-fancy-furniture-money projects out there. I’d stack two pallets for the base, add one pallet or a cut section for the back, and secure everything with long screws and brackets, then top it with outdoor cushions cut to fit. A standard sofa length is about 48 to 72 inches depending on your pallets, and the whole project usually costs around $100 to $250 including cushions and stain.
The key is sanding thoroughly, especially the arm and seat edges, then sealing the wood well and adding rubber feet or pavers underneath so the base doesn’t sit directly in wet grass. I’ve found that a 4-inch-thick bench cushion and a few oversized back pillows make it feel much more like real seating and less like a temporary project. This takes 4 to 6 hours, and my tip is to bring a tape measure when sourcing pallets because slight size differences can make stacking frustrating.
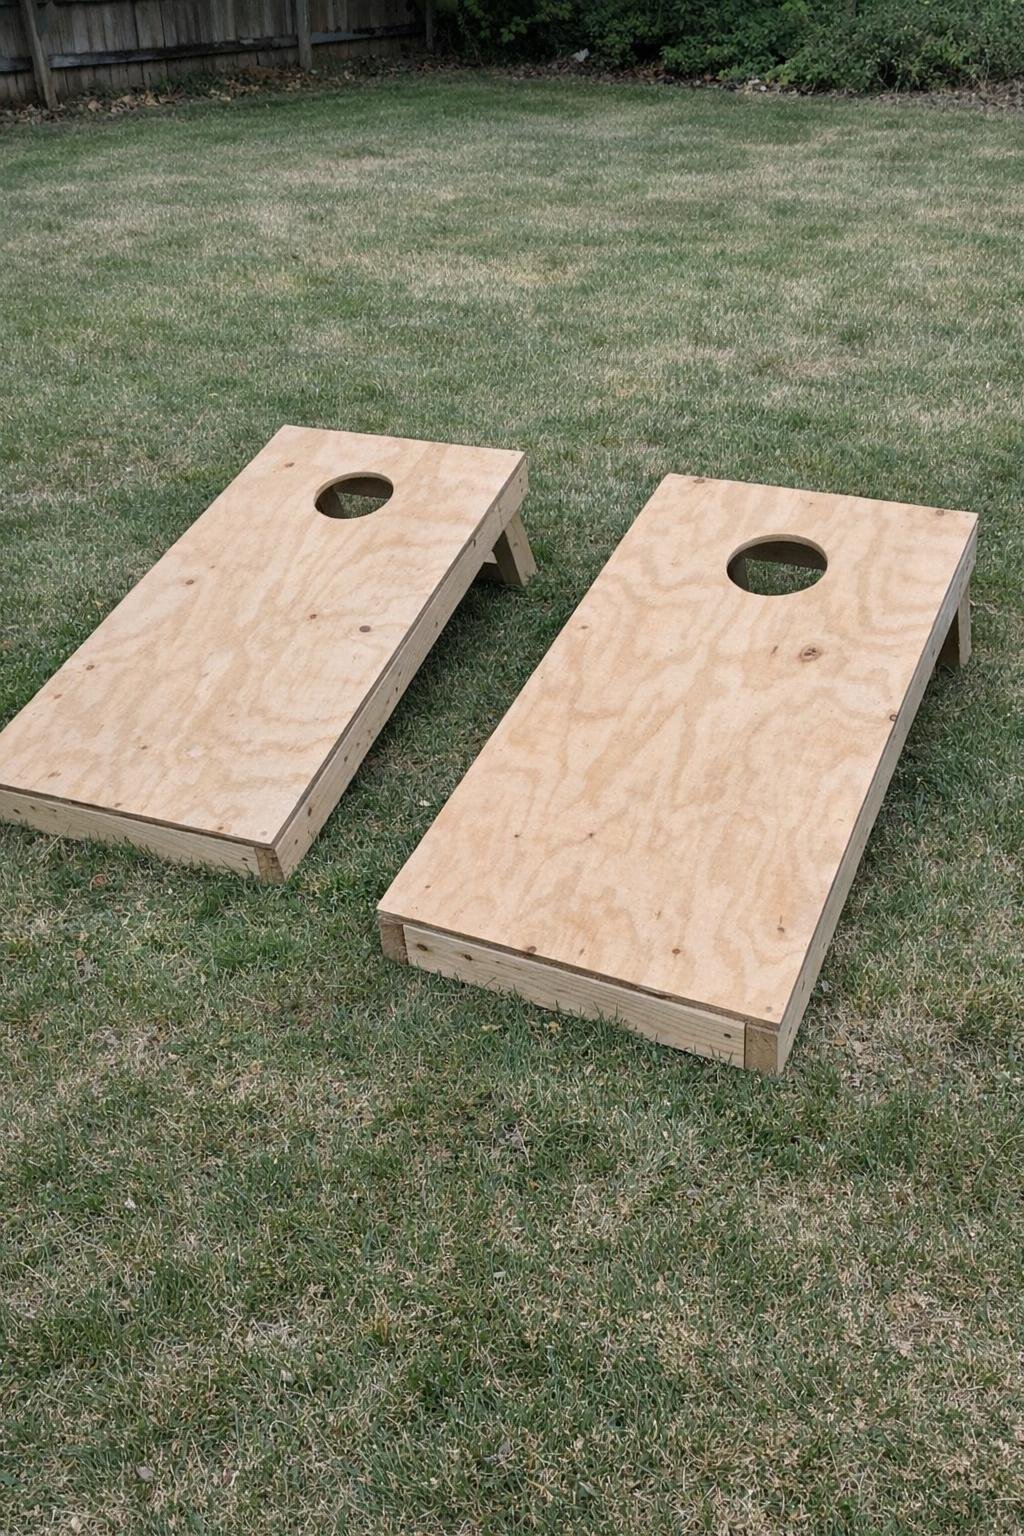
17. Cornhole boards from plywood
If you host even a couple of summer gatherings, cornhole boards are worth making once and keeping forever. A standard set uses two boards, each 2 feet by 4 feet, built from 1/2-inch or 3/4-inch plywood tops with 2x4 frames and a 6-inch hole centered 9 inches from the top edge. Materials generally cost about $70 to $150 depending on lumber and paint.
You’ll cut the tops, build the frames, attach folding legs, sand everything smooth, and then paint or stain the boards before sealing them. I’d use exterior paint and a satin clear coat so the bags slide without the surface getting too slick. This is a half-day build plus drying time, and my tip is to weigh the boards down flat while paint dries if you’re using thinner plywood, because it helps prevent warping.
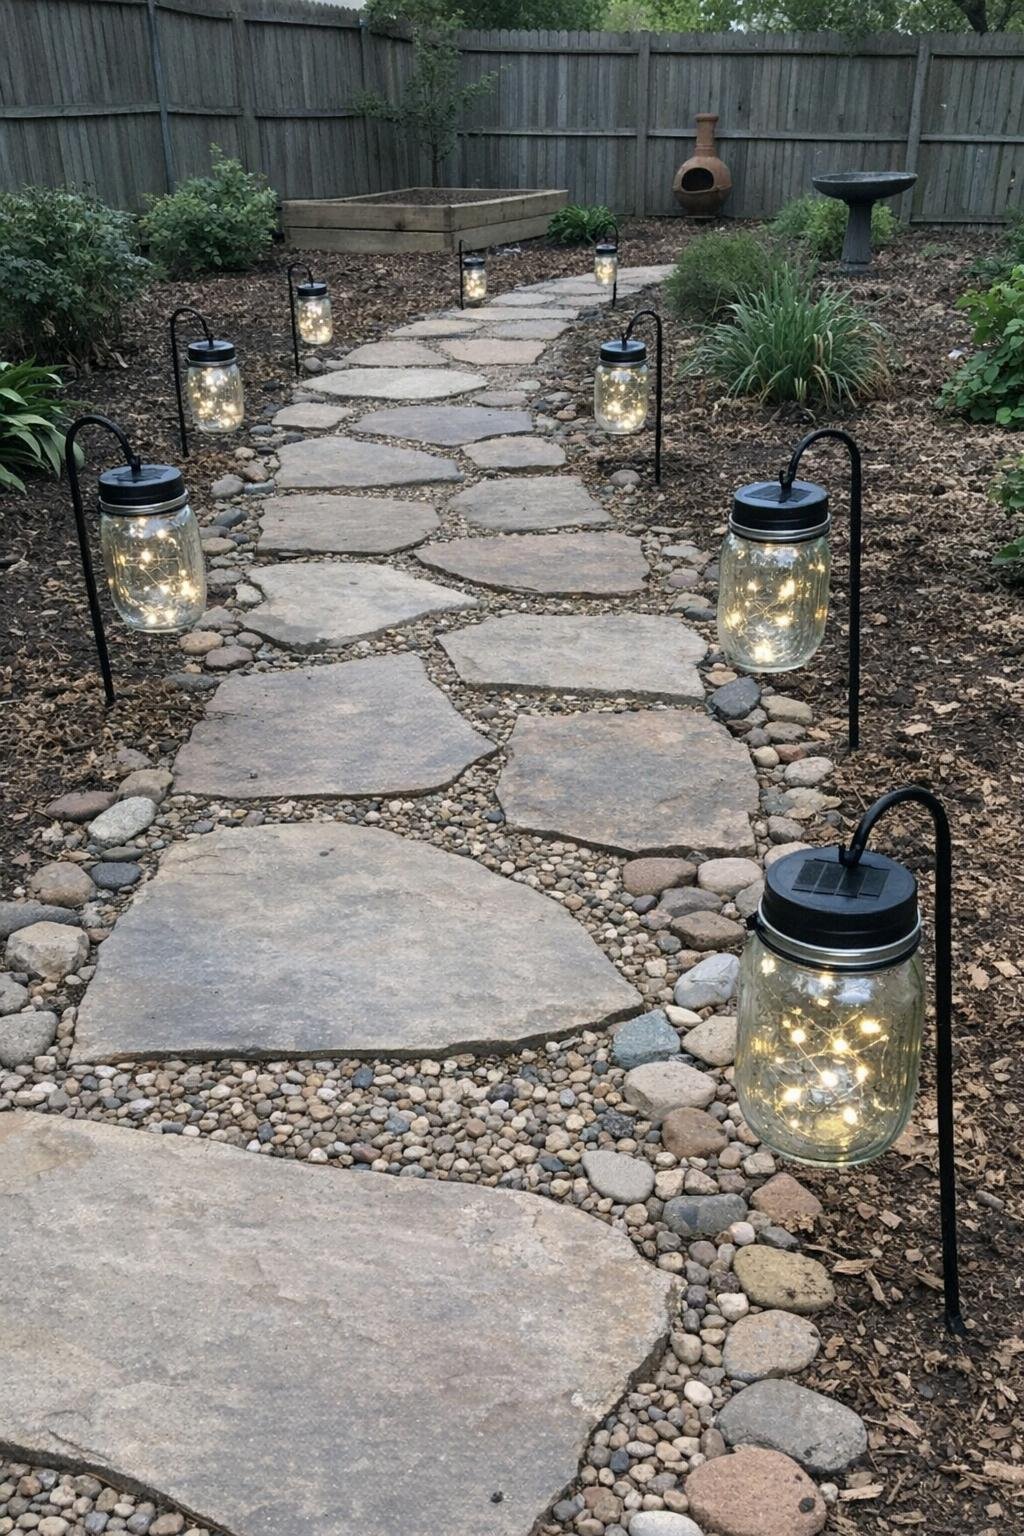
18. Solar-light pathway from mason jars
This is a softer, prettier alternative to basic plastic stake lights, and it works especially well along a short garden path or patio edge. I’d use mason jars with solar lid inserts or small solar lights mounted in the tops, then hang them from shepherd’s hooks or set them on short posts spaced about 4 to 6 feet apart. A path of six to eight lights usually costs around $40 to $100.
The steps are basically assembling the jars, testing the solar tops, and placing them where they get enough sun during the day. I like using clear jars and simple black hooks so the glow stands out more at dusk. You can finish this in 1 hour, and my tip is to keep the jars slightly sheltered from sprinklers because constant water spots make them look cloudy and cut down on that nice clean glow.
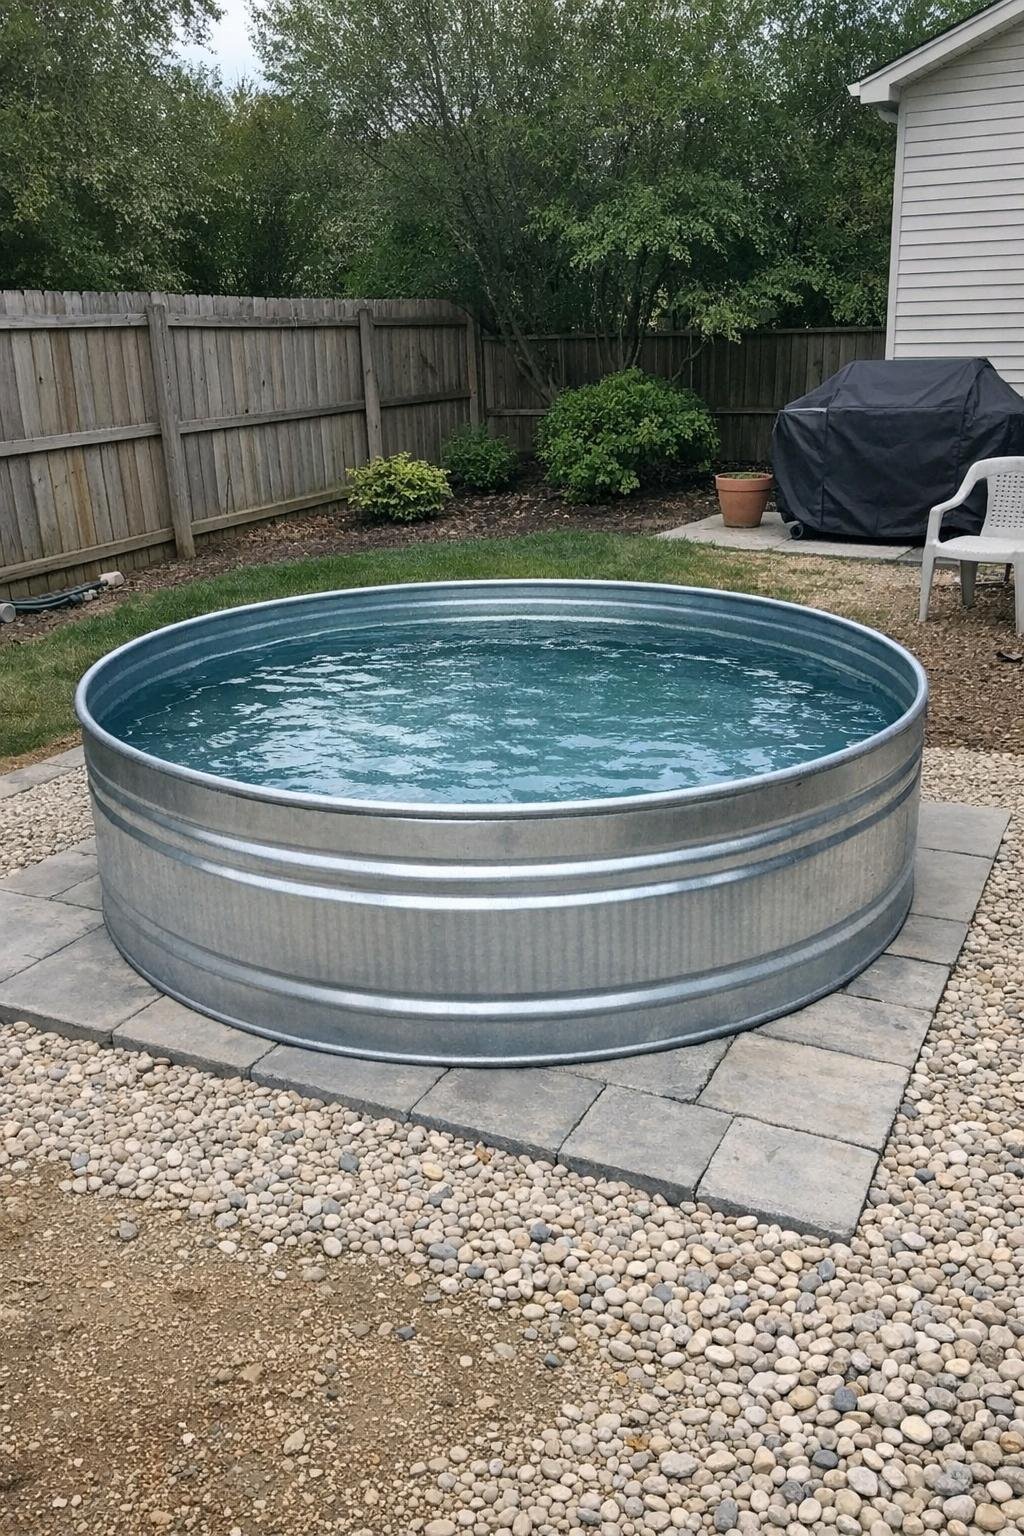
19. Stock-tank pool
I know this project has been popular for a reason: it’s genuinely a clever way to get a small backyard plunge pool without the cost of an in-ground install. A round galvanized stock tank, often 6 to 8 feet across and about 2 feet deep, can be set on a level pad of compacted gravel or pavers and upgraded with a small pump and filter. Depending on size and accessories, expect about $350 to $900.
The critical steps are making the base perfectly level, adding water hookups or a simple drain plan, and using a pump setup that keeps the water from turning murky in two days. I’d also place it where it gets some sun but not all-day blazing heat if possible. This is a weekend project, and my tip is to edge the tank with pea gravel, pavers, or a little deck surround so it looks intentional instead of like a farm tank dropped in the lawn.
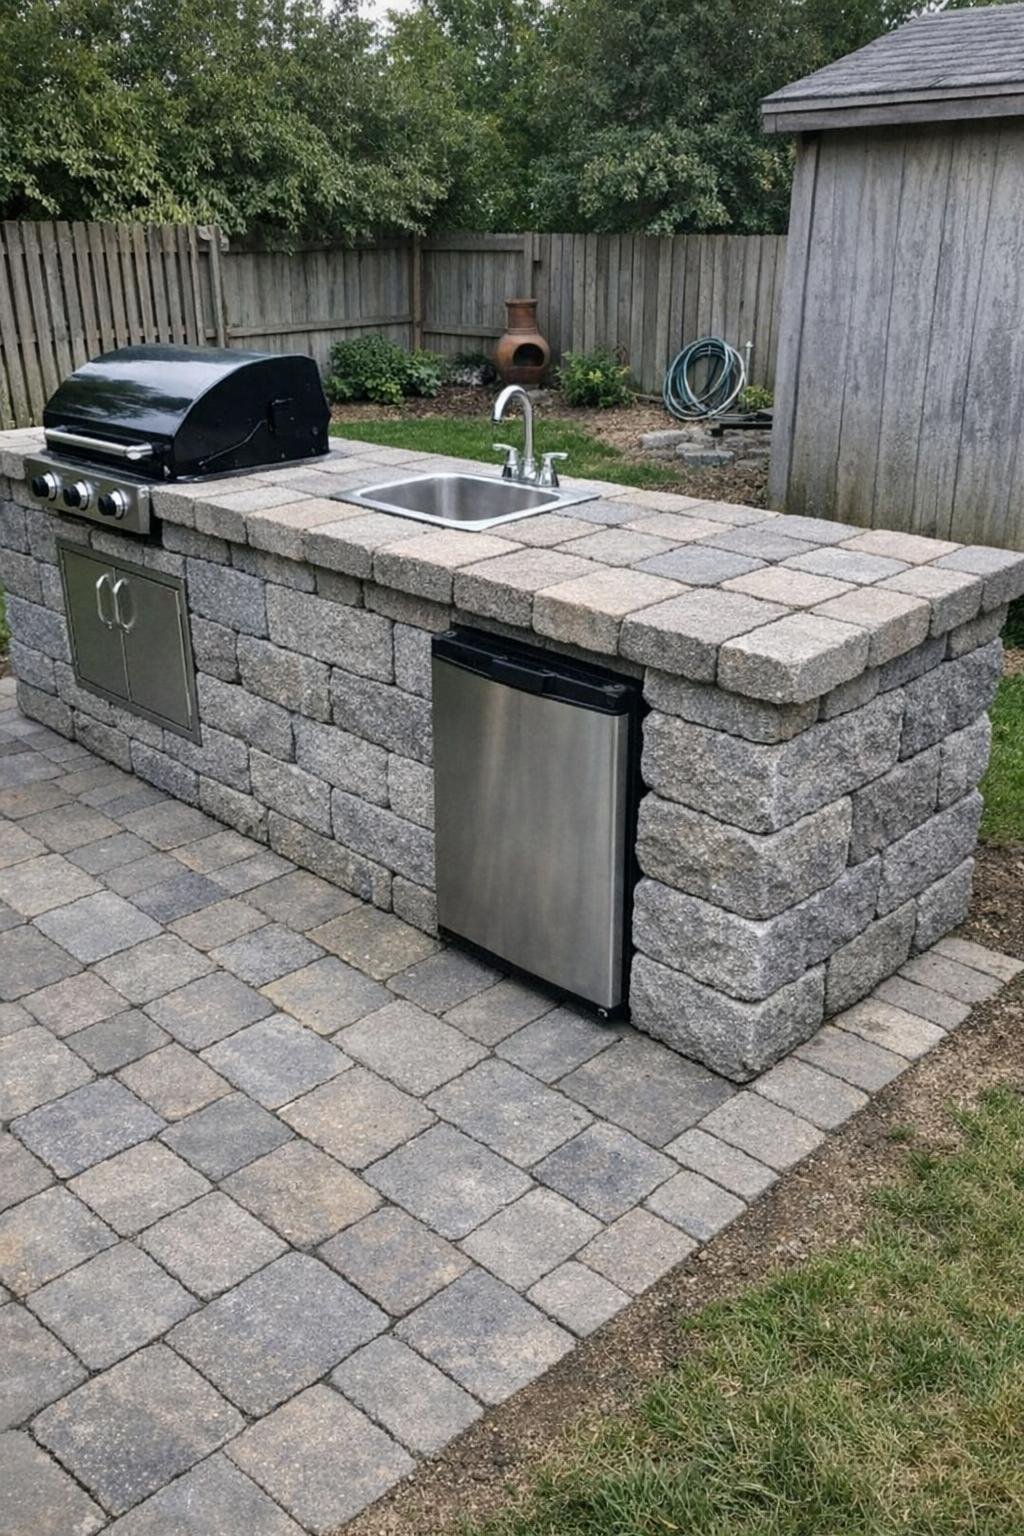
20. Outdoor kitchen counter from blocks and a paver top
If you want one truly impressive DIY that still avoids custom outdoor kitchen prices, this is the one I’d pick. A simple prep counter can be built from stacked concrete blocks or cinder blocks with a large concrete paver or two as the countertop, making a unit about 5 to 6 feet long, 24 inches deep, and 36 inches high. Depending on finishes, this usually costs around $150 to $400.
You’ll level the ground, dry-stack or adhesive-set the blocks in stable columns, then top them with pavers or a slab and add a lower shelf for charcoal, tubs, or serving trays. I like leaving one open bay for a small grill cart or cooler. This takes about 4 to 6 hours, and my tip is to cap the top with the thickest, smoothest pavers you can find because that single detail makes the whole project look far more finished and expensive.
Honestly, the hardest part is usually choosing which one to start with first. If you ask me, the best backyard DIYs are the ones that make you want to use the space more often, whether that means movie nights, a better place to sit, or just a project that makes the whole yard feel a little more finished.