
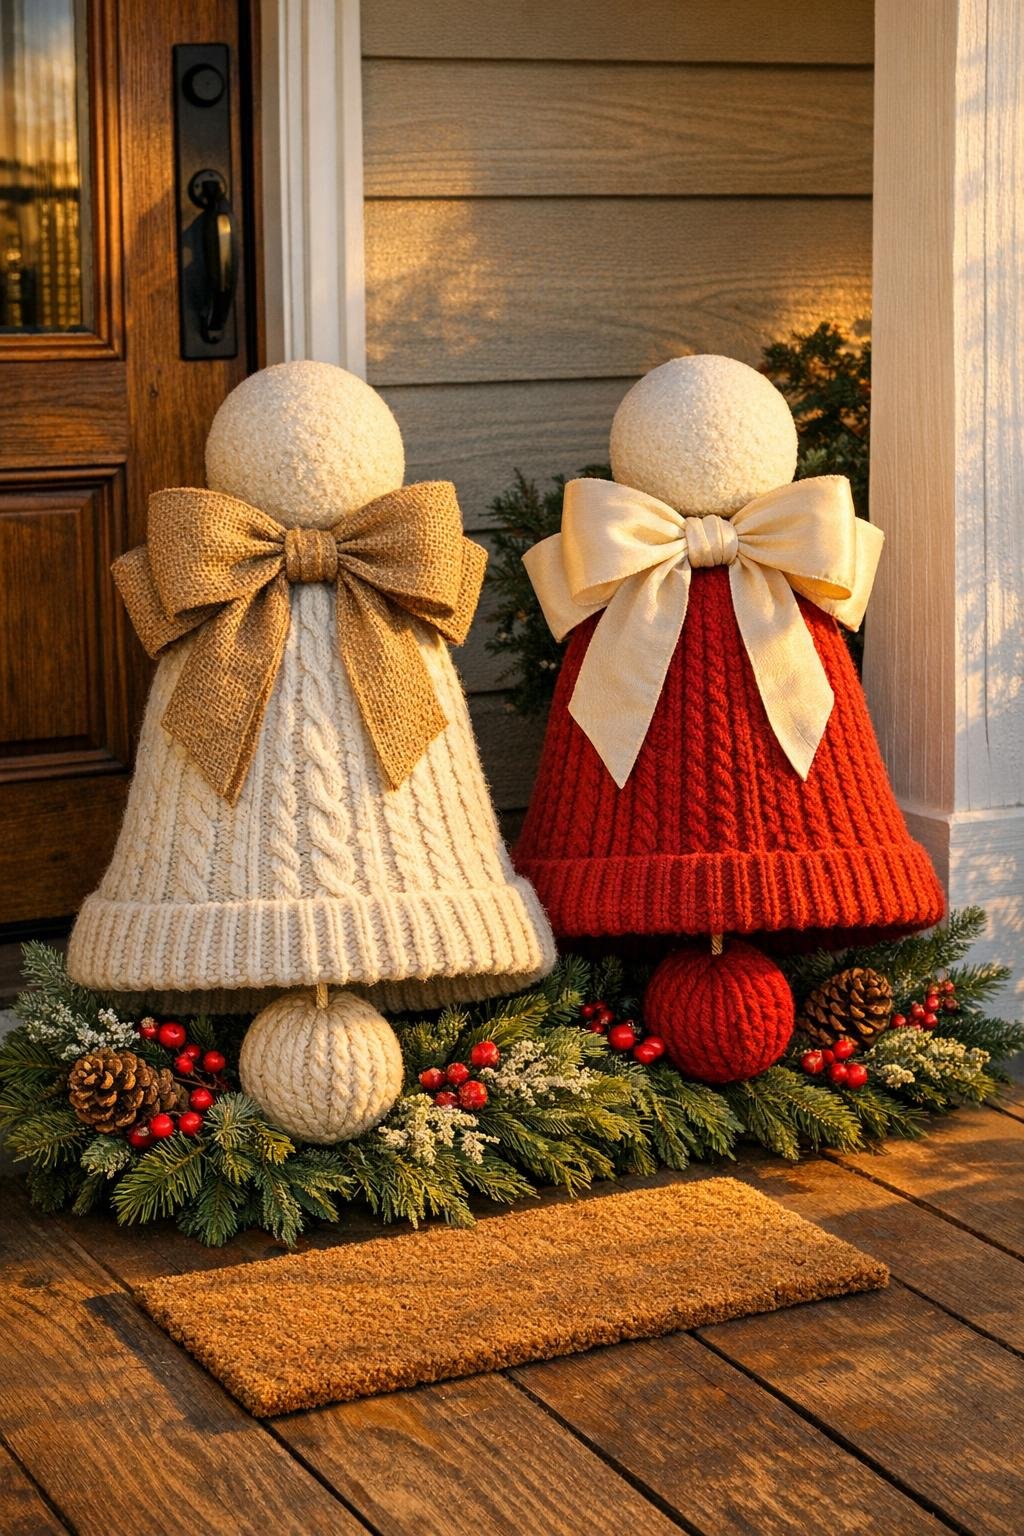
I love a project that makes the most of what’s already in the house, especially when it turns two slightly sad castoffs into something that looks boutique-store expensive. This one is perfect if you have a pair of old lampshades, a couple of sweaters that are too worn to donate, and about an hour to turn them into oversized porch decor with lots of cozy texture and presence.
As someone who is always squeezing in creative projects between work, dinner, and the usual weeknight chaos, I appreciate crafts that are simple in construction but still give a big visual payoff. These are easy to assemble, forgiving if you’re not super crafty, and dramatic enough to fill a front porch, fireplace hearth, or entryway without needing a pile of specialty supplies.
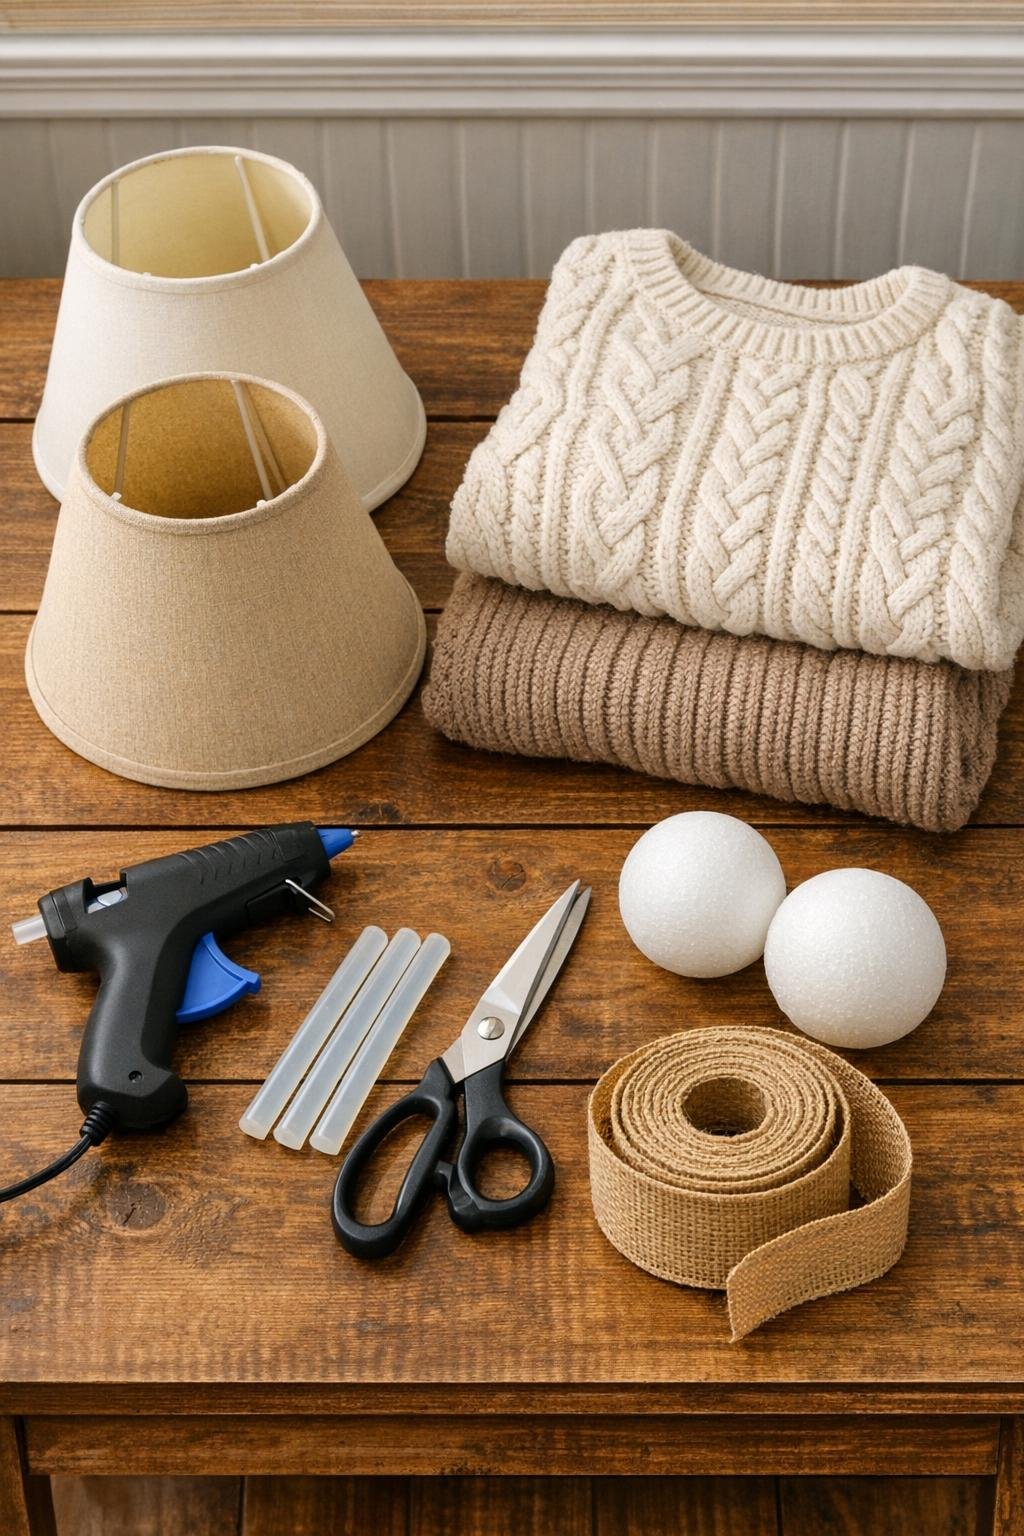
Materials
Instructions
1. Remove any loose trim, fabric lining, or bent hardware from the lampshades so you’re left with clean, sturdy frames and smooth outer surfaces.
2. Cut the sleeves off each sweater and set them aside, then cut up one side seam and across the underarm so each sweater opens into a large flat panel.
3. Slide a lampshade into the body of the first sweater from the wider end and center it so the knit texture runs straight and looks even all the way around.
4. Pull the sweater snug over the shade, then glue the knit to the inside top ring first, folding the raw edge under as you go for a clean finish.
5. Smooth the sweater down the shade, stretch it gently to remove ripples, and glue the fabric to the inside bottom ring, trimming away excess bulk where needed.
6. Repeat with the second lampshade, using the second sweater and matching the tension so both covered shades look like a pair.
7. Turn the sleeve cutoffs into bell bottoms or extra trim by cutting wide bands from the sleeves and gluing them around the bottom edge if you want a thicker, cuffed look.
8. Glue one foam ball at the narrow top opening of each covered shade so it sits centered like the clapper at the top of an oversized decorative bell.
9. Cut each ribbon length in half if you want a layered hanger-and-bow look, or keep each piece whole for one large statement bow per bell.
10. Loop ribbon through or around the top frame of each shade, glue it securely in place, and tie a full bow with long tails that drape down the front.
11. Fluff the bows, trim the ribbon tails into neat angles, and dab a little glue under the knot or tails anywhere they need help staying in place.
12. Set the pair together, adjust the knit so the seams face the back, and style them where you want them so the scale and texture really stand out.
Variations & Tips
Color pairing: I like using two sweaters in similar tones such as cream and oatmeal or gray and ivory so the pair looks collected and intentional instead of random.
Best sweater choice: Chunky knits, cable knits, and ribbed sweaters give the richest finish and hide little imperfections better than very thin jersey sweaters.
Lampshade tip: If one shade is slightly dented, put that side toward the wall or back; once the sweater is stretched over it, minor flaws nearly disappear.
Bow upgrade: For a fuller designer look, layer two ribbons per bell in slightly different widths or textures, then let the tails fall long.
Extra polish: Tuck a sprig of faux cedar, pine, or eucalyptus behind each bow for a styled finish that still keeps the project quick and easy.
Indoor option: These also look beautiful on a hearth, entry bench, or staircase landing if your porch is exposed to weather.
Adhesive note: Hot glue holds well for display decor, but if your shades have slick surfaces, rough them lightly with sandpaper first so the glue grips better.
Storage: Stuff the inside loosely with tissue paper before storing so the bell shape stays crisp and the knit does not get crushed.