
I have a real soft spot for salvaged wood, especially the kind with a little history built right in. Old shutters are one of those pieces that people pass by at curbside sales or pull off a garage pile without a second thought, but they already come with shape, texture, and just enough architectural charm to make something striking with very little fuss.
This project is perfect if you want a tall seasonal porch accent that looks custom without asking for advanced woodworking skills. If you can line things up, drive in a few screws, and tuck greenery into place, you can pull this off in an afternoon and end up with a piece that looks full, polished, and absolutely worth rescuing those old shutters for.
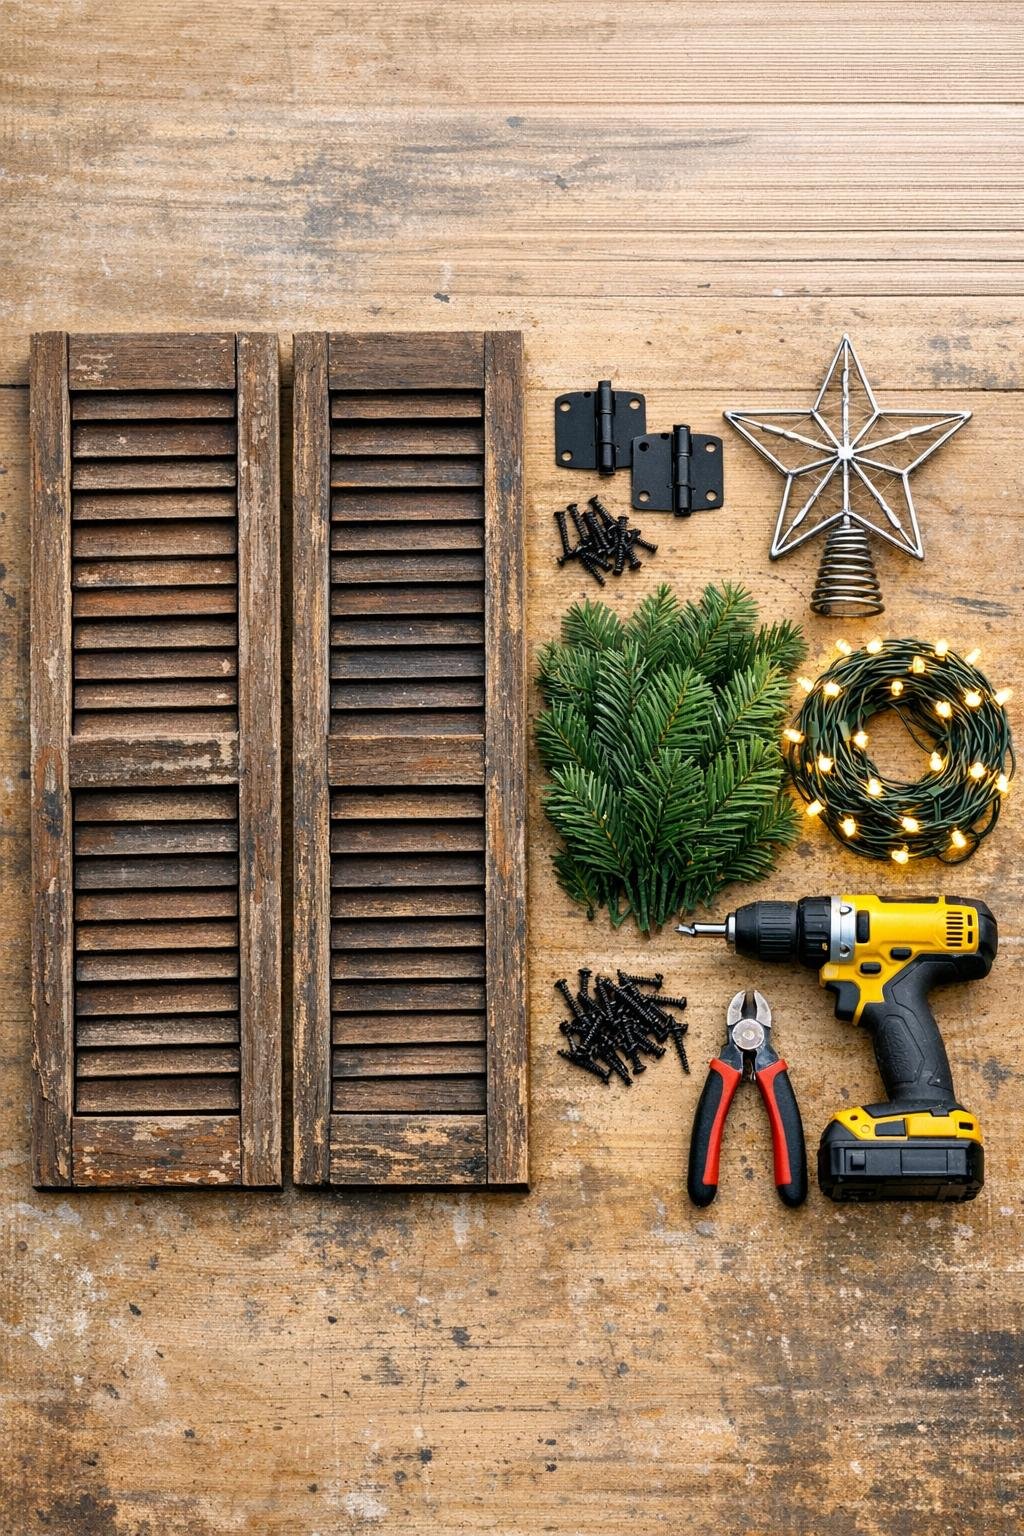
Materials
2 old wooden louvered shutters, 14 to 18 inches wide and 60 to 72 inches tall, closely matched in height
Instructions
1. Clean both shutters well with a dry brush and a damp rag, then let them dry completely so dust does not get trapped under lights, greenery, or finish.
2. If you want to change the color, paint or stain the shutters now and let them cure fully; if you like the weathered look, keep the original finish and just seal it with a clear matte outdoor topcoat.
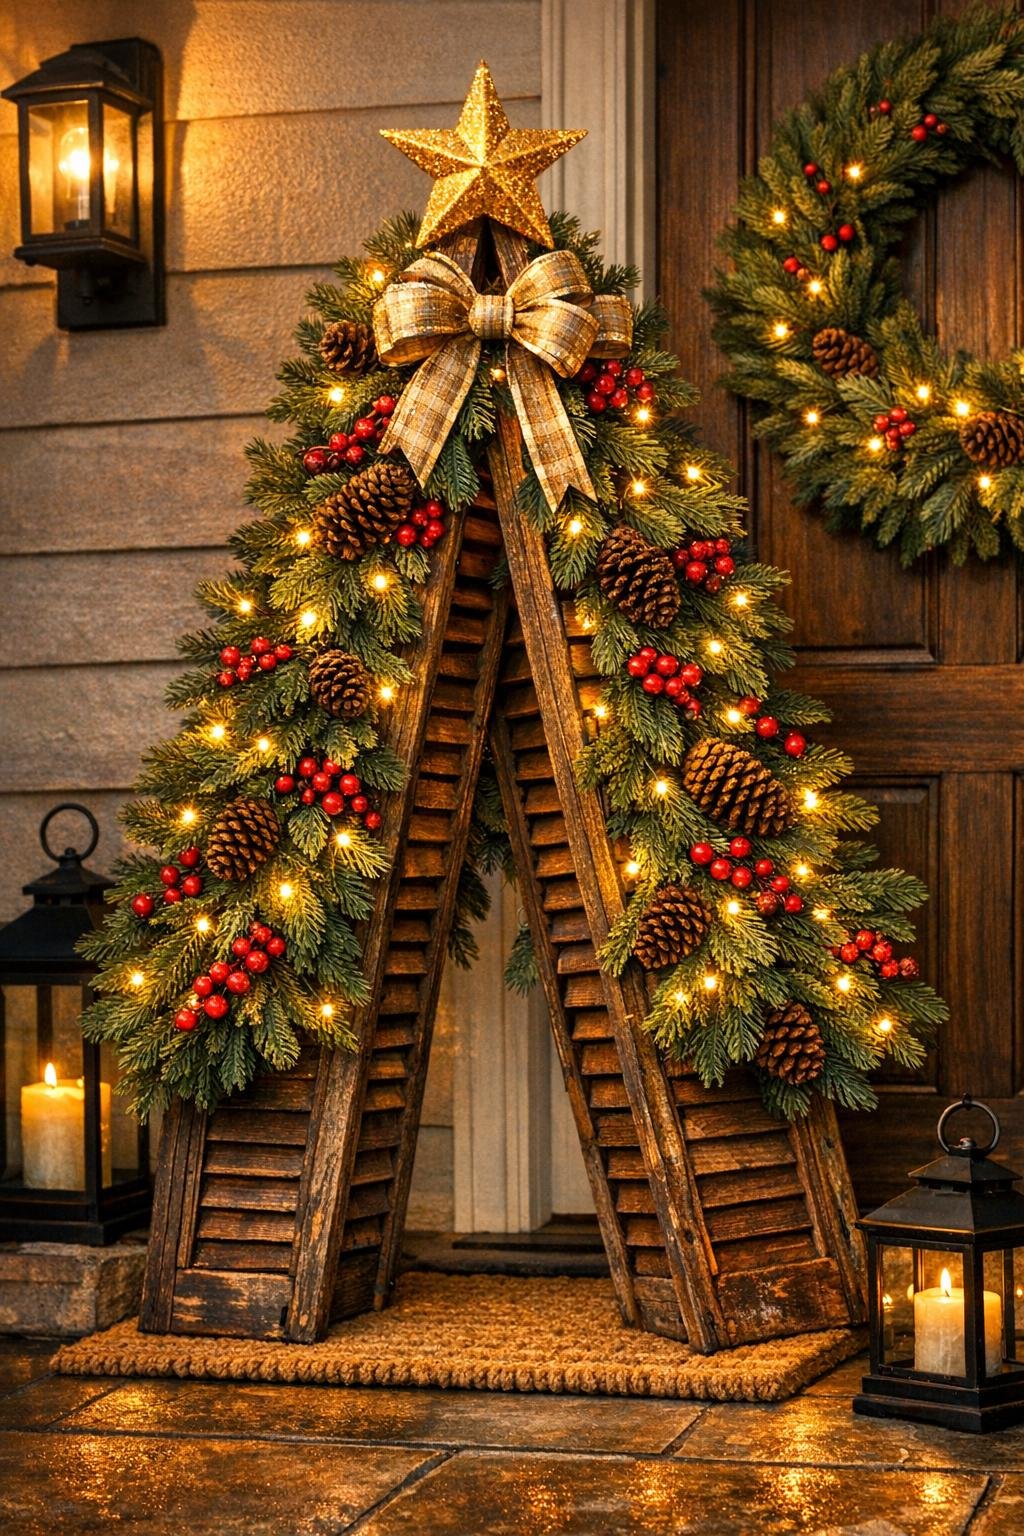
3. Stand the shutters upright with their top edges touching and their bottom edges spread apart to form a tall V shape, then adjust until both sides sit evenly and look balanced from the front.
4. Attach the two hinges across the inside top section, spacing them a few inches apart, so the shutters stay connected while still opening into that V shape.
5. Move the frame to its porch spot before decorating, because once the lights and greenery go on, it gets awkward to carry without snagging everything.
6. Add the string lights first by weaving the wire in and out through the shutter louvers from top to bottom on both sides, keeping the bulbs evenly spaced and securing the wire with a few small zip ties or bits of floral wire on the back.
7. Start filling the shutters with faux greenery picks near the bottom, tucking stems through the louvers at alternating angles so the branches fan outward and cover both faces generously.
8. Continue adding greenery upward in overlapping rows, using the fullest picks through the middle and upper half so the silhouette reads like a dense tree rather than a few scattered branches.
9. Wire in the berry and pinecone picks next, concentrating them in clusters instead of spacing them too evenly; that little trick makes the whole piece look fuller and more styled.
10. Screw a cup hook or screw eye into the top center where the shutters meet, then fasten the star topper securely with floral wire so it sits straight and does not wobble in the wind.
11. Add a wired bow just below the star or halfway down one side, then fluff the loops and tails so it softens the straight lines of the shutters without hiding the wood.
12. Step back, spread any flattened greenery, and check the lights after dusk; on a windy porch, anchor the base with small L-brackets or tuck a patio paver behind each side to keep the piece steady.
Variations & Tips
Color change: Cream, deep green, black, or barn red all work beautifully on shutters like these. I usually lean toward colors that still let the louvers and aged edges show, because that texture is half the charm.
For a taller statement: Use shutters closer to 72 inches tall and choose longer greenery picks, around 18 inches, so the scale feels generous enough for a wide porch.
For a simpler look: Skip the berries and use only mixed evergreen textures with a natural twig star. It reads a little more architectural and works well through winter, not just at the holidays.
Lighting choice: Battery lights are easy if your outlet is awkward, but I prefer plug-in warm white lights for stronger glow and less fuss over replacing batteries in cold weather.
Windproofing: If your porch gets gusty, run a discreet screw eye into the wall or post and tie the top back loosely with clear fishing line. It keeps the piece upright without changing the look.
Best styling trick: Cluster picks thickly at the bottom and middle, then taper the upper section more narrowly. Just like plating a good dish, a strong shape makes everything look more intentional.