
There’s something especially satisfying about turning a tired old sweater into holiday décor that looks soft, cozy, and far more charming than its humble beginnings would suggest. This project is simple enough for a relaxed afternoon, but it still gives you that “I can’t believe that came from a sweater” payoff I’m always chasing when I make seasonal pieces for my home.
If you like easy holiday crafts that don’t require sewing and make good use of thrifted materials, this one is a gem. The basic process is repetitive in the best way, and once you start stacking the circles, the texture really comes to life.
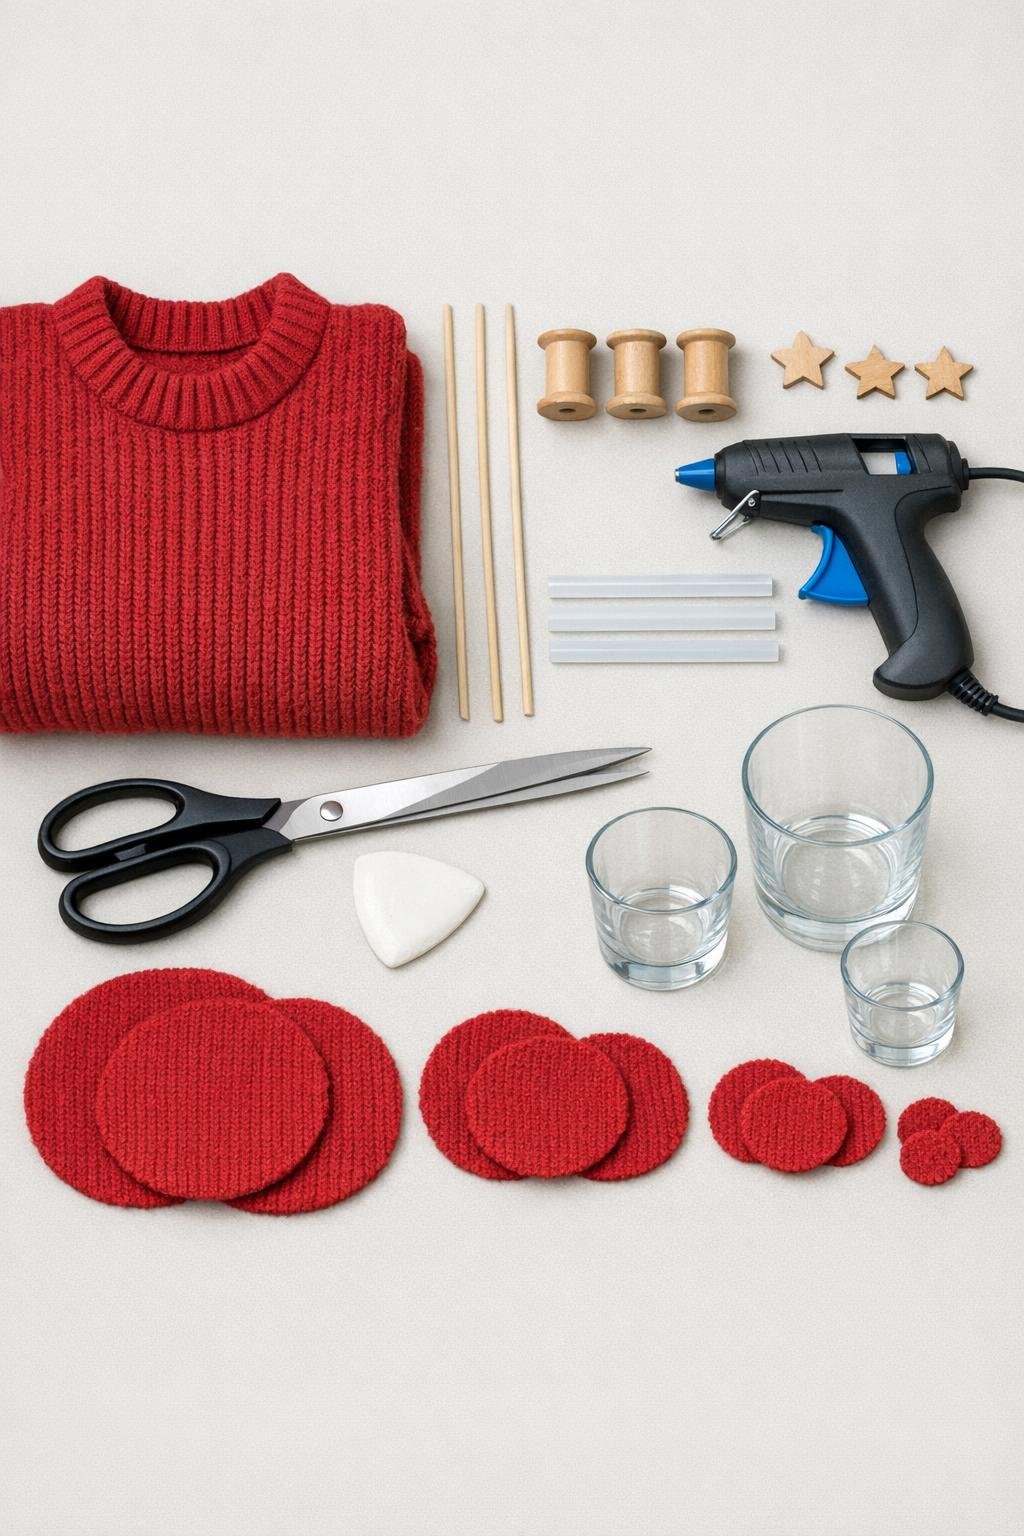
Materials
Instructions
1. Lay the sweater flat and smooth out the sleeves and body so you can use the largest uninterrupted sections of knit fabric.
2. Trace 10 circles with each of the 3 glasses, for a total of 30 circles, spacing them close together to get the most from the sweater.
3. Cut out all 30 circles as cleanly as you can; a little fraying or curling is perfectly fine and actually adds softness.
4. Sort the circles into 3 piles by size, then divide each pile so you have a balanced mix for each tree, with larger circles for the bottom, medium for the middle, and smaller for the top.
5. Push 1 skewer or dowel securely into the center hole of each wooden spool, adding a dot of hot glue first if the fit is loose.
6. Add a generous bead of hot glue at the top of each spool where it meets the skewer to keep the trunk upright and stable.
7. Take the largest circles first and pierce the center of each one with the skewer, sliding them down to the base and scrunching the knit slightly so the fabric ruffles instead of lying flat.
8. Continue stacking more large circles onto each skewer, rotating the fabric a bit as you go so the edges fall in different directions and create fullness.
9. Add the medium circles above the large ones, pressing them down gently after each addition so the shape starts to taper naturally.
10. Finish with the smallest circles at the top, packing them closely enough that the tree shape looks full and rounded rather than sparse.
11. Trim the skewer tops if needed so only about 1/4 inch extends above the top circle, then glue a small wooden star onto each top.
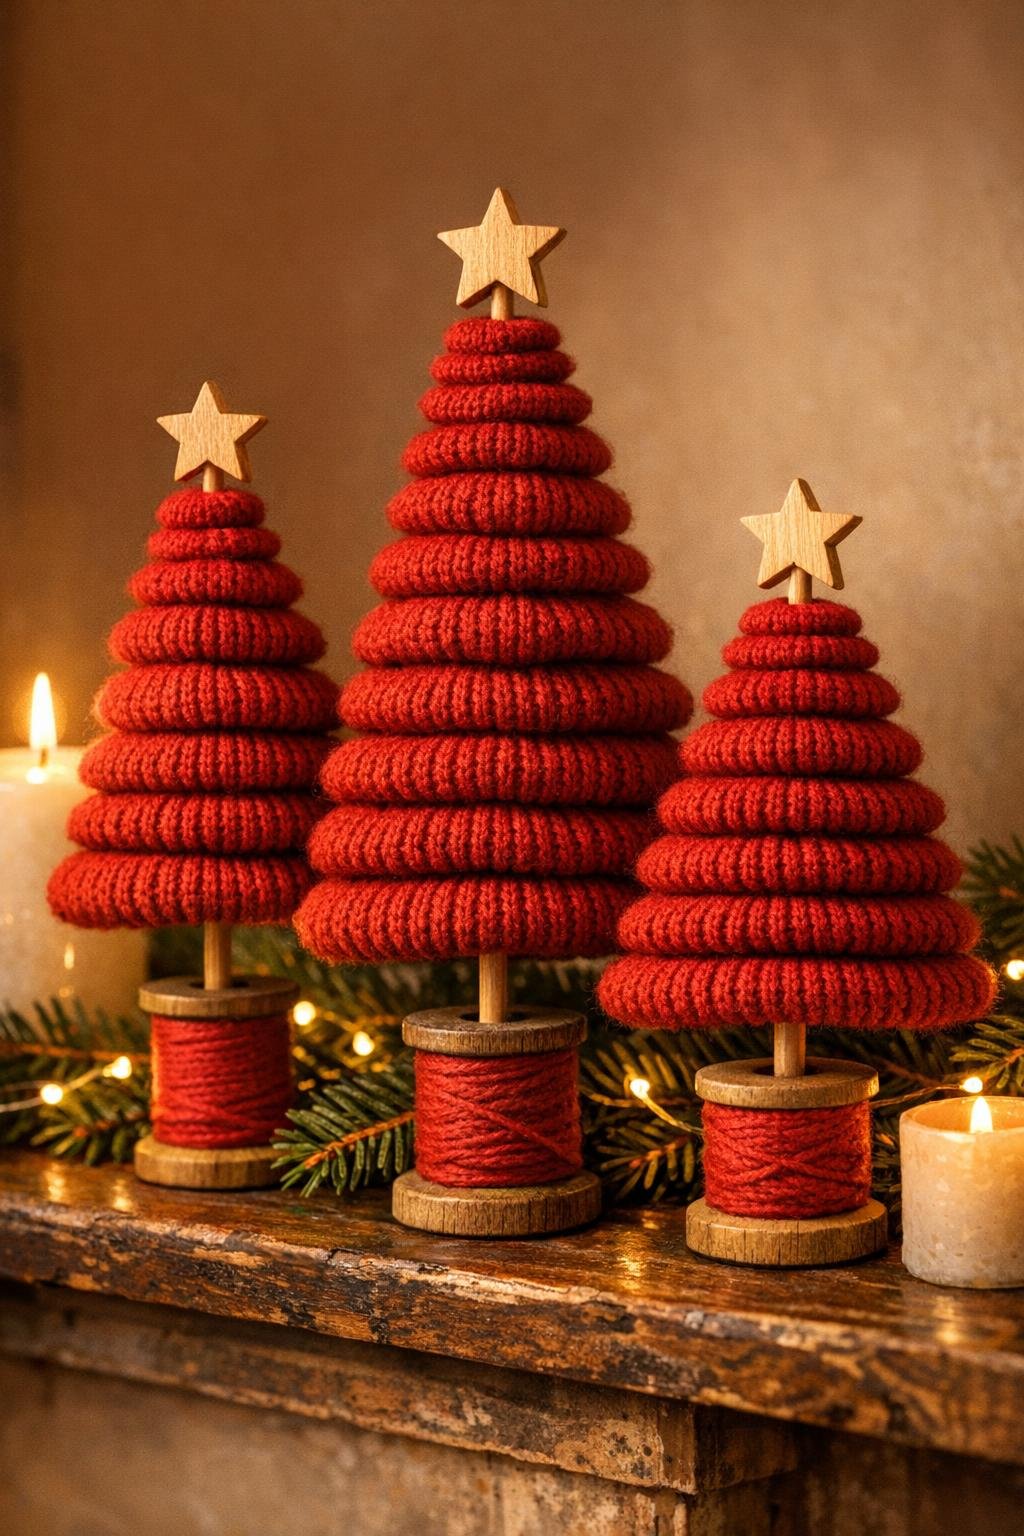
12. Fluff and tug the circle edges with your fingertips to fill any gaps, then set the trio together and adjust the heights or spacing of the circles until they look lush and even.
Variations & Tips
Mix sweater textures: If you have more than one old sweater, combine similar shades in different knit patterns for extra dimension. I love this especially when one sweater is smooth and another has a chunkier rib.
Make the set more dramatic: For a fuller look, cut 36 circles instead of 30 and add two extra layers to each tree. That little bit of extra volume makes the silhouettes look wonderfully plush.
Secure slippery knits: If your sweater fabric is thin or very stretchy, add a tiny dot of hot glue every few layers on the skewer so the circles stay where you want them.
Add subtle sparkle: A light dry brushing of craft glue and a pinch of fine glitter along a few edges can give these a frosted holiday look without overwhelming the cozy sweater texture.
Use coordinated bases: You can leave the wooden spools natural, or paint them white, gold, or dark green for a more finished display. I’d let the paint dry fully before assembling so the base stays neat.
Choose the right sweater areas: I try to cut from the flattest parts of the body first, because seams and ribbed hems can make the circles bulky in awkward ways. Save those thicker areas only if you want a little extra texture near the bottom layers.
Display in a group: These look best clustered together rather than spread apart. On a tray, mantel, or entry table, the trio reads as one cozy statement and has that polished holiday vignette feel I’m always after.