
By the time the garden is winding down, I’m always looking for the easiest possible way to give my raised beds one last boost before winter. This simple little mixer is exactly the kind of project I love: inexpensive, practical, and genuinely helpful when I’m out on the potting bench trying to blend mineral amendments without hauling out a big bucket and shovel.
Using a white plastic milk jug plus two dollar store basics, you can make a shake-and-pour amendment mixer that blends small batches of things like azomite, gypsum, greensand, worm castings, and granular organic fertilizer much more evenly than stirring with a trowel in a coffee can. It’s especially nice for home gardeners who want a cleaner, quicker way to prep bed-topdressing mixes for end-of-season cleanup and soil building.
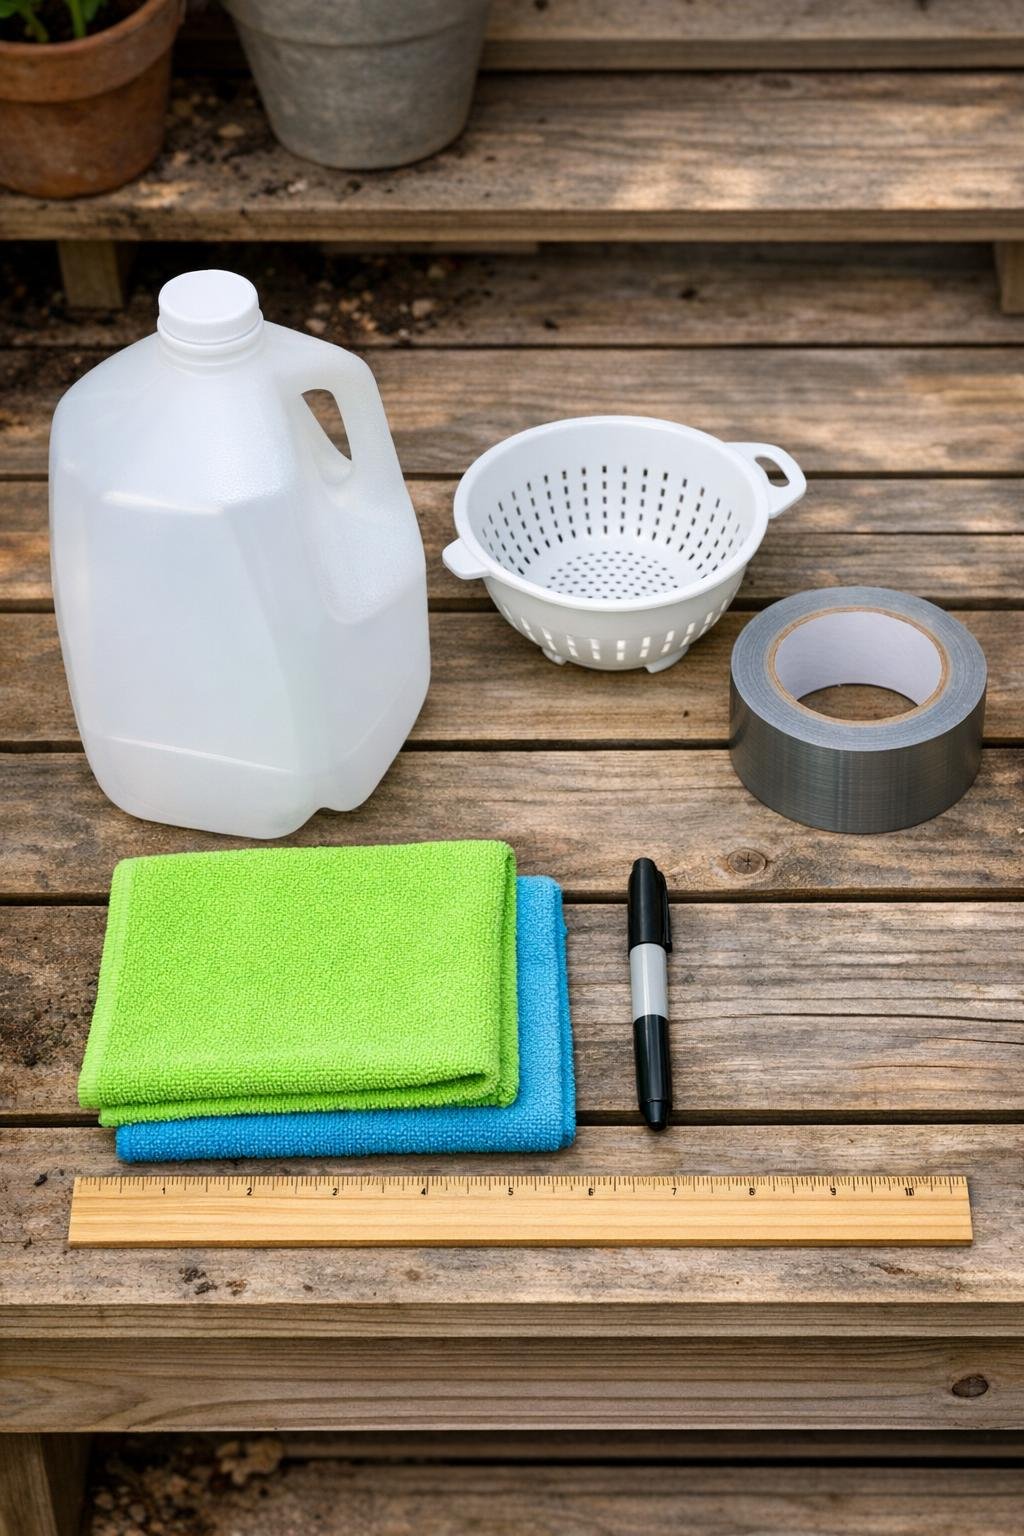
Materials
Instructions
1. Wash and dry the milk jug thoroughly, then remove any loose label pieces so the outside is smooth and easy to mark.
2. Use the marker and ruler to mark three staggered rows of holes around the belly of the jug, keeping the bottom 2 inches and the shoulder near the handle solid so the jug stays sturdy.
3. Drill or poke 1/4-inch holes along those marks, spacing them about 1 1/2 inches apart, for a total of roughly 18 to 24 holes around the sides of the jug.
4. Test the jug by shaking it gently over the colander to knock off any plastic burrs, then trim or smooth any sharp bits around the holes so the cloth liner will not snag.
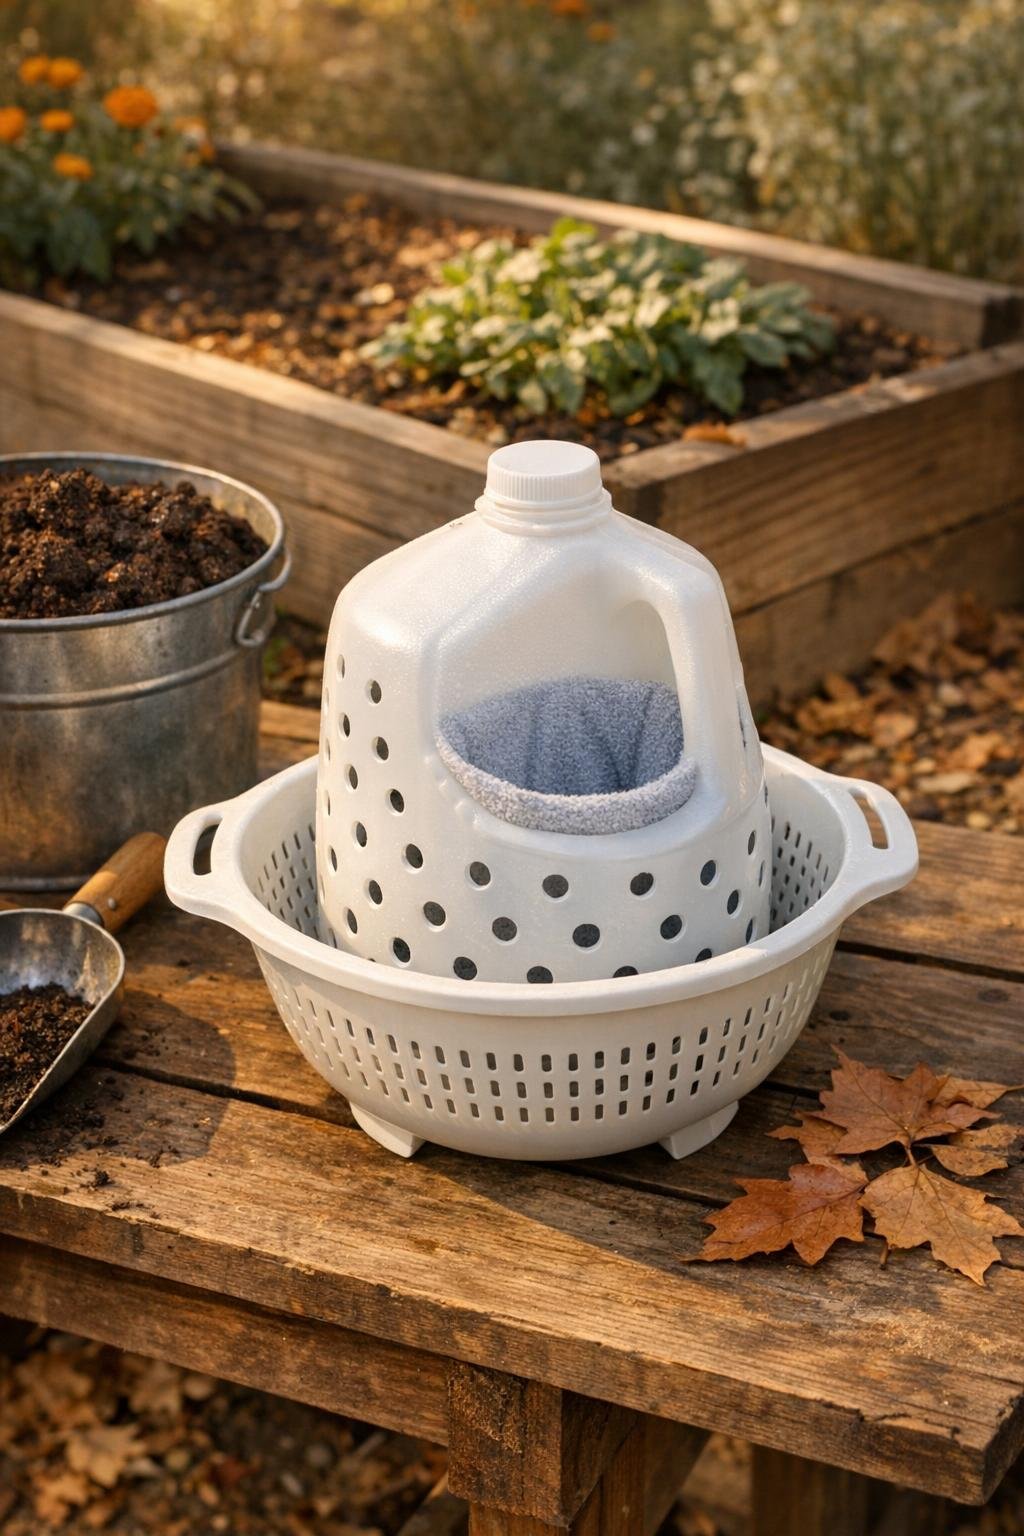
5. Open one microfiber cloth and push it down into the milk jug through the cut-open top, or if your jug opening is narrow, cut a flap in one side of the jug opposite the handle that is 4 inches wide and tape one edge as a hinge for easier loading.
6. Fit the cloth so it lines the inside walls where the holes are, leaving enough extra at the top to fold over the opening or flap edge.
7. Use strips of duct tape to secure the cloth at the top edge or around the flap so the liner stays in place when you shake the jug.
8. Set the colander over a garden trug, bucket, or directly over the raised bed, and place the jug inside it on its side to check the fit; the colander acts as a catch cradle and helps support the jug while you fill and pour.
9. Add your first batch to the lined jug: 2 cups blended mineral amendments and 1/2 cup worm castings or sifted compost, keeping the total amount under one-third full so the contents have room to tumble.
10. Close the jug securely, hold the handle with one hand and support the bottom with the other, then shake for 20 to 30 seconds until the mix looks evenly combined.
11. Unscrew the cap and pour the mixed amendments where you want them, using the handle like a scoop jug; if you made a side flap, you can also open it and sprinkle the blend more broadly over the bed surface.
12. For a finer sift, keep the cloth liner in place and shake the jug over the colander so clumps stay inside while the looser, better-mixed material falls through for easy spreading.
13. When you’re done, empty any leftovers, rinse the jug and colander, and let the cloth dry fully before storing everything together for next season.
Variations & Tips
For dusty amendments: If you work with very fine rock dusts, lightly mist the inside cloth liner before filling the jug so you get less airborne powder while still keeping the mix loose enough to shake.
For picky garden blends: Just like I do with family meals, I like to keep everybody happy by making separate batches. Use one jug for vegetable beds, one for flower beds, and label the cap with a marker so you never mix up your recipes.
If you skip the side flap: A standard milk jug still works well for smaller granular amendments; just use a funnel to load it through the top opening.
Best batch size: Don’t overfill the jug. Keeping it about one-third full gives the contents room to tumble, which is what makes the mixing work so much better.
Cloth substitute: If your dollar store has mesh polishing cloths instead of microfiber, those can work too, but choose a soft, flexible fabric that won’t tear at the drill holes.
Smart end-of-season use: I like to mix enough mineral blend for one raised bed at a time, sprinkle it over the surface, and then top the bed with compost and mulch so everything is ready to mellow over winter.
Easy cleanup: Let the jug dry with the cap off before storing it. That simple step keeps the inside fresh and prevents leftover moisture from turning amendment dust into hard lumps.