
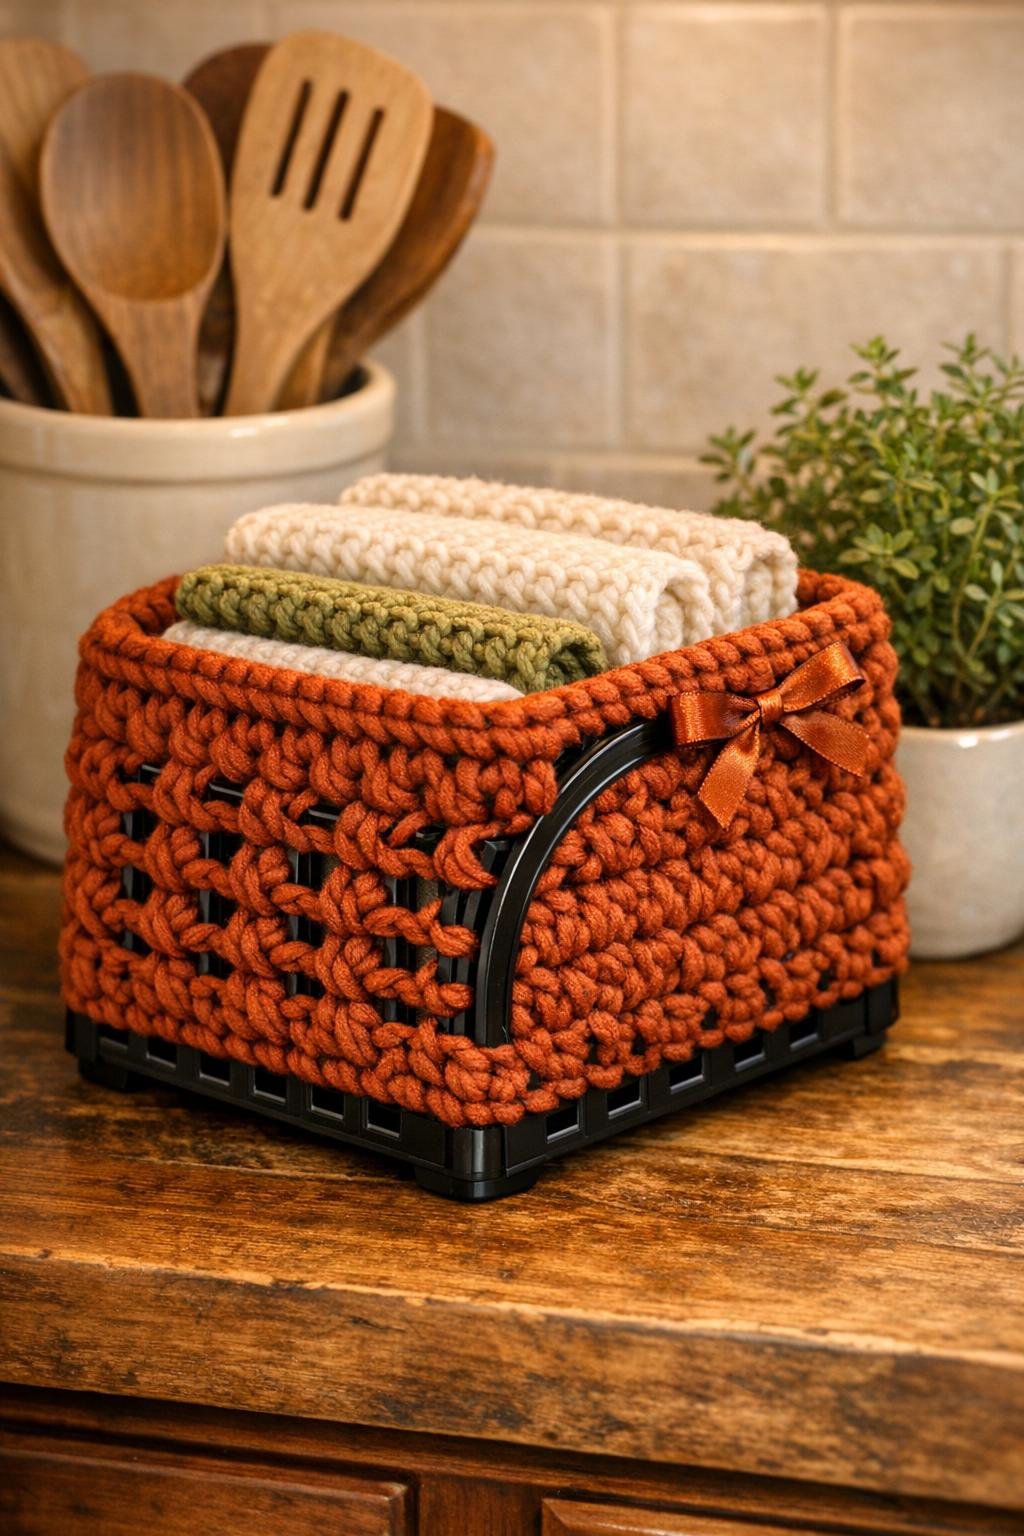
I’ve always had a soft spot for the little castoffs and oddball dollar-store finds that most folks overlook, and a plastic napkin holder is just the sort of thing I can’t help turning over in my hands to see what else it might become. This project turns that humble black napkin holder into a sturdy crochet storage basket by working chunky burnt sienna yarn right through the grid openings, so the frame does the hard part for you and the yarn brings in all the warmth and texture.
If you know a few simple crochet stitches, this is a wonderfully satisfying afternoon project, and even if you’re fairly new to crochet, the plastic grid keeps everything nicely guided. I like this basket for corralling dishcloths, hand towels, packets, or little sewing notions, and because the napkin holder stays visible underneath, it keeps that honest handmade charm I grew up admiring in practical things made to be used every day.
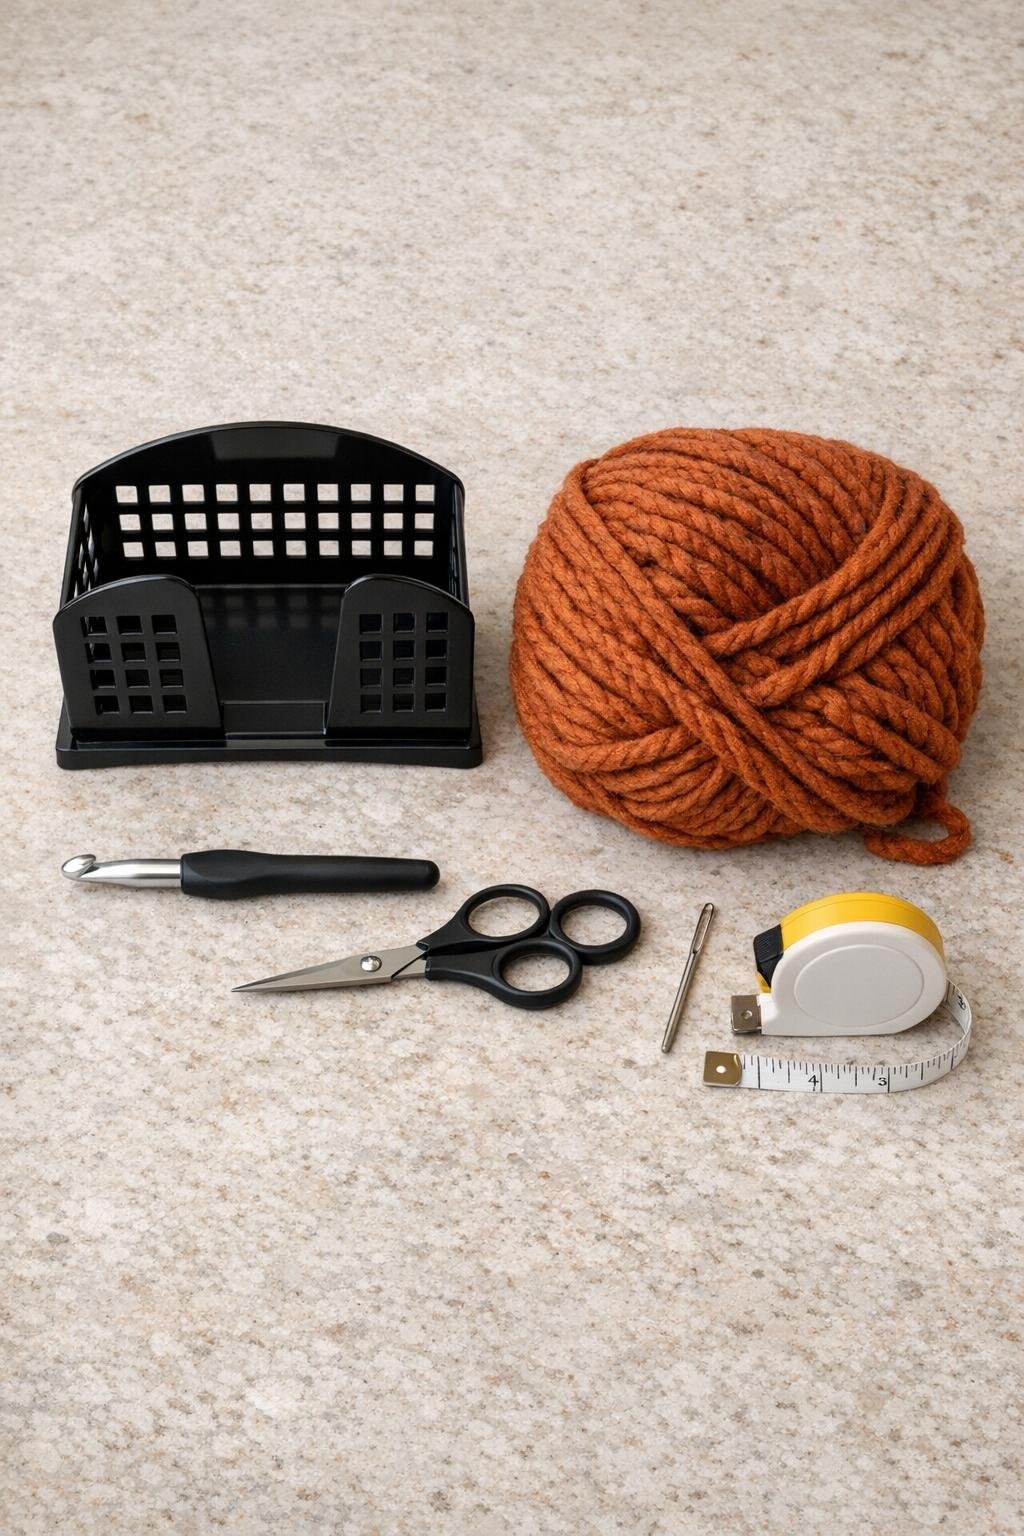
Materials
Instructions
1. Wipe the napkin holder clean and check that all the plastic grid openings are smooth; if you find any rough nubs from the molding, trim them carefully so they won’t snag the yarn.
2. Measure the grid and decide which side will be the basket front, because once you start covering it, the direction of your stitches will give it a finished face.
3. Make a slipknot on your hook, then anchor the yarn at the lower back corner by pulling a loop through one bottom grid opening and chaining 1 to secure it snugly against the plastic.
4. Work single crochet stitches through each opening along the lower edge of one side panel, using the plastic slots like pre-made stitch spaces and keeping the yarn pulled firm but not tight so the frame doesn’t warp.
5. Chain 1 at the end of the row, turn your work slightly, and build the next row by placing one single crochet into each grid opening directly above the first row until the entire side panel is filled.
6. Repeat row by row until that whole side is covered in dense crochet, then work one extra round of single crochet around the outer edge openings to tidy the border and strengthen it.
7. Fasten off or carry the yarn neatly around the corner, then crochet the second side panel the same way so both large sides of the napkin holder are fully covered in burnt sienna texture.
8. Attach the yarn at one short end and work single crochet through the end-grid openings from bottom to top, then crochet back and forth until that end panel is filled in to match the sides.
9. Crochet the second short end the same way, checking as you go that the stitch tension matches the first end so the basket looks even from every angle.
10. Join the yarn along the top rim and work a finishing edge by placing one single crochet or slip stitch into each top opening all the way around, easing over the corners so the rim looks smooth and intentional.
11. Weave in all yarn tails with the yarn needle, running them behind the crochet stitches and around the plastic bars so they stay put even with daily use.
12. Set the basket upright and gently shape the crochet with your hands, tugging any uneven spots into place; if you like, add felt pads to the bottom and tie a simple ribbon through one corner for a polished finish.
Variations & Tips
For a fuller look: If your napkin holder has larger openings, work 2 single crochet stitches in the wider slots instead of 1. That fills the frame more generously and gives the basket that rich, cozy texture that makes it look finished instead of skimpy.
Best yarn choice: I like a chunky yarn with a little body to it rather than anything silky or limp. A cotton-blend or firm acrylic helps the stitches sit nicely over the plastic and hold up well for everyday use.
What to store in it: This size is just right for rolled washcloths, tea towels, snack packets, mail, or crochet supplies. In my house, useful little containers like this never stay empty long.
If you’re a beginner: Use only single crochet for the whole project. Fancy stitches may look tempting, but plain single crochet through the slots gives the cleanest coverage and the strongest basket walls.
Color ideas: Burnt sienna gives this basket such a warm farmhouse feel, but mustard, cream, olive, or deep red would be lovely too. Just be sure the yarn color works with the black napkin holder so the frame still looks intentional where it peeks through.
Make it gentler on surfaces: A few felt pads underneath are worth the extra minute, especially if you’ll set the basket on a painted shelf or wood table. It keeps the plastic base from scuffing and helps the basket sit quietly.
For extra polish: Thread a ribbon, leather cord, or even a short crocheted chain through one upper corner and tie it in a small bow. That tiny finishing touch reminds me of the practical prettiness women used to add to everyday household things, and it makes a simple upcycle feel special.