
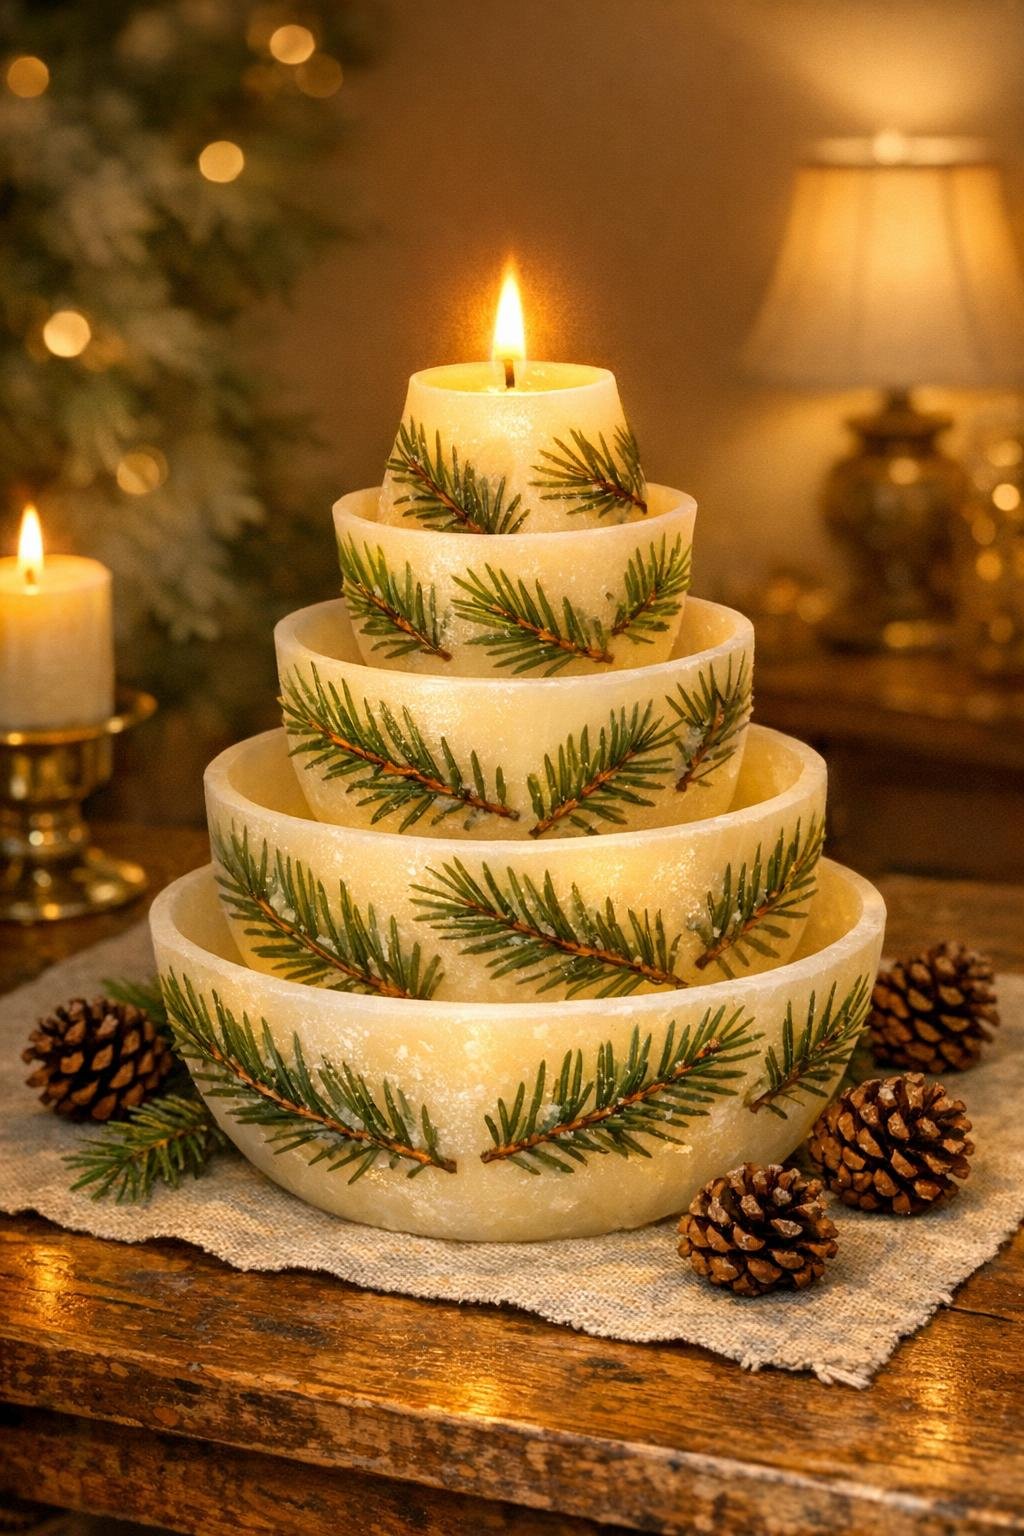
There’s something especially satisfying about turning the most ordinary supplies into something that feels festive and a little bit spellbinding. This project starts exactly as simply as it looks: paper bowls, pine sprigs, and melted dollar store candles. But once the wax sets and the pieces are stacked, the result has that soft, wintry glow I love on a kitchen counter, entry table, or holiday buffet.
If you’re comfortable melting butter for a sauce or setting up a double boiler for chocolate, you can absolutely make this. I’m writing it the way I’d explain it to a friend in my own Midwest kitchen: straightforward, practical, and with enough detail that your finished piece looks full and polished rather than like a craft-store afterthought.
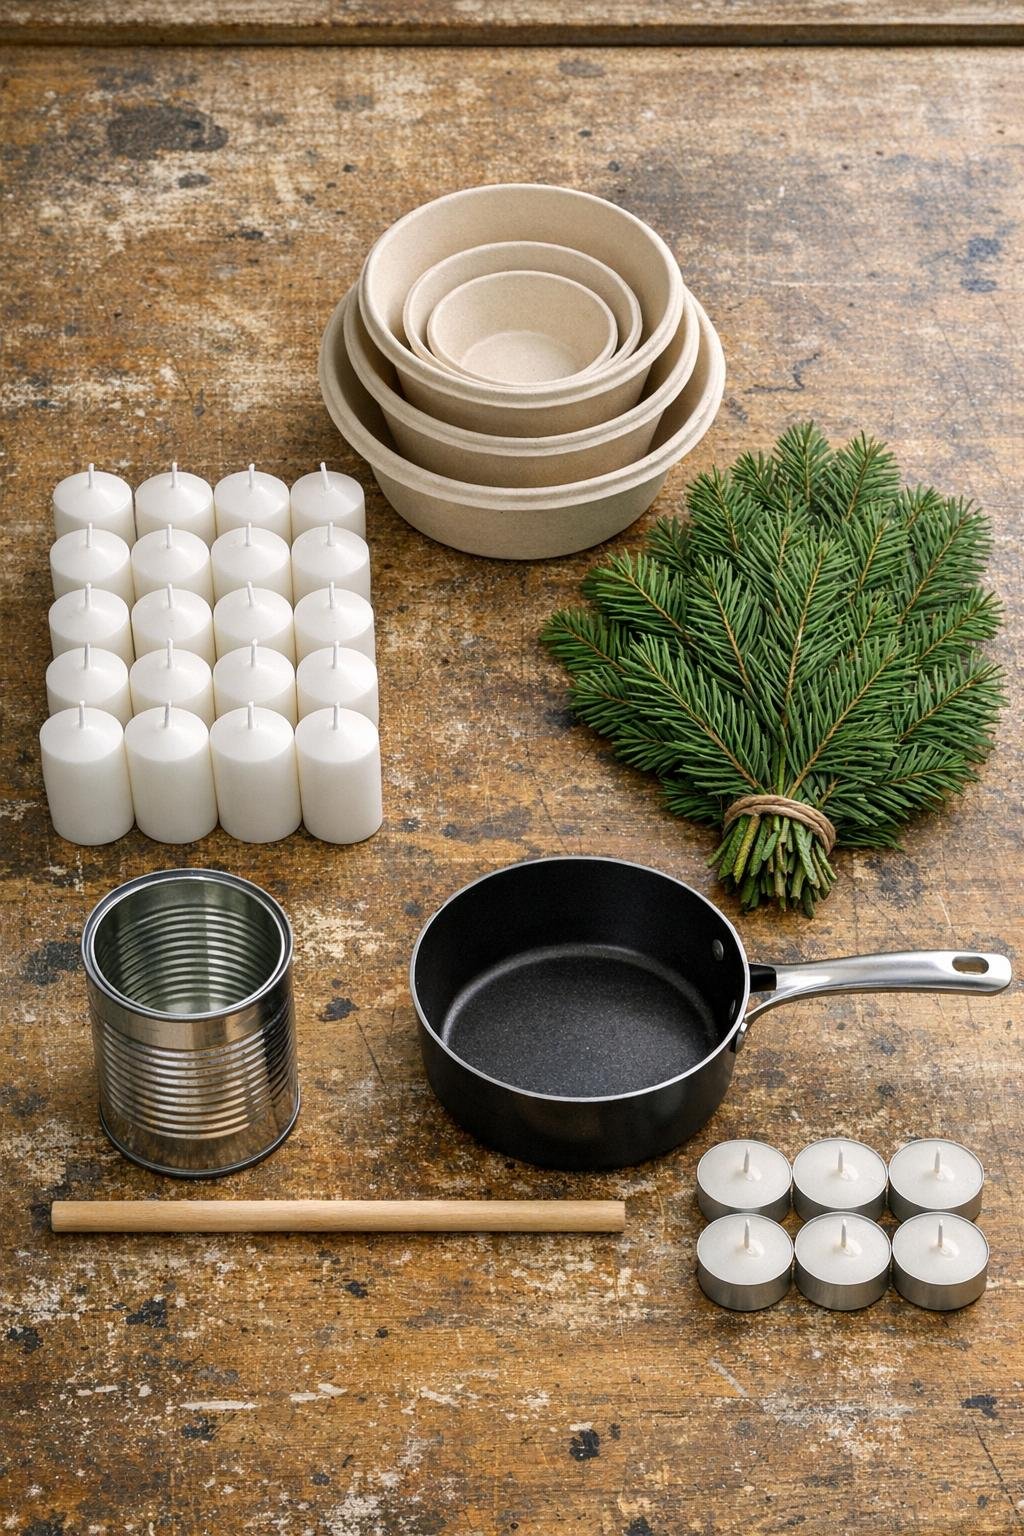
Materials
Instructions
1. Cover your work surface with parchment paper and arrange the 5 paper bowls in a row from largest to smallest. Trim the pine sprigs into tidy flat pieces that fit the inside curve of each bowl without sticking far above the rim.
2. Line each bowl with 5 to 7 pine sprigs, pressing them against the sides so the needles fan outward and create full evergreen coverage all around. Leave a small open circle in the center bottom of each bowl so you’ll have a level spot for stacking later.
3. Remove any wrappers, metal tabs, and wicks from the dollar store candles, then break the wax into smaller chunks so it melts evenly. Set the wax pieces into the tin can and place the can in a saucepan filled with about 2 inches of water.
4. Heat the saucepan over low to medium-low heat until the wax is fully melted, stirring gently with the dowel. Keep the wax hot but not smoking, and add more candle pieces as space opens up until you have enough melted wax for the first two bowls.
5. Carefully pour melted wax into the largest bowl until it reaches about 3/4 inch deep, then pour the next bowl to about 5/8 inch deep. Work slowly so the pine stays pressed to the sides and remains visible through the creamy wax.
6. Let those first bowls sit for 5 to 8 minutes until the wax looks thickened but not fully hard, then pour the remaining three bowls with slightly shallower layers as the sizes decrease. This staggered timing helps every piece set evenly and keeps the pine from drifting.
7. While the wax is still soft, press one tea light straight down into the center of the largest bowl and remove the metal cup so only the wax tealight core remains embedded; repeat with one tea light in each of the other four bowls. Center each one carefully so the finished stack will glow evenly.
8. Allow all five wax bowls to cool completely at room temperature until firm, usually 1 to 2 hours. If any bowl has a slightly sunken top, pour a thin finishing layer of warm wax over it to level the surface.
9. Peel the paper bowls away gently, loosening the edge first with a butter knife if needed. You should have five solid wax forms with the curved bowl shape intact and the pine clearly visible around the sides.
10. Stack the wax bowls from largest to smallest, centering each one so they taper upward like a tree; if a piece feels slippery, warm the base of that piece for a second over the tin can steam and set it back in place to bond. Press very lightly so the layers adhere without cracking.
11. Trim any stray pine ends with scissors and smooth drips or rough wax edges with your fingertips while the wax is just slightly warm. Nestle one fresh tea light into the top opening, or light the exposed embedded wicks if they remained intact and centered enough to burn safely.
Variations & Tips
Use one wax color: Plain white candles give the cleanest snowy look and make the pine show up beautifully. I’d stick with all one color unless you want a very specific holiday palette.
Choose flatter greenery: Flat pine or fir tips hug the bowl walls best and stay visible through the wax. Very bushy needles tend to trap air pockets and can make the sides look uneven.
Keep the tree sturdy: If your largest bowl feels too shallow to anchor the stack, remelt a little extra wax and pour a fresh 1/4-inch base under it before stacking. A heavier bottom always makes the finished piece look more intentional.
Work in batches: I find this easiest when I melt enough wax for two bowls at a time rather than trying to manage the whole project in one pour. It’s much like cooking caramel in stages: calmer hands, cleaner results.
Try a frosted finish: For a softer, wintry look, let the wax cool slowly at room temperature instead of rushing it. Slower cooling often gives that velvety, slightly frosted surface that looks especially pretty by lamplight.
Display safely: Set the finished piece on a heat-safe plate or tray and never leave it burning unattended. Because real pine is embedded in the wax, I recommend short display burns and close supervision, or using a battery tea light at the top if you want the glow without worry.