
There’s a special sort of satisfaction in taking something headed for the recycling bin and coaxing it into something lovely. I’ve always had a soft spot for projects like that, the kind that feel a little bit like kitchen magic, where plain everyday materials surprise you once a little heat and patience get involved.
This is an easy oven craft that’s wonderful for winter decorating, gift toppers, and afternoon making with older kids or grandkids. If you can trace, cut, and bake, you can do this one just fine, and the payoff is far prettier than you’d ever expect from a stack of clear berry containers.
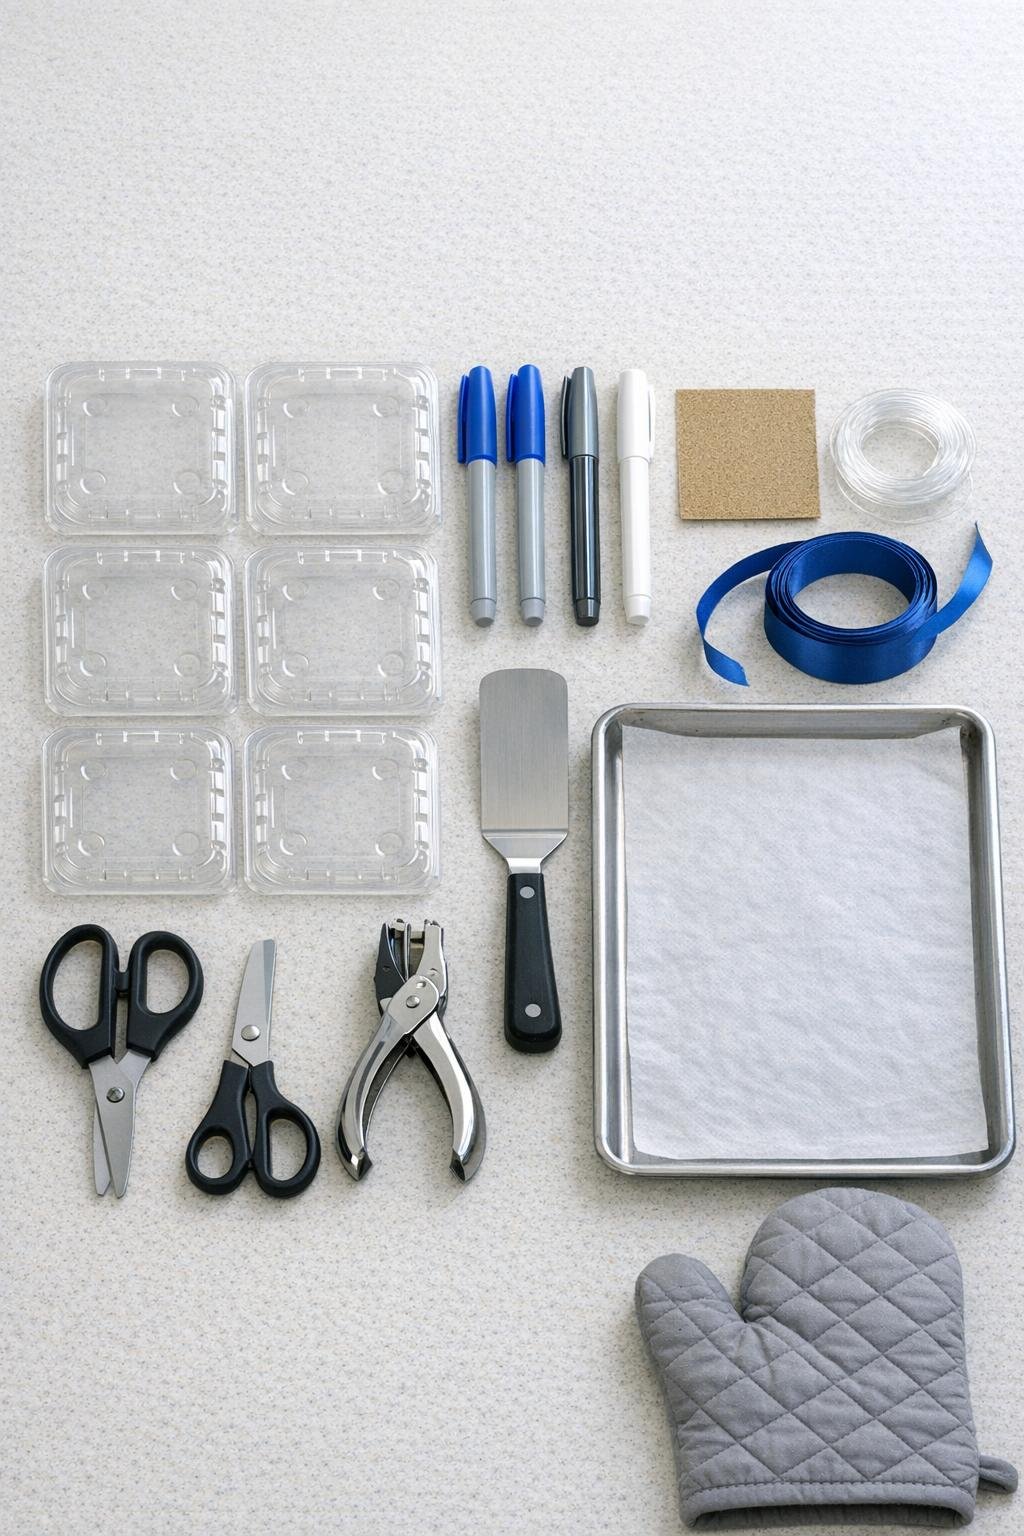
Materials
Instructions
1. Wash the six plastic lids with warm soapy water, remove any residue, and dry them completely so the marker will stick cleanly.
2. Lightly sand one side of each lid with the fine sandpaper until the surface looks softly frosted; this gives the ink something to grab and helps the finished design show up beautifully.
3. Cut away the raised edges, hinges, and latch parts so you’re left with the largest flat sections possible, then trim those sections into six circles or rounded squares about 4 to 5 inches wide.
4. Fold each plastic piece lightly in half just enough to find the center, then unfold and use the blue marker to draw a large six-point snowflake that fills most of the shape.
5. Add smaller branches, dots, and icy details with the silver marker, keeping the lines bold because they’ll shrink right down in the oven.
6. Finish the designs with a few white paint-pen accents, then let all six pieces dry flat for 10 to 15 minutes so the lines won’t smear.
7. Punch one hole near the top edge of each piece, keeping it about 1/4 inch from the edge so it stays strong after shrinking.
8. Heat the oven to 325°F and line the baking sheet with fresh parchment if needed, then place the decorated pieces colored-side up with at least 2 inches between them.
9. Bake for 1 to 3 minutes, watching closely as the plastic curls, scoots, and then settles back down flat; once the pieces are mostly flat again, remove the tray right away.
10. If any piece is still slightly wavy, press it flat for a few seconds with a metal spatula while it’s hot, then let all the pieces cool completely for 5 minutes.
11. Thread ribbon or fishing line through each hole and knot it securely, trimming the ends neatly so every ornament hangs straight.
12. Group them on the tree, tie them onto wrapped gifts, or hang them in a sunny window where the shrunken plastic catches the light and shows off all that snowflake detail.

Variations & Tips
For the best plastic: Make sure the containers are stamped with a #6 symbol. Other plastics may melt improperly, turn cloudy in the wrong way, or release unpleasant fumes, and I never like gambling with the oven.
For fuller designs: Draw larger and bolder than feels necessary. In my experience, tiny lines can disappear a bit after shrinking, but generous snowflake branches and layered dots stay crisp and eye-catching.
For a frosty finish: Sand both sides instead of one if you want a softer, more icy look. The ornament will catch the tree lights in a gentler way, almost like old-fashioned window frost.
For matching sets: Use one color palette across all six ornaments, or make two each in blue-silver, white-silver, and all-blue. A coordinated batch looks especially handsome on a tree or tied across a garland.
For gift toppers: Use fishing line for a nearly invisible hanger, then tie the ornament onto a wrapped package with ribbon. It’s a sweet little extra, and folks always seem touched that the decoration is handmade.
If a piece curls onto itself: Leave it another few seconds in the oven if it hasn’t finished shrinking, because it often uncurls on its own. If it stays stuck, lift it carefully with the spatula and flatten it while still hot.
For storage: Wrap the cooled ornaments in tissue paper and keep them flat in a cookie tin or shallow box. That’s how I like to put away delicate holiday makes, and they come out just as pretty next winter.