
I love a craft that looks far fussier than it really is, and this one absolutely delivers. You start with nothing more glamorous than thin craft wire and a bottle of old red nail polish, and somehow those little dipped loops turn into glossy, light-catching petals that feel almost like tiny pieces of stained glass.
If you’re craving a holiday project that looks special without requiring advanced floral skills, this is a wonderful one to make on a weeknight. I’m always looking for hands-on projects I can do after work without dragging out half the house, and this one has that satisfying “just one more petal” rhythm that makes it hard to stop.
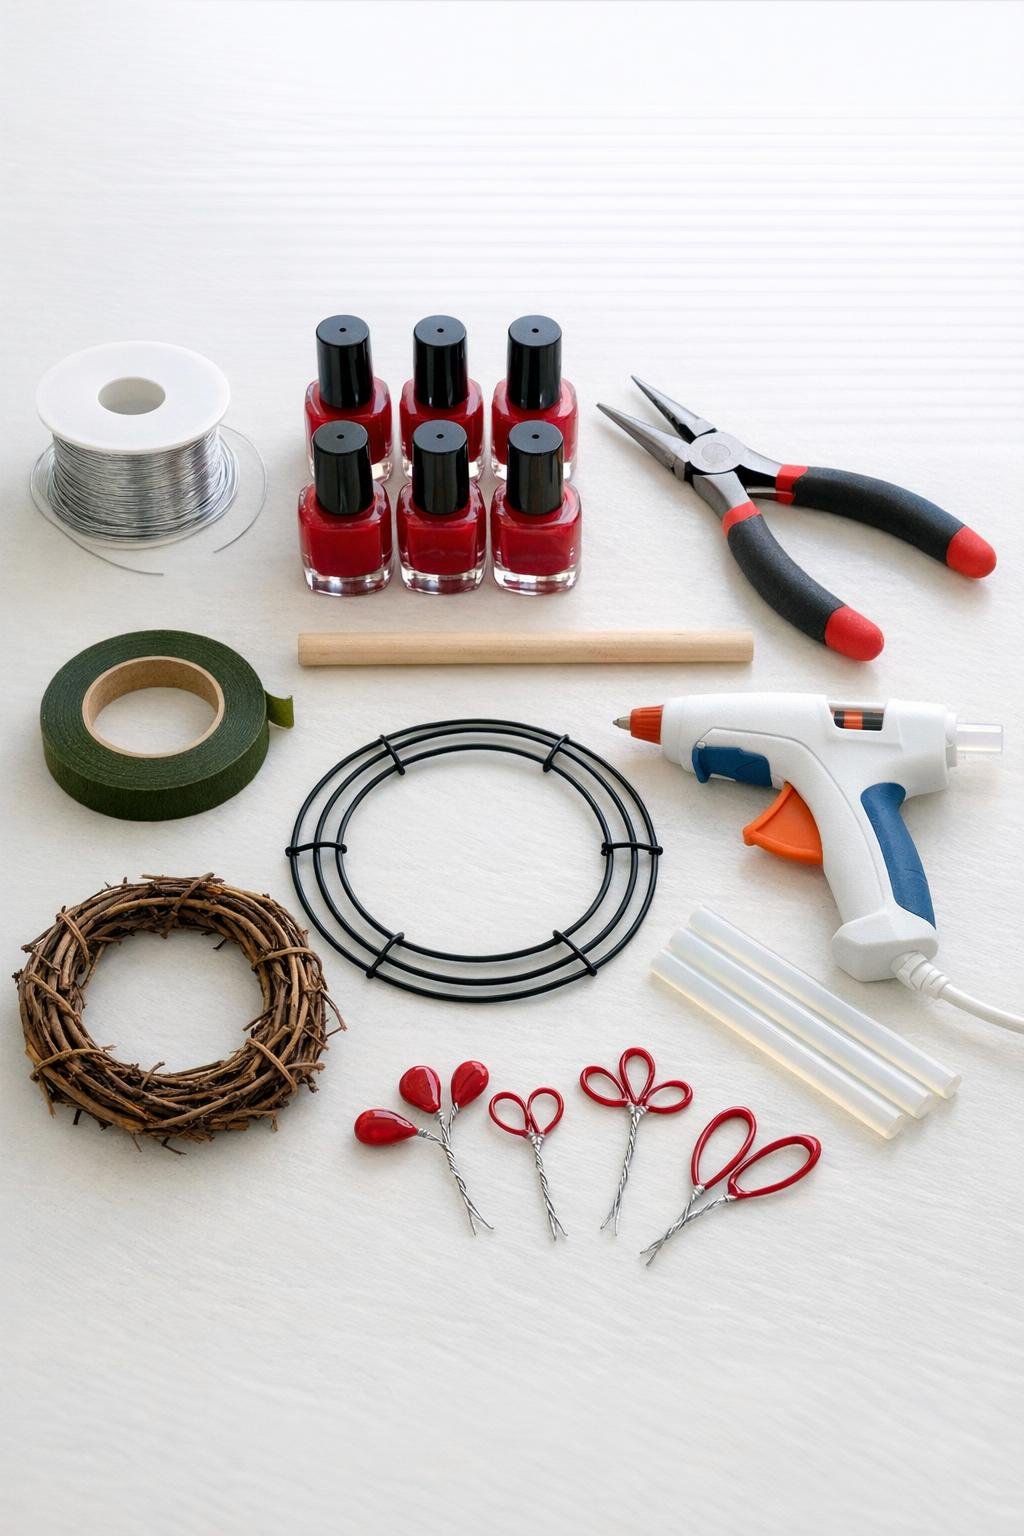
Materials
26-gauge craft wire, 1 spool of 75 feet
Instructions
1. Cut sixty pieces of craft wire, each 6 inches long, so you have enough for full, layered flowers and a few extras in case a petal film breaks.
2. Wrap one wire piece around the dowel to form a teardrop-shaped loop about 1 1/2 inches long, twist the ends together tightly for a 1-inch stem, and repeat until all 60 loops are shaped.
3. Use the pliers to pinch each loop into a poinsettia-style petal by sharpening the tip slightly and flattening any uneven curves so the set looks consistent.
4. Open a bottle of red nail polish and dip one wire loop straight into the polish, then lift it out slowly so a glossy film stretches across the center of the loop.
5. Hold the loop still for a few seconds, then set it aside upright or leaning safely so the film can dry without touching anything; continue dipping all 60 loops, working bottle by bottle as needed.
6. Let the dipped loops dry completely for at least 30 to 45 minutes, then re-dip any petals with thin spots or broken film to build a richer, glassy finish.
7. Divide the petals into 10 groups of 6, then stack each group into a flower by arranging 3 petals in a lower layer and 3 petals in an upper layer.
8. Twist the stems of each 6-petal group together tightly by hand or with pliers, keeping the petals fanned evenly so each flower looks full and balanced.
9. Wrap the twisted stem of every flower with green floral tape, stretching the tape slightly as you go so it grips and gives each bloom a neat finished base.
10. If you’re using a grapevine wreath, tuck the taped stems into the vines before gluing; if you’re using a wire ring, position the flowers around the ring first so you can space them evenly.
11. Hot glue the flowers onto the wreath base one at a time, overlapping them slightly and alternating angles to create a lush ring with no obvious gaps.
12. Fill the entire front of the wreath with all 10 flowers, concentrating a few blooms closer together at the lower sides and top so the shape feels full, generous, and polished rather than flat.
13. Check for any bare spots, gently bend petals for dimension, and add a small dot of hot glue anywhere a stem needs extra hold before the wreath is hung up.

Variations & Tips
Use mixed reds: If your old polish bottles aren’t identical, lean into it. A blend of cherry, crimson, and deeper wine shades gives the flowers more depth and makes the finished wreath look even richer.
Work in batches: I like to shape all the loops first, then dip 15 to 20 at a time. It keeps the process manageable, especially on a busy evening when I only have a little crafting time after dinner.
Choose the right wreath base: Grapevine gives a warmer, fuller look right away, while a wire ring keeps the flowers looking lighter and a little more airy. Both work well, so use what you already have.
Handle petals gently: Once dry, the nail polish film is sturdy enough for decorating but can still puncture if pressed too hard. Hold each flower by the taped stem when attaching it to the wreath.
Add a center if you want more sparkle: A tiny drop of hot glue in the middle of each flower can hold a gold bead, a sequin cluster, or even a rolled nub of floral tape for extra detail without complicating the project.
Store it carefully: Hang or box the wreath where nothing presses against the petals. I’d keep it indoors or on a protected door so the finish stays glossy and the delicate centers don’t collect dust or moisture.