
There are a handful of projects that feel almost theatrical, and this is one of them. You start with a worn towel, a bucket of concrete mix, and a simple form, and somewhere between the draping and the drying you get a sculptural holiday piece that looks far more expensive than the materials would suggest. I love projects like this because they reward a little mess with a lot of visual drama.
If you’re comfortable stirring pancake batter, you can make this. The process is simple, the supplies are easy to find, and the finished result has that wintery, collected look I always appreciate when I’m decorating a porch or entryway. It’s especially good for anyone who likes seasonal décor with texture and height, but doesn’t want to fuss with anything delicate.
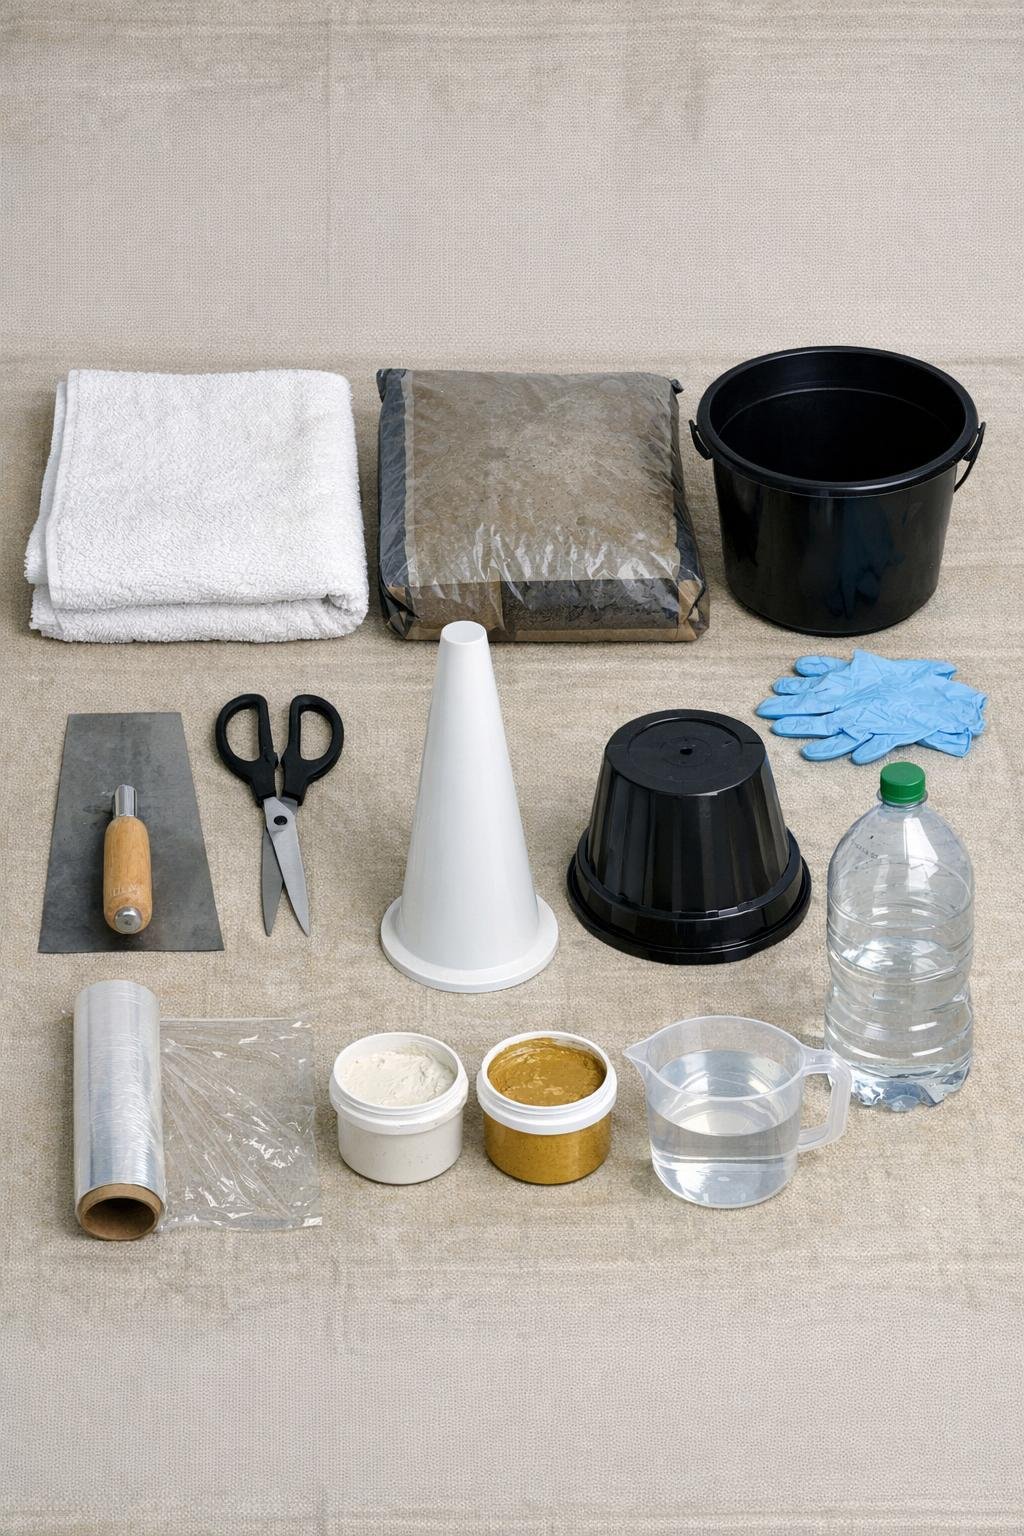
Materials
Instructions
1. Spread a tarp over your work area, set the 2-liter bottle upright, and place the cone or upside-down flowerpot centered on top so you have a tall tree-shaped form.
2. Wrap the entire form in plastic wrap, covering the cone or pot and the bottle beneath it so the concrete-soaked towel won’t stick as it cures.
3. Put on gloves, pour the concrete mix into the bucket, and add water a little at a time until it reaches the consistency of thick oatmeal or brownie batter, wet enough to soak fabric but not runny.
4. Push the towel down into the bucket and work the slurry through every section with your hands and the trowel until the fabric is fully saturated from edge to edge.
5. Lift the soaked towel, let the excess drip back into the bucket for a few seconds, and center it over the wrapped form so the bulk of the towel falls evenly all the way around.
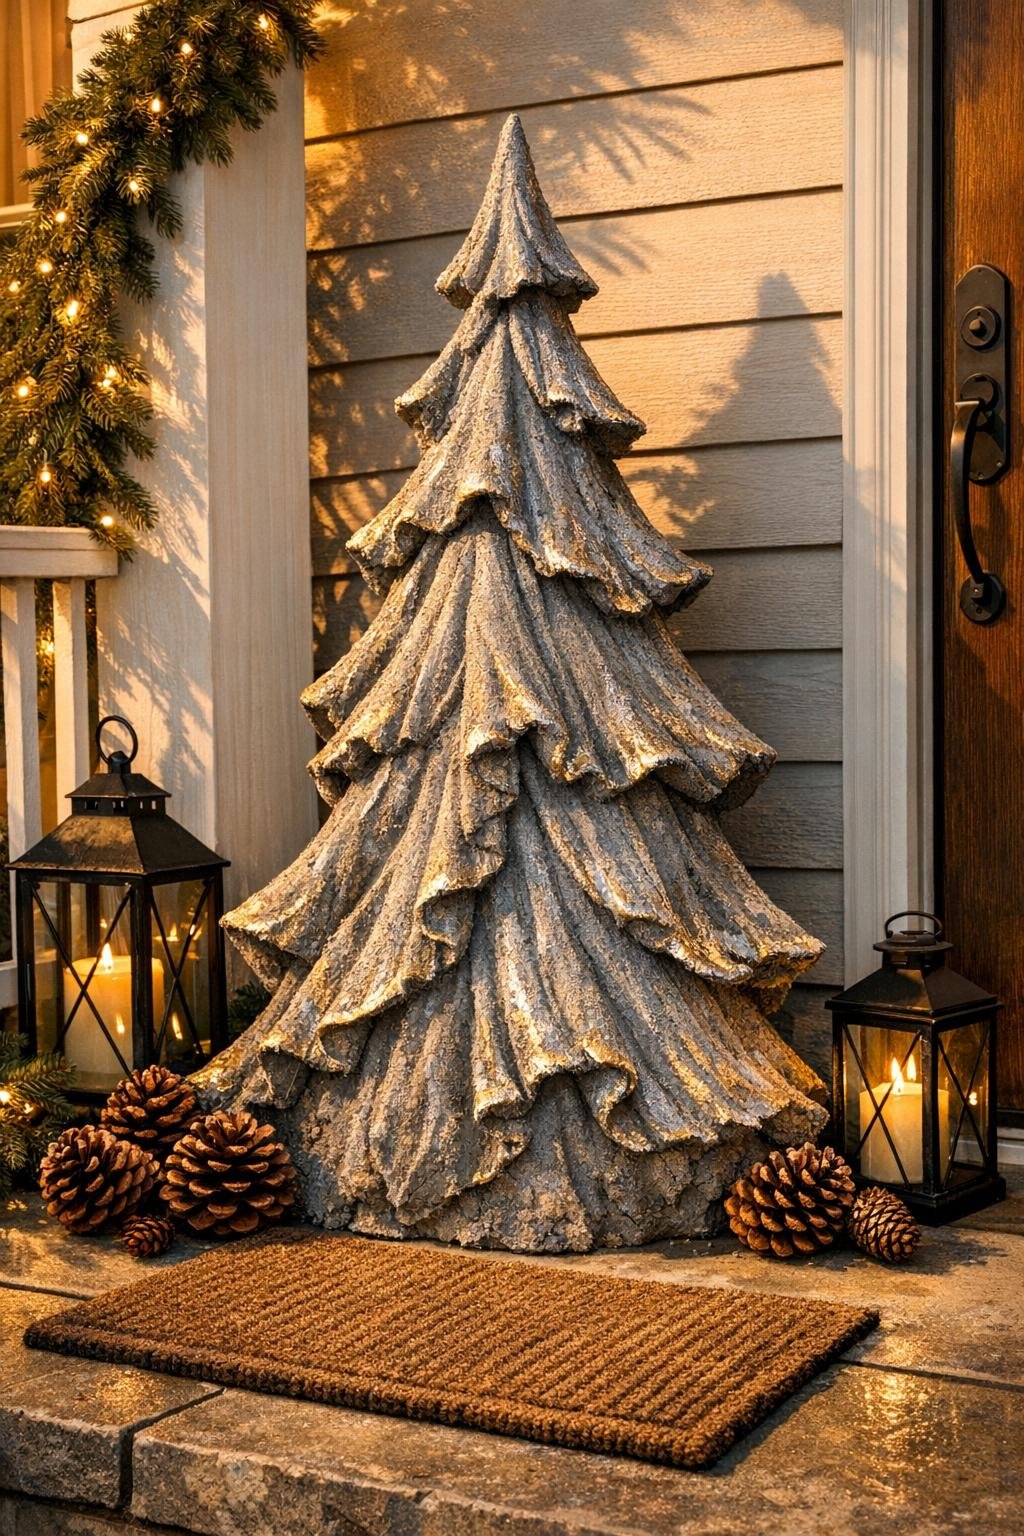
6. Arrange the folds with your gloved hands, pulling and pinching the fabric into deep vertical drapes that taper to a pointed top and widen into a generous skirt at the bottom.
7. Tuck, smooth, or separate the lower edges so the base sits flat and stable, then use the trowel to dab extra concrete into any thin or dry-looking spots.
8. Leave the piece undisturbed to set for 24 hours, then check firmness; if your mix is still cool or damp, give it another 12 to 24 hours until it feels hard all over.
9. Once cured, carefully lift the concrete-draped piece off the form and peel away any plastic wrap stuck inside.
10. Trim the bottom edge with scissors if needed to level it, removing only small bits at a time so the shape stays balanced.
11. For a snowy look, lightly dry-brush white chalk paint across the raised ridges and tips of the folds; for a warmer finish, use gold chalk paint the same way and keep the color concentrated on the high points.
12. Let any paint dry completely, then place your finished piece on a porch, hearth, or entry table where the sculpted folds and height can really be seen.
Variations & Tips
Hand towel version: Use two hand towels instead of one bath towel if you want a pair of smaller trees with matching texture but easier handling.
Choosing the form: A tall plastic cone gives the crispest tree silhouette, but an upside-down flowerpot makes a lovely, slightly stouter version that feels substantial outdoors.
Mix consistency: If the slurry is too thin, the towel will slump and lose its folds; if it’s too thick, it won’t soak in properly. I aim for something just thick enough to cling to the trowel without pouring off.
Extra texture: Before the piece cures, exaggerate the ridges with your fingers and create more layers at the bottom edge so the final surface catches paint beautifully.
Color finish: White paint reads snowy and classic, while gold catches evening light in a softer, dressier way. You can even combine them by brushing white first and adding a very light touch of gold just on the outermost edges.
Outdoor use: These hold up best in a covered outdoor spot or indoors for the season. If you want more weather resistance, add a clear matte sealer after the paint has dried.
Stability tip: For a wider, more grounded base, spread the bottom folds a bit farther out before curing; it makes a big difference if the piece will sit on a porch that gets bumped or breezy.
My favorite styling trick: I like grouping two or three at different heights rather than displaying just one. The repeated draped shapes look intentional and almost architectural, especially near greenery or lanterns.