
In a small bedroom, I’m always looking for lighting that feels soft, useful, and a little bit special without taking up precious space. This nightlight is one of those deceptively simple ideas that looks polished once it’s finished: warm battery puck lights tucked under frosted glass cloches and grouped on a small wooden tray so the whole arrangement reads like intentional décor instead of a stray utility light.
What I love most about this project is that it asks for almost no building skill, but the result feels layered and boutique. The frosted glass diffuses the light into a gentle glow that’s easy on sleepy eyes, and the tray keeps everything contained on a nightstand, dresser, or shelf. If you want a bedroom light that’s pretty, renter-friendly, and easy to switch on at bedtime, this is a very satisfying afternoon project.
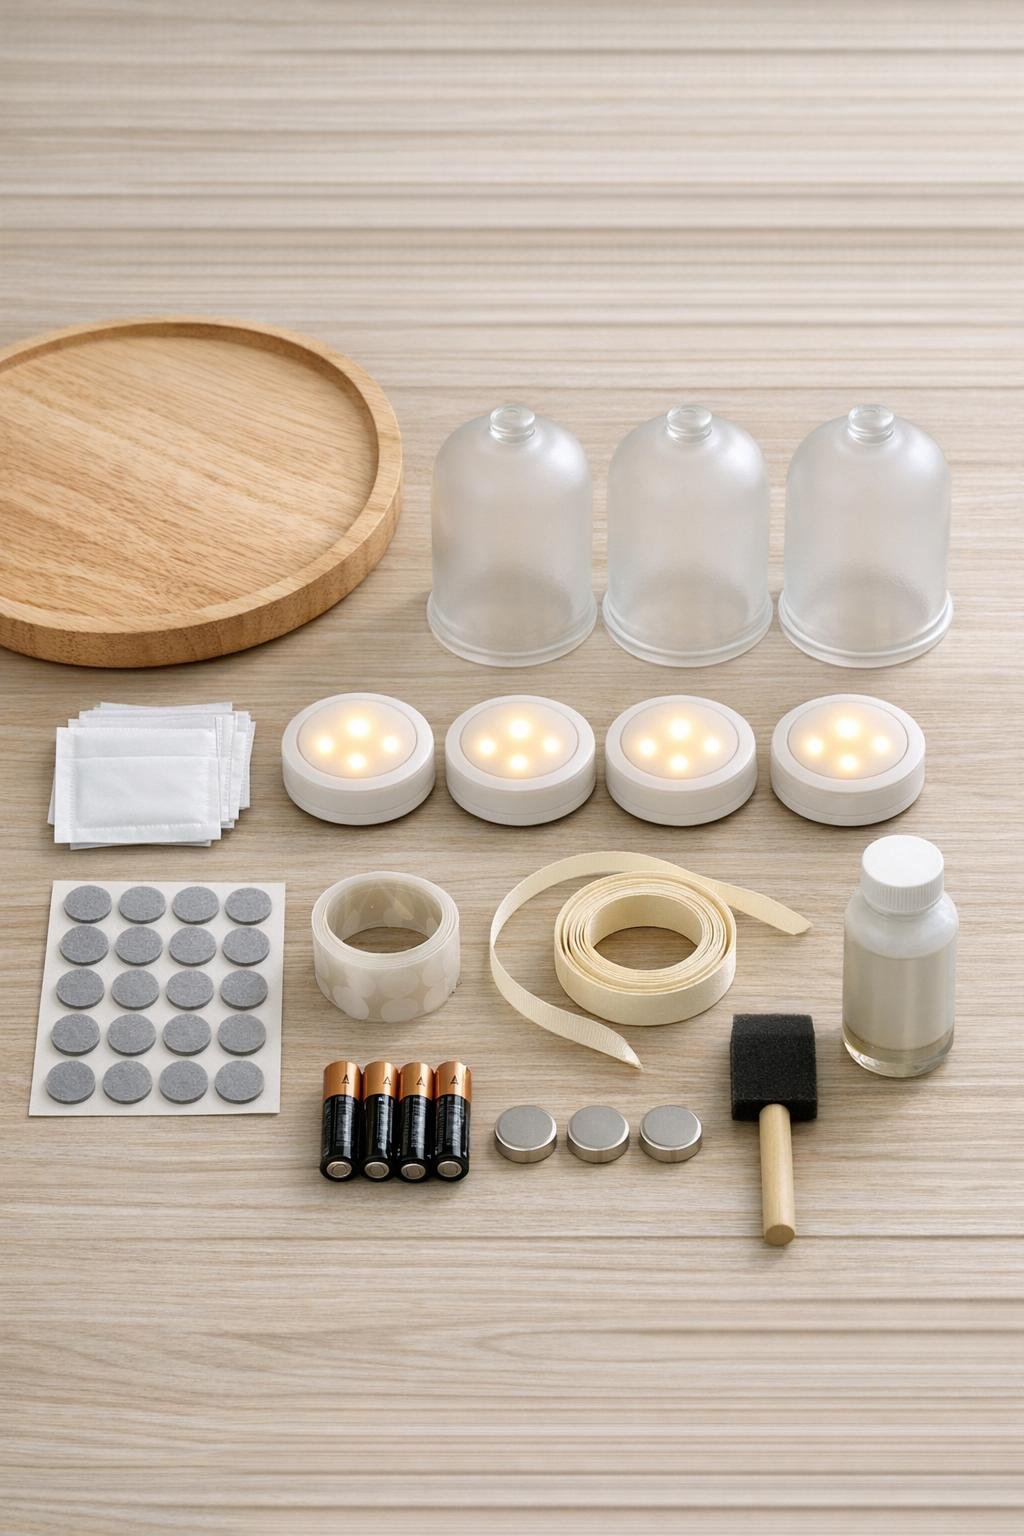
Materials
1 round wooden serving tray, 10 to 12 inches wide
Instructions
1. Wipe the wooden tray, puck lights, and the inside rim of each frosted glass cloche with alcohol, then let everything dry completely so the finished setup sits cleanly and stays put.
2. Brush a thin coat of matte clear sealer over the wooden tray and let it dry according to the bottle directions; this simple step gives the tray a more finished look and helps it handle bedside dusting.
3. Add adhesive felt pads to the underside of the tray if it does not already have them, spacing them evenly around the bottom so the tray won’t scratch a nightstand and will feel stable when lifted.
4. Insert the batteries into the puck lights, switch them on, and test all three together to make sure the color and brightness match before you arrange anything permanently.
5. Set the three puck lights on the tray in a loose triangle, leaving about 1 1/2 to 2 inches between each light and about 1 inch of open tray visible around the outside edge.
6. Place 3 to 4 small removable mounting dots under each puck light and press them onto the tray so they stay centered when the tray is moved but can still be removed later for battery changes or a new layout.
7. Lower one frosted glass cloche over each puck light, checking that each cloche fully covers the light and sits flat on the tray without rocking.
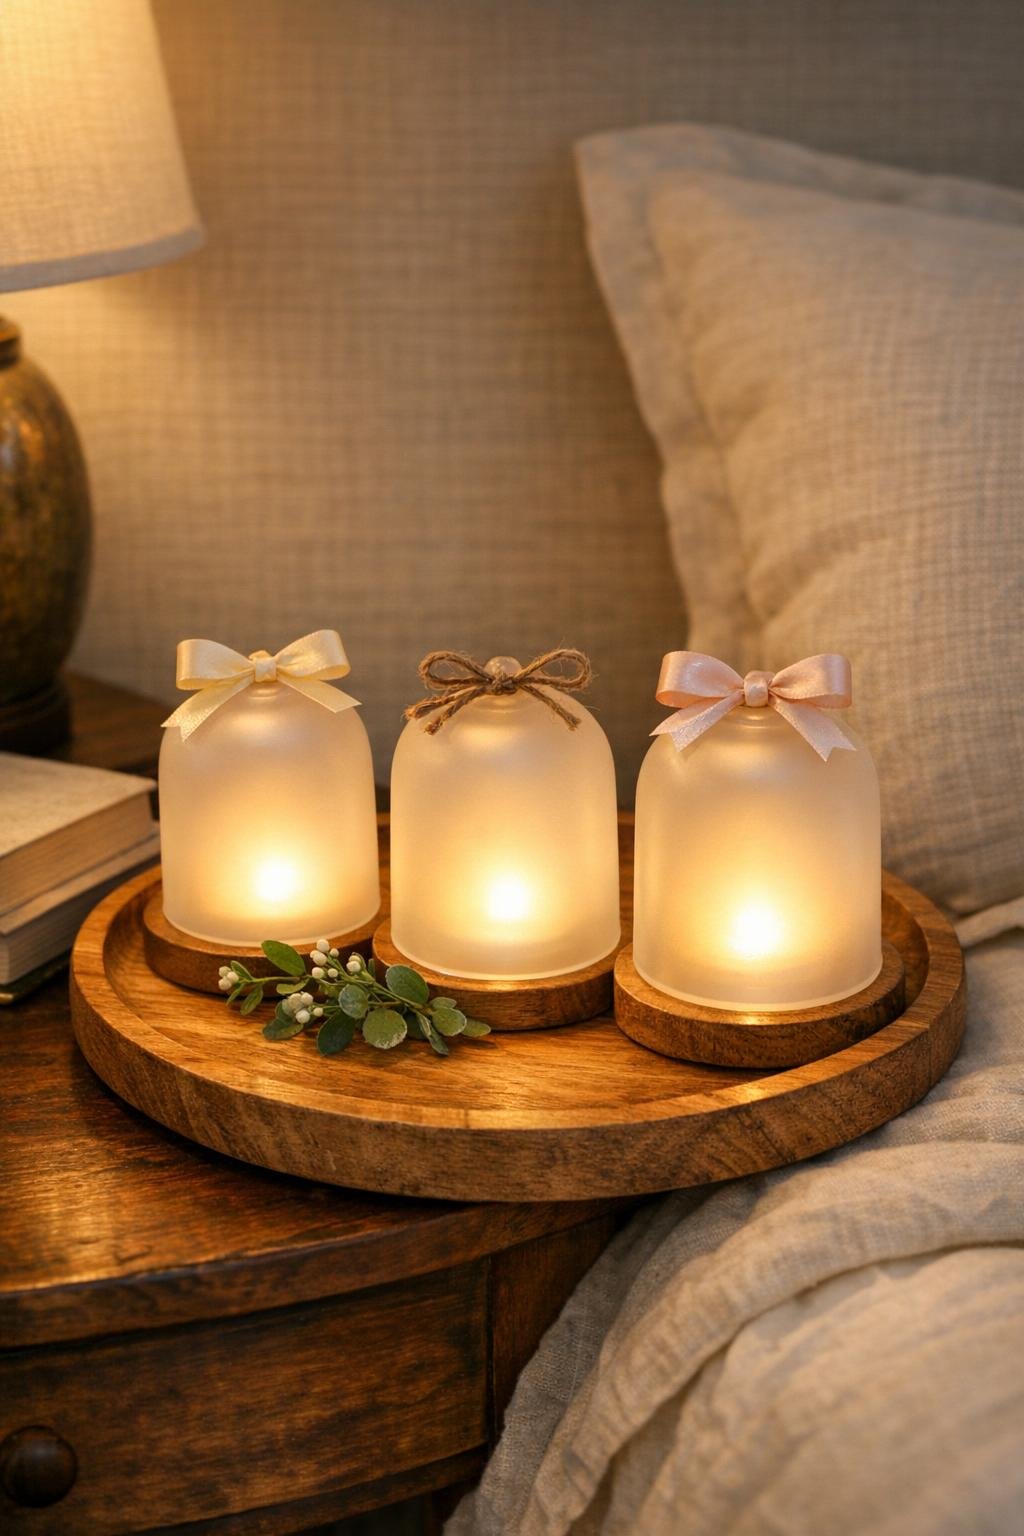
8. Turn the lights off and tie a short ribbon bow around the knob or top of each cloche, keeping the bows small and neat so they add softness without making the piece feel fussy.
9. Tuck your optional accents around the bases of the cloches in small amounts, filling the tray lightly between the domes so the display looks styled and full while keeping the wood tray and glass shapes visible.
10. Turn the puck lights back on in low or warm mode, then shift the cloches by tiny increments until the glow looks evenly spaced and the whole tray reads like one balanced bedside lamp arrangement.
Variations & Tips
For a larger glow: Use five smaller cloches on a 14-inch tray instead of three standard ones. I like odd numbers for arrangements, and five creates a lush, boutique-hotel look without changing the basic method.
For easier bedtime use: Choose puck lights with a remote or tap-on top. In a small bedroom, that little convenience makes a bigger difference than you’d think.
If your tray is very smooth: Swap removable dots for thin museum gel or clear gripper pads under the puck lights. You want enough hold to prevent sliding, but not so much that battery access becomes annoying.
Color temperature matters: Stick with warm white rather than cool white. Frosted glass can make cool LEDs look stark, while warm light gives the soft, candlelike effect that makes this idea so appealing.
To match your décor: Use black ribbon for a moodier modern room, velvet ribbon for a softer traditional look, or no ribbon at all if your space is very minimal. The tray-and-cloche shape still does all the heavy lifting.
For safer styling: Keep dried florals, fabric, and paper accents outside the cloches rather than inside them. The light looks cleaner that way, and you won’t block the glow from the frosted glass.
My favorite finishing move: I often add just a whisper of greenery or a few wood beads on the tray because it makes the arrangement feel intentional, the same way a final sprinkle of herbs wakes up a finished dish. The trick is restraint: enough detail to look polished, not so much that it crowds the light.