
There are a few craft supplies that still give me that little spark of childlike wonder, and plain cheesecloth is one of them. It starts out so humble and floppy, the kind of thing you can toss in a basket at the dollar store without thinking twice, and with a little glue water and patience it turns into something sturdy, textured, and awfully pretty. This is the sort of project I love when I want a big visual payoff without hauling out power tools or spending a fortune.
If you enjoy easy seasonal decorating, porch styling, or making something that looks far fancier than the ingredients suggest, this one is for you. It’s simple enough for an afternoon of crafting, but the finished piece has that soft, glowing charm that makes a front step or entry corner feel special the minute the lights come on.
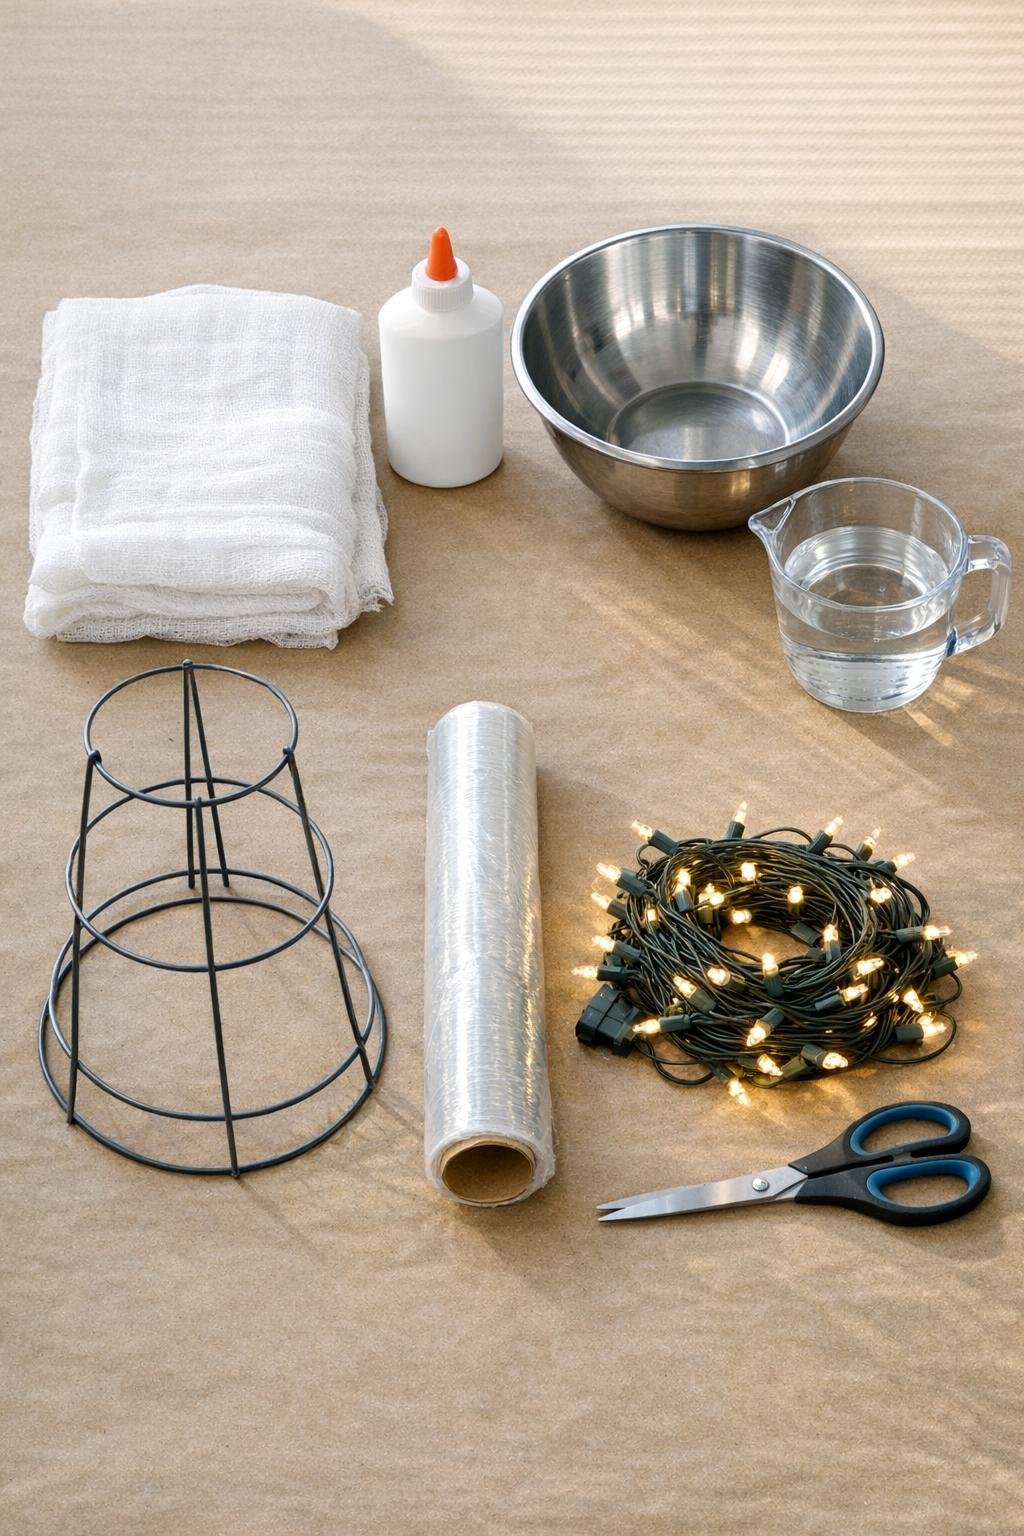
Materials
Instructions
1. Cover your table and set the tomato cage upside down on a tray or piece of cardboard so the wide ring becomes the base and the pointed end becomes the top. Gather the top wires together and secure them tightly with twine or a twist tie to make a clean tree shape.
2. Wrap the entire tomato cage in plastic wrap, covering the wires from top to bottom. This little step makes the dried cheesecloth release easily later, and I never skip it anymore after learning the hard way with sticky crafts years ago.
3. In the mixing bowl, stir together the school glue and water until you have a smooth, milky mixture. It should feel slippery and thin enough to soak into the cloth, not pasty.
4. Submerge the full 3 yards of cheesecloth in the glue water and press it down until every section is saturated. Let it sit for 1 to 2 minutes so the fibers drink up the mixture all the way through.
5. Lift out one long section at a time and gently squeeze off the excess so it’s wet but not pouring. Drape the first length over the wrapped tomato cage from top to base, letting the gauzy holes and wrinkles stay visible for that soft, lacy look.
6. Continue adding the remaining cheesecloth, rotating the form as you go so the cage is covered on all sides. Layer some pieces straight down and others at slight angles to build full coverage with pretty ridges and folds instead of a flat shell.
7. Pat and arrange the cloth with your fingers until the tree has an even cone shape with a few open areas for light to shine through. If any section looks thin, pull a loose flap across it or add another folded layer from the bowl.
8. Let the covered form dry completely for 12 to 24 hours, or until it feels firm and no longer cool or tacky. Around here, I usually leave it overnight on the mudroom table and resist the urge to fuss with it.
9. Once dry, gently loosen the hardened cheesecloth shell from the plastic-wrapped tomato cage and lift it off in one piece. Peel away any bits of plastic wrap caught inside and trim the bottom edge with scissors so it sits nice and level.
10. Place the string lights inside the hollow tree, starting at the top and tucking the strand down through the center so the bulbs spread evenly. Keep the battery pack or plug end accessible at the back near the base.
11. Adjust the folds one last time so the lights glow through the openings and the shape looks balanced from every side. Set it on the porch, by the front door, or in a sheltered entry corner where the texture and light can really show off after dusk.

Variations & Tips
Add sparkle: If you want a frostier look, dust the damp cheesecloth lightly with clear or iridescent craft glitter before it dries. Keep it light so the texture still shows.
Use different lights: Warm white lights give the softest, most magical glow, but cool white can make it feel icy and wintry. I’d avoid multicolor unless you want a more playful holiday look.
Make a set: This project looks especially lovely in a group of two or three trees made on different sizes of tomato cages. Clustered together by the door, they look much more dramatic than a single one on its own.
For outdoor use: Display it on a covered porch or protected entry so rain and heavy moisture don’t soften the glue. If your porch gets damp, use battery lights and bring the tree inside during bad weather.
Neaten the base: After trimming, you can glue on a narrow band of extra cheesecloth around the bottom edge if you want it fuller and more finished. That little touch helps hide any uneven cuts.
Storage tip: Store the tree in a large paper bag or cardboard box so the shape doesn’t get crushed. I like to remove the lights first, then tuck them back in next season to keep everything tidy.