
I’ve seen a lot of sad yards in my time, but the hardest ones are the old barren patches that are somehow dusty in one corner, muddy in another, and too depressing to use anywhere. The good news is you do not need a landscape designer or a five-figure budget to turn that kind of space into something useful, pretty, and much easier to live with.
These are the 20 smartest yard makeovers I’d do for a tired, bare backyard on a real-life budget. I’m going in order from simple visual fixes to bigger upgrades, and every one includes the basic materials, a rough cost, the key steps, and one practical tip I’d give a friend before they start.
1. Dry creek bed for drainage
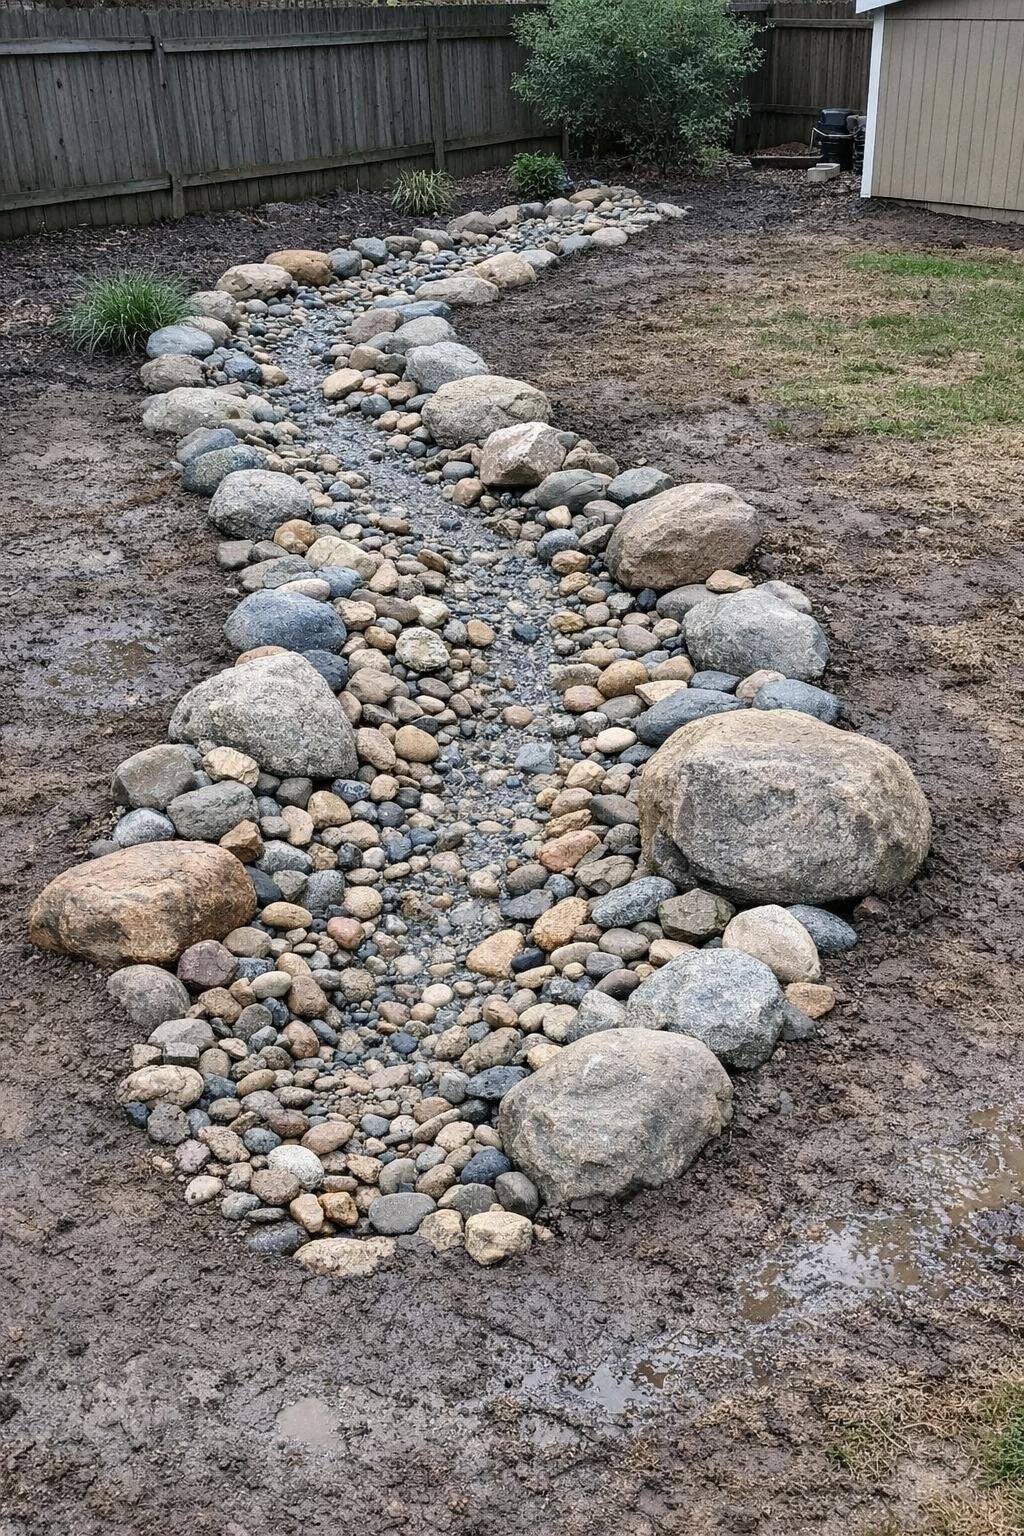
If your yard stays soggy after every storm, a dry creek bed can solve the problem and look like a deliberate landscape feature instead of a fix. Materials are landscape fabric, drainage gravel, larger river rock, and a few accent boulders. For a 15-foot run, expect roughly $200 to $500 depending on stone size and whether you haul it yourself.
The main steps are to shape a shallow winding trench 6 to 8 inches deep, slope it gently toward a safe drainage point, and line it with fabric. Fill the bottom with gravel, top with river rock, and place bigger stones at the bends so it looks natural. My tip is to vary the rock size; a creek bed made from one uniform stone often reads more like driveway spill than a landscape feature.
2. Fire it up
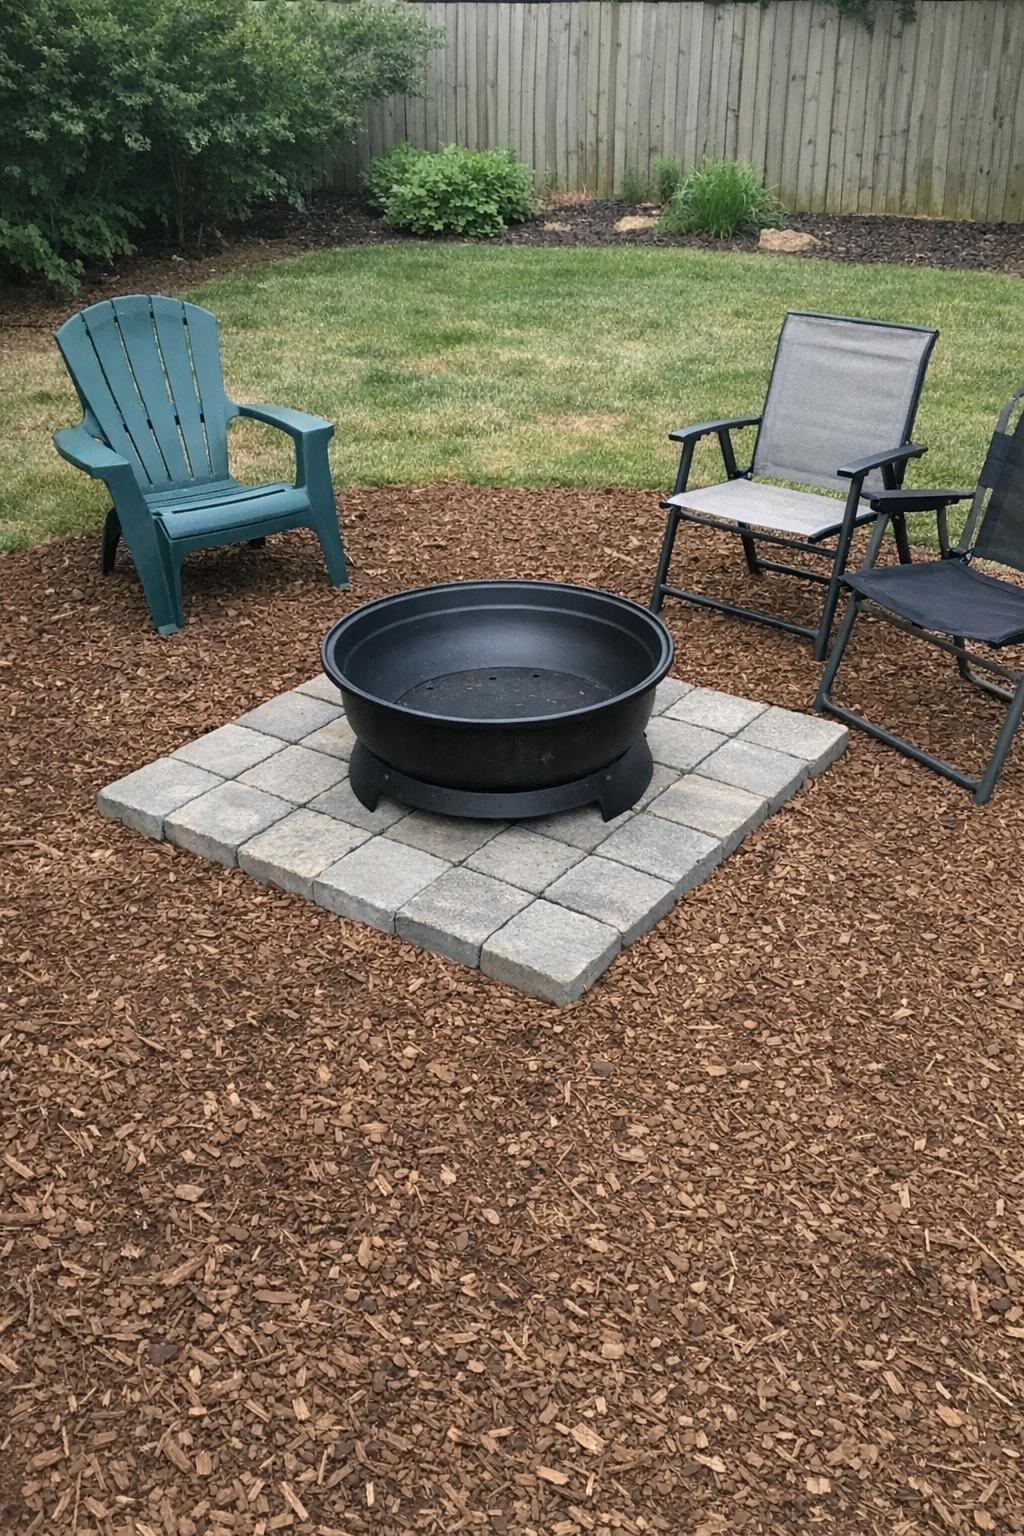
If grass will not grow in one stubborn patch, I stop fighting it and turn it into a fire pit zone. A basic steel fire pit bowl can be found for about $50, and if you add 6 to 8 bags of mulch plus a few inexpensive chairs, the whole setup can come in around $100 to $250. This works especially well in a 10-by-10-foot area where the lawn has already given up.
First, clear the circle and level it as best you can. Spread mulch 3 inches deep over bare soil, then place the fire pit on pavers or a compacted nonflammable base in the center so it isn’t sitting directly in loose bark. Add chairs at least 3 feet back from the rim. My tip is to use dark brown mulch rather than bright red; it hides ash and looks calmer around a fire feature.
3. Light it up
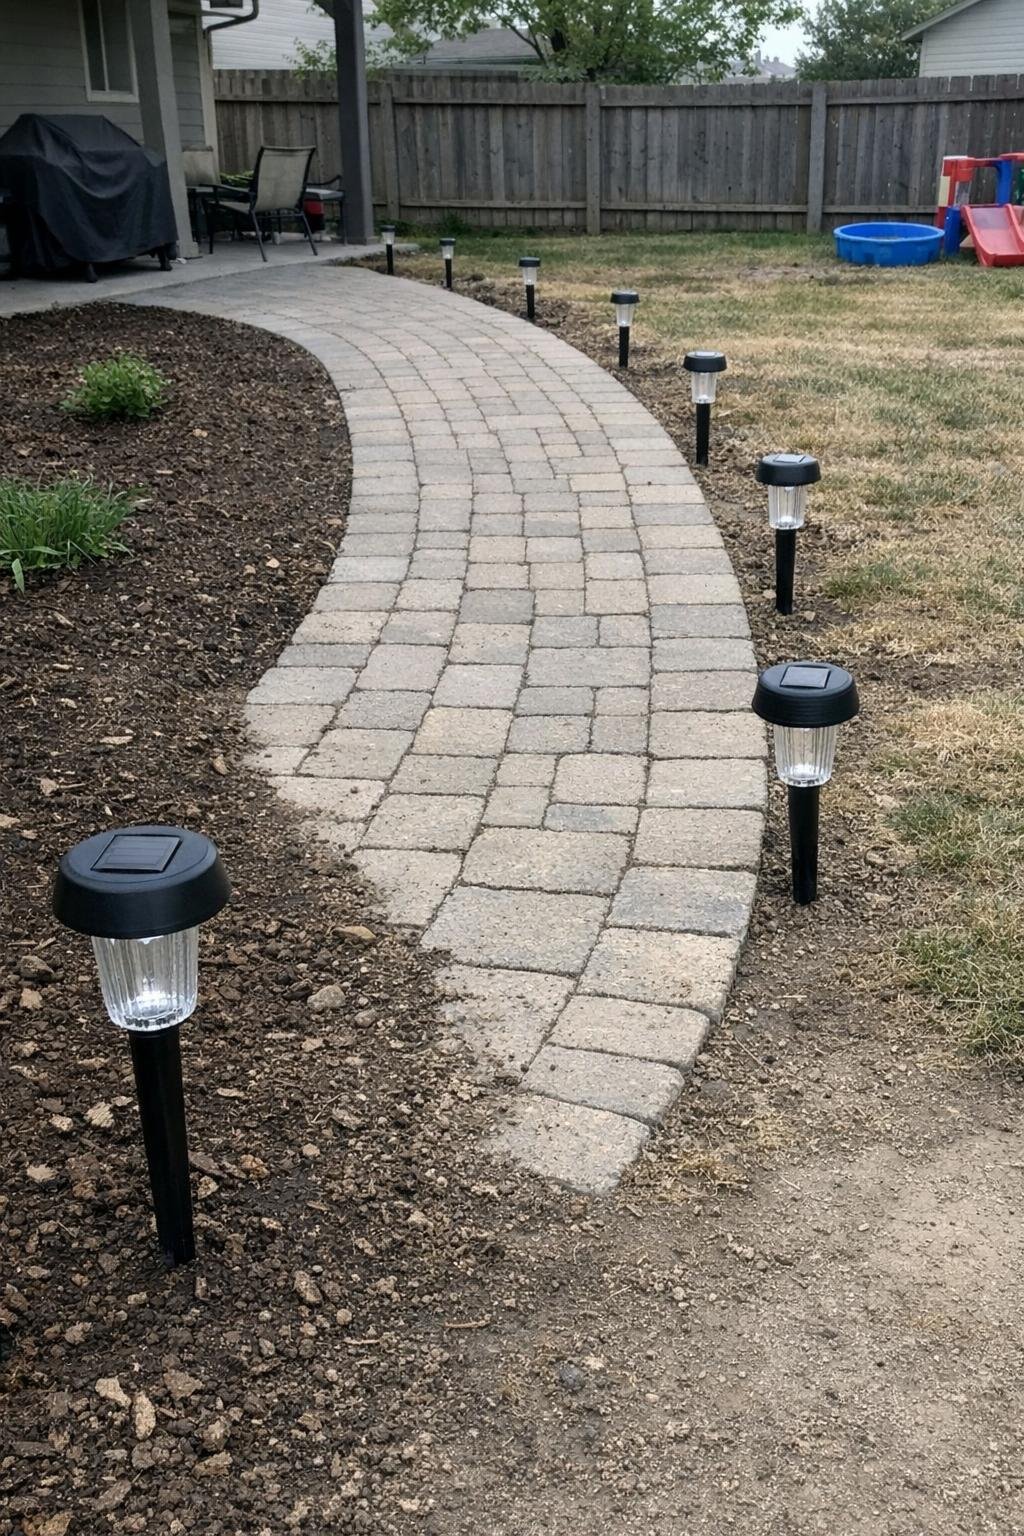
Solar lights are one of the cheapest ways to make a barren yard feel finished fast. A pack of 8 to 12 path lights usually costs $25 to $60, and I’ve had the best luck placing them along a walkway, around a seating area, or beside a feature bed where they can catch full sun during the day.
The basic steps are to map the line first, spacing lights about 4 to 6 feet apart so they glow evenly instead of clustering. Push them into firm soil, not loose mulch, and keep them all at a consistent distance from the path edge. My tip is to buy all one style and one finish; matching lights instantly make even a rough yard look more considered.
4. Add decorative edging
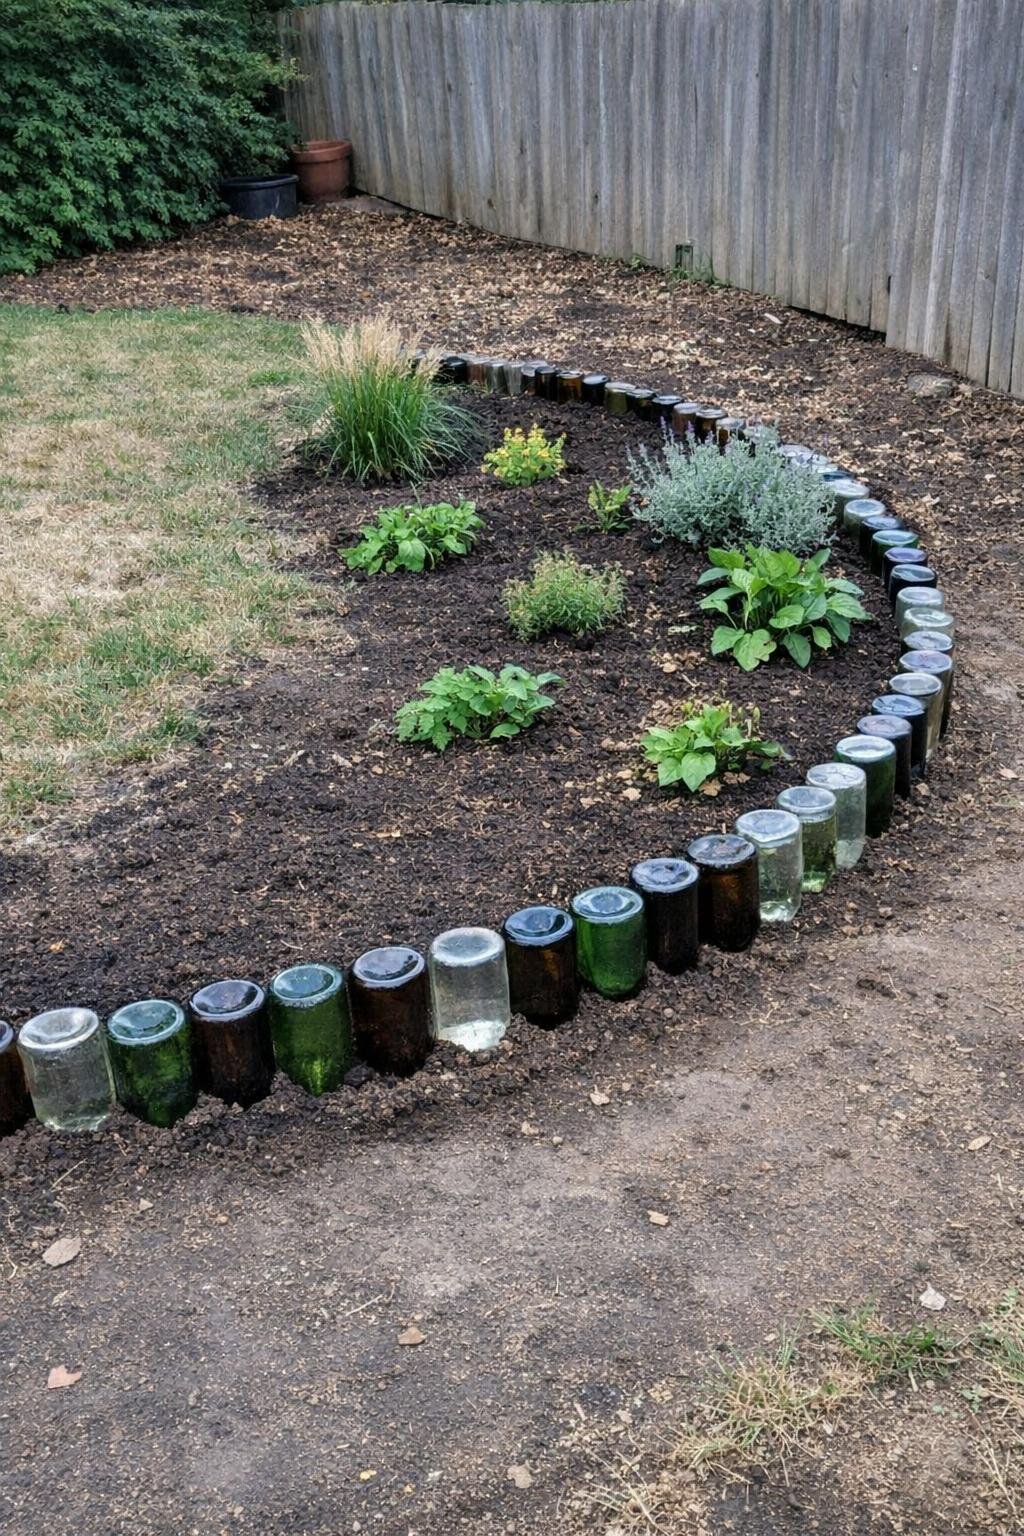
When a yard feels shapeless, edging gives it definition for very little money. You can use cinder blocks, short logs, river rock, or even inverted wine bottles if you have enough of them. Depending on the material and the length, edging a 15- to 20-foot bed can cost anywhere from $30 to $150.
I usually start by outlining the bed with a hose so I can adjust the curve before committing. Then I cut a shallow trench, set the edging material so the top line stays consistent, and backfill tightly on both sides. My tip is to choose one material and repeat it; mixing logs, rock, and blocks in one small yard can make it feel busy instead of polished.
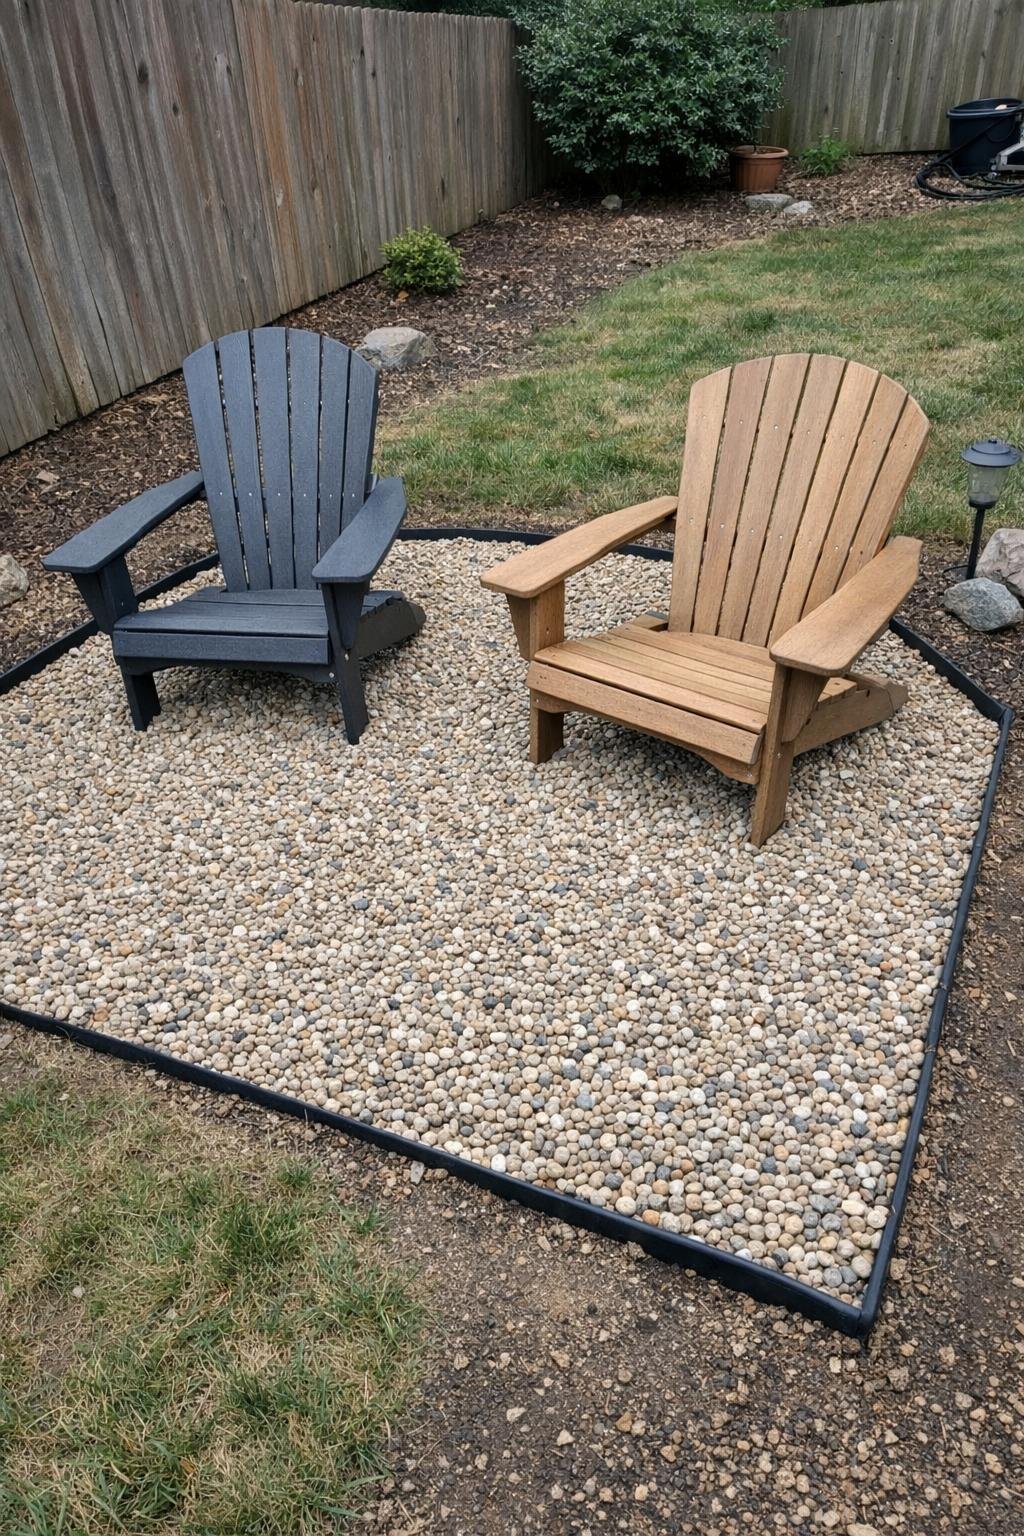
5. Pea-gravel seating area with two Adirondack chairs
This is my go-to answer for a muddy patch where patio furniture always sinks. You need landscape fabric, edging, about 1 cubic yard of pea gravel for a 10-by-10-foot space, and two Adirondack chairs. If you already own the chairs, the project can cost about $150 to $300; with new chairs, closer to $350 to $600.
Mark the area, dig down 3 to 4 inches, and lay weed barrier over the whole footprint. Add edging, pour in the pea gravel, rake it level, and set the chairs on the flattest side. If you want a little table in the middle, use a single large paver under it so it doesn’t wobble. My tip is to compact the soil before the fabric goes down, or the gravel will settle unevenly after the first rain.
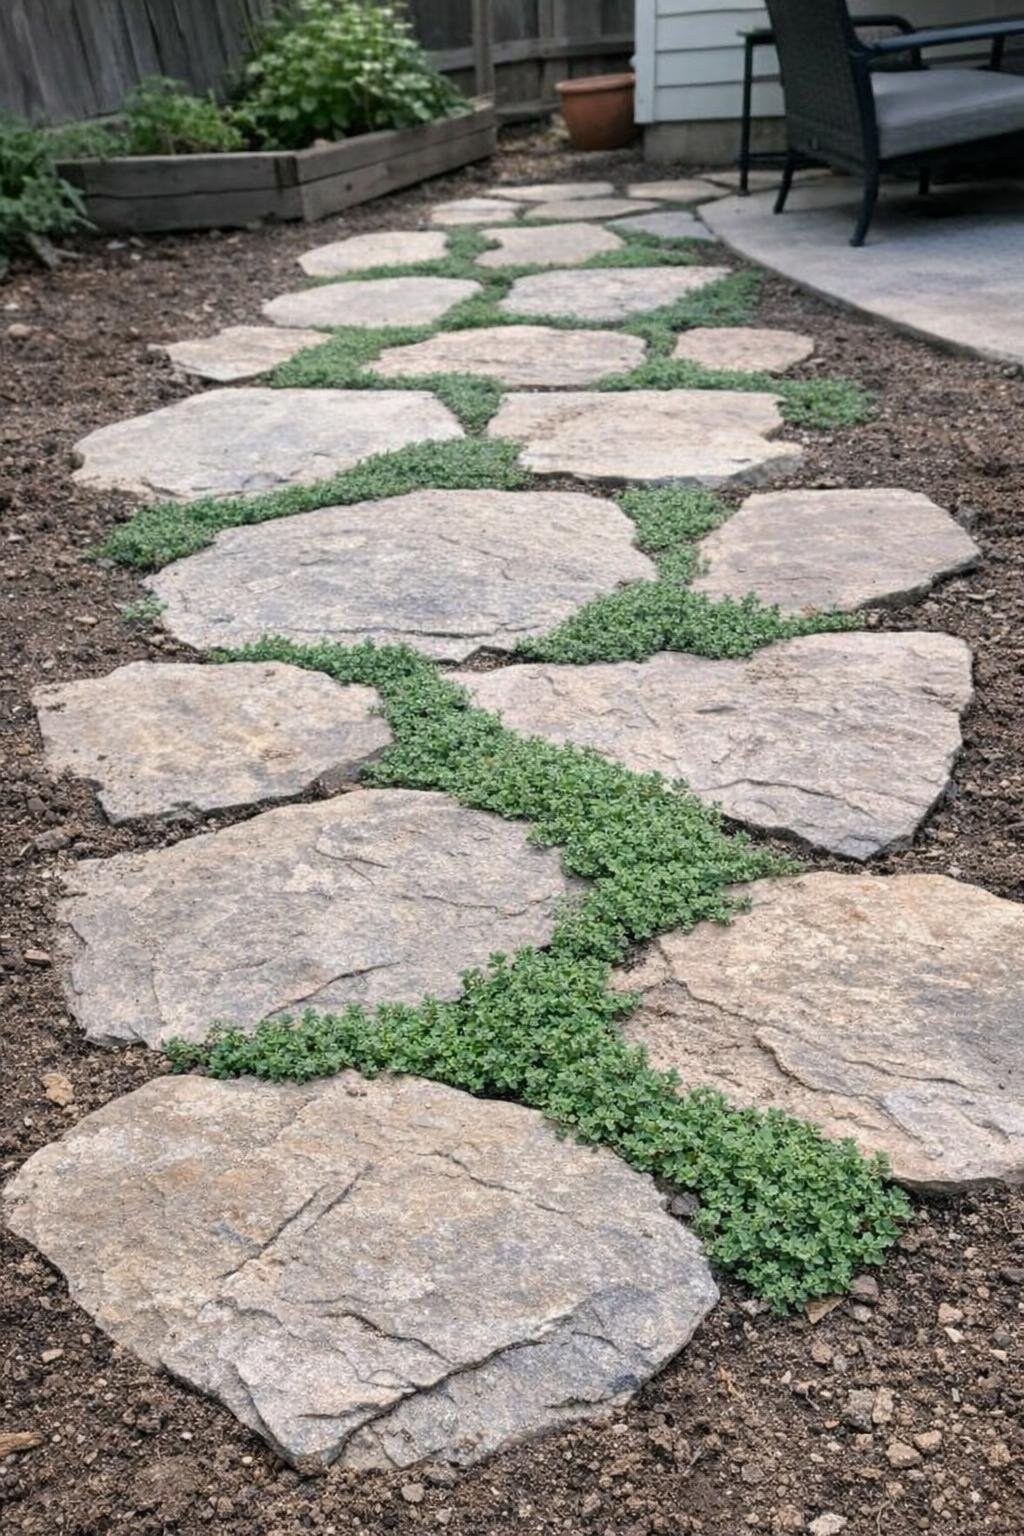
6. Flagstone stepping-stone path with creeping thyme
A muddy shortcut across the yard is begging to become a path, and flagstone makes it look intentional right away. For a path with 8 to 12 large stones, a few bags of leveling sand, and a flat or two of creeping thyme, I’d budget about $180 to $400 depending on the stone size in your area.
Set the stones into the mud line first by removing just enough soil so each piece sits nearly flush with the ground. Tamp sand underneath for stability, leaving 2 to 4 inches between stones, then tuck creeping thyme into the gaps once everything is level. My tip is to walk the path before setting it permanently; spacing should match a natural stride, usually around 20 to 24 inches center to center.
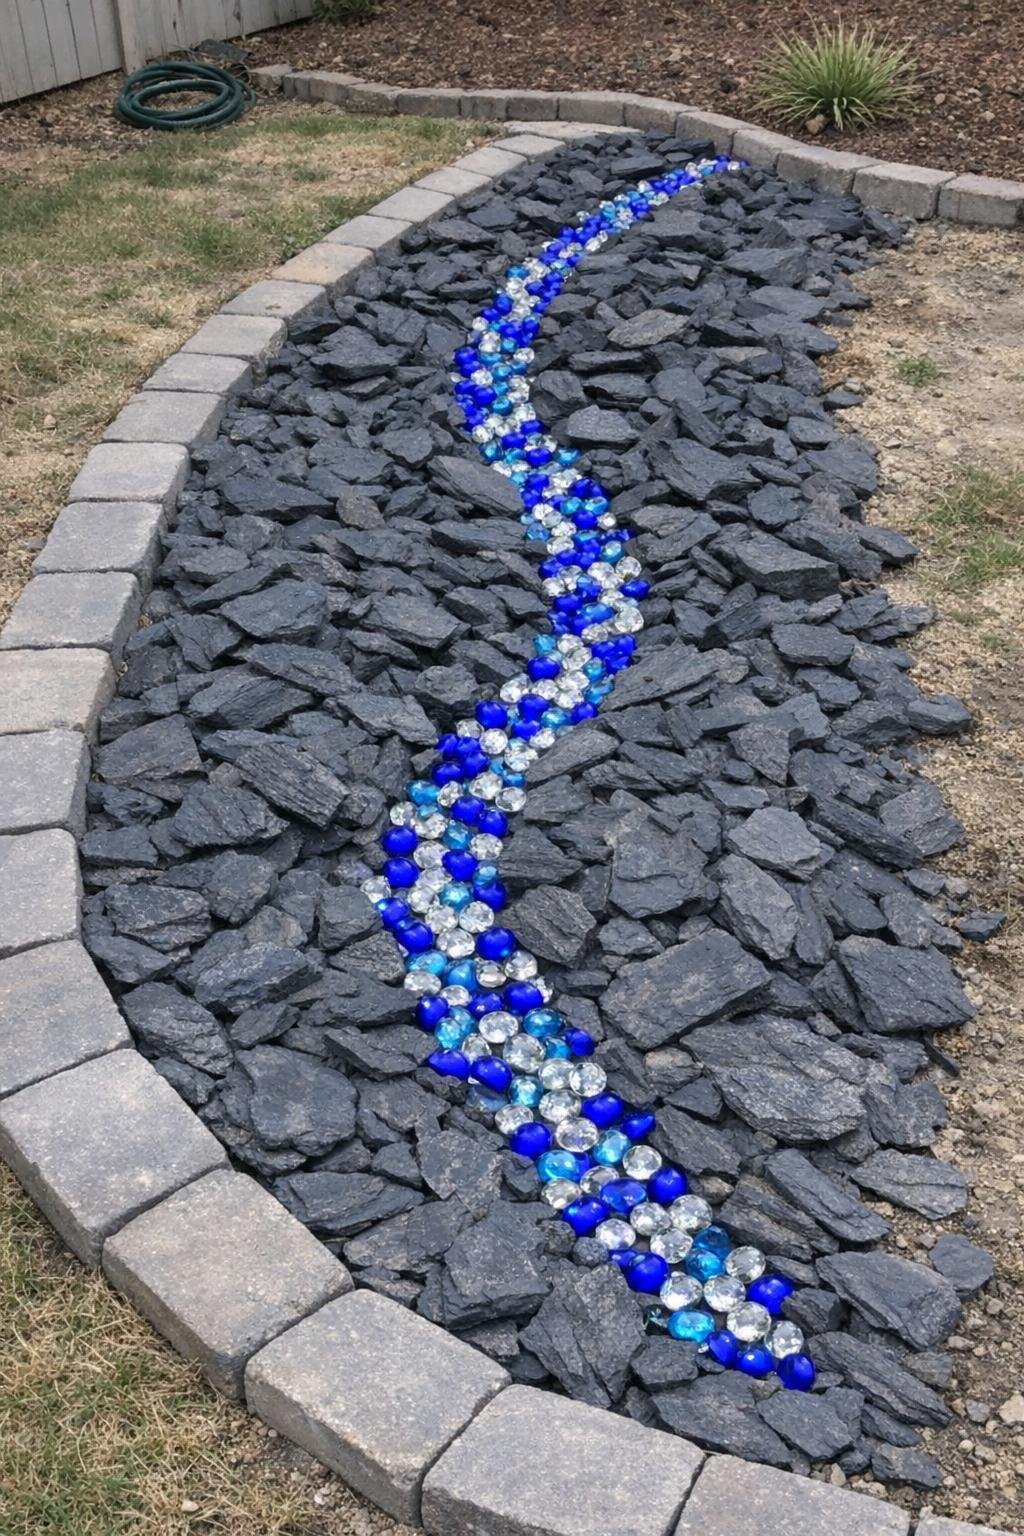
7. Thea's glass river over black shale
This is one of my favorite ways to dress up a dead strip of yard because it gives you a focal point without asking you to grow anything. You need landscape fabric, 8 to 12 bags of black shale or black gravel, a paver or brick border, and 6 to 10 bags of clear or blue glass gems from the dollar store. For a 12-foot meandering run about 18 inches wide, I’d expect to spend roughly $90 to $160 depending on the stone you choose.
The key steps are simple: scrape the area flat, lay down landscape fabric, and pin it well. Set your paver border first so the shape reads clearly, then spread the black shale 2 to 3 inches deep and pour a thin winding line of glass gems through the middle like a little river. My tip is to keep the glass line narrow—about 3 to 5 inches wide—or it starts looking scattered instead of intentional.
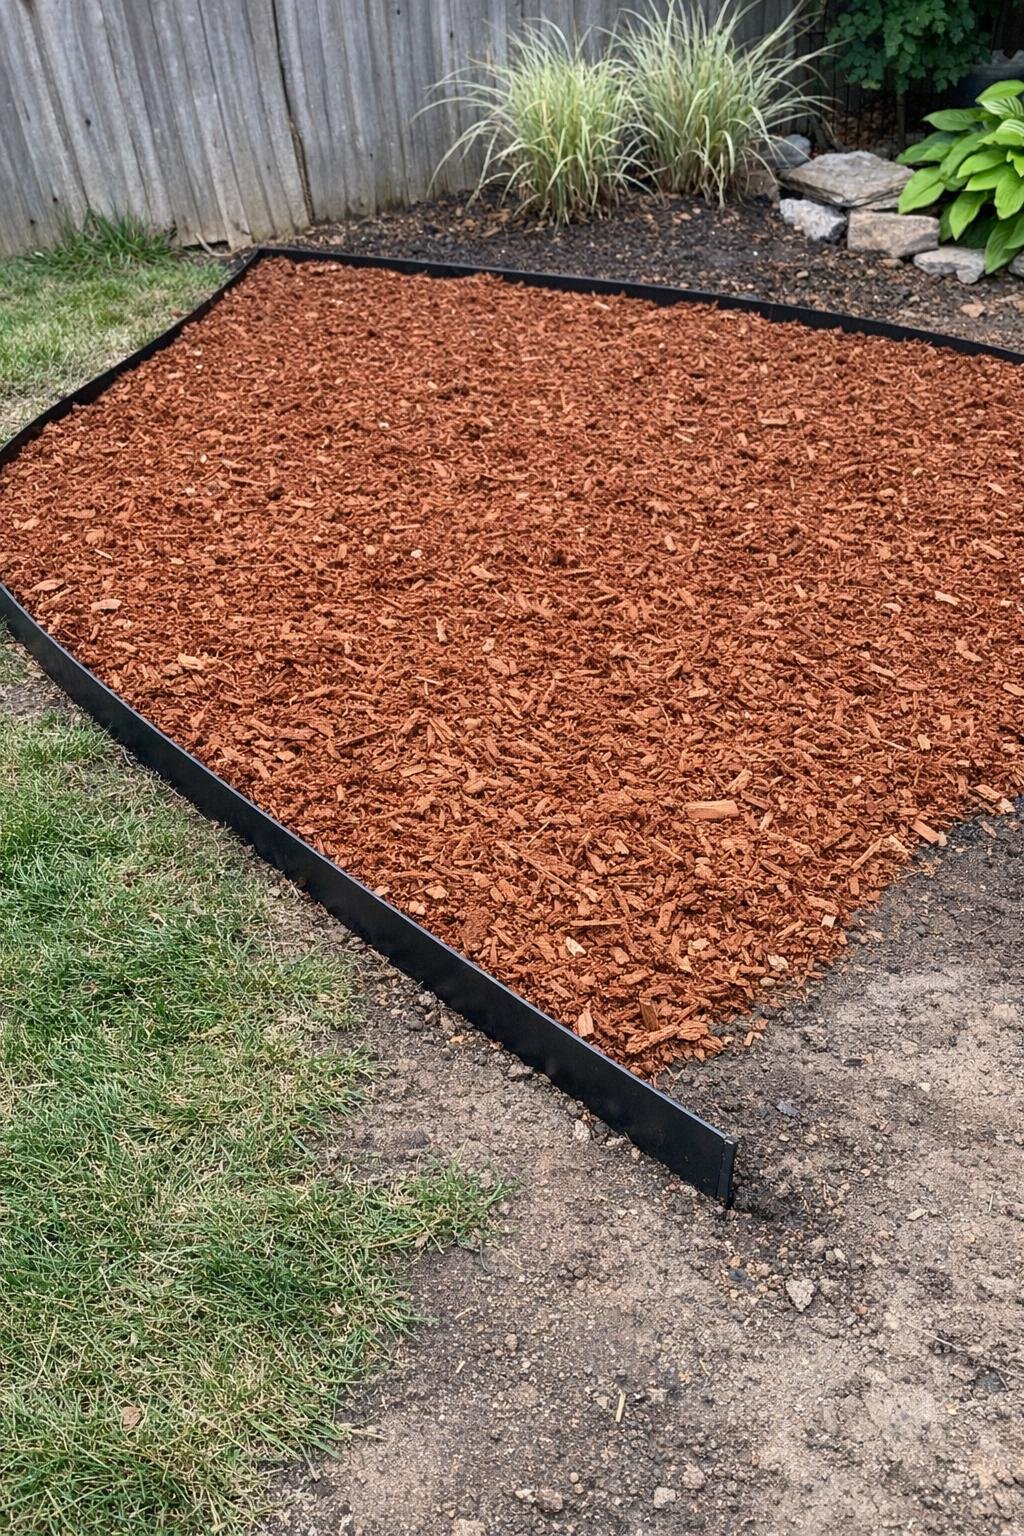
8. Cedar mulch beds with a steel edge
Sometimes the quickest makeover is to stop pretending the whole patch should be lawn and create clean mulch beds instead. With steel edging, cedar mulch, and a few small shrubs or perennials later on, a rough 200-square-foot patch can be transformed for about $150 to $350. The crisp border is what makes this look much more expensive than it is.
Outline the whole area first, then install the steel edge so the curves are smooth and secure. Weed or scalp the interior, lay cardboard or fabric if needed, and spread cedar mulch 3 inches deep across the entire bed. My tip is to water the mulch lightly after spreading it; that settles the fluff and gives you a truer sense of the finished color.
9. Raised-bed vegetable garden from 2x10s
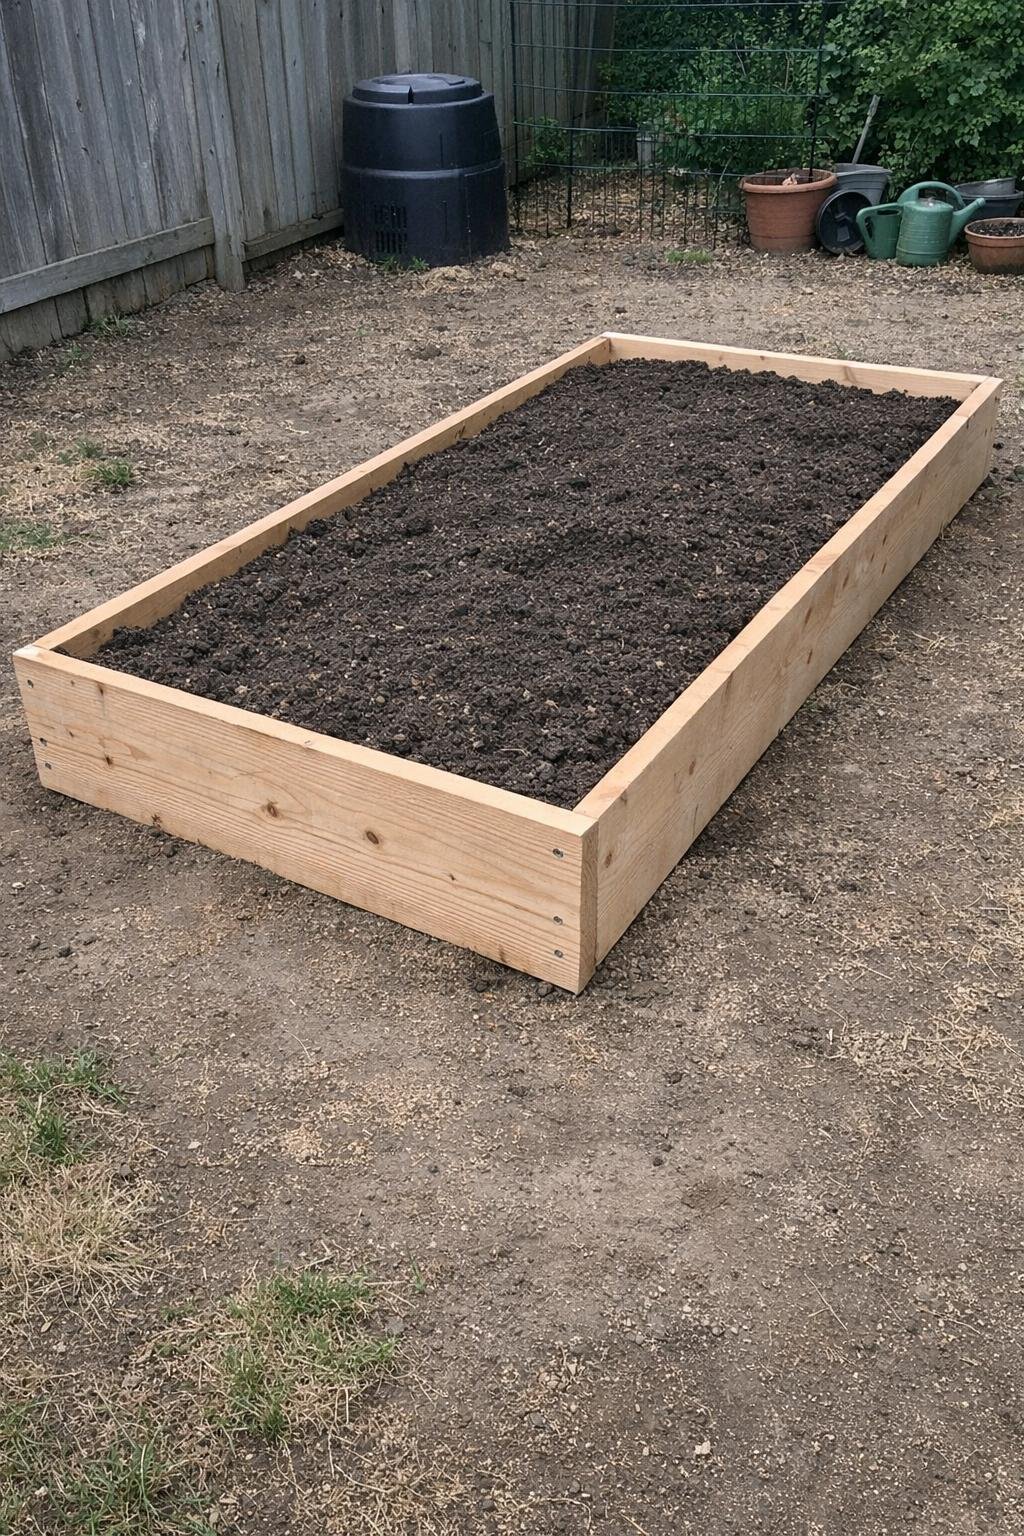
That one spot where grass never grew can become the most productive part of the yard. A simple raised bed made from 2x10 lumber, screws, and soil mix is one of the most rewarding weekend projects I know. A 4-by-8-foot bed usually costs around $140 to $300 depending on lumber prices and whether you need to buy compost and soil in bags.
Cut the boards, screw together a rectangle, and place it right on the stubborn patch after leveling the area. Add cardboard under the bed if weeds are a concern, then fill with a mix of topsoil, compost, and aged manure or raised-bed mix. My tip is not to make the bed wider than 4 feet; you want to reach the center from both sides without stepping in it.
10. Clover lawn instead of grass
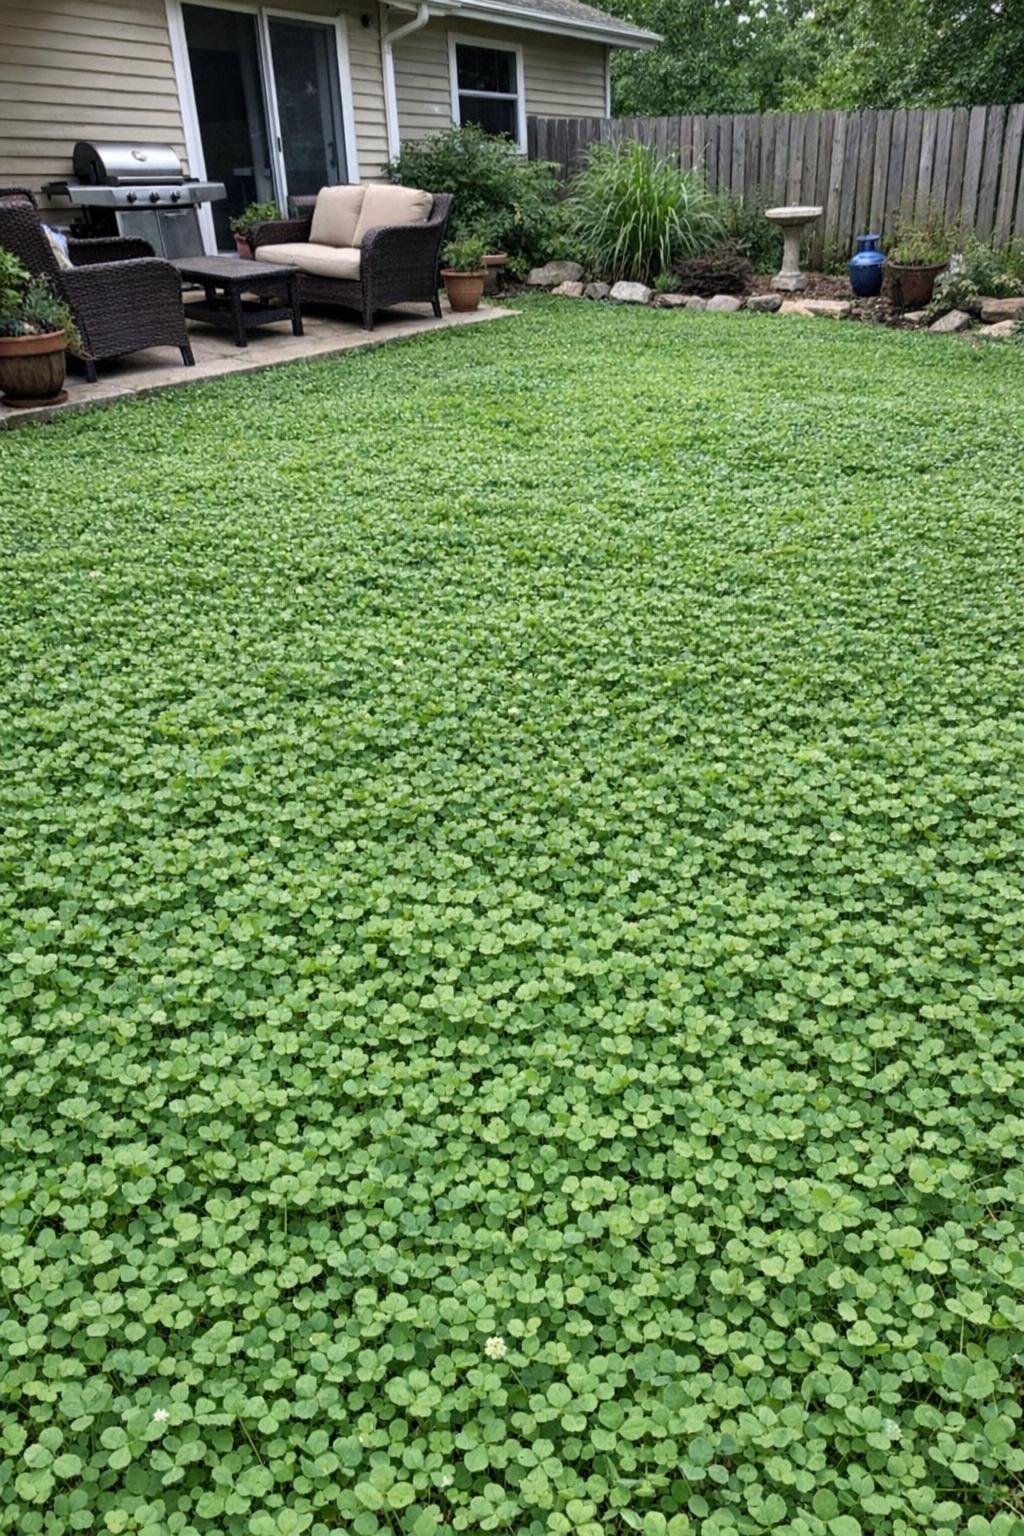
If you are tired of nursing a thin lawn, clover is one of the smartest swaps I know. Microclover or white clover seed is inexpensive, usually $20 to $50 for a small yard section, and it handles poor soil better than standard grass while staying softer and greener with far less fuss. You can seed a 500-square-foot area in a weekend.
Rake the bare area hard to loosen the top half-inch of soil, scatter the seed evenly, and press it in with the back of a rake or a light roller. Keep it damp for the first 10 to 14 days, and avoid heavy foot traffic while it sprouts. My tip is to mix the tiny seed with dry sand before spreading; it helps you see coverage and prevents thick clumps.
11. Pallet-wood boardwalk over the wettest strip
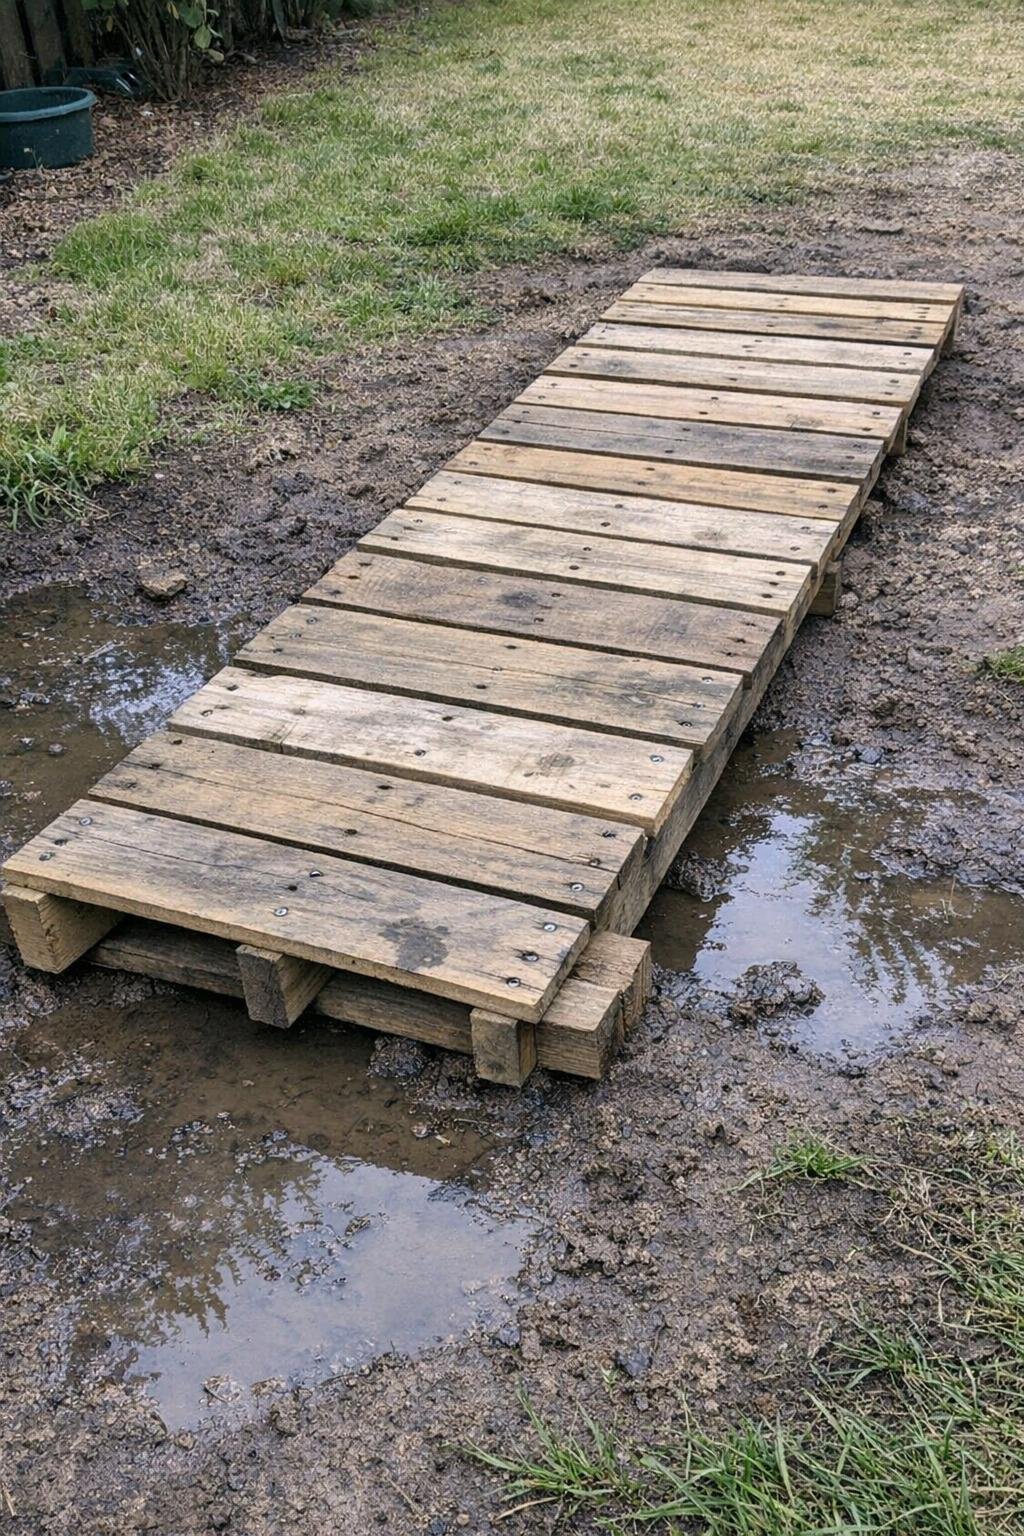
For a yard with one chronically wet strip, a pallet-wood boardwalk is surprisingly effective and far cheaper than a full patio. You’ll need 2 to 4 sturdy pallets, exterior screws, weed barrier, and a little gravel or paver base under support points. If you source free pallets safely, this can cost just $40 to $120.
Break down the pallets or use the best sections whole, then build a walkway about 2 to 3 feet wide over the soggy area. Set the wood on level support blocks or compacted gravel pads so it stays above the mud, and screw everything tightly together. My tip is to sand rough edges and seal the wood, because pallet lumber splinters faster than most people expect.
12. Cinder-block planter border with succulents
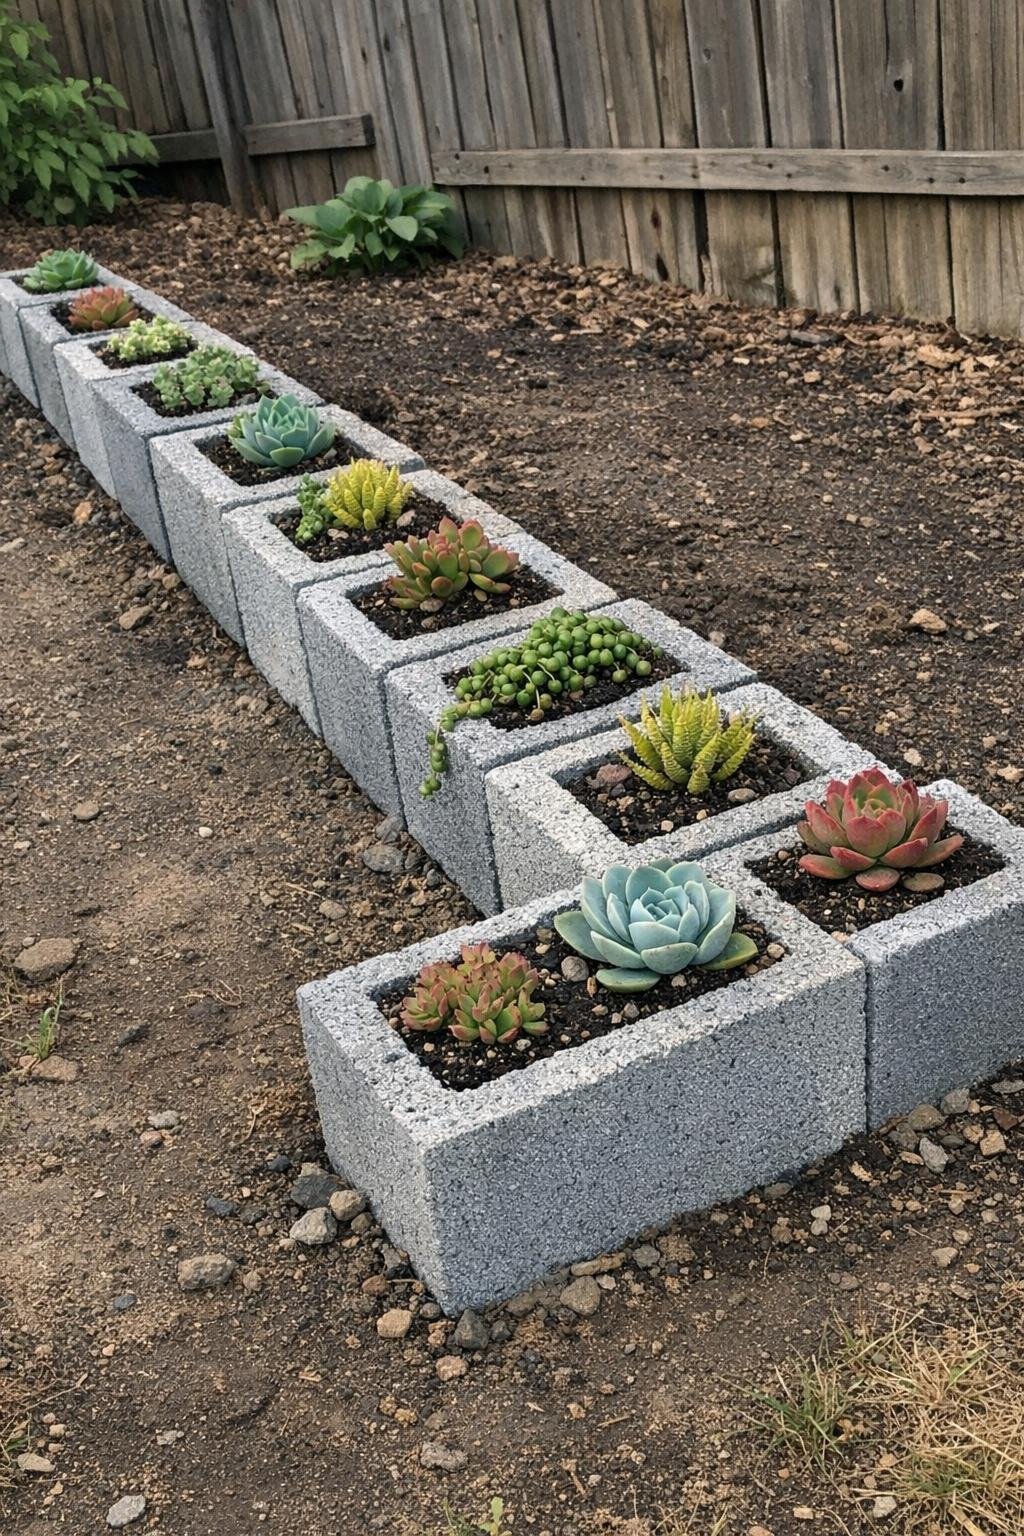
Cinder blocks are not glamorous on their own, but arranged well, they make a brilliant budget border with built-in planting pockets. For a 12- to 16-foot run, you may need 15 to 25 blocks plus potting mix and small succulents, bringing the project to about $60 to $180 total.
Level the ground carefully, then set the blocks in a straight or gently curved line with the holes facing up. Fill the holes with soil, add succulents or trailing sedums, and mulch the inside of the bed behind them. My tip is to stick to one or two succulent varieties repeated throughout; too many mixed shapes in the holes can look fussy fast.
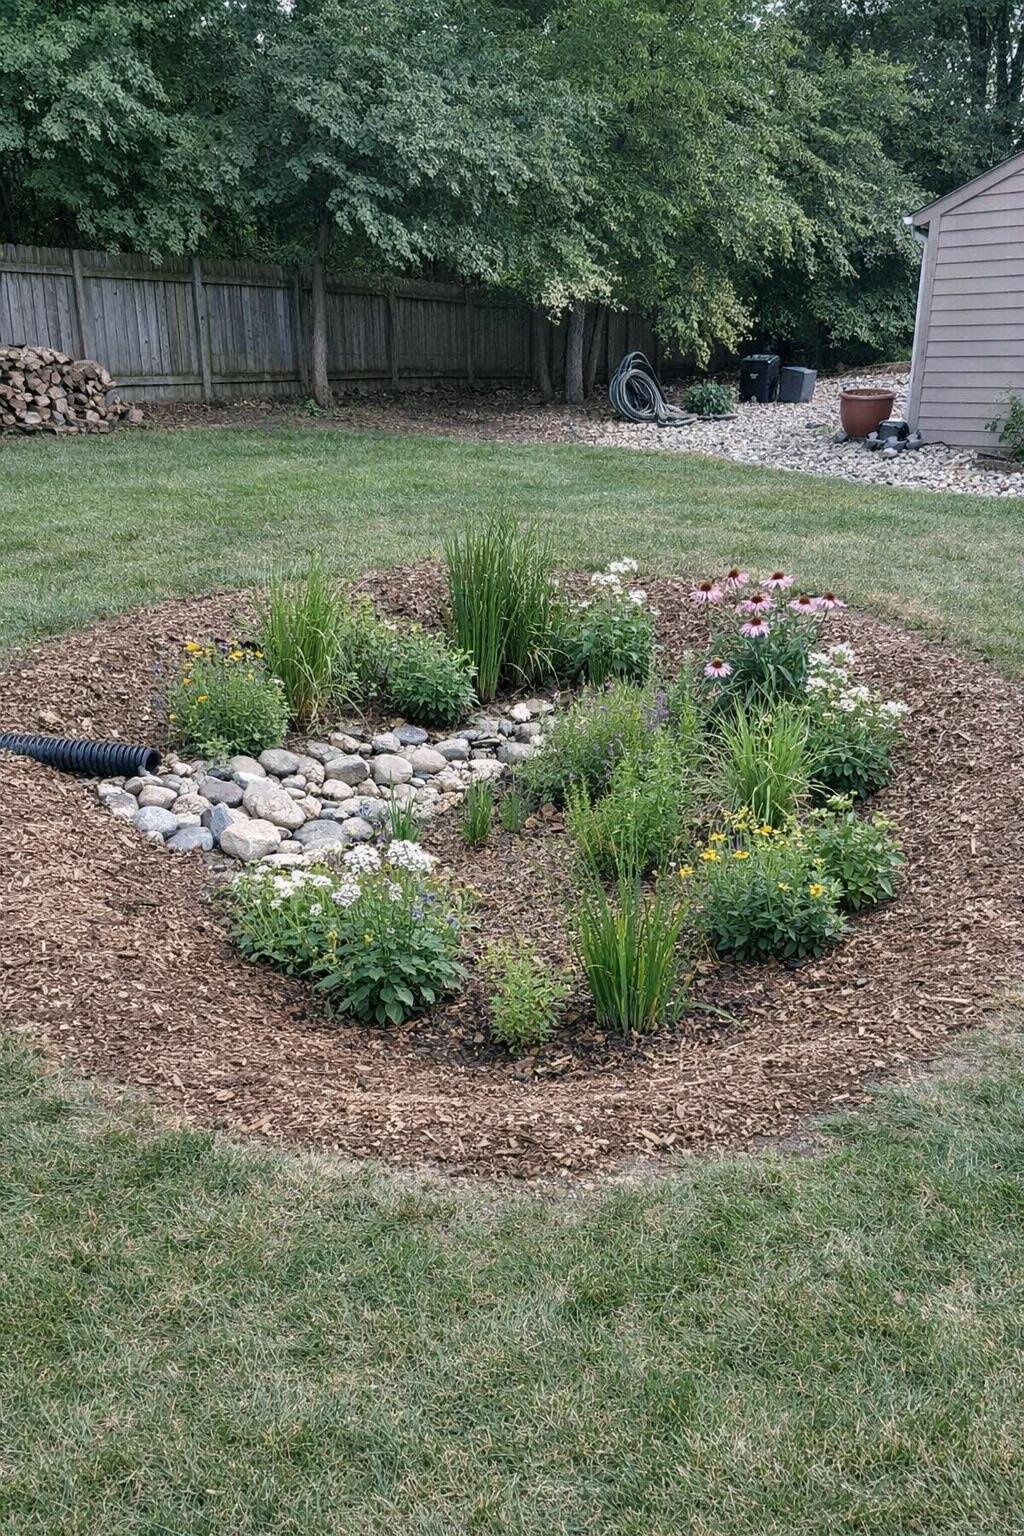
13. Rain garden in the low spot
A low spot that turns into a puddle is the perfect excuse for a rain garden. This is less about fighting water and more about giving it a place to go. With native moisture-loving plants, compost, and mulch, a small rain garden can cost $150 to $400 and save you years of frustration.
Start by digging a shallow basin 4 to 8 inches deep in the natural low area, then amend the soil if it’s heavily compacted. Plant in layers, with the thirstiest natives in the center and tougher edge plants around the rim, then mulch to reduce erosion. My tip is to watch the yard during a storm before digging so you place the basin exactly where the runoff already wants to collect.
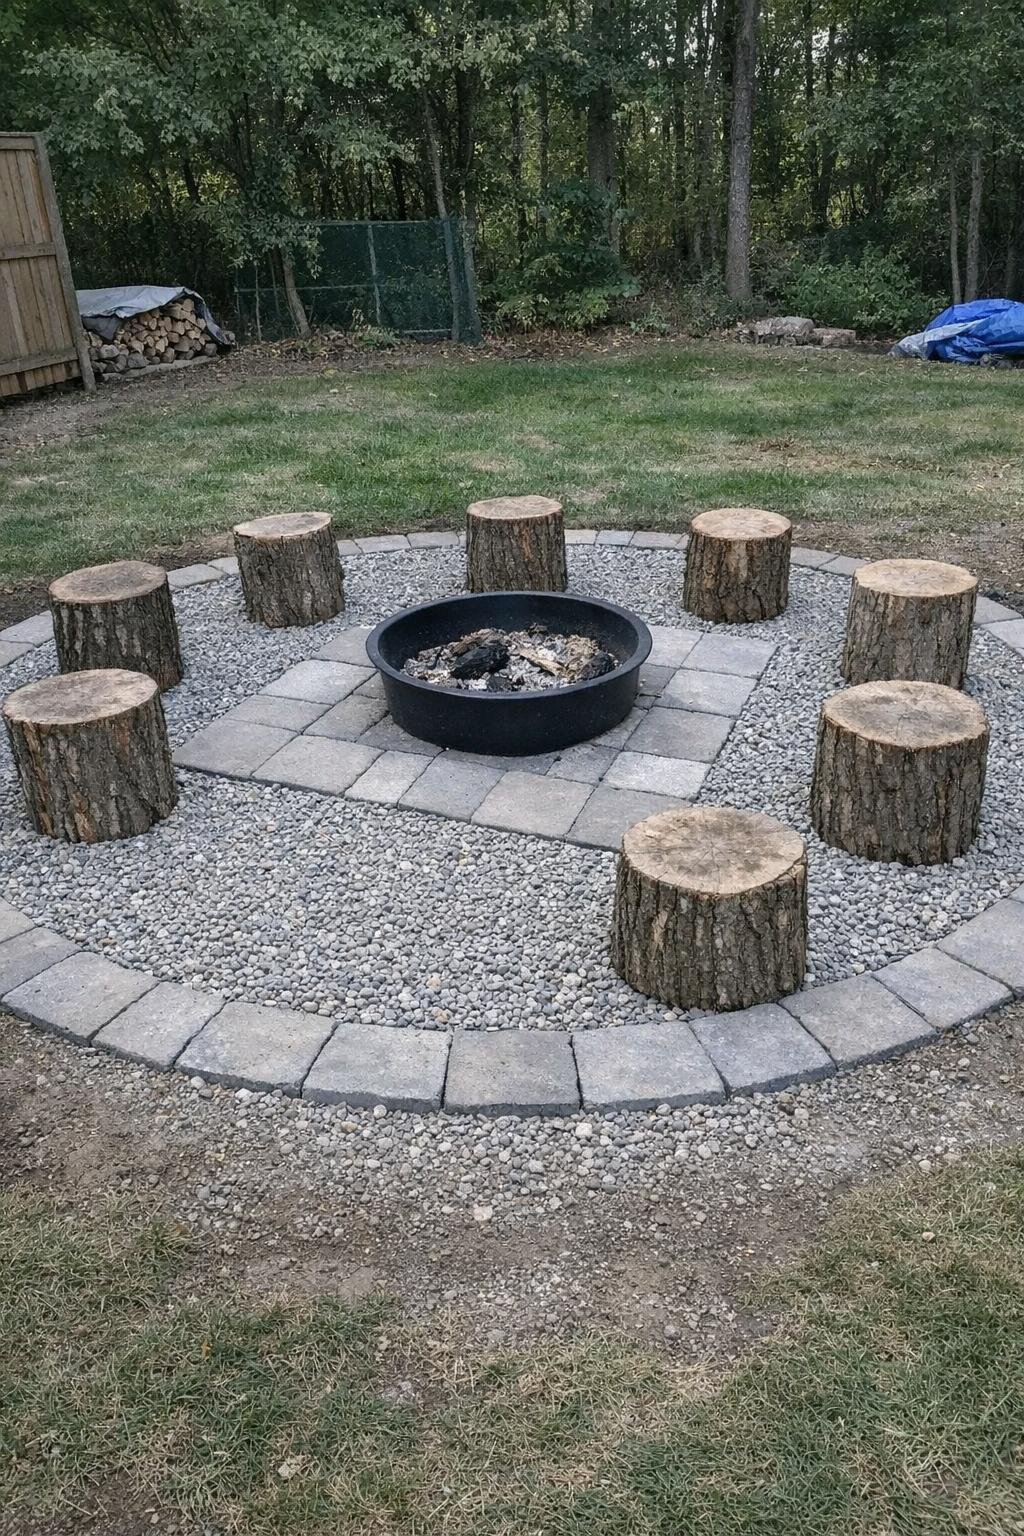
14. Gravel-and-paver fire circle with log stools
This version of a fire area feels more finished than simply setting a pit on mulch. You need a small fire ring or bowl, gravel, several large square pavers, and 4 to 6 cut log stools. For a circle about 12 feet across, I’d budget $180 to $450, especially if you already have access to log rounds.
Mark the circle, remove the top layer of sod or mud, and add weed barrier with 2 to 3 inches of gravel over it. Set the pavers in a ring or as little landing pads around the pit, then place the log stools evenly around the edge. My tip is to seal the tops of the log stools or place them on pavers so they last longer and do not wick up ground moisture.
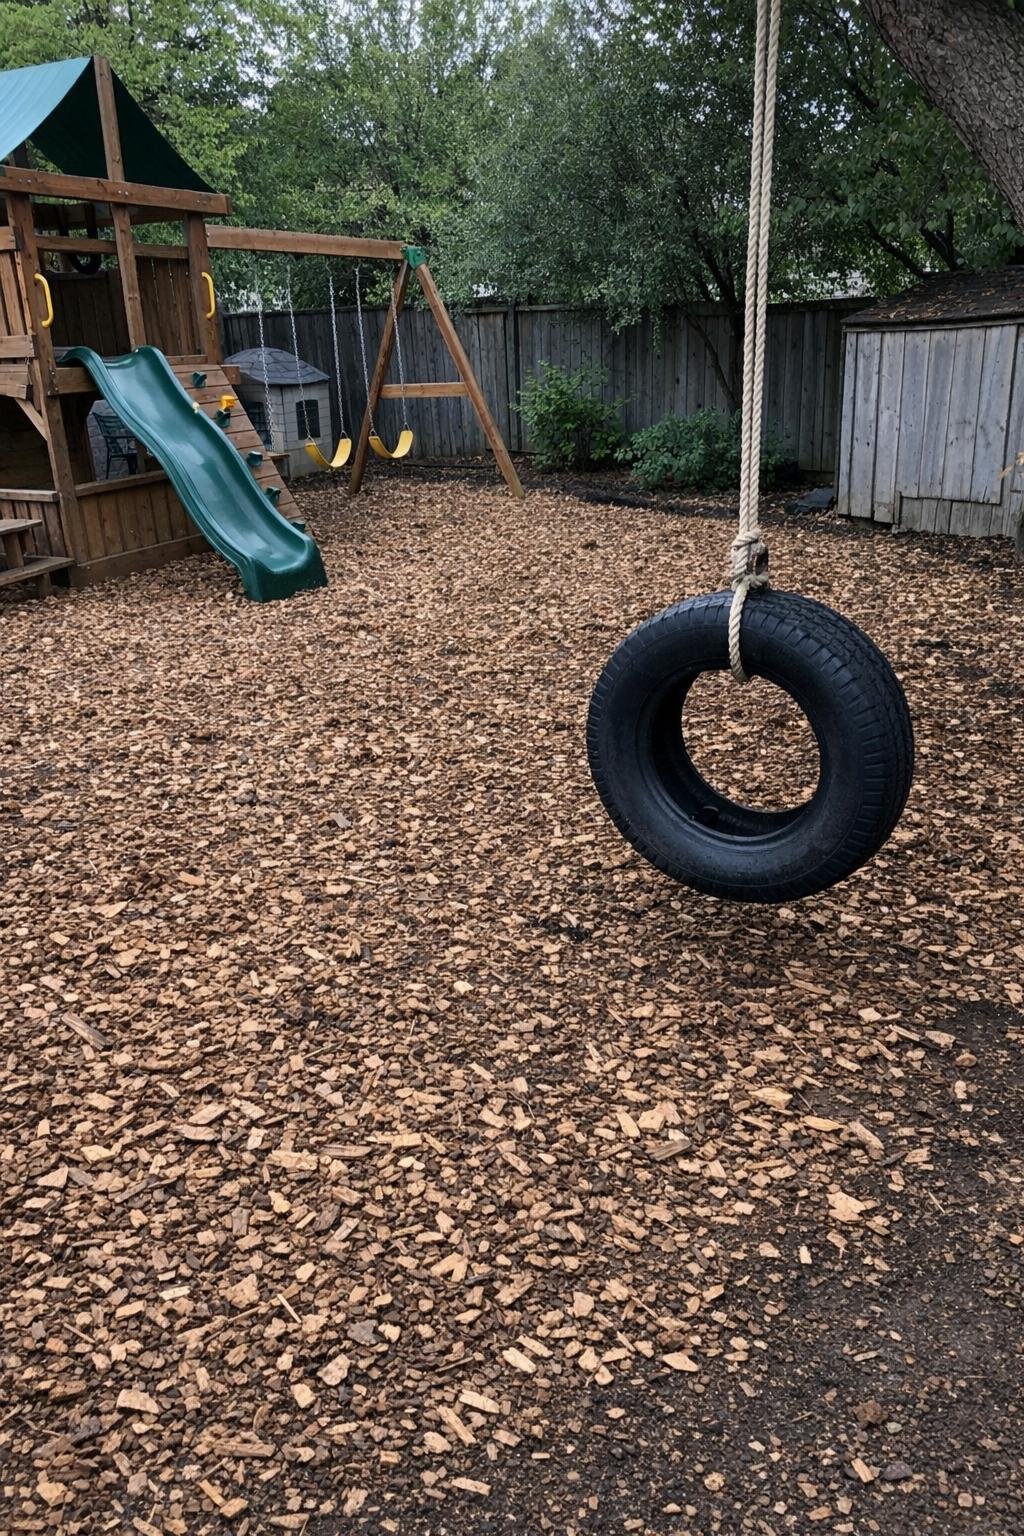
15. Bark-chip play area with a tire swing
If the muddy corner of the yard is where kids already try to play, giving it a defined surface is a huge improvement. A bark-chip play area with a tire swing is practical, soft underfoot, and forgiving on a rough budget. Depending on whether you already have a sturdy tree and a spare tire, this can run about $120 to $300.
Outline the play zone, lay down landscape fabric, and spread bark chips 4 inches deep for cushioning. Hang the tire swing from a healthy limb or a proper frame using outdoor-rated rope or chain, keeping plenty of clearance around it. My tip is to make the bark-chip zone wider than you think you need; the chips migrate, and extra perimeter space keeps the surrounding yard from turning into a mess.
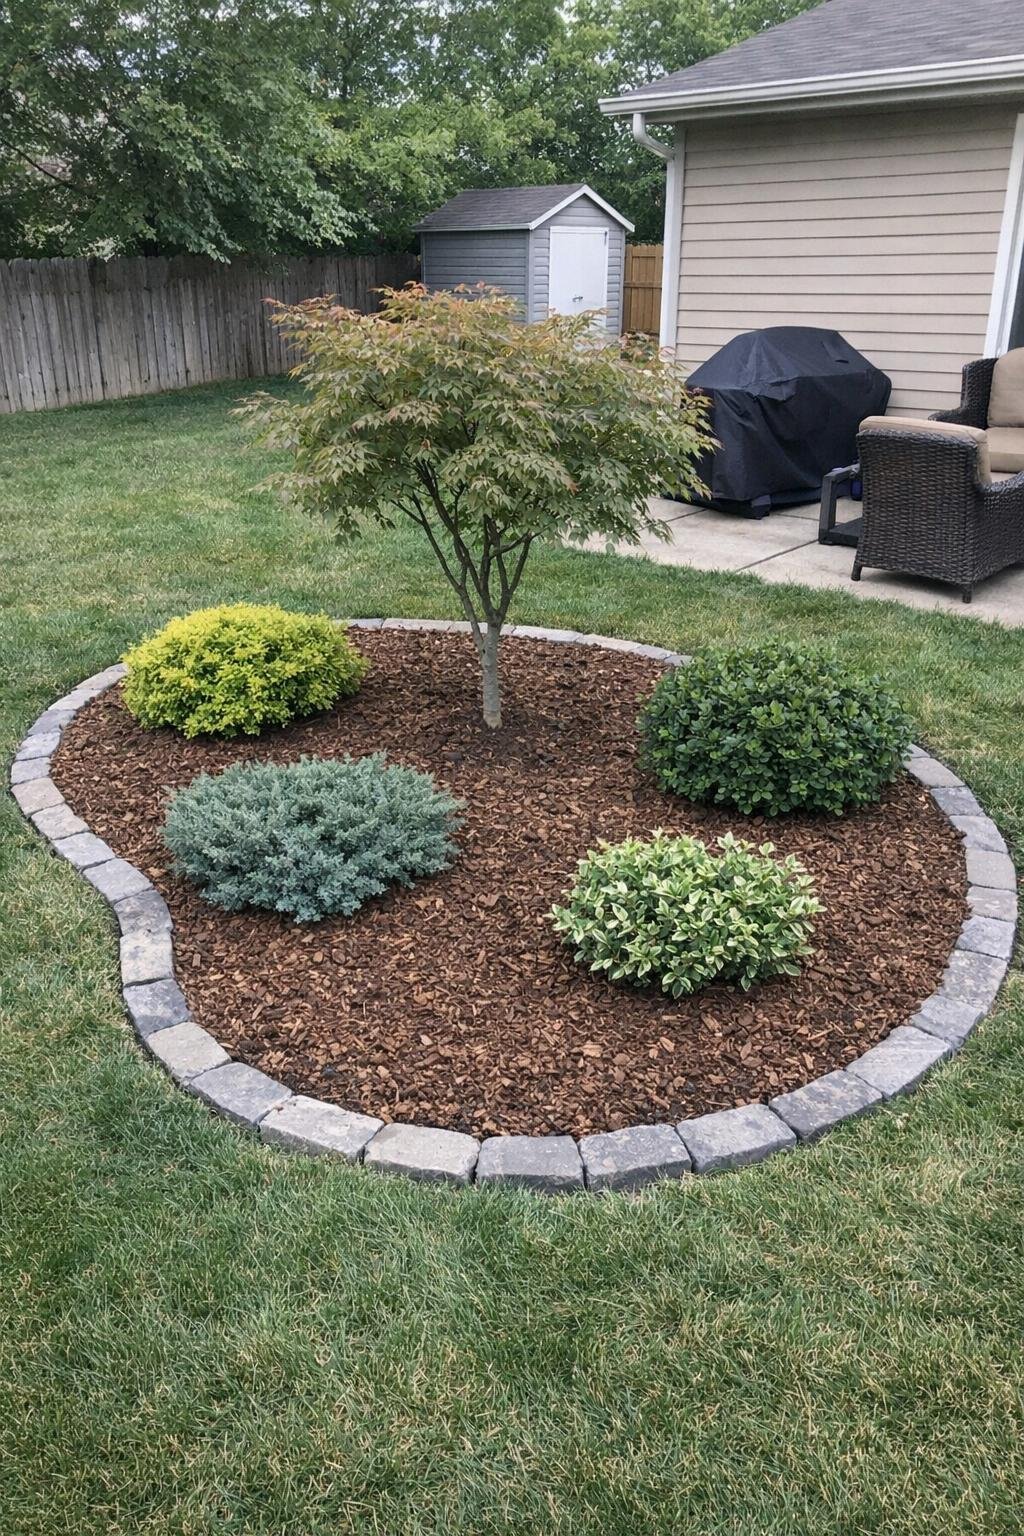
16. Kidney-shaped island bed with a tree and shrubs
When a yard is just one big empty flat space, an island bed gives it instant structure. A simple kidney-shaped bed with one small ornamental tree, three shrubs, and mulch can anchor the whole yard for about $200 to $600 depending on plant size. I love this in the middle of a lawn substitute or broad open patch because it breaks up the emptiness beautifully.
Lay out the shape with a hose, cut the edge cleanly, and remove the grass or weeds inside the outline. Plant the tree slightly off-center, place three shrubs around it in a triangle, then mulch the whole bed 2 to 3 inches deep. My tip is to keep the bed large enough to breathe—at least 8 by 12 feet—so the tree and shrubs do not look jammed together in a tiny blob.
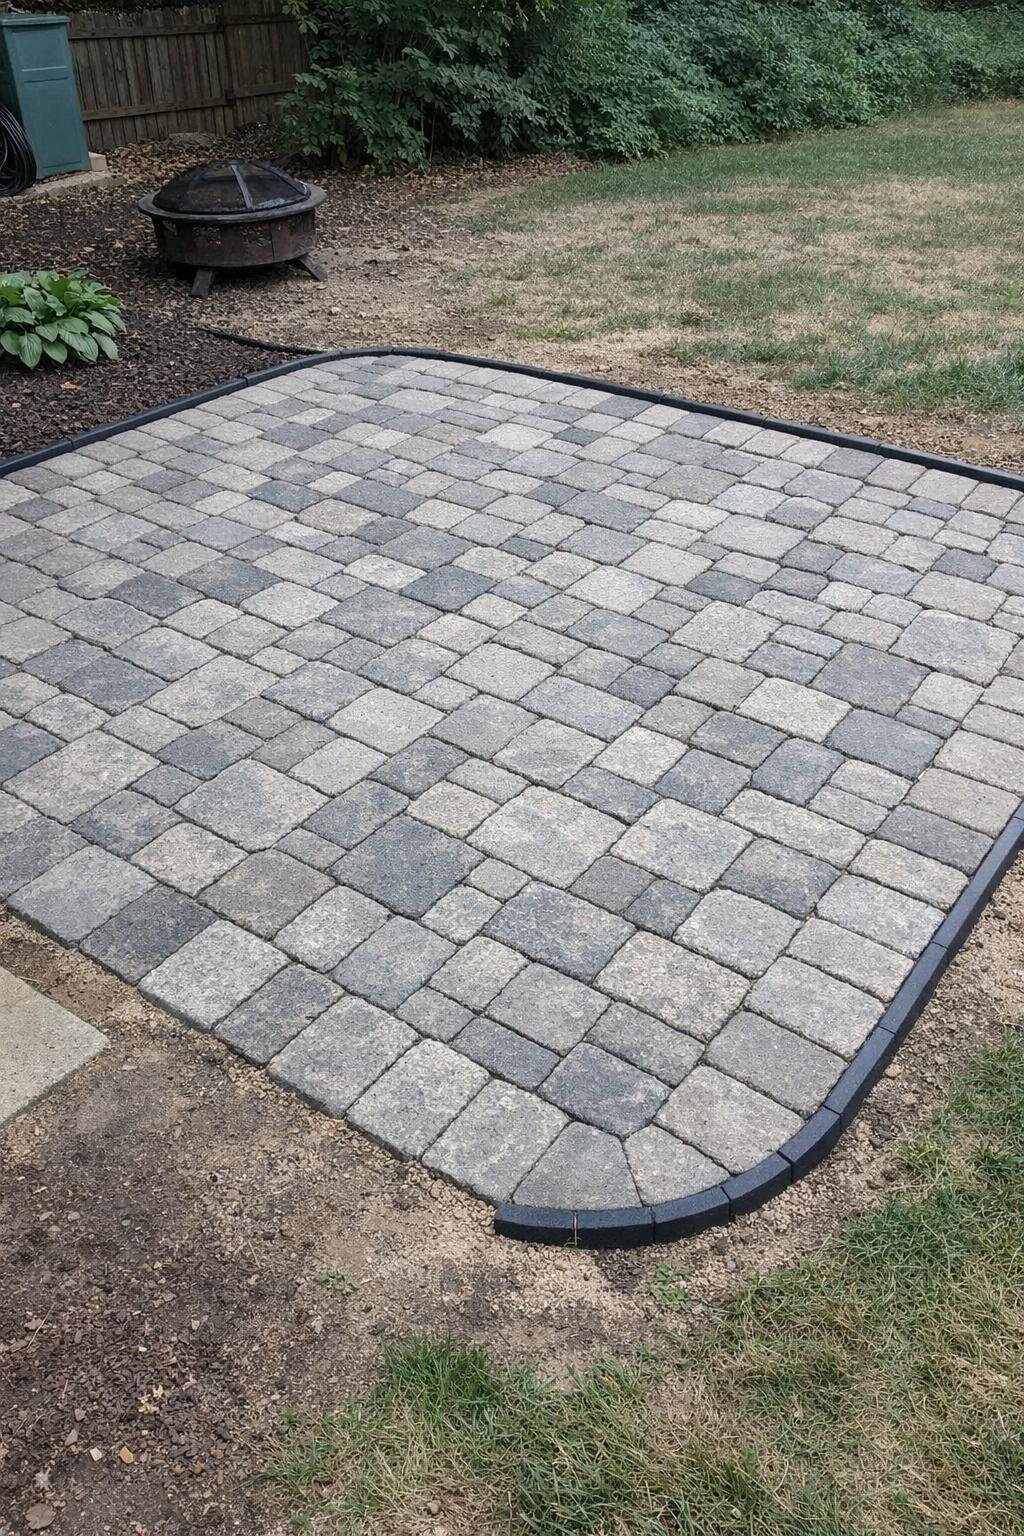
17. Cobblestone-look concrete-paver patio
A barren yard becomes useful the minute it gets a real surface for a table and chairs, and concrete pavers are one of the most affordable ways to get there. For a 10-by-12-foot patio using cobblestone-look pavers, paver base, sand, and edge restraint, a realistic budget is about $300 to $800 if you do the labor yourself.
Excavate 6 to 8 inches, compact the base in layers, and screed a 1-inch layer of sand before laying the pavers in your chosen pattern. Sweep sand into the joints and compact again so the surface locks together. My tip is to spend extra time on leveling the base, not the pavers; almost every patio problem starts underneath, not on top.
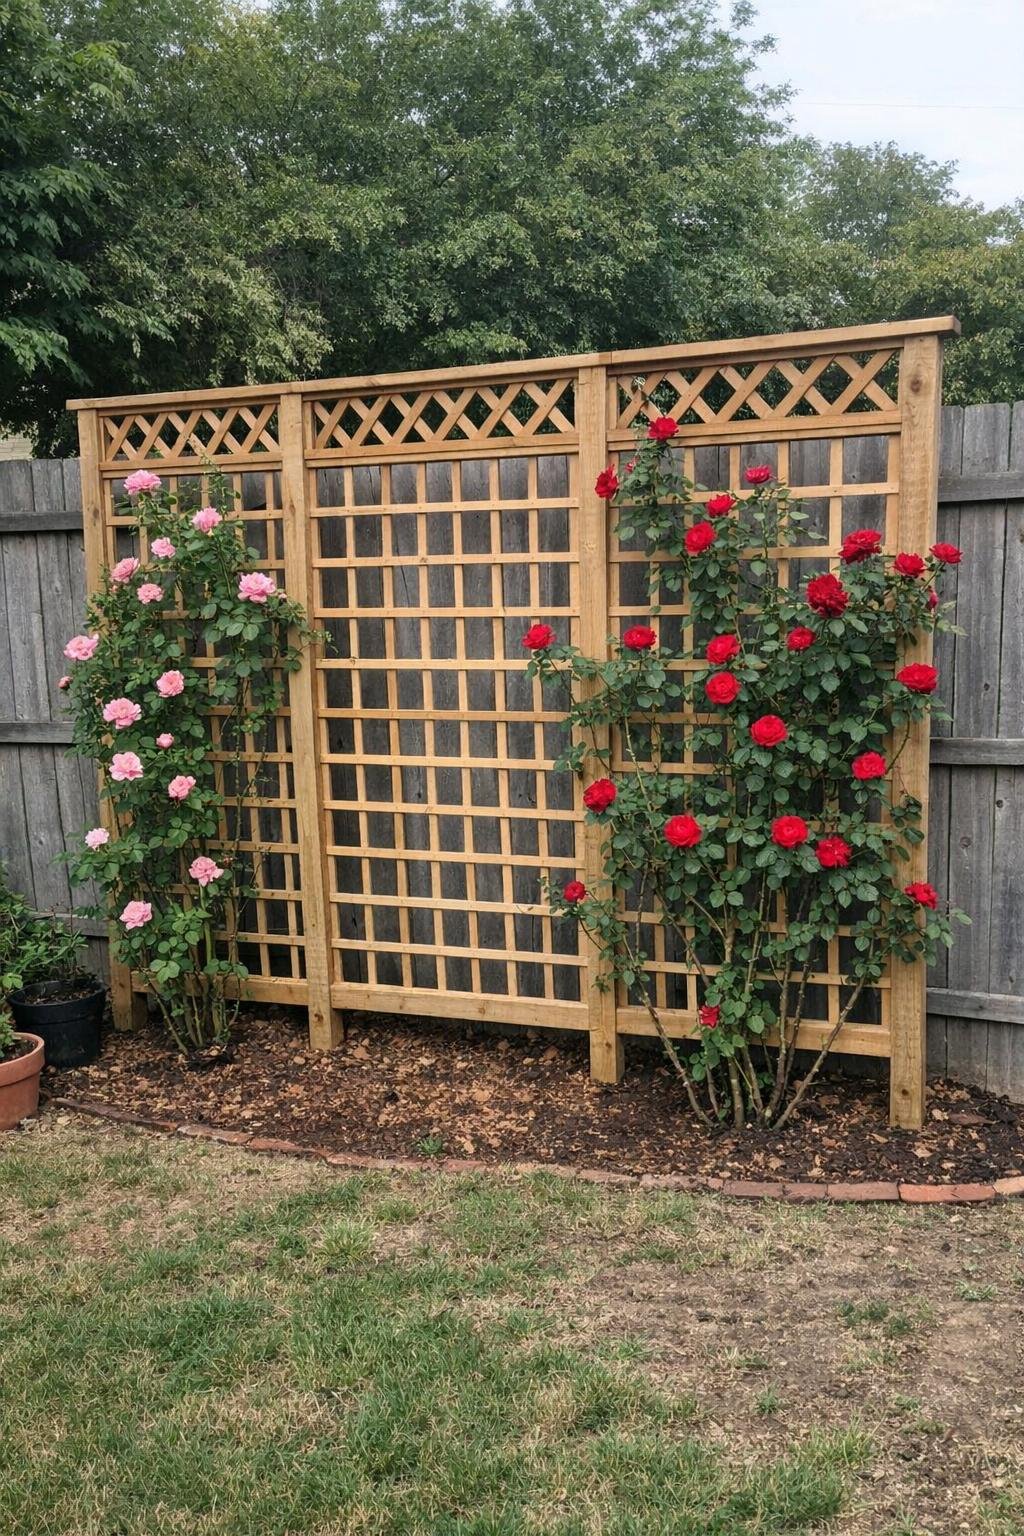
18. Trellis wall with climbing roses
If the main problem with the yard is an ugly view, I’d hide it instead of staring at it for another summer. A trellis wall can screen a neighbor’s fence and add height to a flat yard. With wood or metal trellis panels, posts, and two or three climbing roses, most homeowners can do this for about $180 to $500.
Set the posts securely first, making sure the trellis sits 6 to 12 inches in front of the existing fence for airflow. Attach the panels, plant the roses at the base, and tie in new canes gently as they grow. My tip is to choose disease-resistant climbers suited to your climate; the prettiest rose in the nursery is no bargain if it sulks all season.
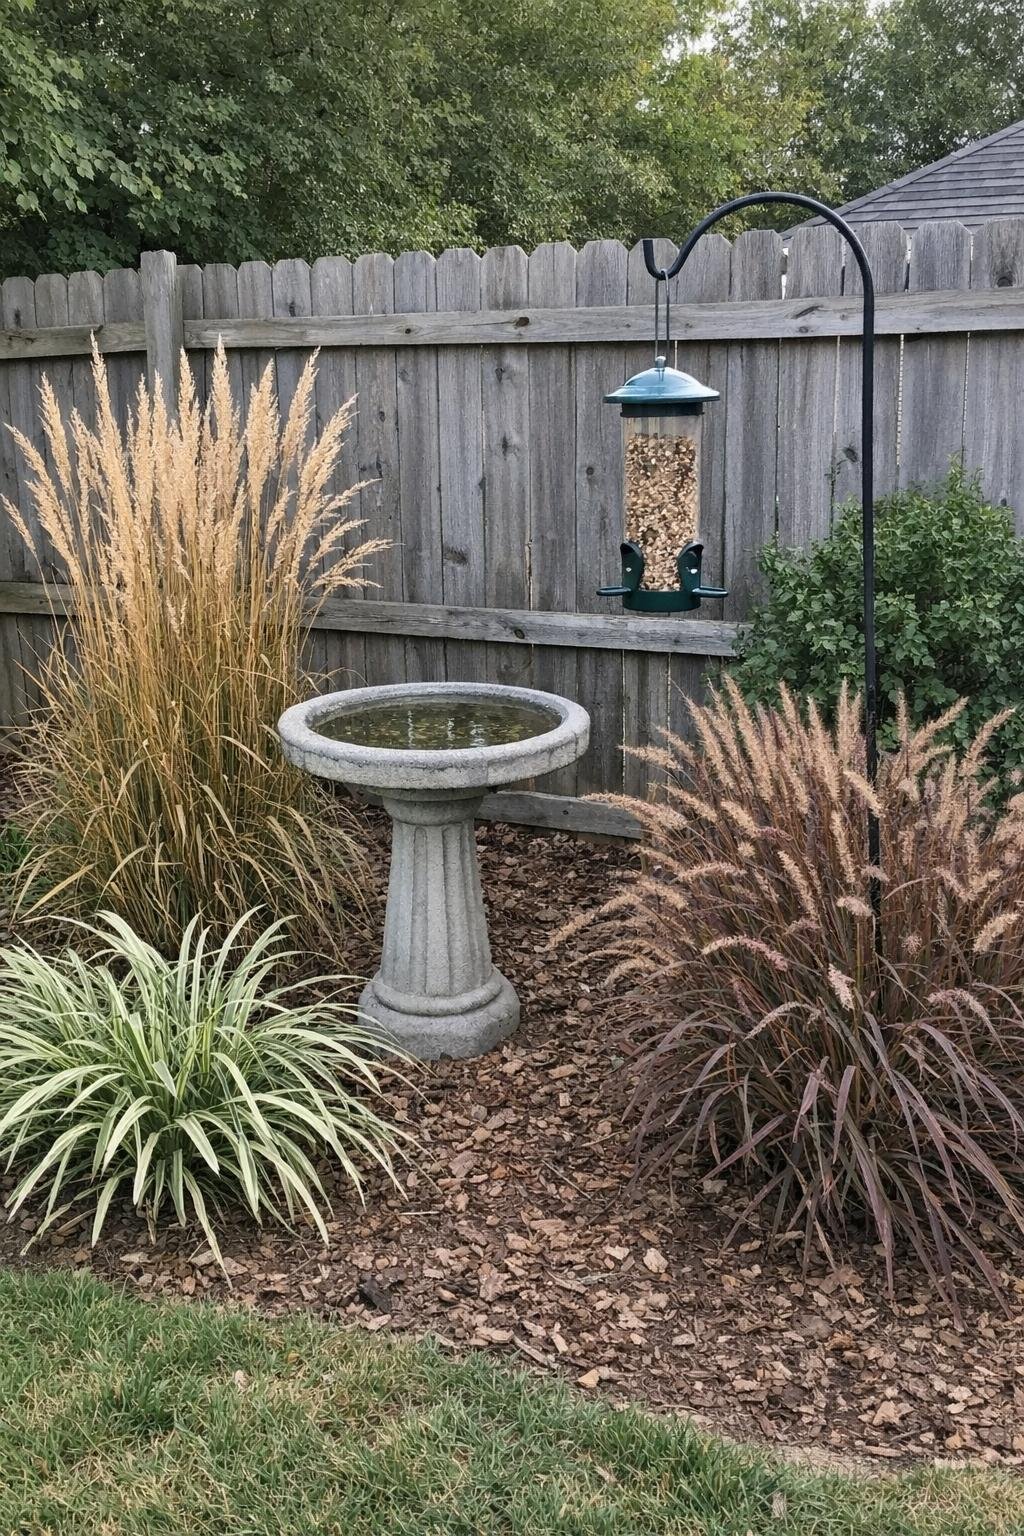
19. Birdbath and bird feeder corner with ornamental grasses
This is a gentle makeover for a quiet corner that feels empty but does not need a major build. A birdbath, a feeder on a hook, and a cluster of ornamental grasses make a bare patch feel alive. Depending on the pieces you choose, this can come together for about $80 to $250.
Place the birdbath on a firm, level base like a buried paver so it does not wobble. Add a feeder nearby but not directly over the bath, then plant 3 to 5 ornamental grasses around the corner to soften the edges and give birds a little cover. My tip is to leave enough open space around the birdbath that you can easily dump and refill it every few days.
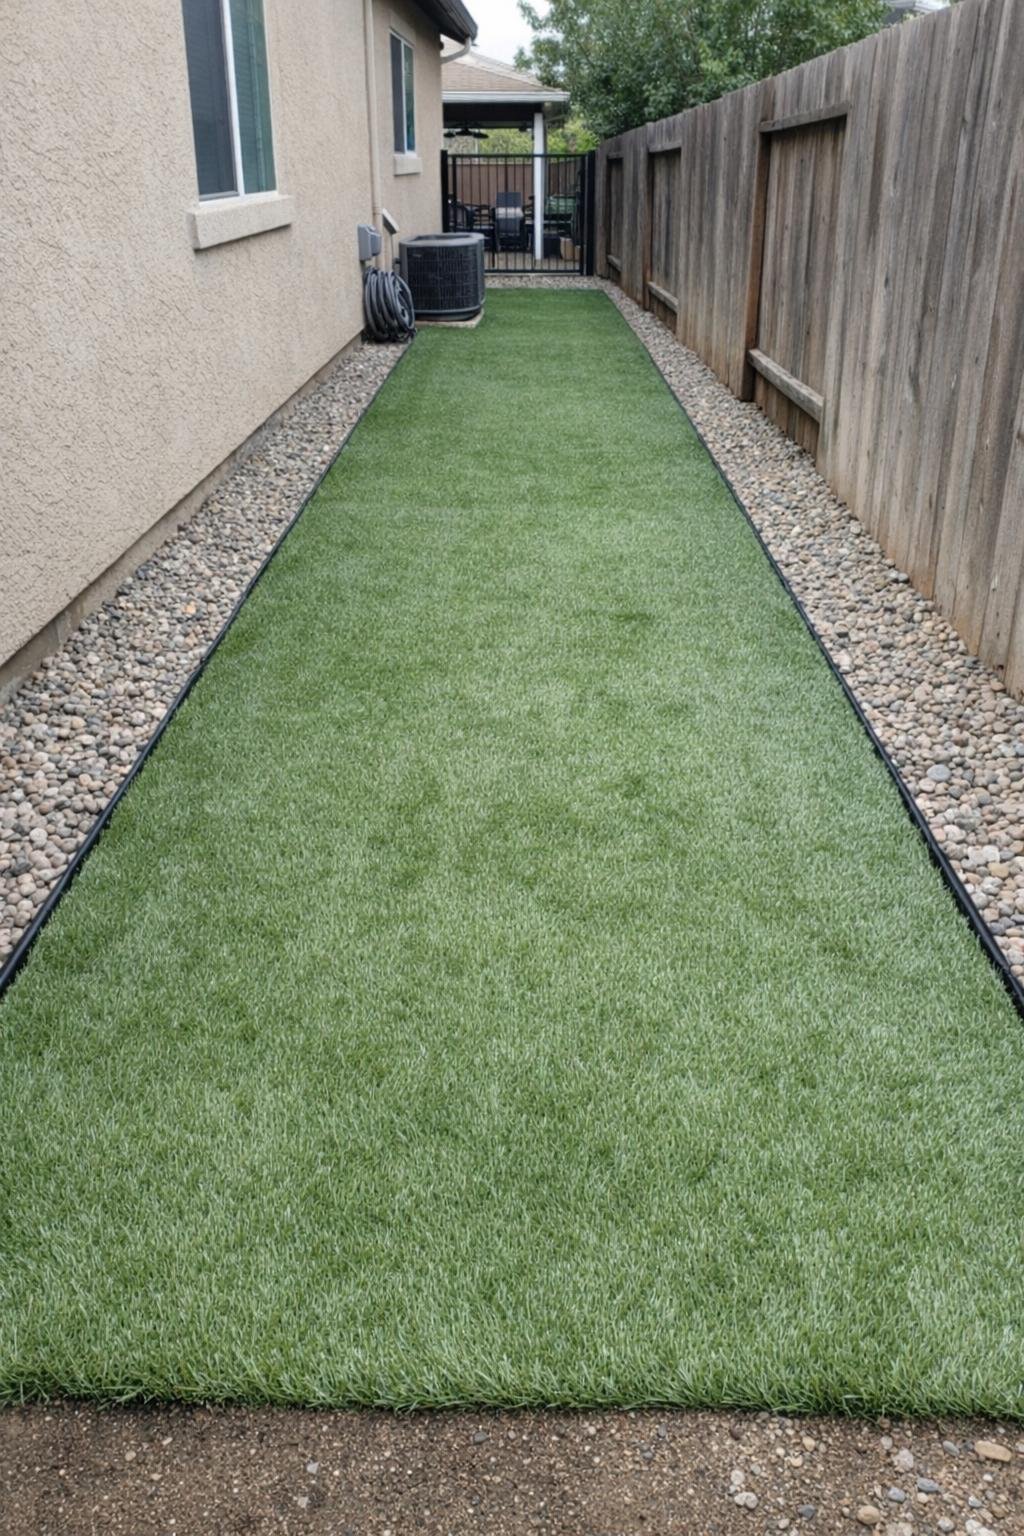
20. Artificial turf strip for the dog run
For a side-yard dog run that is permanently worn to dirt, artificial turf can be a sanity saver. It keeps paws cleaner, cuts mud to almost nothing, and gives the space a finished look. For a strip about 3 to 5 feet wide and 20 feet long, expect roughly $250 to $700 depending on turf quality and how much base prep you do.
Excavate the area, lay and compact a gravel base, then roll out the turf and secure the edges tightly with landscape spikes or nails made for the purpose. Brush the fibers up once it is installed, and make sure the strip slopes slightly so water drains away. My tip is to add a narrow border of gravel along the edges; it keeps the turf cleaner and makes trimming the surrounding area much easier.
An old barren yard usually looks overwhelming until you pick one problem and solve it on purpose. Start with the soggiest patch, the ugliest view, or the place you most want to use, and even one of these projects can change the whole feel of the space.