
I love a home project that makes people assume I spent way more than I actually did. As someone balancing a full-time job, weeknight cooking, and the usual suburban life shuffle, I’m always looking for upgrades I can knock out over a weekend without turning my house into a construction zone for a month. The good news is that some of the most dramatic improvements are really just smart paint, simple lumber, and a little patience.
These are 20 home improvement ideas that look expensive but really aren’t, and every one of them is doable on a realistic budget. I’m sharing the materials, rough cost, the key steps that matter most, and one pro tip for each so you can skip some of the trial and error I’ve already lived through in my own house.
1. Add board and batten
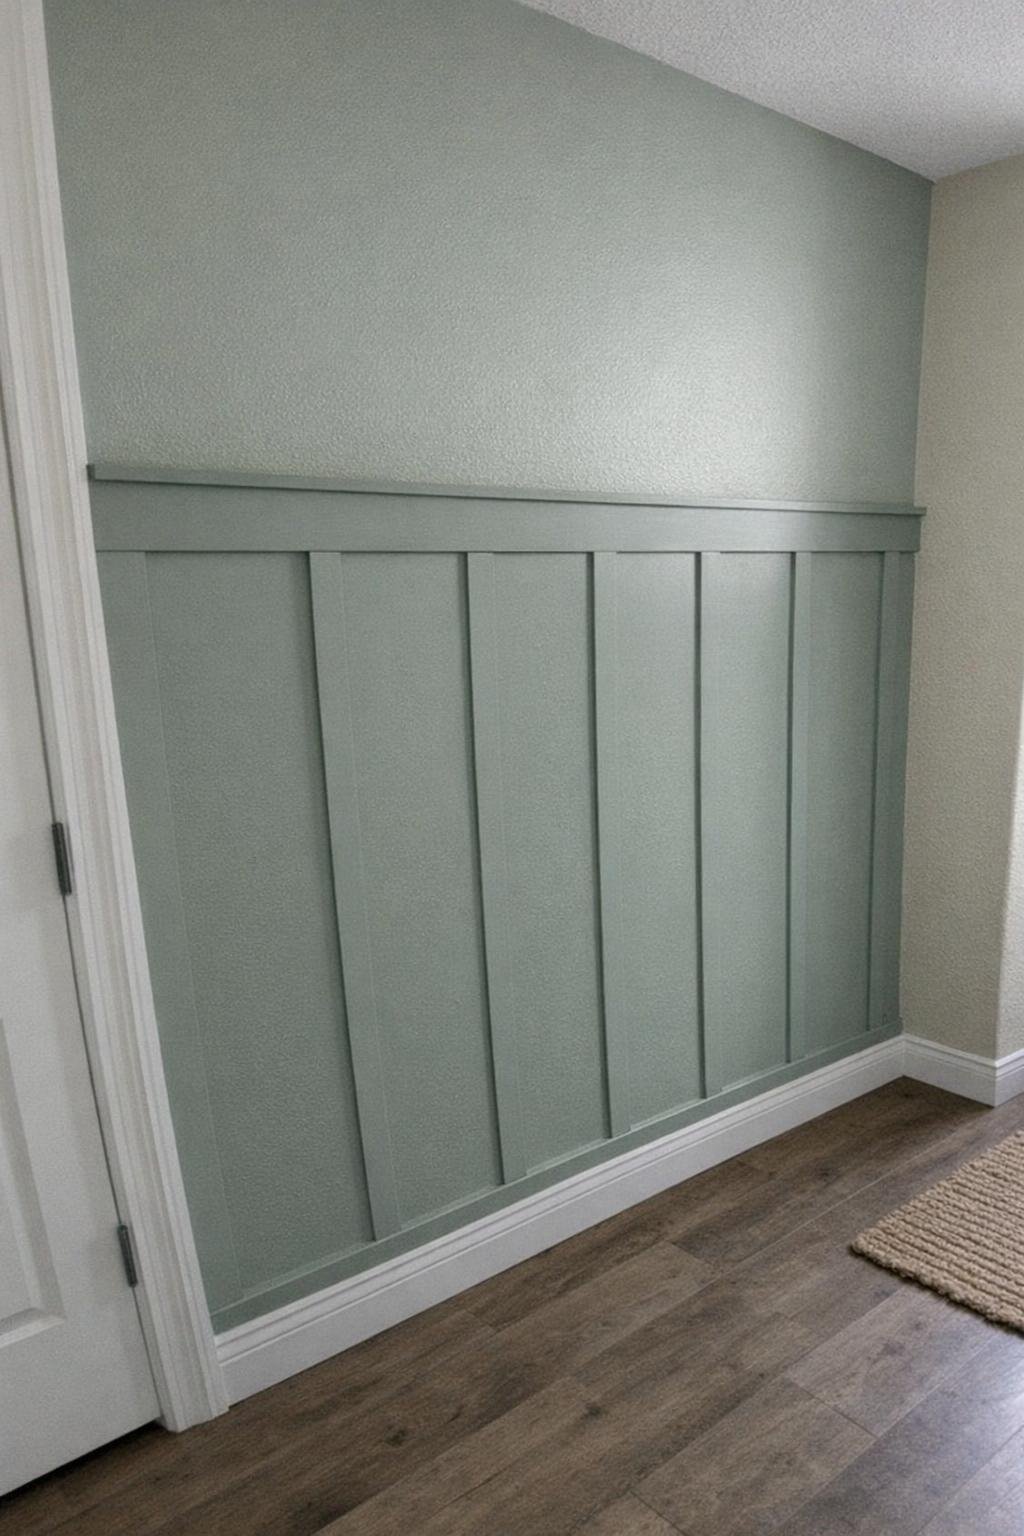
Board and batten is one of my favorite “big impact for not much money” projects, especially in an entryway or hallway that feels flat. For a 10-foot wall, I’d use one 1x4 top rail, several 1x3 battens spaced 12 to 16 inches apart, construction adhesive, caulk, and a gallon of paint. The total usually lands around $80 to $150 depending on lumber prices, and it takes about one weekend including paint drying time.
The key steps are simple: first, mark your height line at about 48 to 56 inches from the floor; second, attach the top board and vertical battens with adhesive and brad nails; third, caulk every seam and paint everything the same color for that custom look. My pro tip is to space battens based on the wall length before you cut anything so the end sections are even instead of noticeably skinny.
2. Paint over a staircase
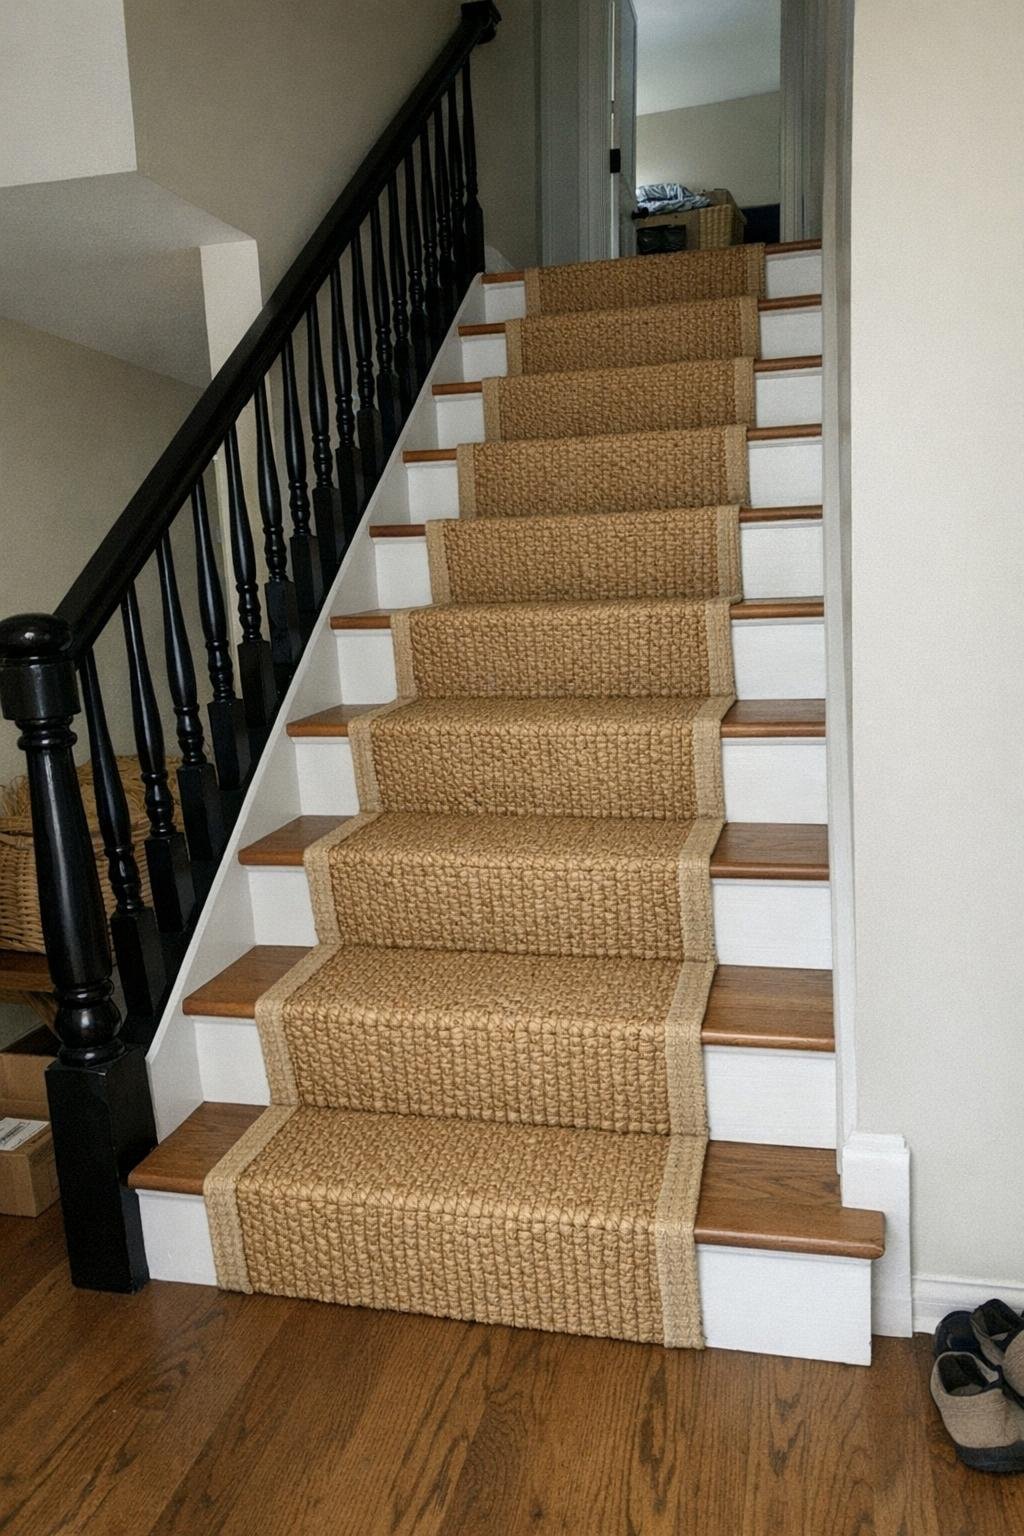
A painted staircase can completely change the feel of a dated foyer. I like the classic mix of white treads, black banisters, and a natural seagrass runner because it looks crisp and expensive without requiring a full stair rebuild. Expect to spend about $150 to $300 on porch and floor paint, primer, sandpaper, a runner, and stair rods or staples, with most of the time going to prep and dry time.
The main steps are to sand and clean the staircase really well, prime and paint the treads and rails in durable enamel, and then install the runner once everything cures. I learned the hard way not to rush that last part. My pro tip is to paint every other tread first so you can still use the stairs, then go back and finish the remaining treads the next day.
3. Custom DIY breakfast nook with hidden storage
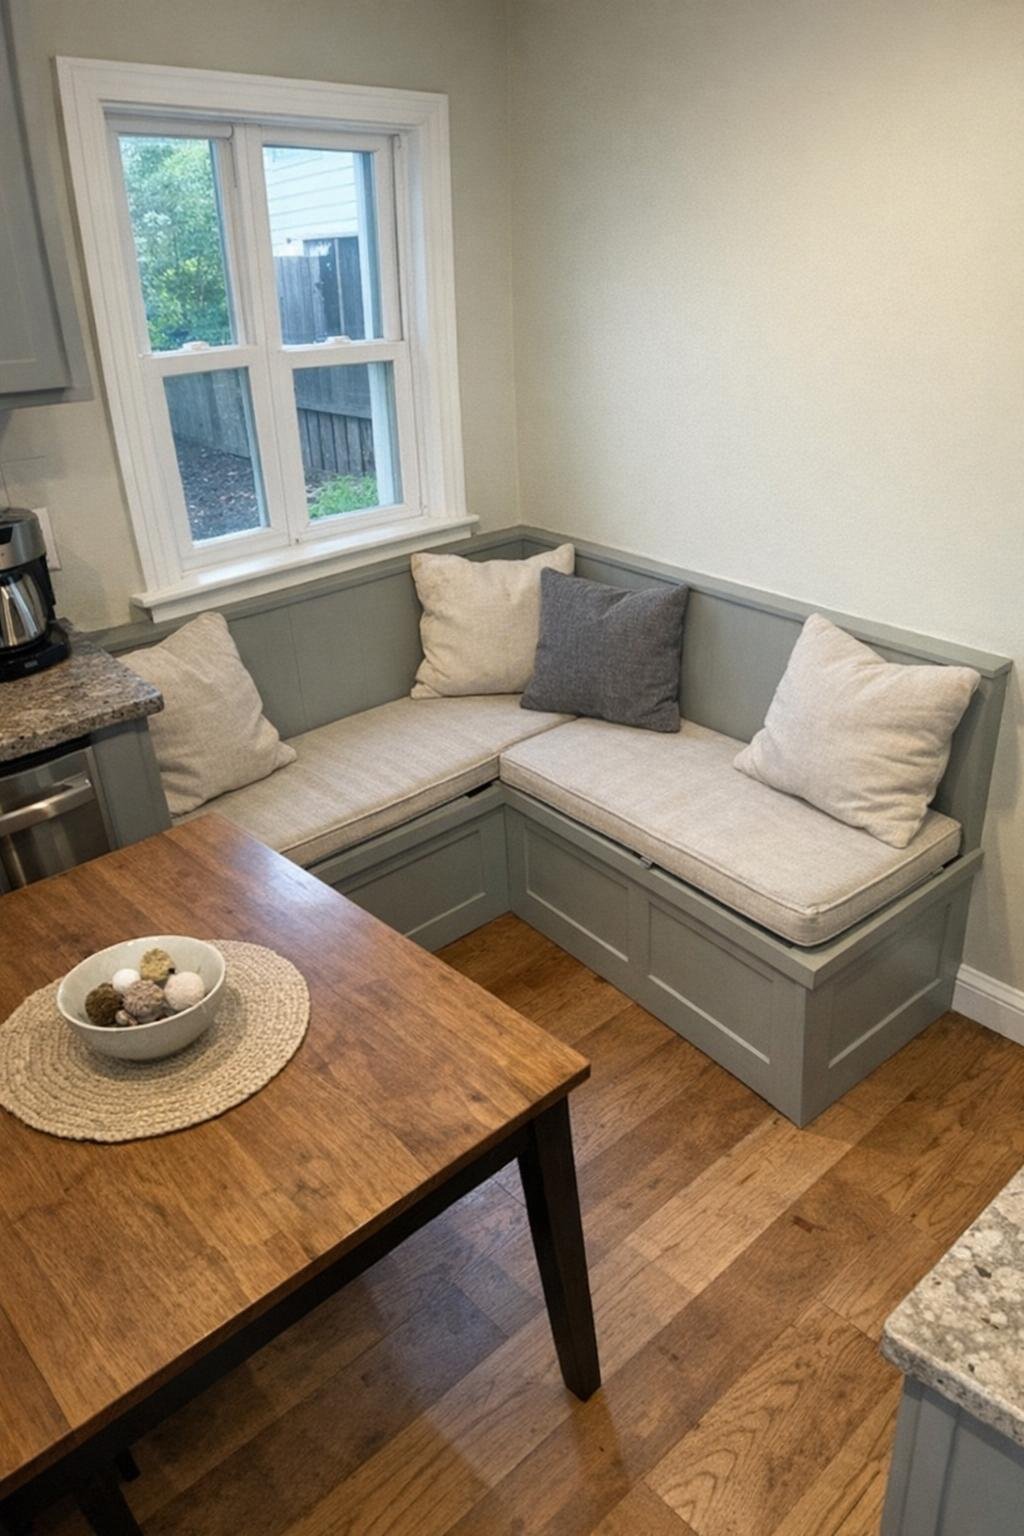
If you have an unused dining corner, a built-in bench with storage can make the whole kitchen feel more custom. I’d build it from 2x4 framing, 3/4-inch plywood, hinges for the lift lid, trim boards, and a bench cushion. For a 5-by-5-foot corner nook, the cost is usually around $200 to $450 depending on the cushion and paint, and it’s a solid weekend-plus project.
Build the bench boxes first at about 18 inches high and 18 to 20 inches deep, secure them to wall studs, then add plywood tops with lift-up lids for blankets, small appliances, or board games. Finish with trim and paint so it looks built-in. My pro tip is to leave a small finger gap or use recessed pulls on the lids so they open easily without scratching the paint every time.
4. DIY accent wall
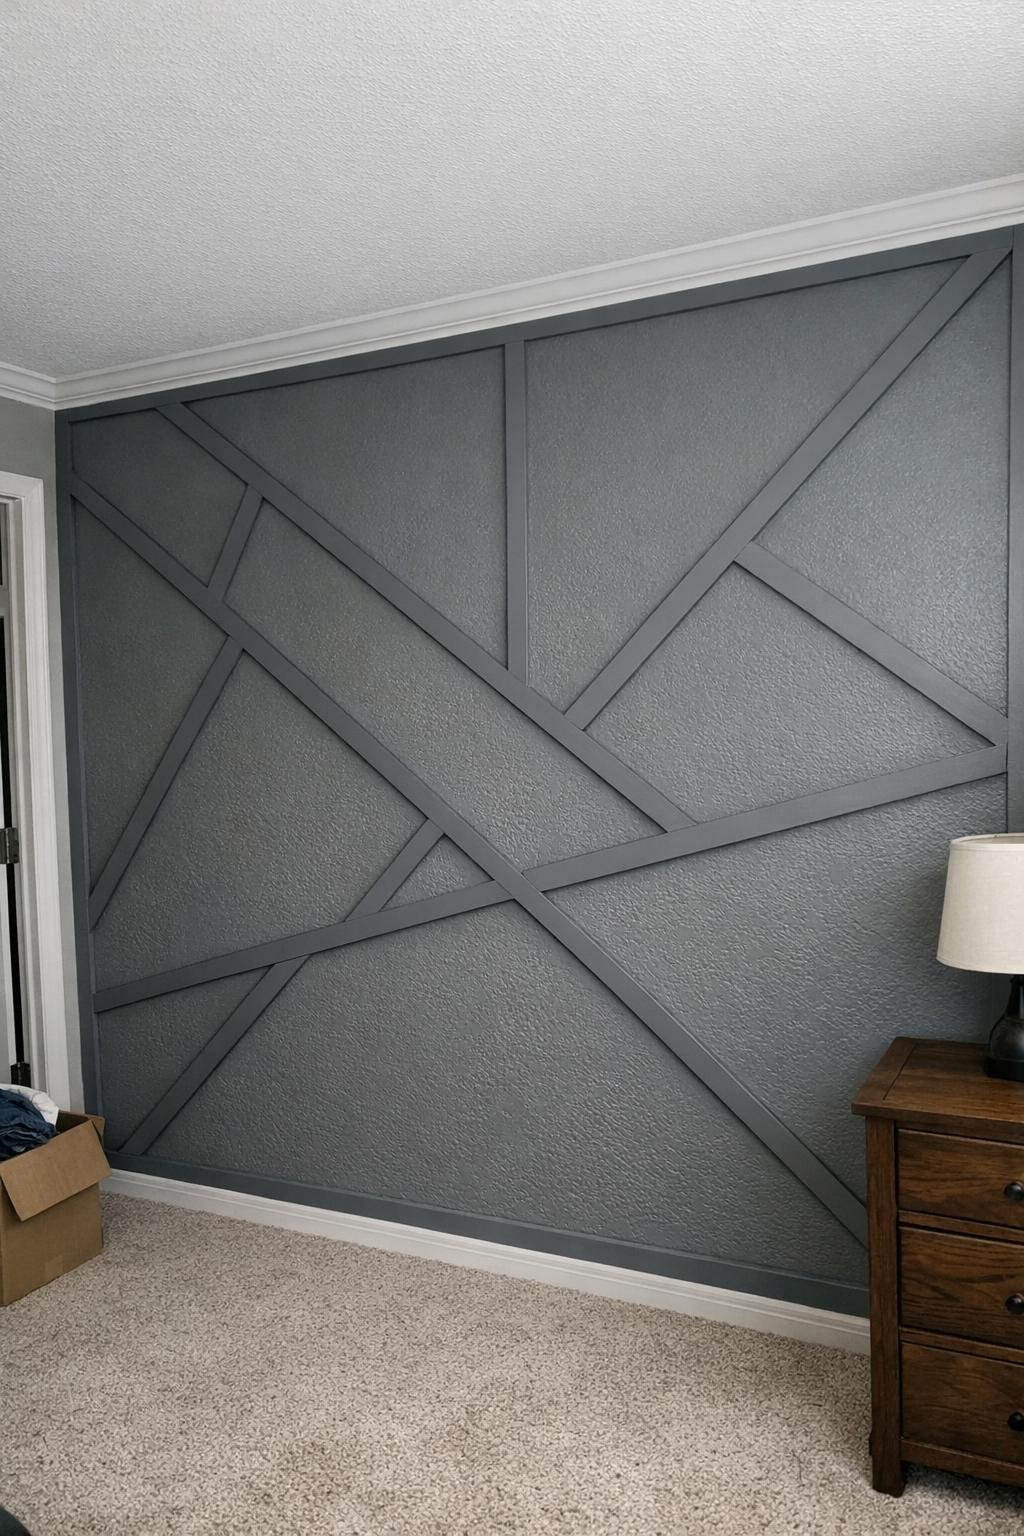
A geometric wood-trim accent wall can make a bedroom, office, or dining room look like it came straight from a designer portfolio. All you really need is 1x2 or 1x3 trim boards, a miter saw, adhesive, a nailer, caulk, and paint. Most walls cost about $75 to $180, and you can often finish in one long day if your design is mapped out first.
I start by taping out the pattern on the wall so I can see the spacing before I cut anything. Then I cut and attach the trim, fill nail holes, caulk the seams, and paint the entire wall and trim one color to make the pattern feel intentional instead of busy. My pro tip is to snap a few level lines and measure from the ceiling and corners, because old walls are rarely as straight as they look.
5. DIY faux marble
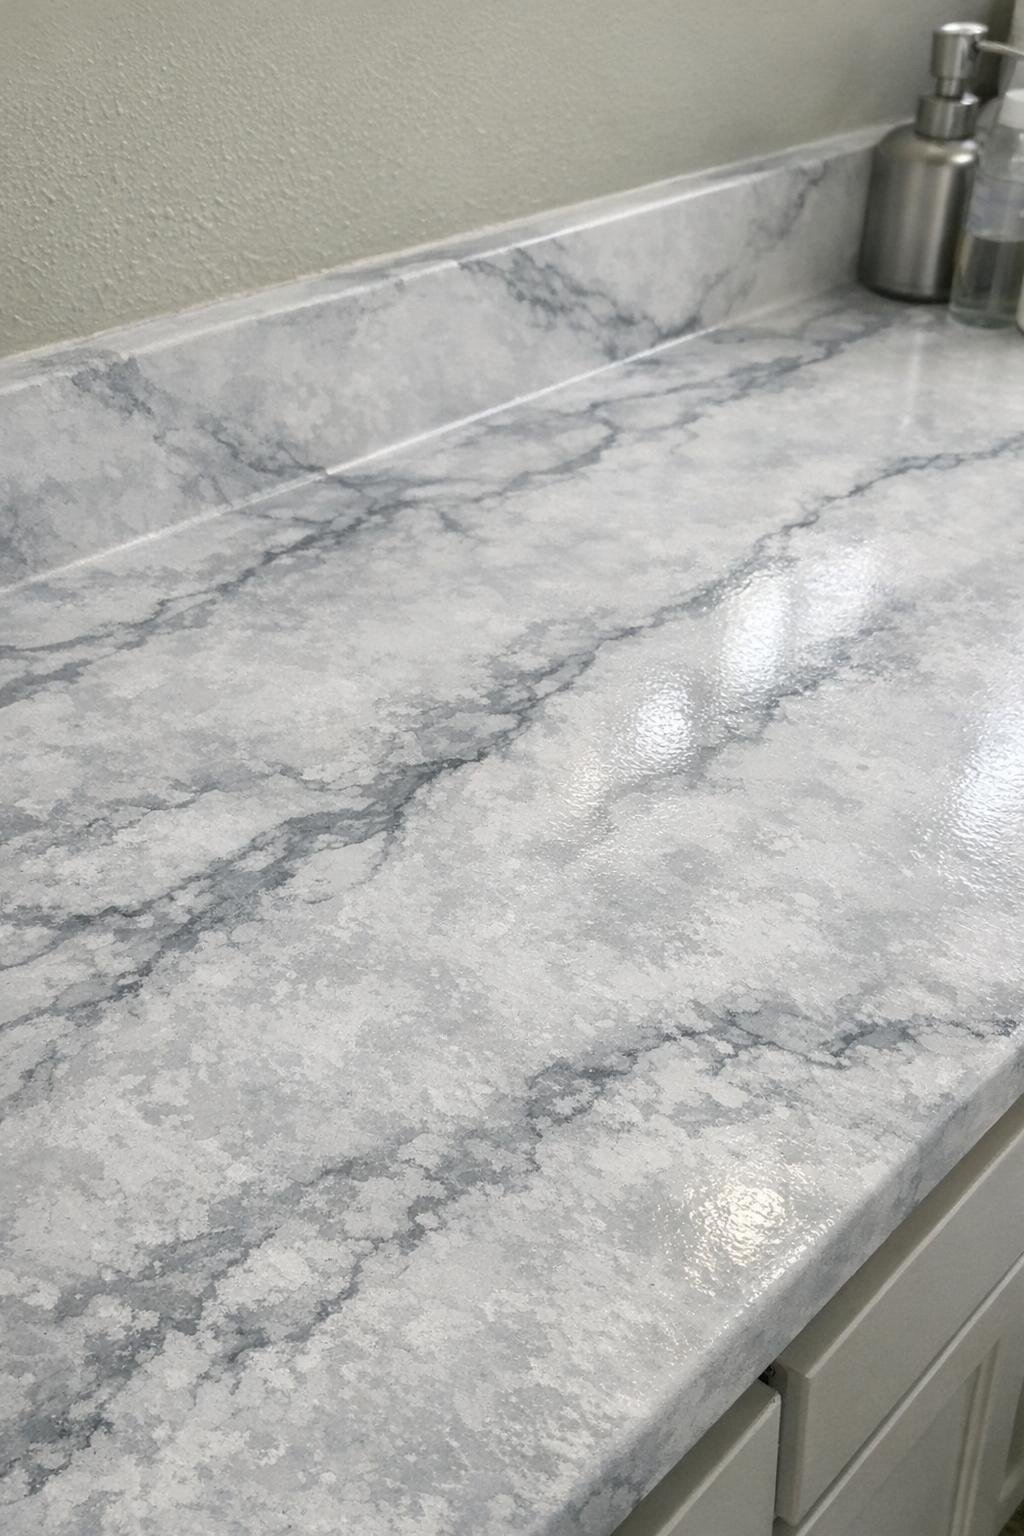
Faux marble is such a fun trick for old laminate tops, side tables, or trays, and it is surprisingly forgiving. I’ve seen beautiful results with white base paint, gray craft paint, a spray bottle of water, a sea sponge, feathers or a small artist brush, and a clear topcoat. You can absolutely keep this under $75 for a small vanity or tabletop, and most of the work happens in a single afternoon plus drying time.
First, paint the surface white and let it dry fully. Next, dab in soft gray areas with a damp sea sponge, spritz lightly with water to blur hard edges, and drag on thin veins with a feather or fine brush. Seal it after it cures. My pro tip is to keep the veining sparse and slightly irregular; too many bold lines are what make faux marble look fake.
6. Textured shower floor
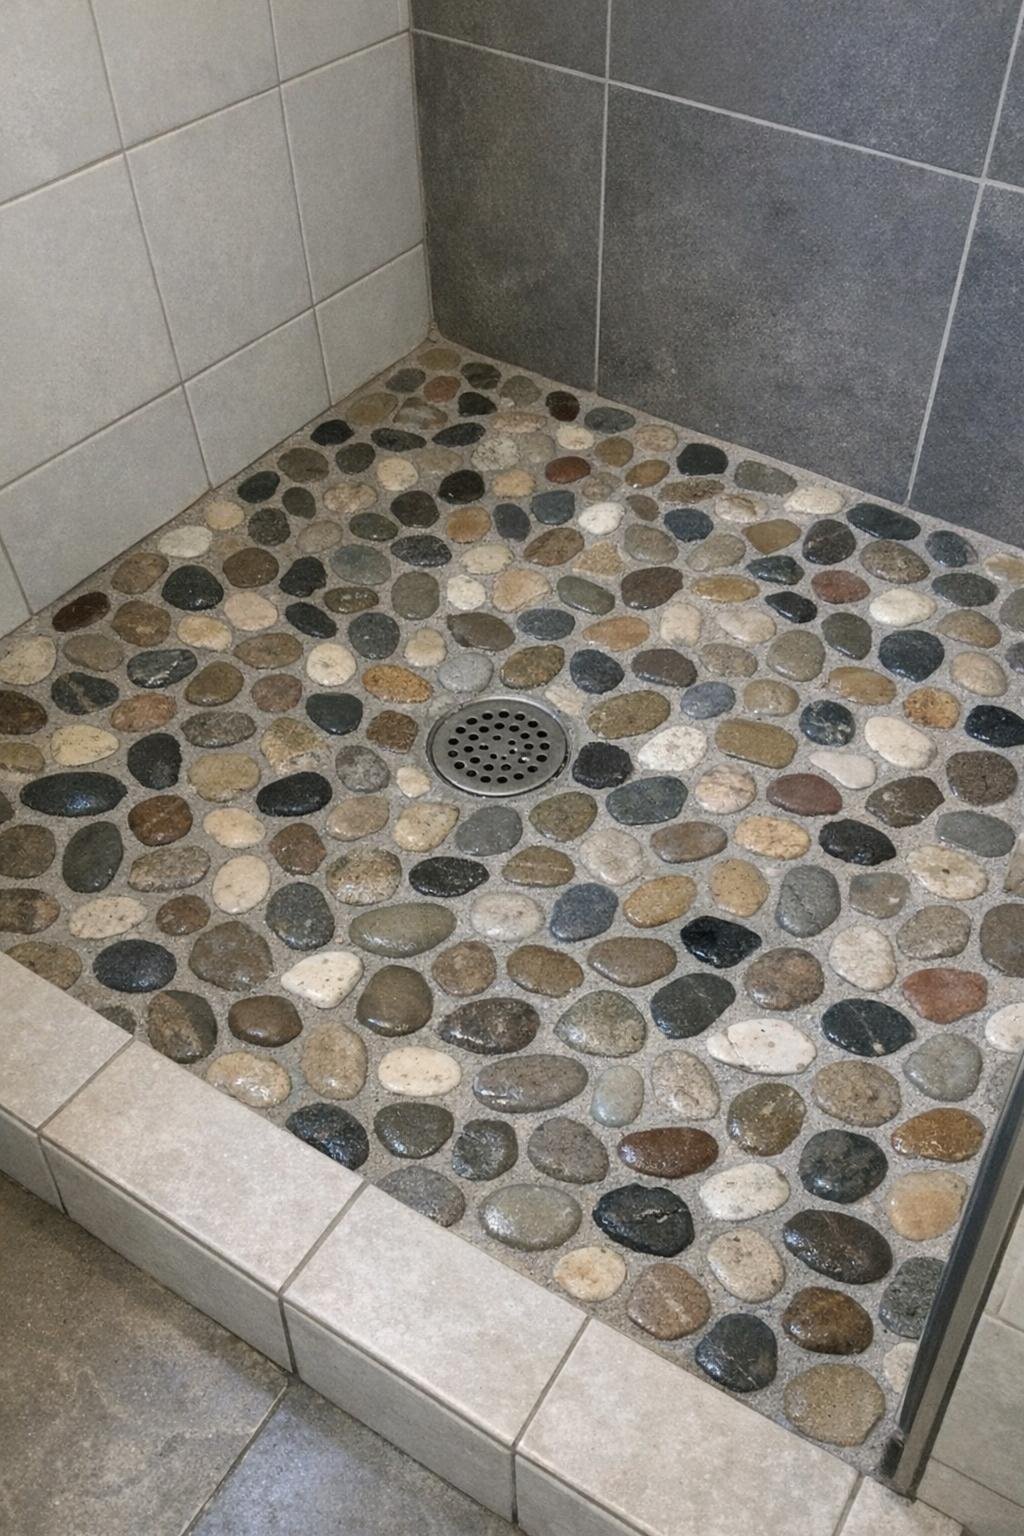
A pebble tile shower floor adds texture and spa style without redoing the entire bathroom. For a standard 3-by-5-foot shower, you’ll need mesh-backed pebble tile sheets, thinset, grout, sealant, and a notched trowel. The materials often run $120 to $250, and the project usually takes one weekend if the shower pan is already prepped and waterproofed.
The big steps are to dry-fit the sheets so you can blend the edges, spread thinset in small sections, and press each sheet in while adjusting loose edges so you don’t end up with obvious square seams. After it sets, grout and seal. My pro tip is to choose a medium-tone grout instead of bright white, because it hides soap residue and makes the stones look more natural.
7. Hide the garbage cans
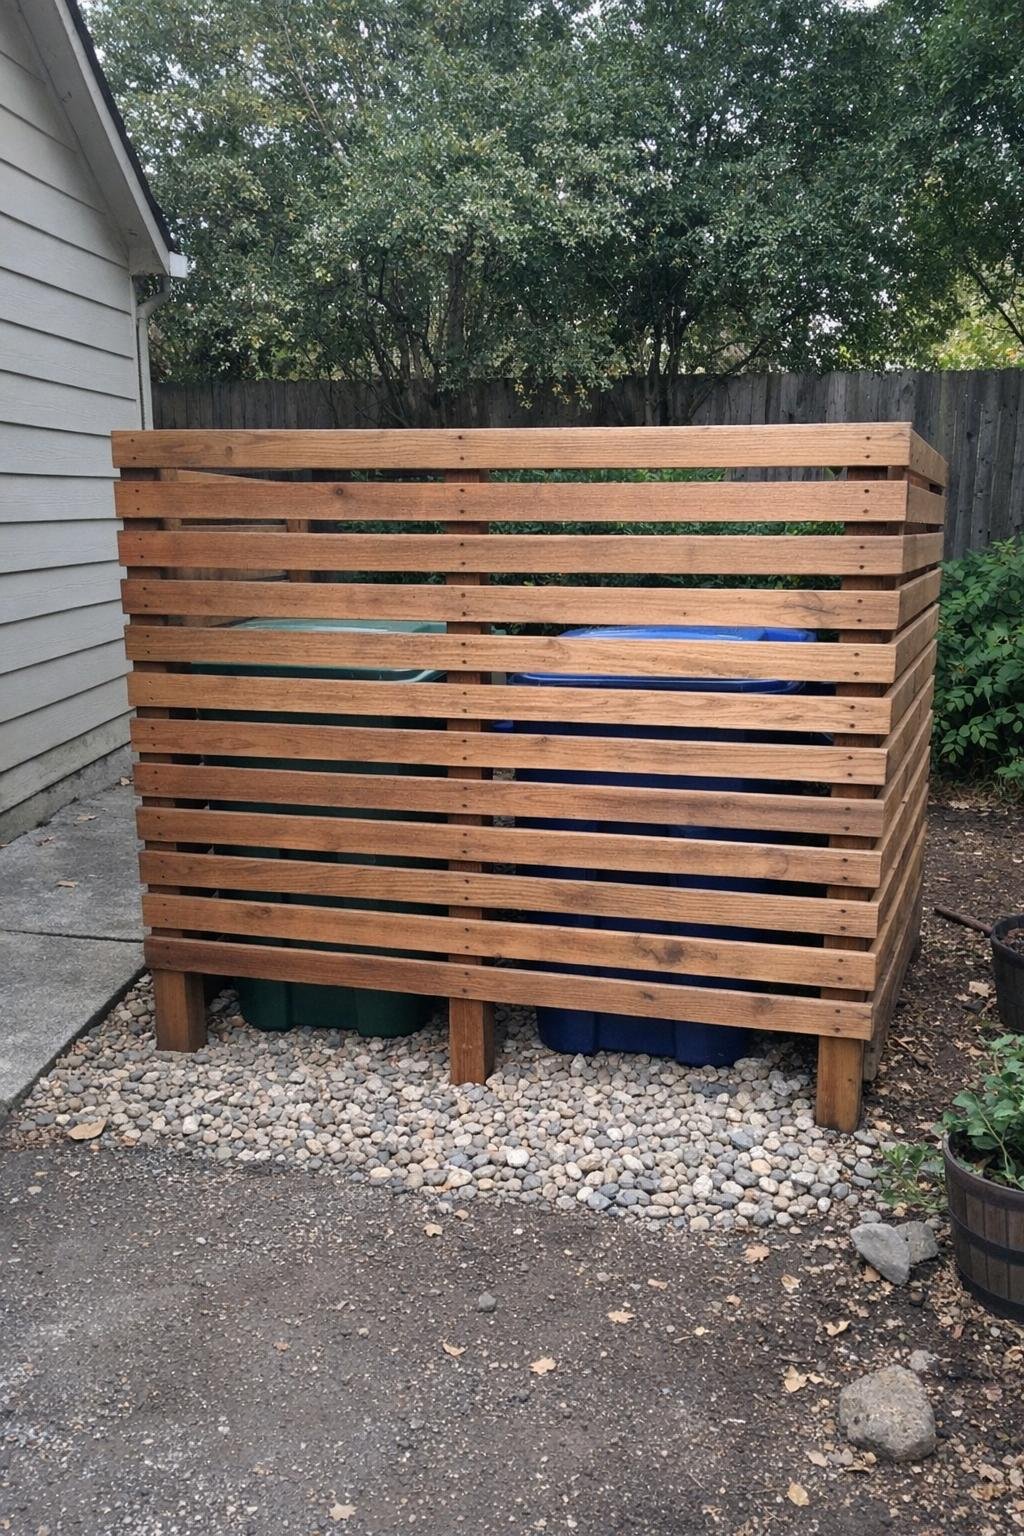
Outdoor garbage cans are necessary, but they’re not exactly charming. A simple slatted screen makes a backyard or side yard look much tidier for around $100 to $220 using 4x4 posts, 1x4 or 1x6 slats, exterior screws, and stain or paint. If your cans are standard 96-gallon bins, plan on a screen roughly 4 to 5 feet tall and wide enough to leave at least 6 inches of clearance around them.
Set the posts in the ground or secure them to concrete anchors, screw horizontal or vertical slats across the frame, and leave a gap for airflow and easy rinsing. You can do two fixed panels or one panel with a simple gate. My pro tip is to keep the bottom slat a couple of inches above grade so it doesn’t wick up water and rot early.
8. Paint your air vent covers instead of replacing them
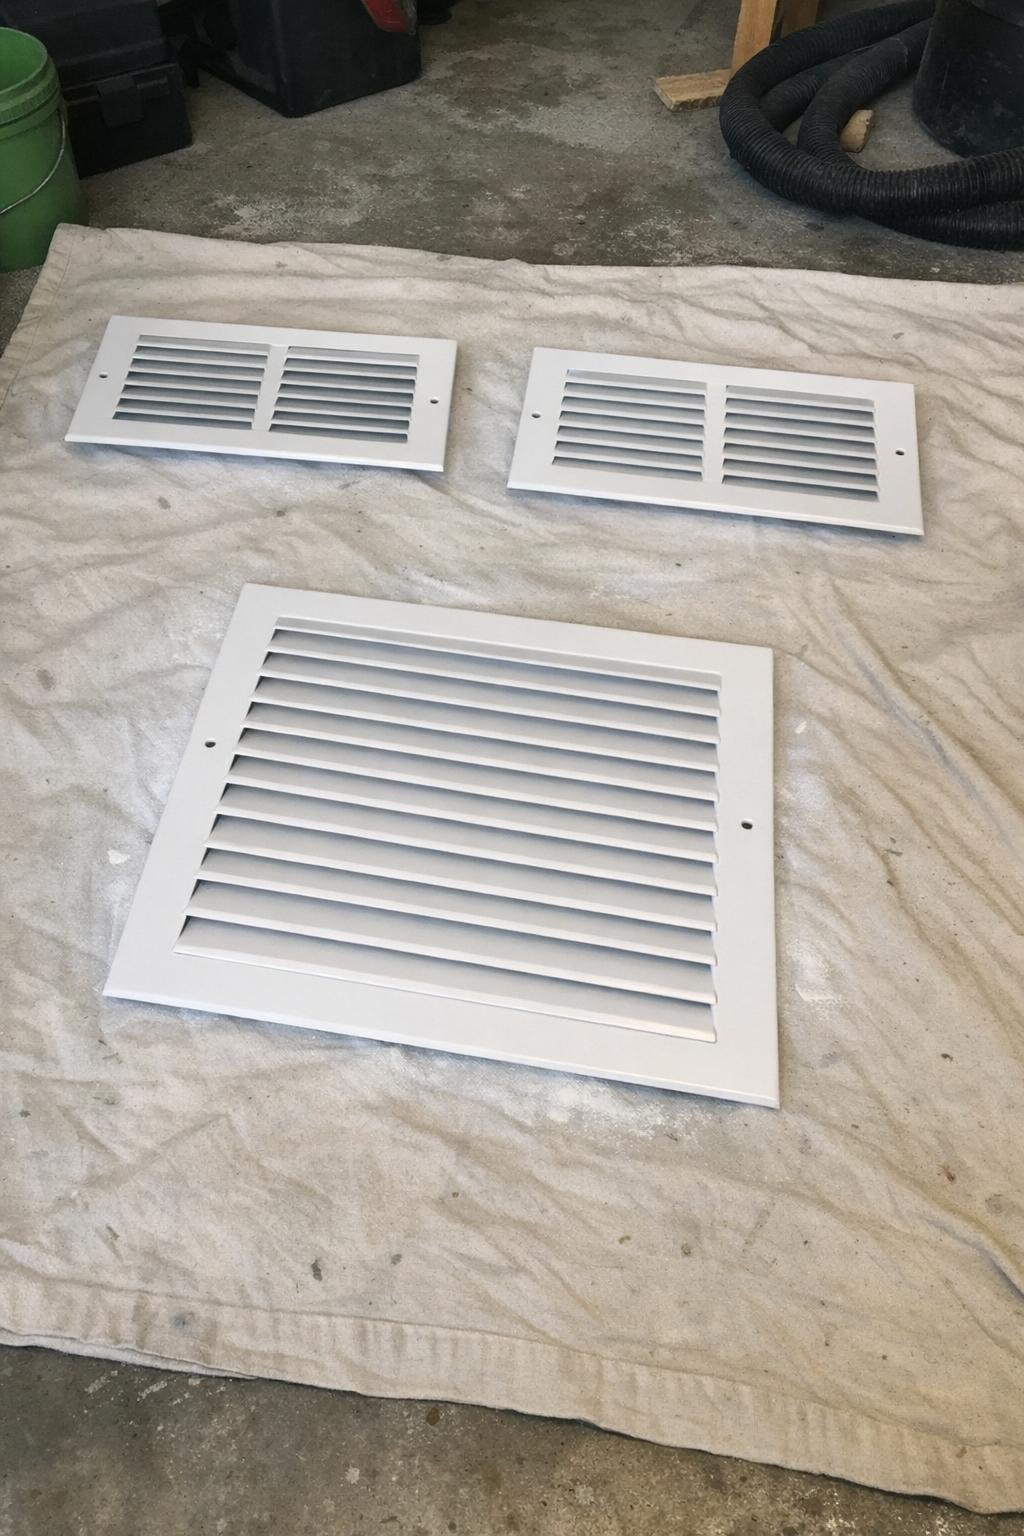
This is one of those tiny upgrades that makes a room feel cleaner fast. If your vent covers are structurally fine but yellowed, chipped, or the wrong color, spray paint is so much cheaper than replacing every register in the house. A few cans of metal-friendly primer and spray paint usually cost $20 to $40 total and can update multiple vents in an afternoon.
Remove the covers, wash off dust and grease, lightly sand any rough spots, then spray thin coats instead of one heavy coat. Let them cure fully before reinstalling so they don’t stick to the floor or wall paint. My pro tip is to label the underside with painter’s tape while they’re off, because vent sizes can vary more than you think from room to room.
9. Built-in work station
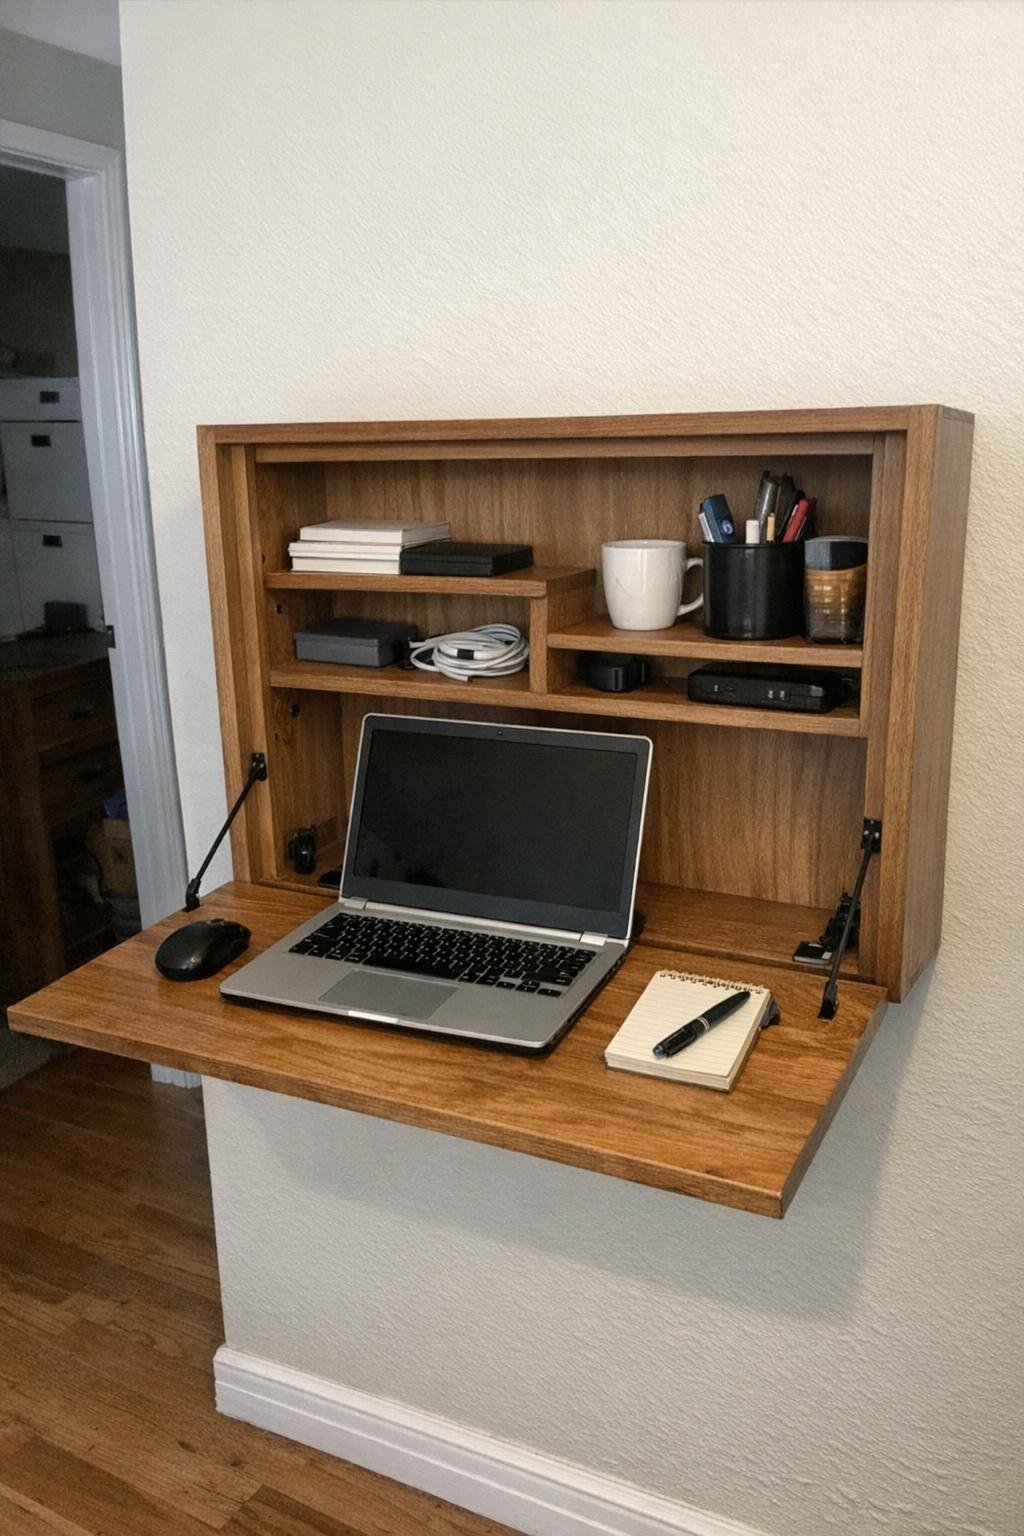
A wall-mounted drop-down laptop cabinet is perfect when you need a home office but don’t want to give up a whole room. You can build one from plywood, a piano hinge, shelf supports or chains, magnetic catches, and a small power strip. I’d budget $120 to $250 depending on size and finish, and you can build a simple version in a weekend.
Mount the cabinet securely to studs, install the fold-down front so it becomes the desktop, and add one or two interior shelves for a laptop, charger, and notebook. Closed up, it looks tidy and intentional instead of like work took over the house. My pro tip is to make the desktop depth at least 16 inches so a laptop actually feels usable, not cramped.
10. Give the backyard patio a makeover
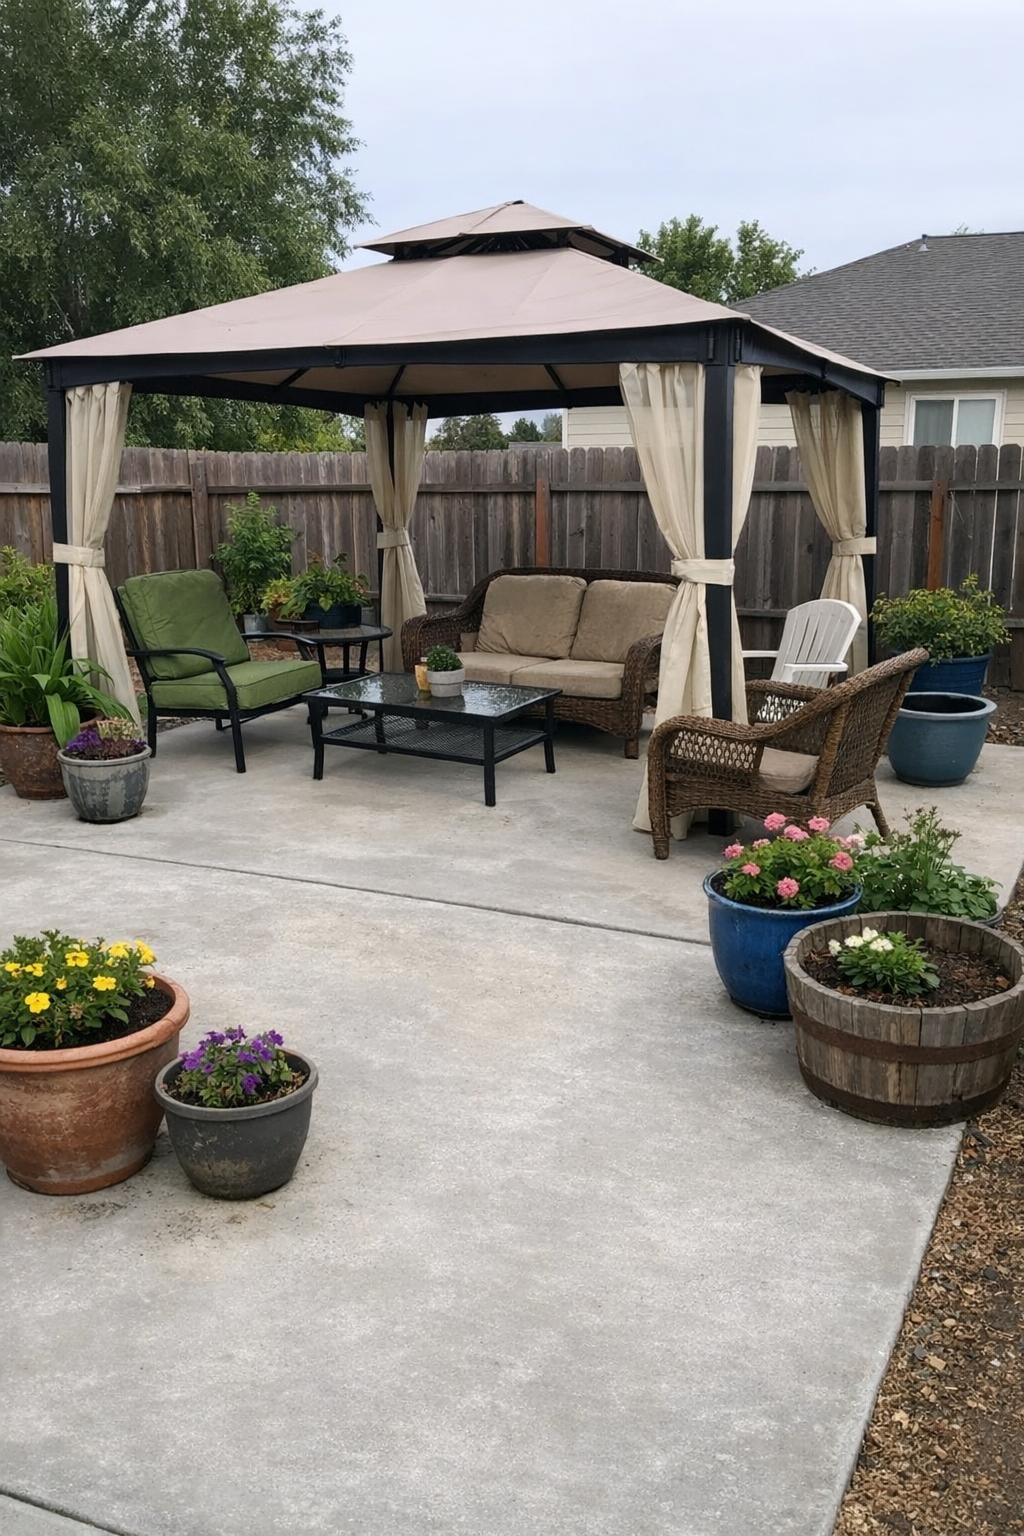
You do not need a luxury budget to make a patio feel inviting. One of my favorite budget moves is using a thrifted gazebo frame, secondhand outdoor furniture, fresh cushions, string lights, and a few large planters. Depending on what you can source locally, you can make a tired patio feel styled for about $250 to $800, and most of the transformation happens in a day.
Start by power washing the concrete and arranging the biggest pieces first: the gazebo, seating, and a rug. Then layer in cushions, planters, and soft lighting so the space feels finished. My pro tip is to stick to two or three colors max, like black, natural wood, and green, because that makes thrifted pieces look collected on purpose instead of random.
11. Painter's tape drill depth stop
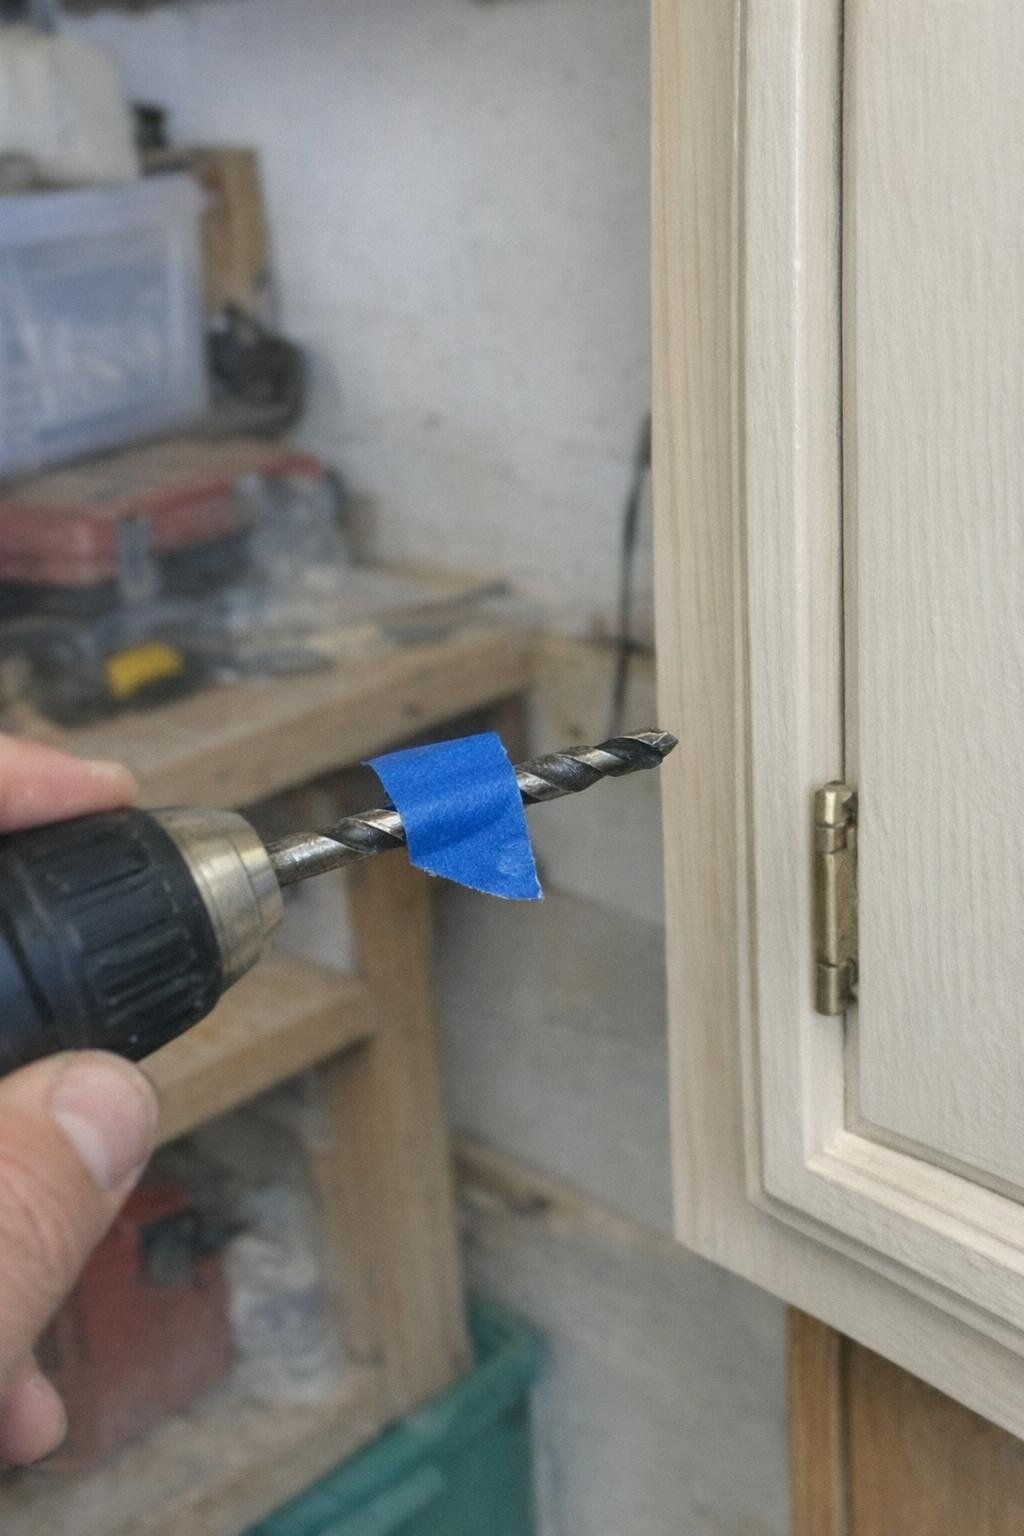
This one is tiny, but it can save a door, cabinet, or wall from an ugly mistake. If I need to drill a precise depth for hardware or anchors and don’t have a stop collar handy, I wrap painter’s tape around the drill bit at the exact depth I want, usually 1/2 inch to 1 inch depending on the screw or insert. It costs basically nothing and takes under a minute.
Measure the depth on the bit, wrap the tape so a little flag sticks out, and drill until that tape flag starts sweeping the sawdust right at the surface. Then stop immediately. My pro tip is to use a contrasting tape color like blue on dark bits, because it’s much easier to see when you’re working quickly or in a dim closet or cabinet opening.
12. Peel-and-stick backsplash
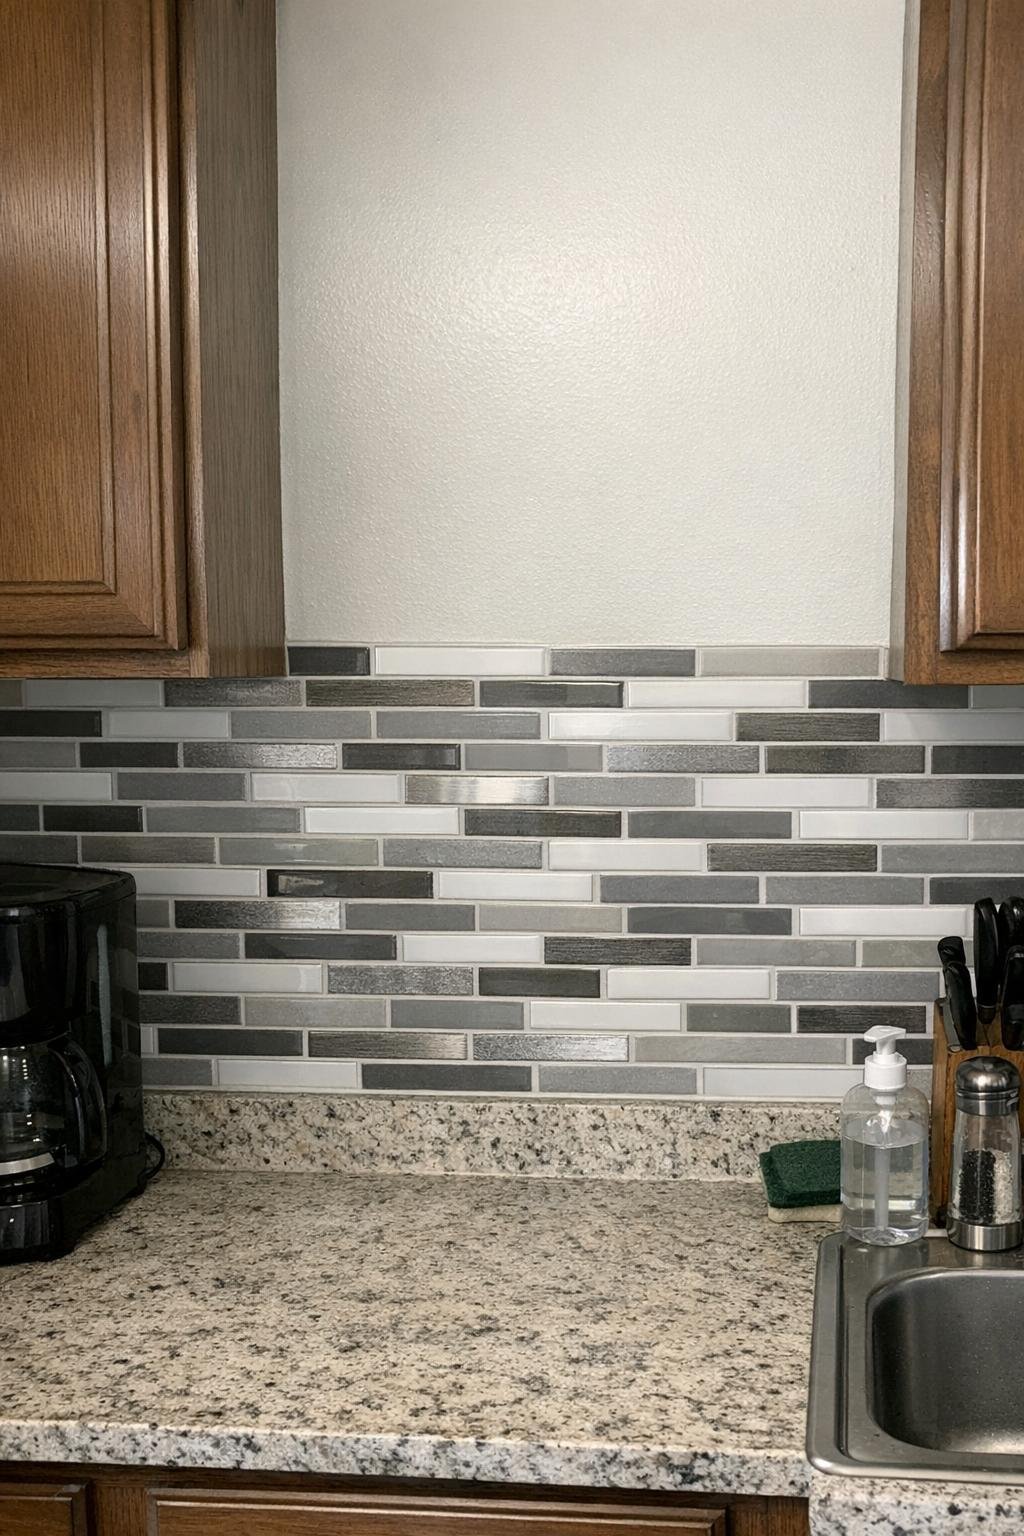
A peel-and-stick backsplash is one of the fastest kitchen refreshes I know, especially if you’re staring at plain painted drywall behind the counters every morning. For a typical 20-square-foot backsplash area, materials usually cost $60 to $180 depending on the tile style, plus a utility knife, level, and smoothing tool. This is very doable in one afternoon.
Clean the wall thoroughly, mark a level starting line, and work from the most visible corner outward so your cuts land in less noticeable spots. Press each sheet down firmly and roll the seams well. My pro tip is to buy one extra box, because matching the lot and color later can be surprisingly tricky if you run short by just one strip.
13. Shiplap a fireplace surround with plywood strips
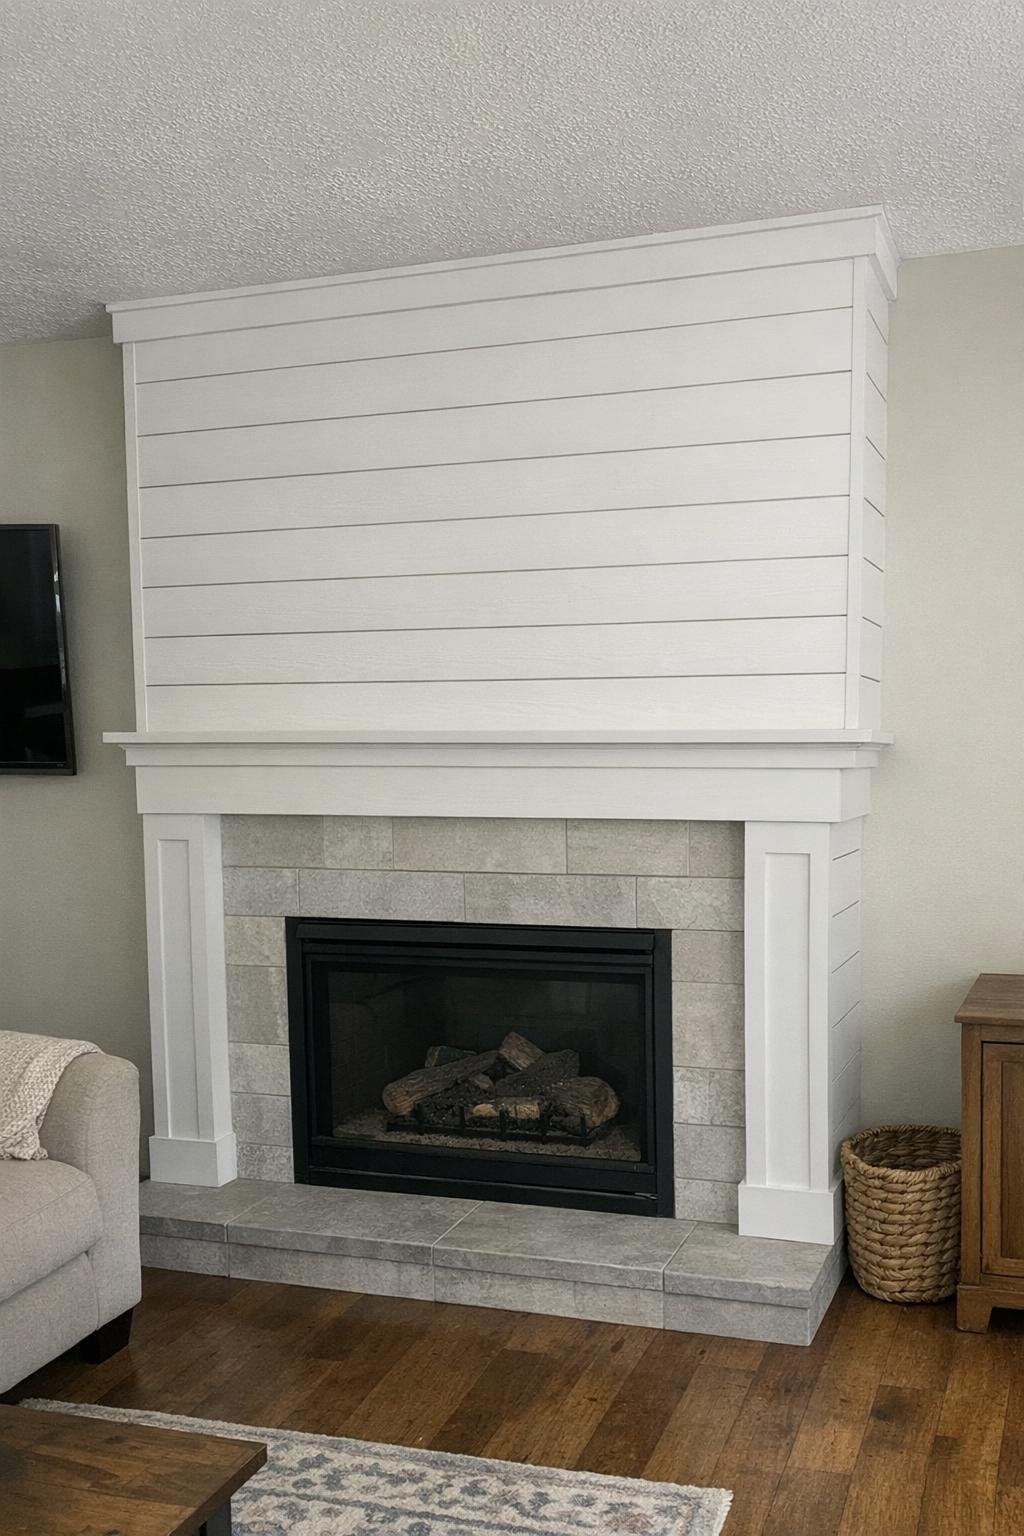
This is a great way to make a basic fireplace wall feel architectural without paying for solid boards. I like using ripped plywood strips, usually 5 1/2 inches wide, because they’re more budget-friendly and stay flatter. Depending on the size of the surround, you can often do this for $70 to $180 in plywood, trim, nails, caulk, and paint.
Cut your strips, mark level reference lines, and attach them from the bottom up with a nickel or tile spacer between rows for consistent gaps. Frame the edges with trim, then caulk and paint everything one color. My pro tip is to check your local fireplace clearance requirements before you start, because combustible trim needs to stay a safe distance from the firebox opening.
14. Swap builder-grade lights for a $40 fixture
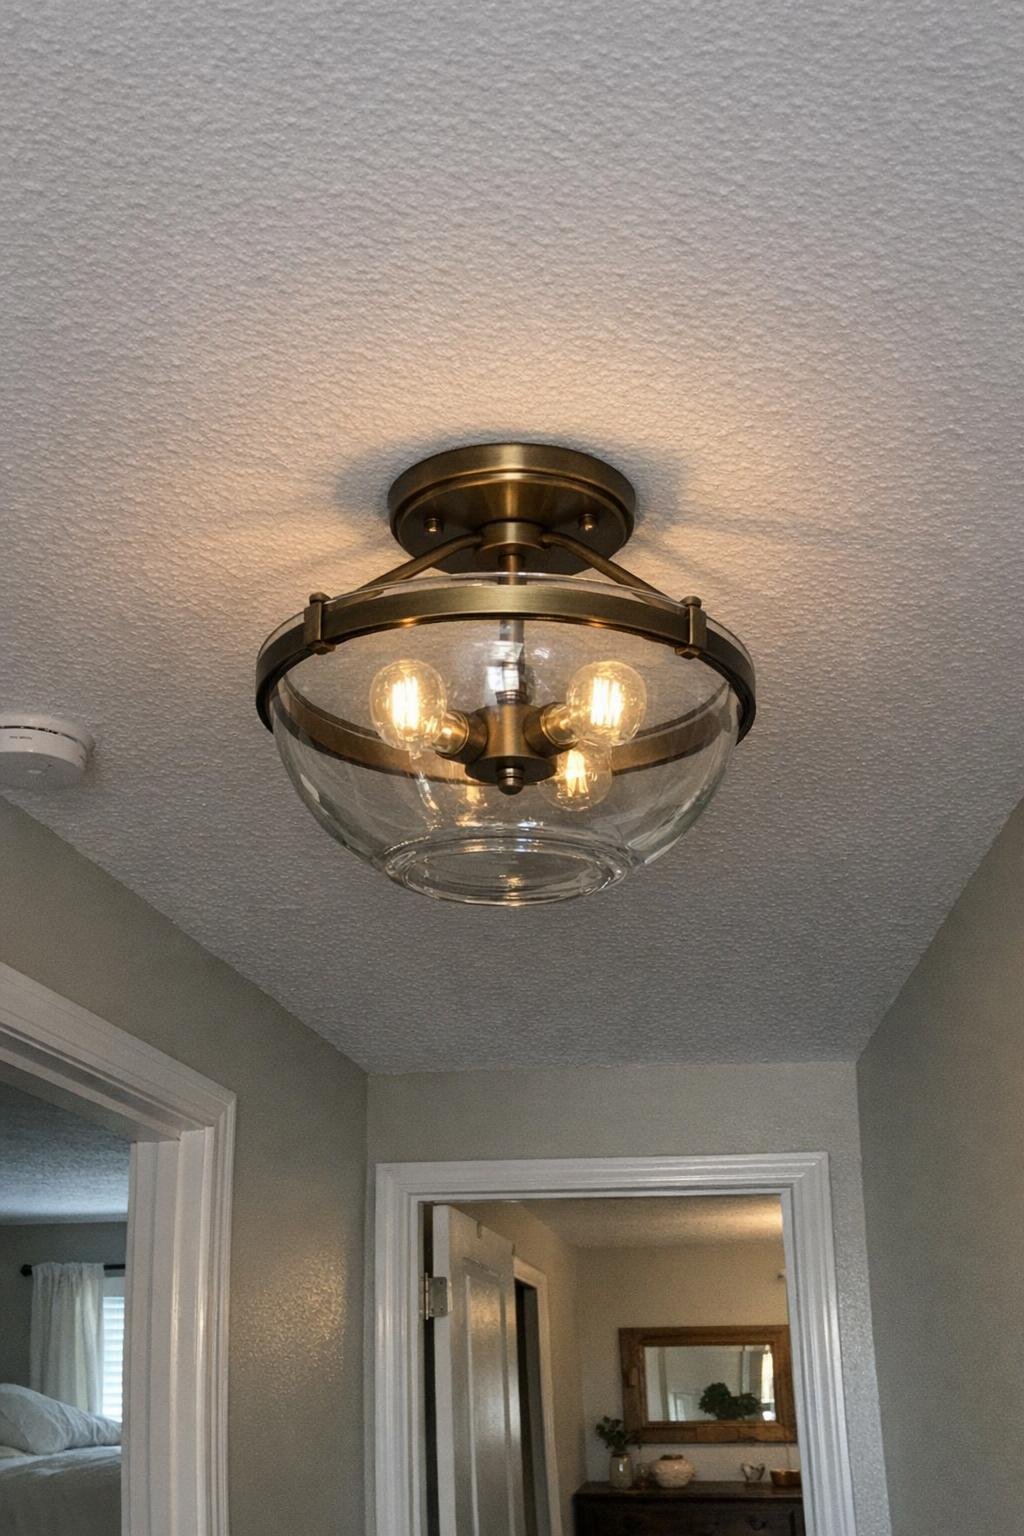
Changing a basic dome light to a simple pendant or semi-flush fixture makes a room feel instantly more current. I’ve found plenty of good-looking fixtures in the $40 to $70 range, and the rest of the supplies are usually just wire nuts and a voltage tester if you don’t already own one. The actual swap takes about 30 to 60 minutes.
The six steps I follow are: turn off the breaker, verify the power is off, remove the old fixture, connect black to black and white to white, attach the ground wire, and secure the new canopy to the ceiling box. Then restore power and test. My pro tip is to take a photo of the old wiring before disconnecting anything, because it’s a lifesaver if you get interrupted halfway through.
15. Pull-out trash and recycling cabinet
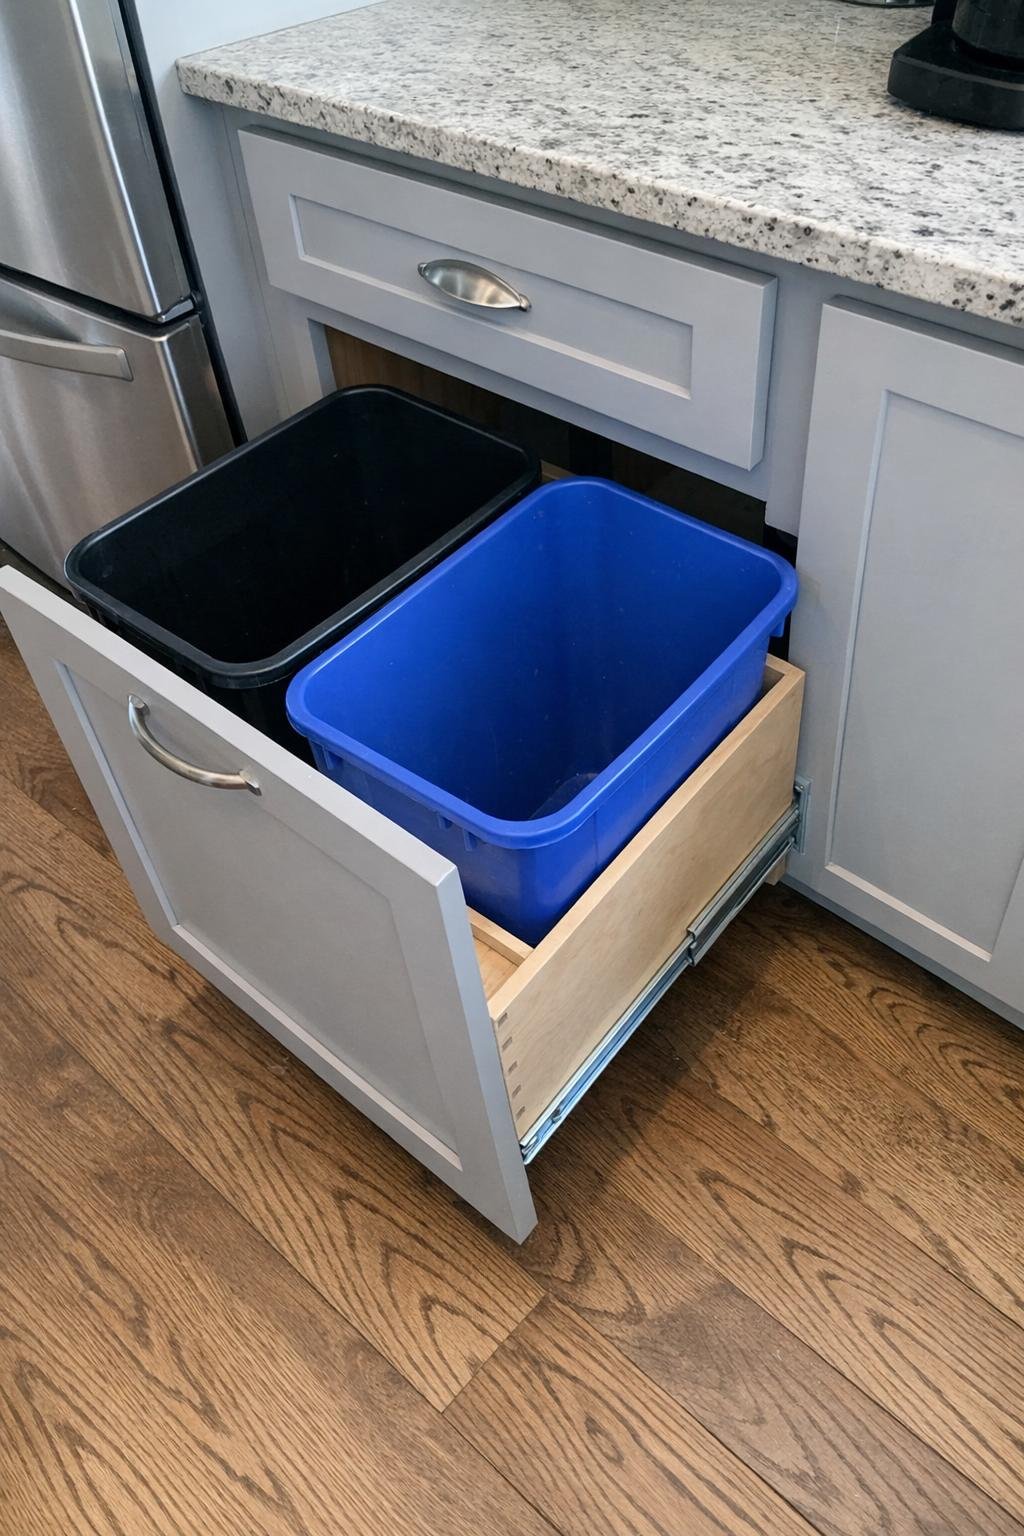
A pull-out trash cabinet is one of those upgrades that makes everyday kitchen life feel nicer. You can create one from a stock drawer kit or pull-out frame, full-extension slides, and two bins sized to your cabinet opening. Most setups cost about $80 to $180, and installation usually takes two to three hours.
Measure your cabinet opening carefully first, then install the slide hardware square and level so the pull-out doesn’t bind. Drop in one bin for trash and one for recycling, and test the clearance with the door closed. My pro tip is to account for hinge swing on face-frame cabinets, because that’s the detail that can make a pull-out fit on paper but scrape in real life.
16. Garage slat wall for tools from 1x4s
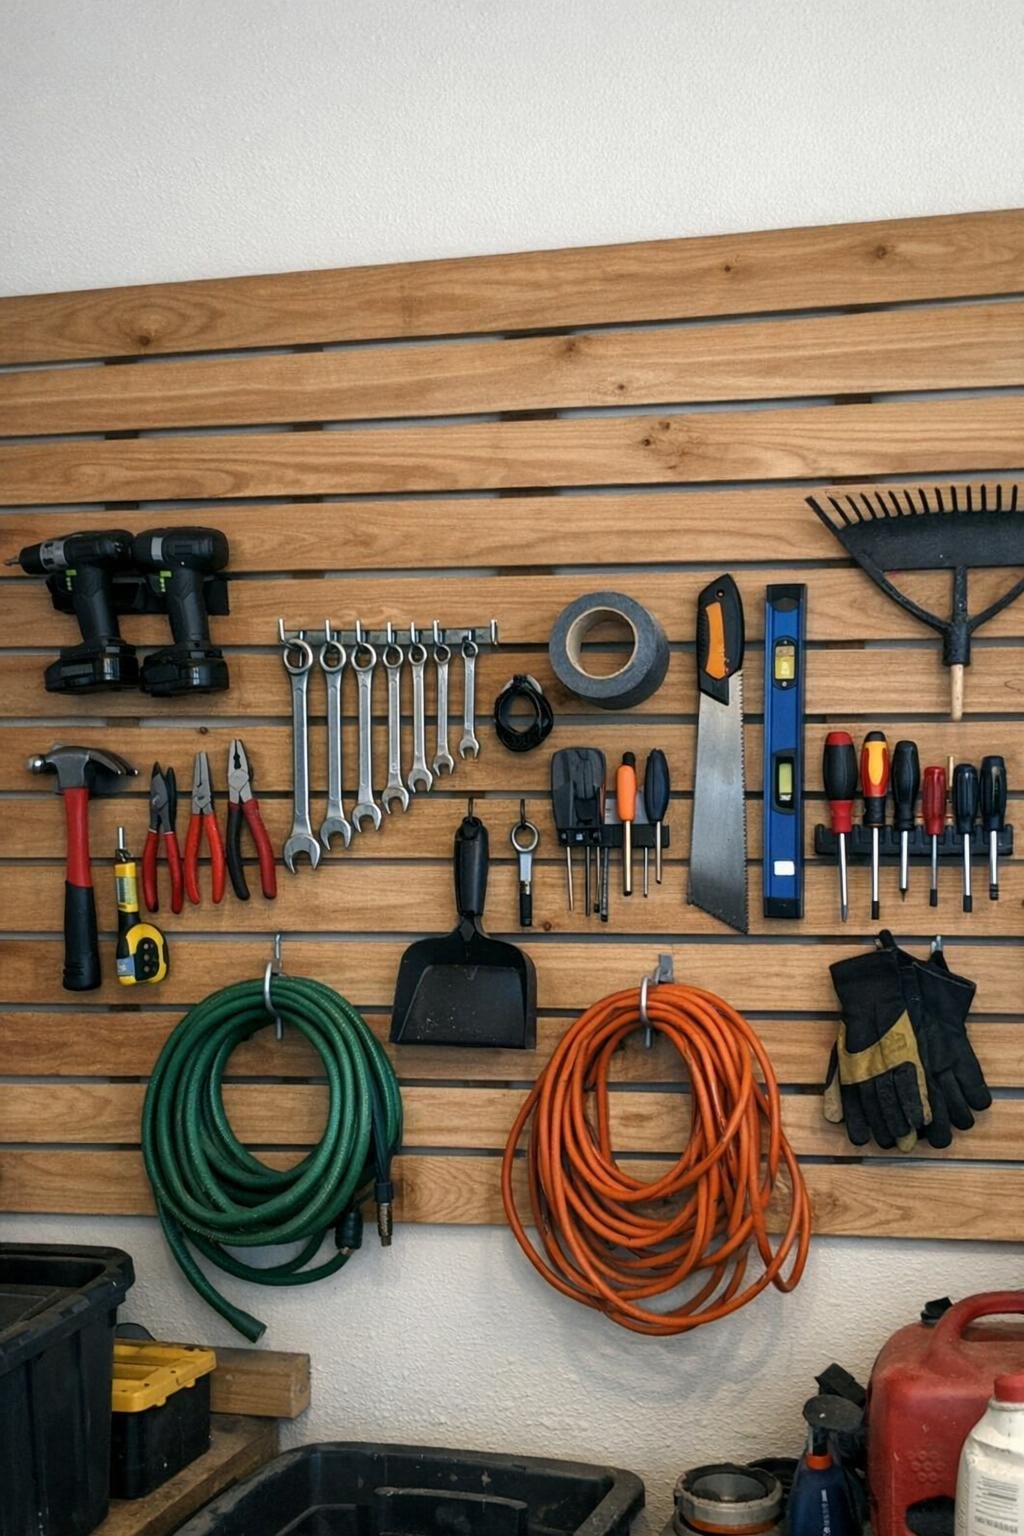
If your garage has that “everything is leaning in a corner” problem, a DIY slat wall is incredibly satisfying. Using 1x4 boards, screws, spacers, and a few hooks or brackets, you can cover a useful section of wall for about $100 to $250 depending on the size. A 4-by-8-foot section is a great starting point for rakes, brooms, cords, and small ladders.
Screw the horizontal boards into studs, keeping the gaps consistent at about 3/4 inch to 1 inch, then add movable hooks wherever you need them. Paint or stain it if you want, but even raw wood looks organized. My pro tip is to leave the bottom row high enough to clear the garage base edge and let you sweep under it without catching every bristle.
17. Window box planters built to the sill width
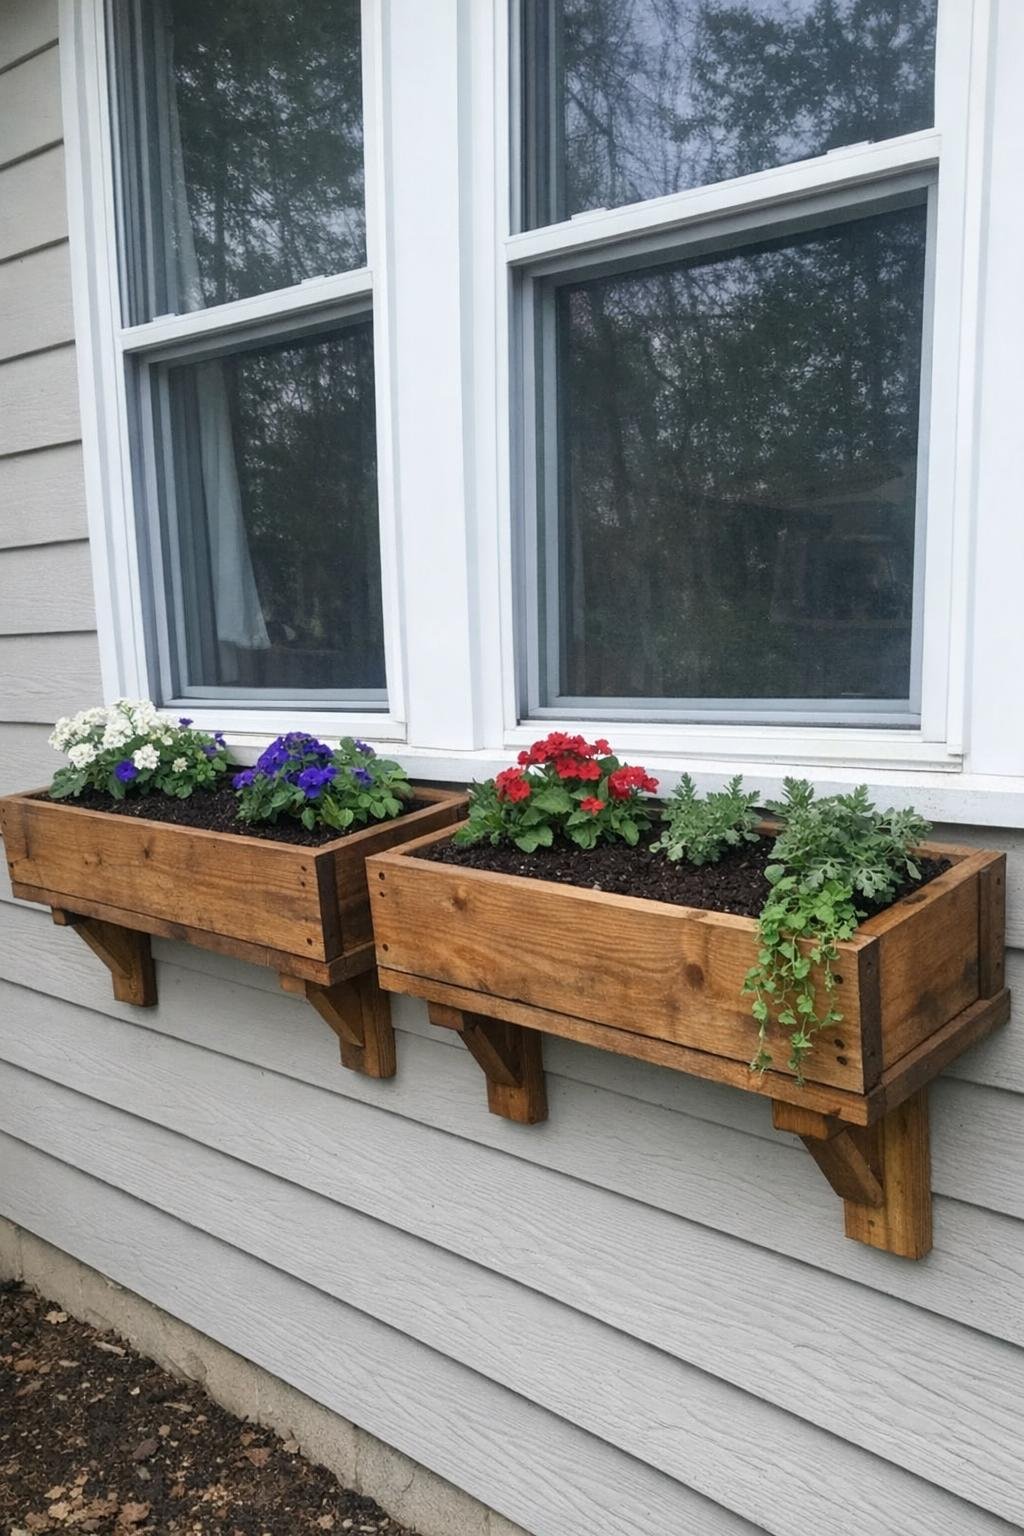
Window boxes add so much charm to the front of a house, and sizing them exactly to the sill width makes them look custom. I’d use cedar or pressure-treated boards, exterior screws, brackets, landscape fabric, and potting soil. For two average windows, the cost is usually around $80 to $180 not including plants, and you can build them in half a day.
Measure each sill, build simple rectangular boxes 6 to 8 inches deep, drill drainage holes, and mount them securely into framing or masonry with proper brackets. Then line and plant them. My pro tip is to leave at least 1 inch of clearance below the window trim so the boxes don’t trap water against the house or look awkwardly jammed under the sill.
18. Paint the front door and change the hardware
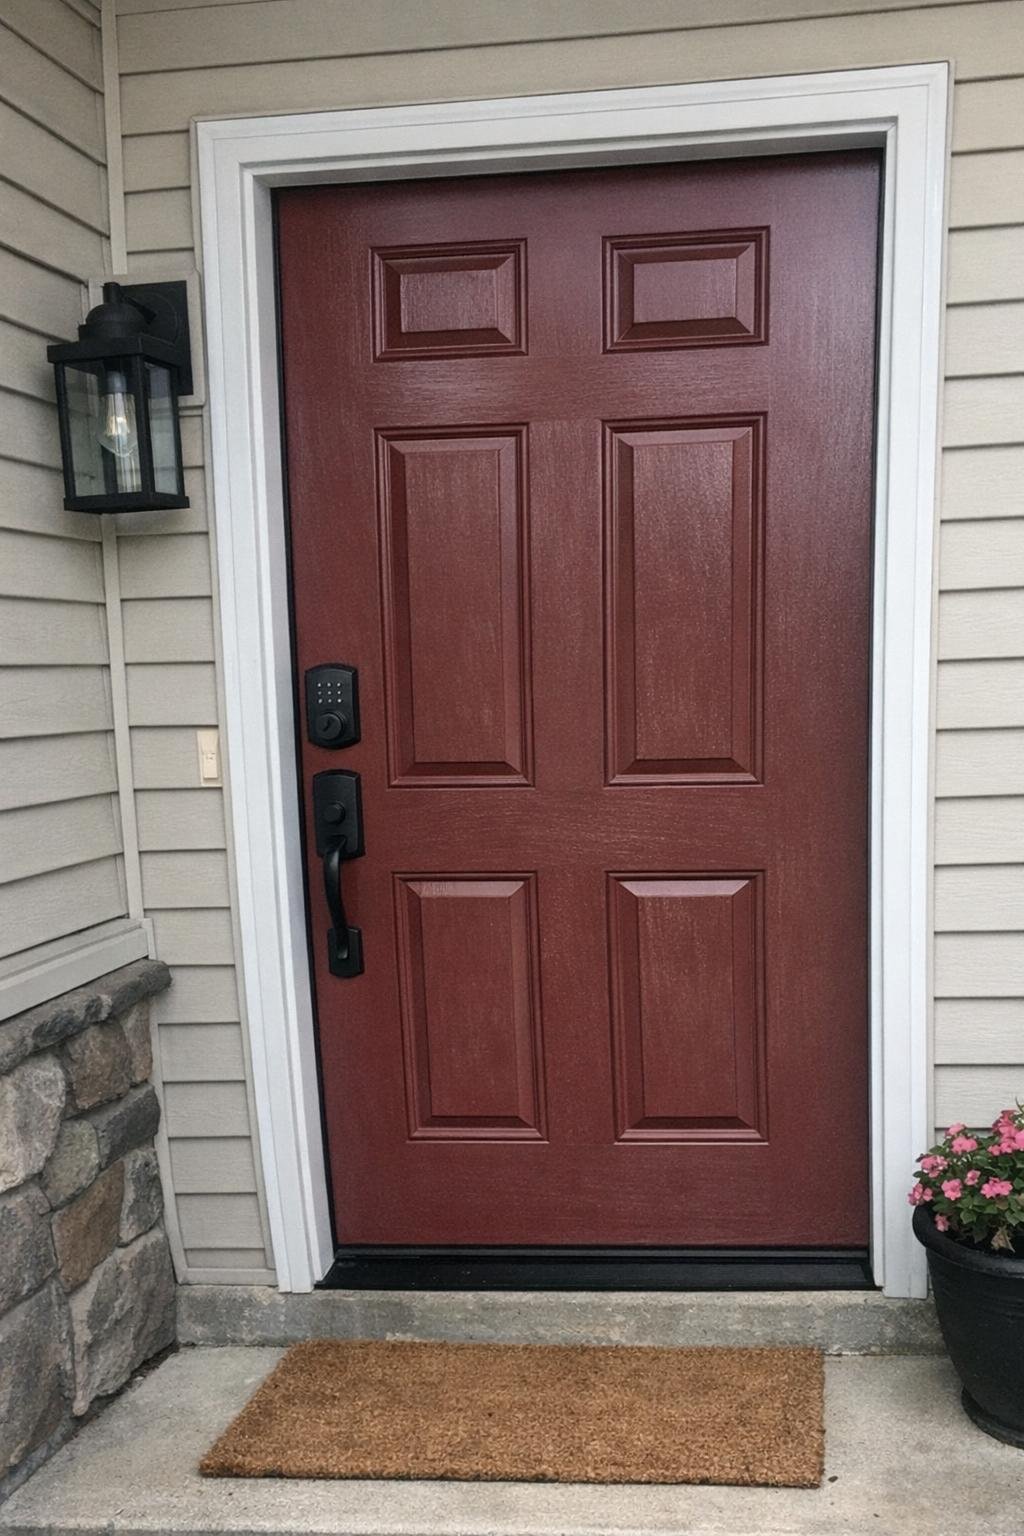
This is probably the fastest exterior update with the biggest payoff. A quart of exterior door paint, a new handle set or knob, and maybe a kick plate can make the whole front entry feel more intentional for about $60 to $200. I’ve done this over a weekend and it made the entire house look sharper from the street.
Take off the hardware, clean and lightly sand the door, paint thin even coats, and install the new hardware once the finish cures enough to handle safely. If you want the expensive look, choose a color with some depth like navy, deep green, charcoal, or a warm black. My pro tip is to paint the door edge too, especially the latch side, because that little detail makes the refresh look complete.
19. Floating shelves with hidden brackets in the bathroom
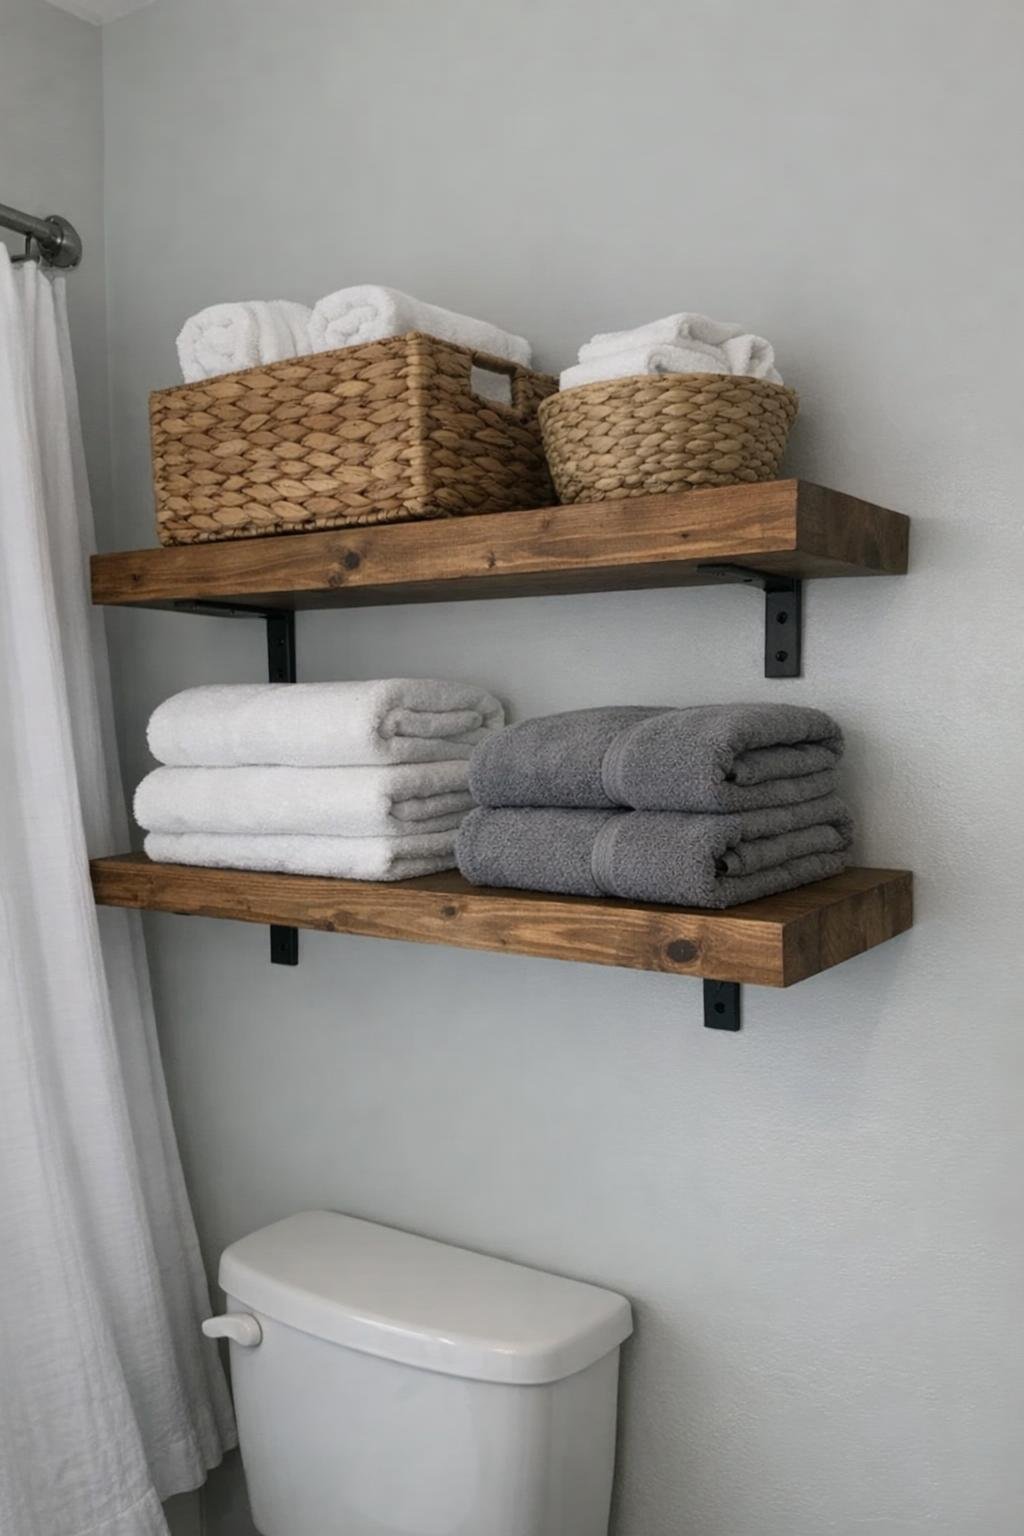
Bathroom storage is always at a premium in my house, so floating shelves are one of my favorite practical upgrades. You can build or buy wood shelves and use heavy hidden brackets anchored into studs. A pair of 24- to 30-inch shelves usually costs about $50 to $150 total and takes a couple of hours to install.
Find the studs, mount the brackets perfectly level, then slide the shelves on and secure them with the included set screws. Above a toilet or beside a vanity, they’re perfect for rolled towels, baskets, and everyday items. My pro tip is to keep the shelf depth around 7 to 9 inches in a small bathroom so they hold useful things without making the room feel crowded.
20. Closet system from plywood and a hanging rod kit
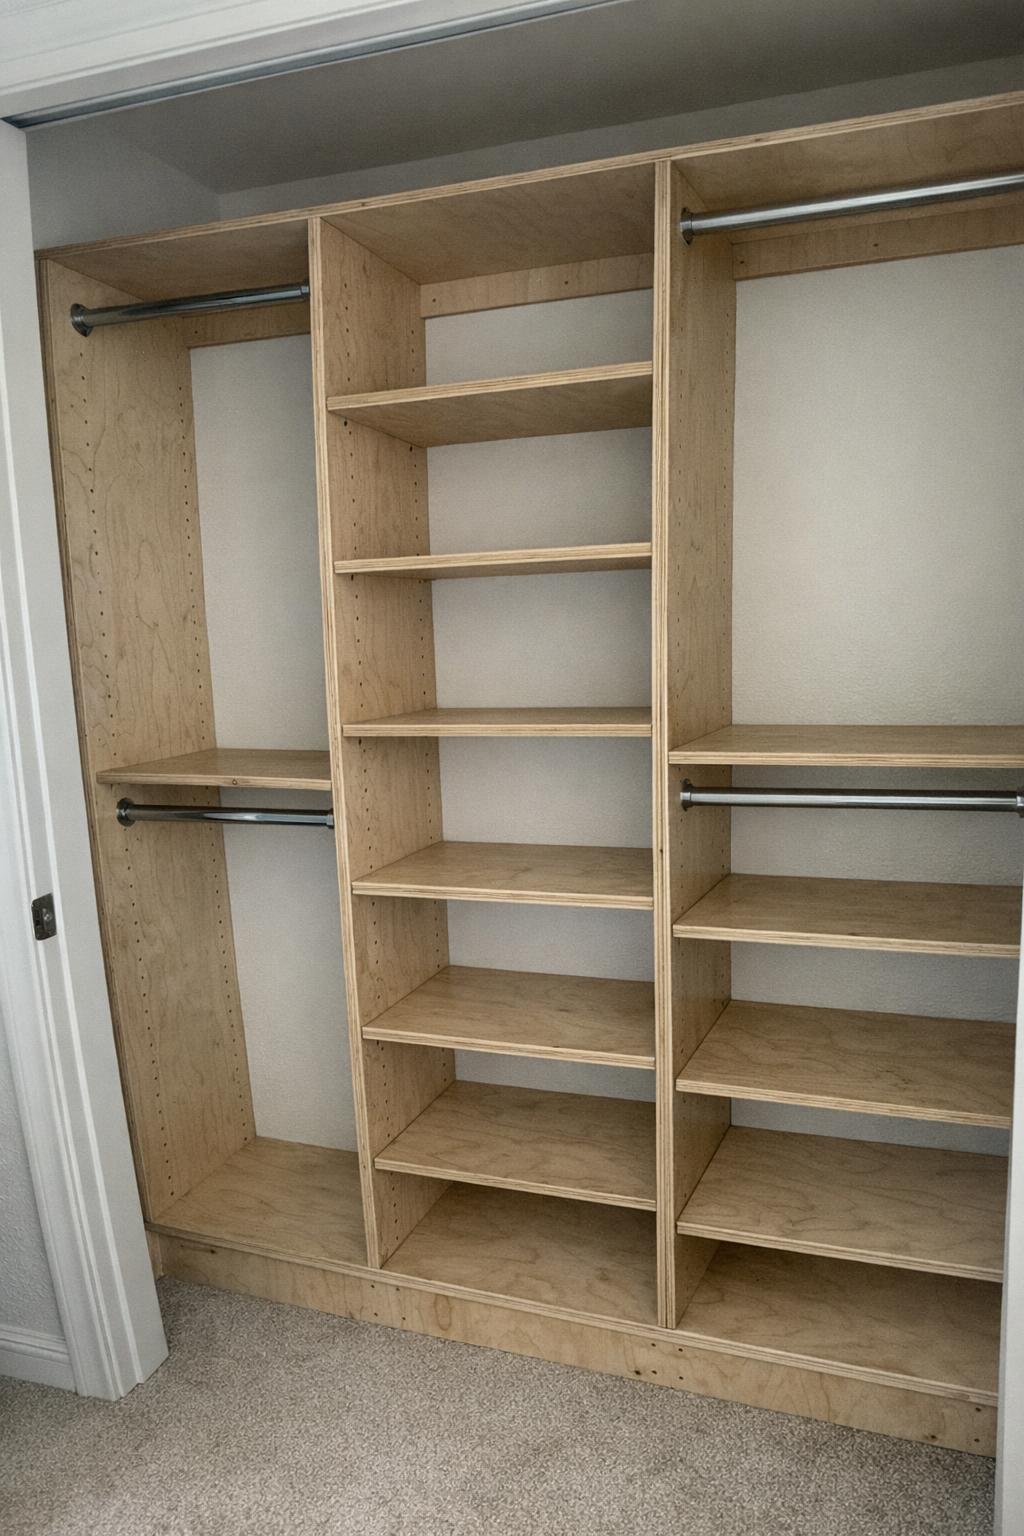
A basic reach-in closet becomes so much more functional with a simple plywood system and a hanging rod kit. For a 6-foot-wide closet, I’d use 3/4-inch plywood for side panels and shelves, edge banding or trim, one or two hanging rods, and a few screws into studs. The total often lands around $150 to $350, which is still far less than many custom systems.
Start by measuring the closet and deciding how much double-hang versus shelf space you actually need. Install the side supports and top shelf first, then add the rods and any lower cubbies or shelves. Paint it all white if you want that clean built-in look. My pro tip is to make one shelf section tall enough for a laundry basket or tall boots, because that flexible storage ends up being more useful than another tiny cubby.
If you only tackle one or two of these, you can still make your home feel noticeably more polished without blowing your budget. That’s honestly my favorite kind of project: affordable, useful, and satisfying enough that every time I walk by, I’m still glad I did it.