
I love a DIY that starts with something humble from a kitchen drawer, the craft bin, or the grocery bag and somehow ends up looking like I paid boutique prices for it downtown. These are the kinds of projects that make people lean in and say, “Wait, you made that?” and honestly, those are my favorite kinds of home projects to do on a regular weeknight.
Every one of these ideas uses the oven for a little magic, whether that means softening, shrinking, drying, opening, or curing. I put these in the exact order I’d share them with a friend, and I included the temperatures, timing, finishing details, and a few practical safety notes too, especially for the plastic-based projects where I always like to crack a window and use an old baking sheet lined with parchment.
1. Plastic spoon chrysanthemum mirror
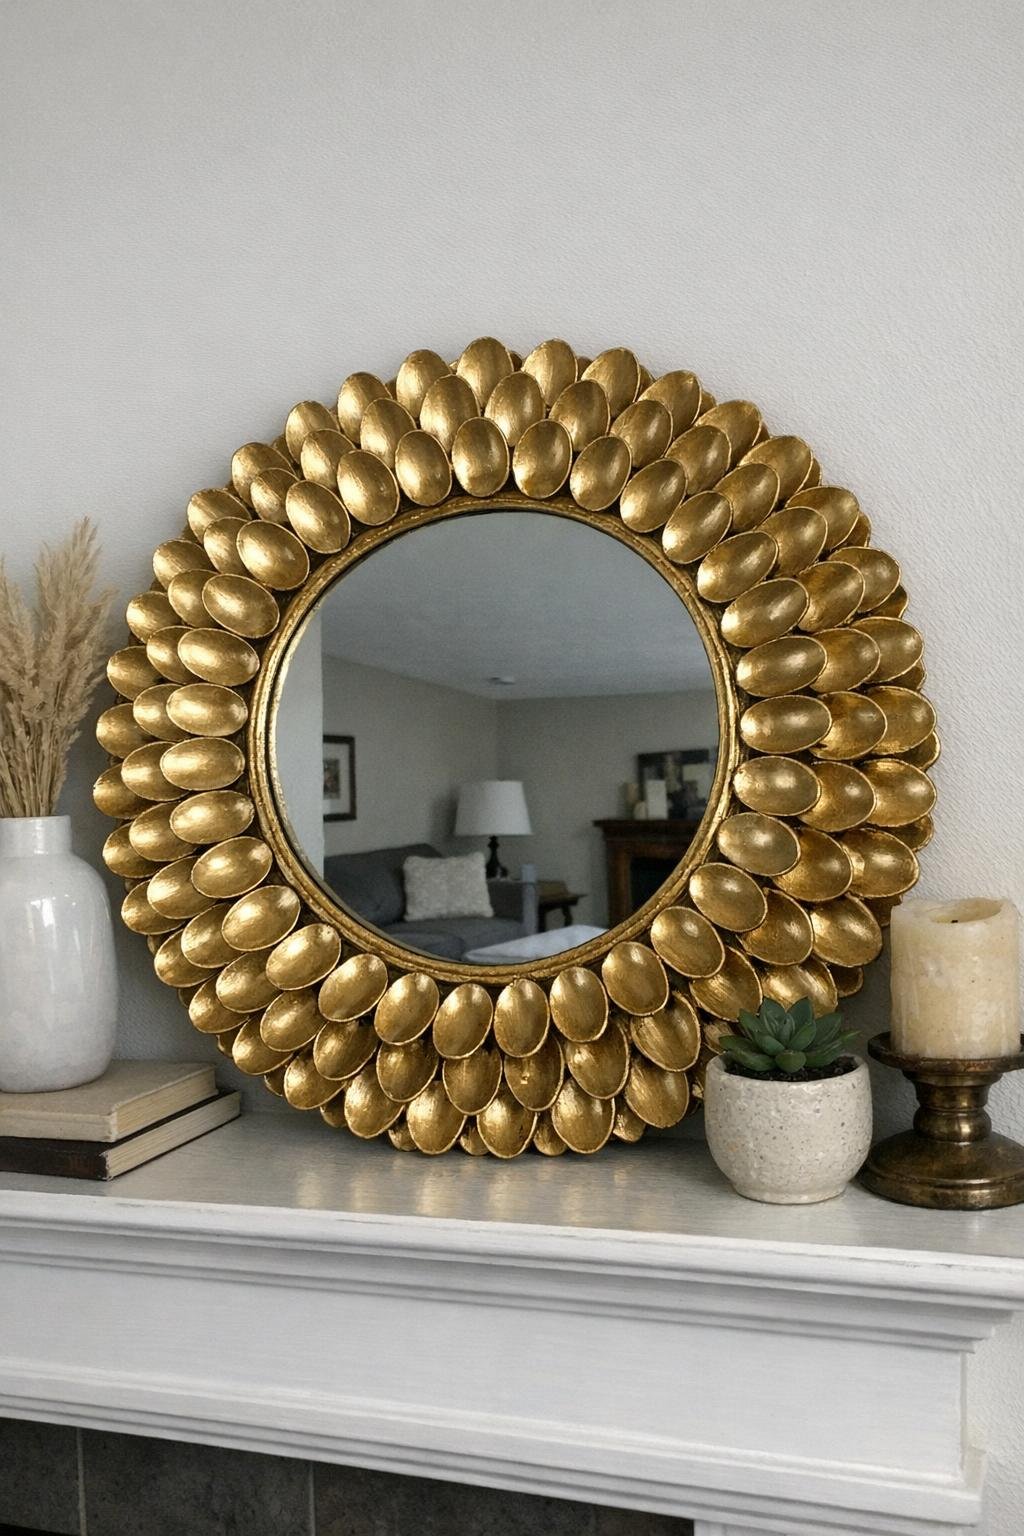
This one starts with plain plastic spoons and ends up looking like a statement piece from a home decor shop. I snip off the spoon heads, lay them cupped-side up on a parchment-lined baking sheet, and warm them at 250°F for just a few minutes until the edges start to soften and curl slightly. Once cooled, I glue the spoon heads in tight overlapping rings around a round mirror, working from the outside in on a cardboard or wood backing.
The expensive-looking finish is spray paint: one even coat of warm metallic gold turns those little spoon heads into chrysanthemum petals. Keep the mirror about 12 to 18 inches across so it still feels refined, and always ventilate well when heating plastic and painting afterward.
2. Takeout clamshell shrink charms
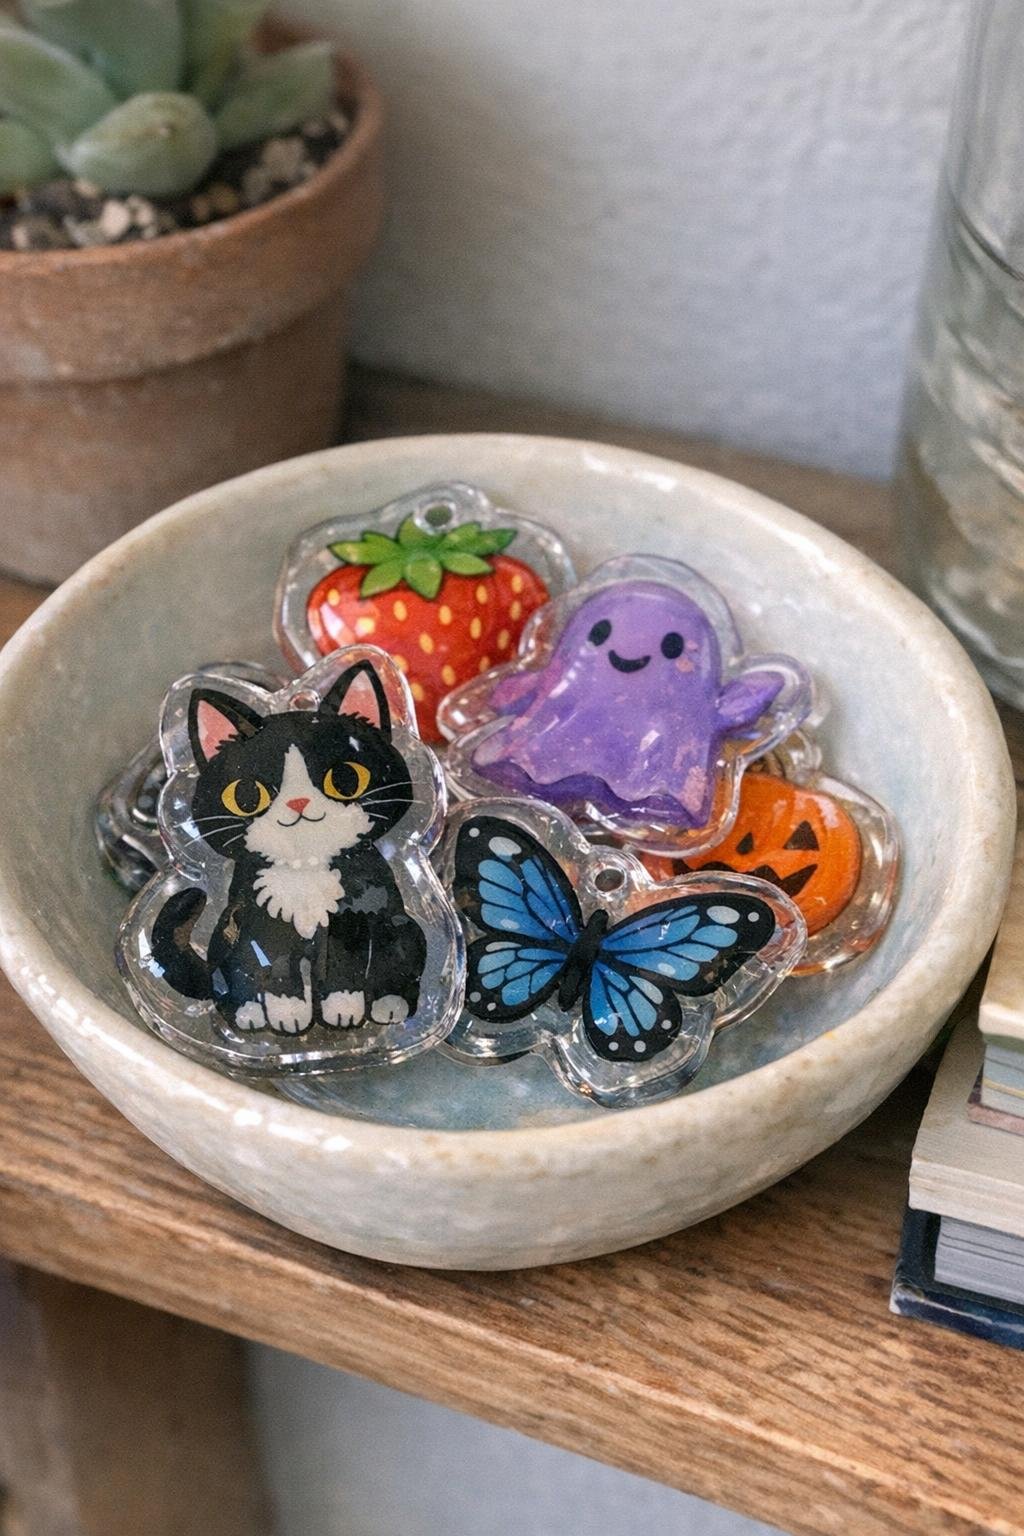
Clear #6 takeout clamshell plastic is one of those materials that surprises people. I cut flat sections from the lid, lightly sand one side so marker will grip, draw simple shapes like mushrooms, hearts, initials, or little fruit slices, punch a hole, and bake them at 325°F on parchment. They curl dramatically for a moment, then flatten and shrink down into thick little charms in about 1 to 3 minutes.
Once cool, they’re sturdy enough for ornament hooks, bracelet jump rings, or a tiny ribbon tie. The trick that makes them look polished is outlining the finished pieces with a metallic paint pen or sealing them with a dot of glossy glaze, and because plastic is heating, I always use good ventilation and dedicate an older baking sheet to craft projects.
3. Pony bead suncatchers
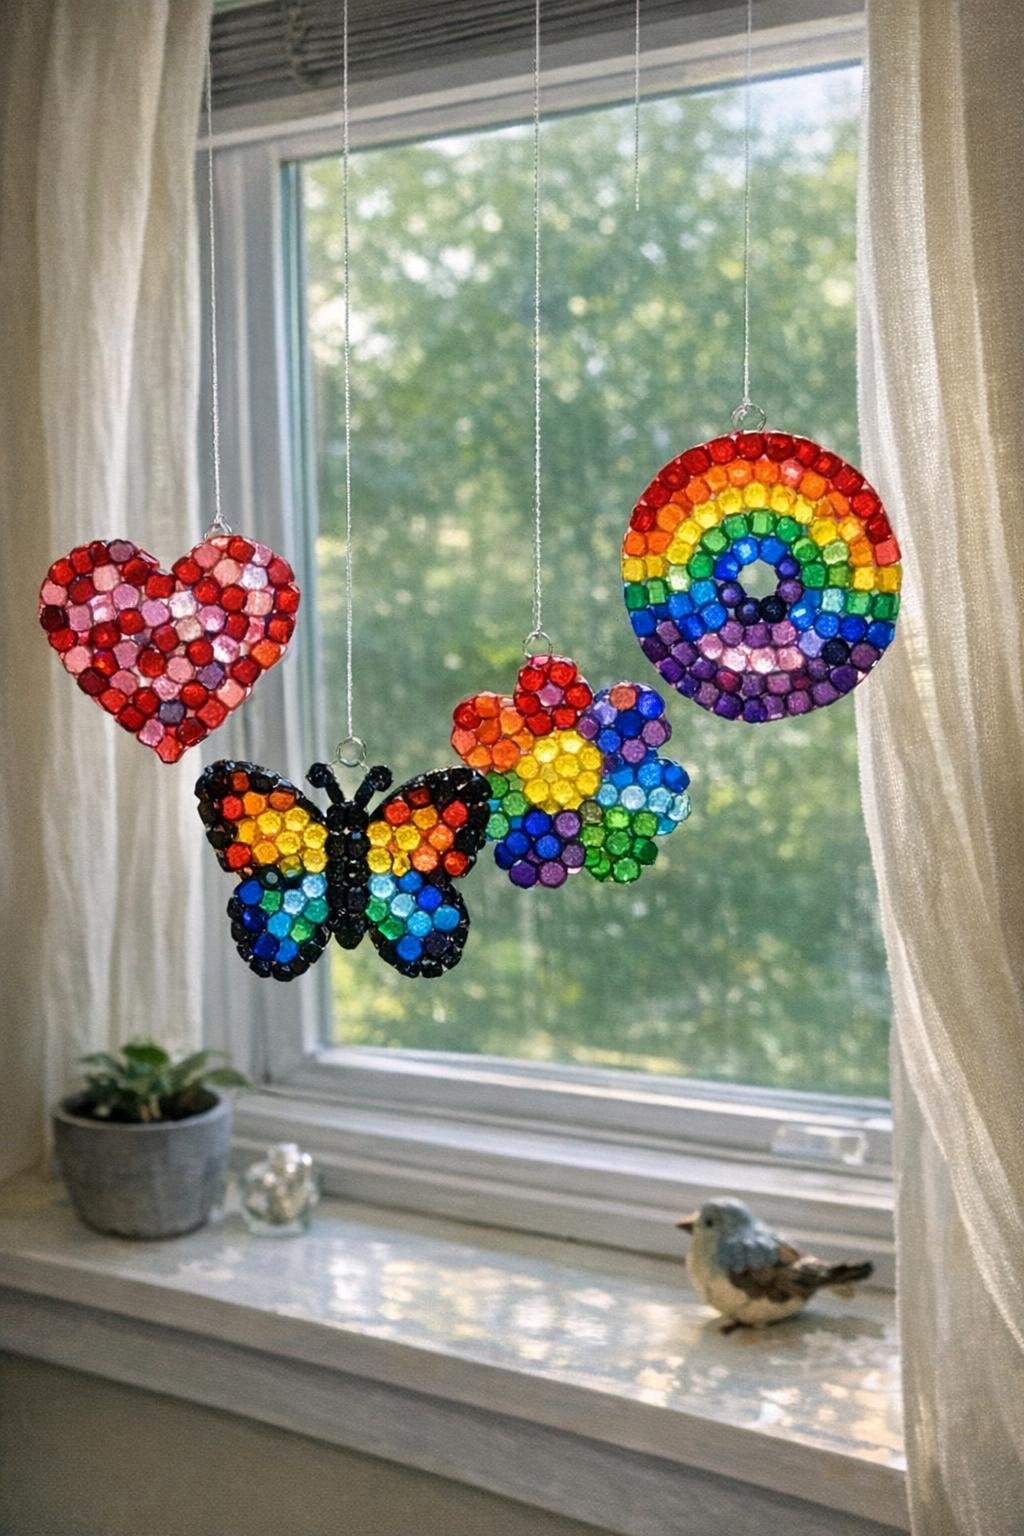
If you’ve never melted pony beads in a muffin tin, it feels a little magical the first time. I place translucent plastic pony beads in a single layer inside a well-used metal muffin tin, usually about 45 to 60 beads per cup depending on the size, and bake at 400°F for around 20 minutes until they fuse into one glowing disc.
After cooling, I pop them out, drill or melt a small hanging hole near the top, and thread them with fishing line or ribbon for a sunny window. I like to arrange colors in rings or simple ombré blends so they look intentional, and because beads are plastic, I always open a window and keep the kitchen fan running during baking.
4. Gold-tipped pine cone wreath
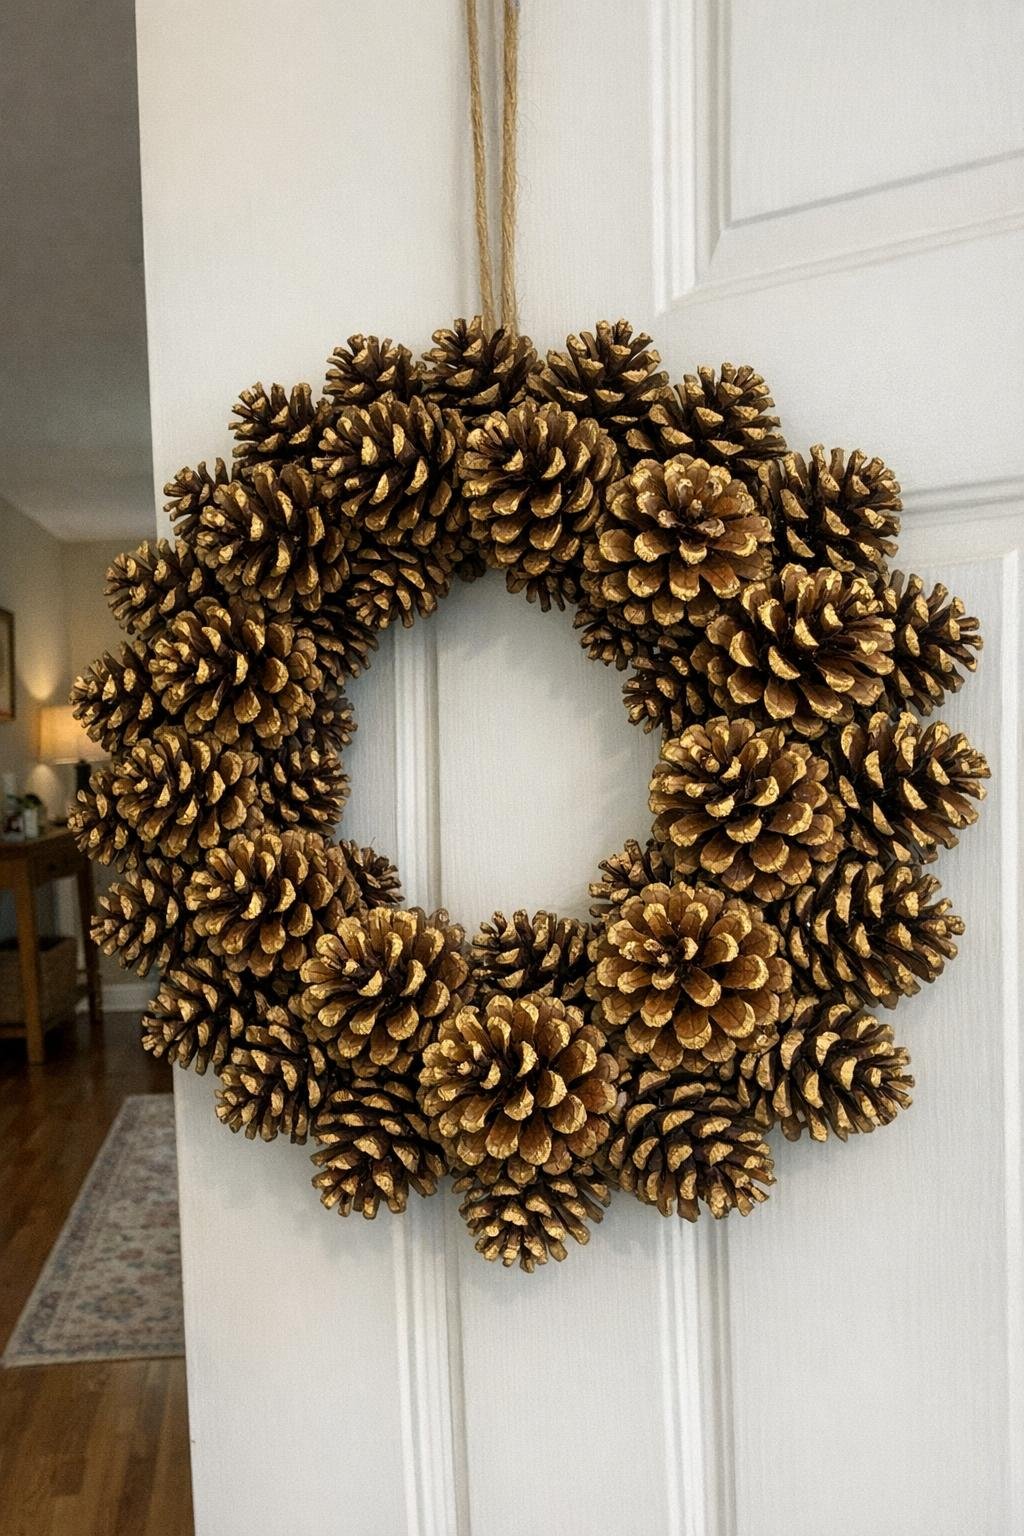
This wreath starts with gathered or store-bought pine cones spread on a baking sheet and baked at 200°F for about 30 to 45 minutes. That low oven opens them beautifully and helps dry and sanitize them at the same time. Once cool, I brush just the outer tips with metallic gold craft paint so the natural brown still shows through.
I hot-glue the cones onto a wire wreath form, starting with the largest around the outside and filling gaps with smaller ones. A narrow velvet ribbon or a few tucked-in eucalyptus stems gives it that styled look without making it busy.
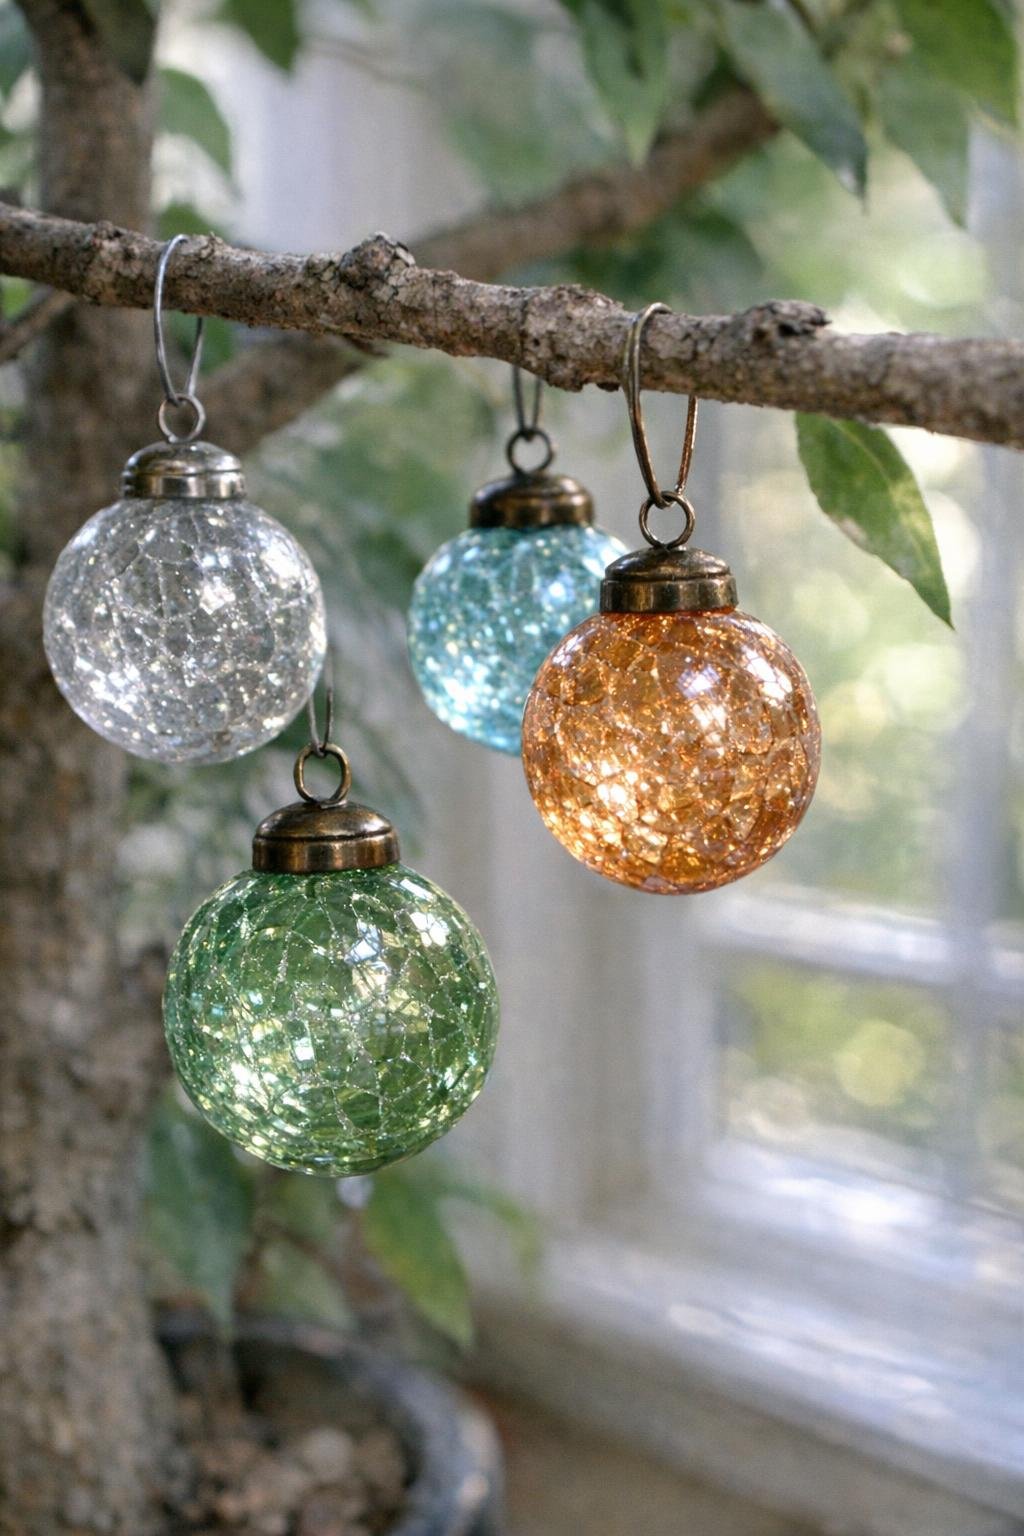
5. Cracked marble ornaments
These have such a jewel-like look on a tree or in a bowl. I place clear glass marbles on a baking sheet and heat them at 500°F for about 20 minutes, then carefully transfer them straight into a bowl of ice water. The thermal shock crackles the inside without shattering the outside when done correctly, giving each marble a beautiful fractured sparkle.
After they’re fully dry, I wrap them with thin jewelry wire to make pendants or ornaments. A silver or gold wire cage and a velvet ribbon are what make them look special, and I always wear eye protection and use tongs for this one since the temperature change is the whole point.
6. Salt dough leaf bowls
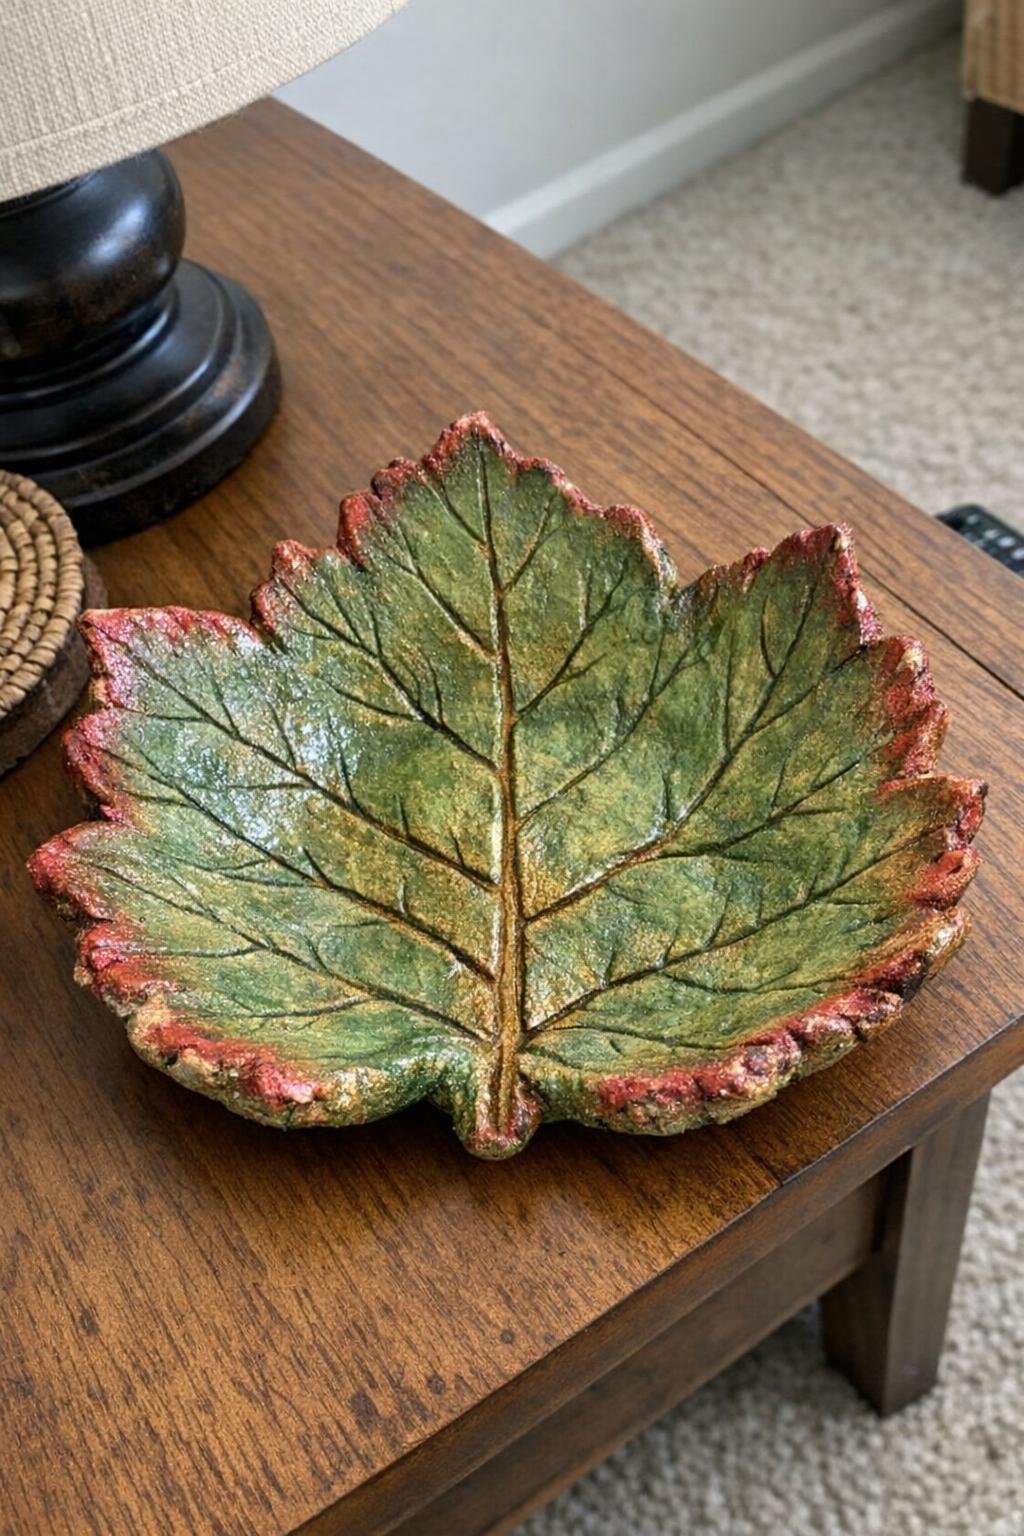
For these, I make a simple dough with 1 cup salt, 2 cups flour, and about 3/4 cup warm water, then roll it to about 1/4 inch thick. I press a real leaf firmly into the dough to imprint the veins, trim around it with a knife, and drape it over the outside of an upside-down oven-safe bowl or nest it inside a bowl for shape. Then I bake it low and slow at 250°F for 2 to 3 hours.
Once dry, I paint the finished bowl in soft sage, ivory, or matte charcoal and seal it with a clear acrylic spray. Dry-brushing a little gold over the veins is the detail that really lifts it from school project to coffee-table decor.
7. Baked red party cup ruby ornaments
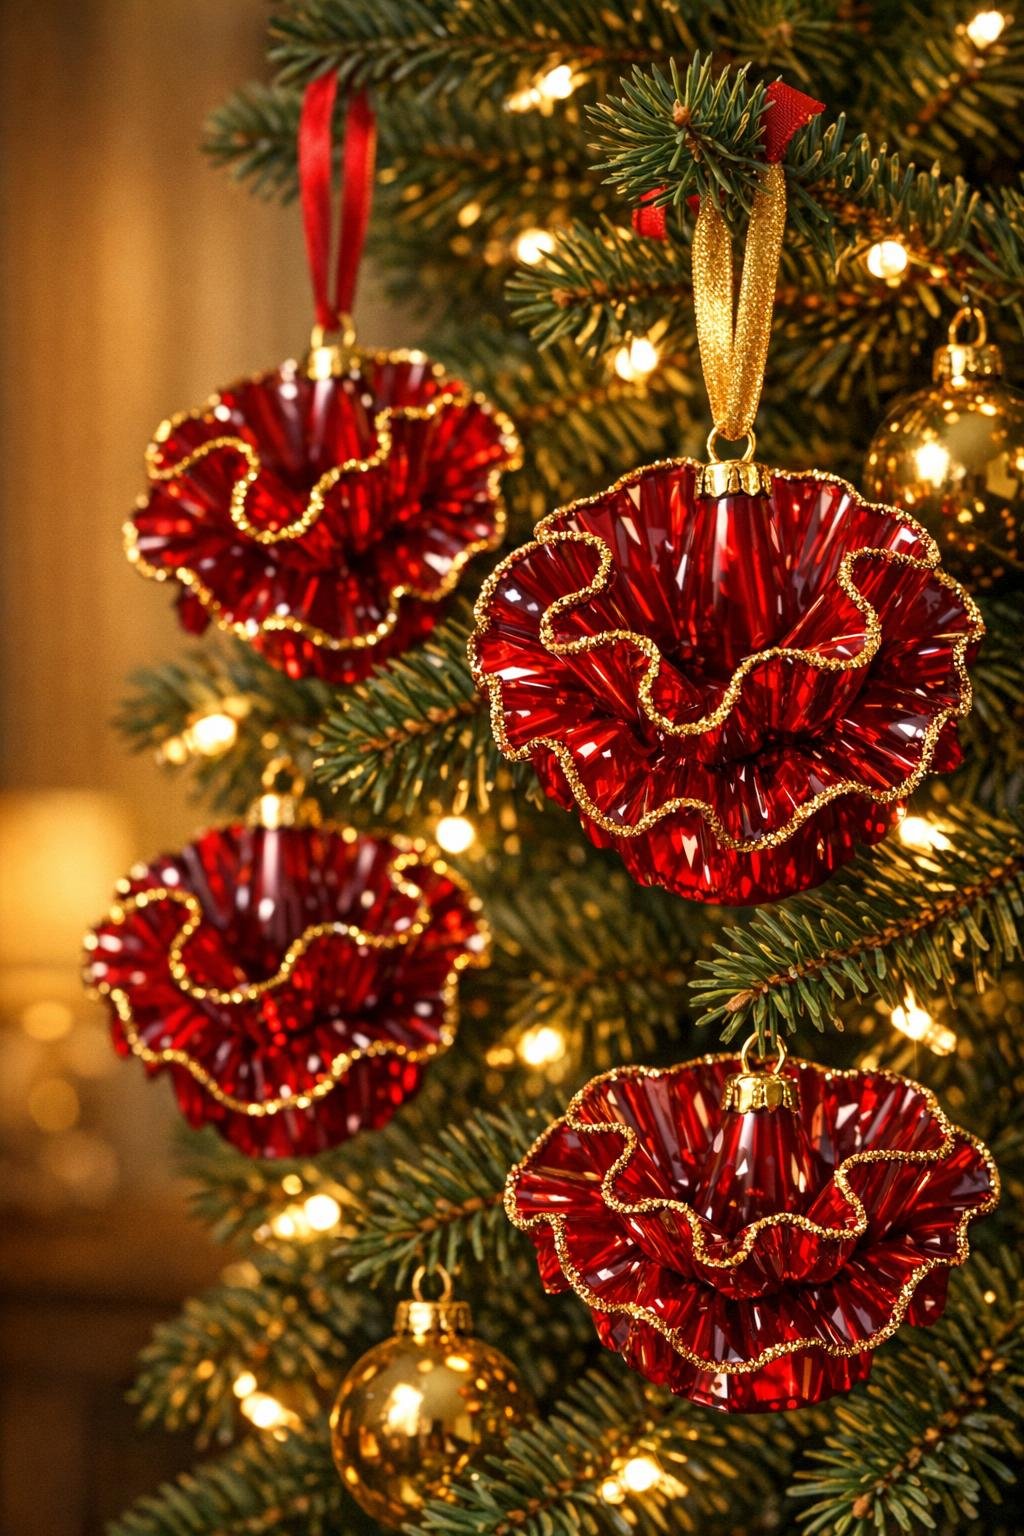
These are so dramatic for how simple they are. I set 12 red #6 plastic party cups upside down on parchment and bake them at 300°F for 4 to 8 minutes, watching closely until each cup collapses into a ruffled flower shape. They come out looking like glassy ruby blossoms with surprisingly elegant folds.
When they cool, I trace the ridges lightly with a gold paint pen and add a tiny hole near the top for ribbon. Hung in a window or on a holiday tree, they catch the light beautifully, and because they’re heated plastic, I absolutely keep ventilation going and never leave the oven unattended.
8. Oven-dried citrus wreath
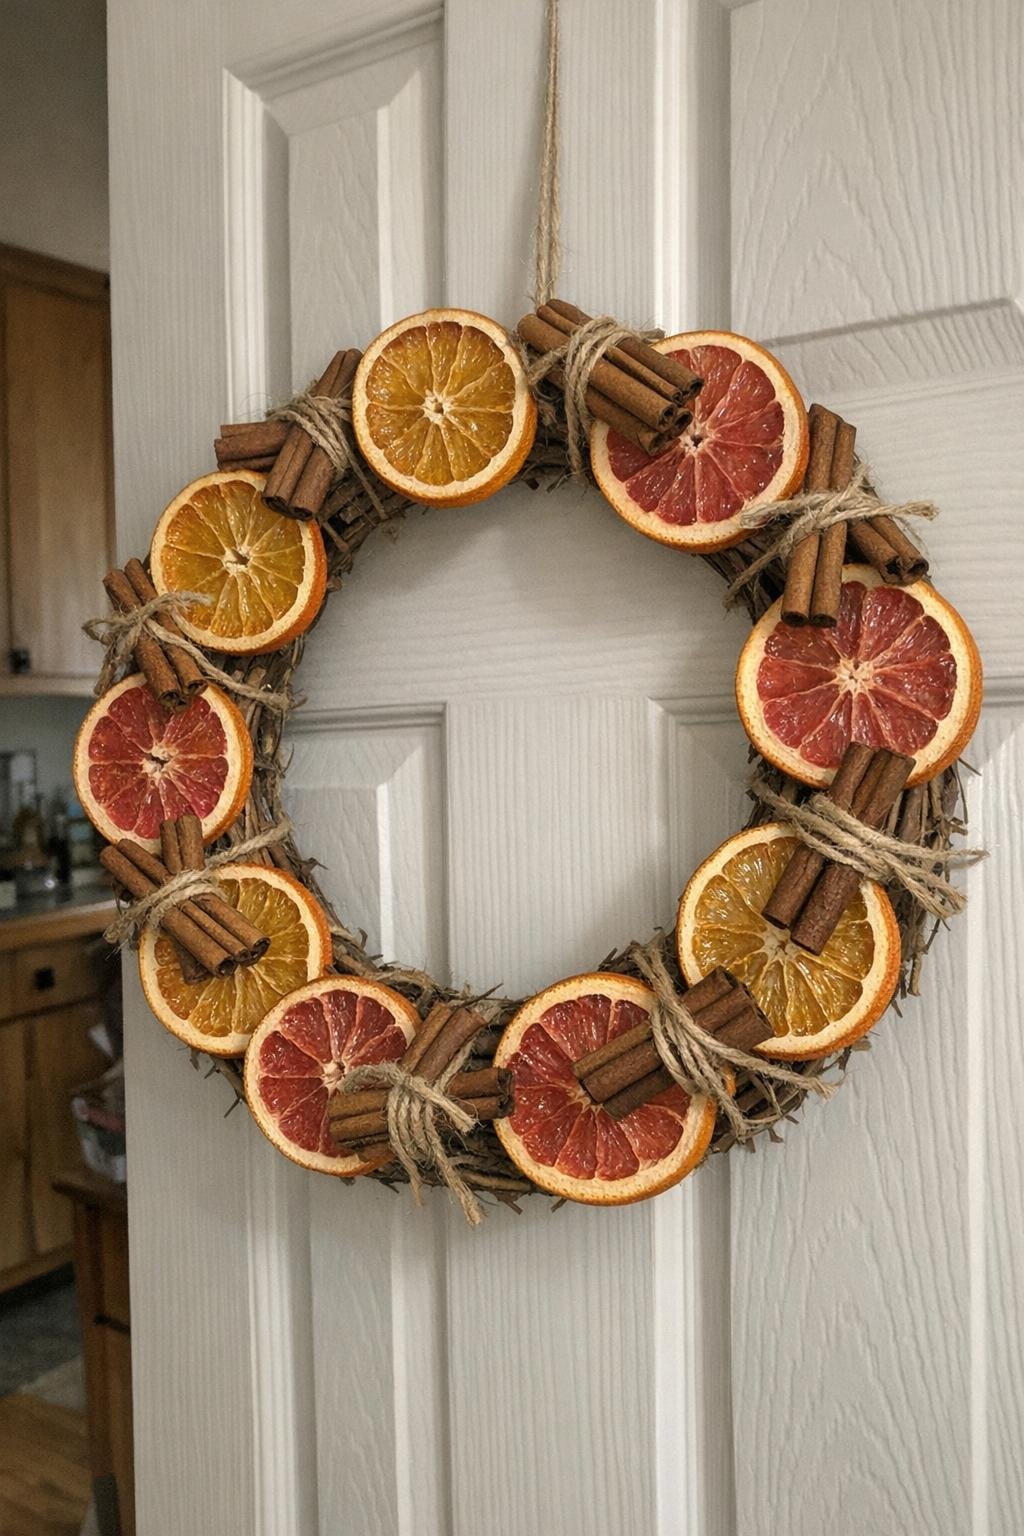
Thin citrus slices always make a room feel cheerful. I slice oranges and grapefruit about 1/4 inch thick, blot them dry, and bake them on wire racks set over baking sheets at 200°F for around 3 hours, flipping once or twice, until they’re dry and translucent but still colorful.
I wire the slices onto a grapevine wreath with cinnamon sticks tucked in between, and sometimes I add a few bay leaves or dried eucalyptus. The combination of the glowing fruit and warm brown sticks gives it that handcrafted-but-refined look that works from late fall right through winter.
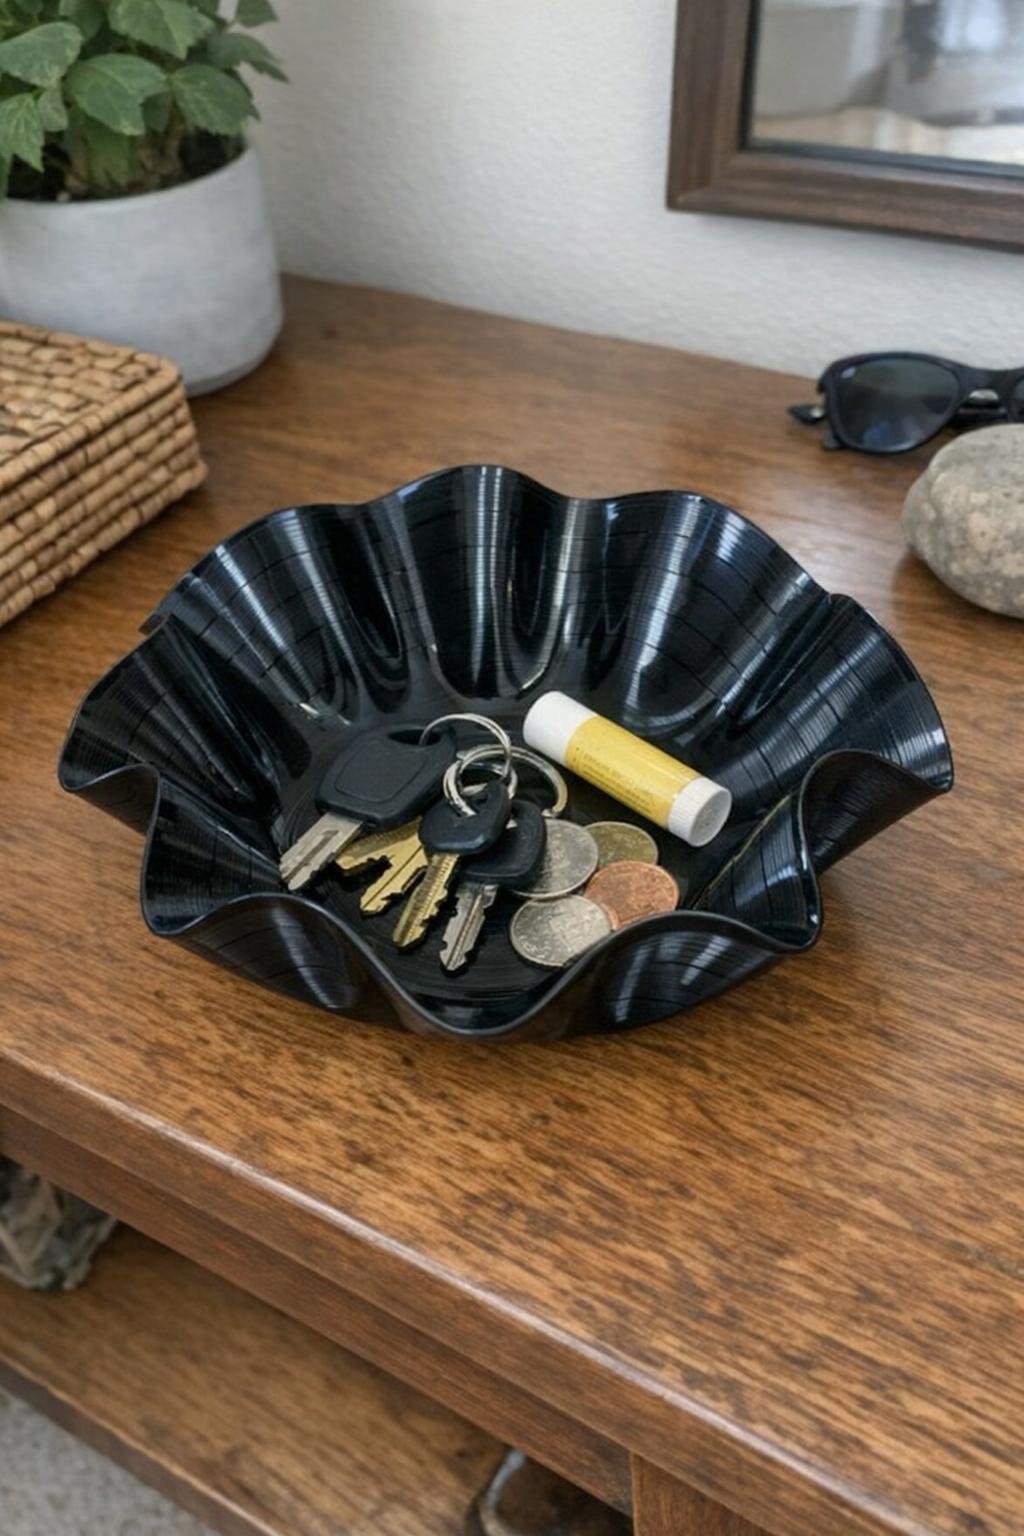
9. Vinyl record bowl
An old record can turn into a really striking catch-all bowl with very little effort. I place an oven-safe bowl upside down on a baking sheet, set the record centered over it, and warm it at 200°F for a few minutes just until it softens and drapes. Once it starts to slump, I shape the edges gently into loose flutes and let it cool in place.
The finished bowl is perfect on an entry table for keys or on a teen’s dresser for bracelets, and the grooves in the vinyl do all the decorative work for you. If your record has a label, I angle it so it’s not the focal point in the display.
10. Melted bead lace bowl
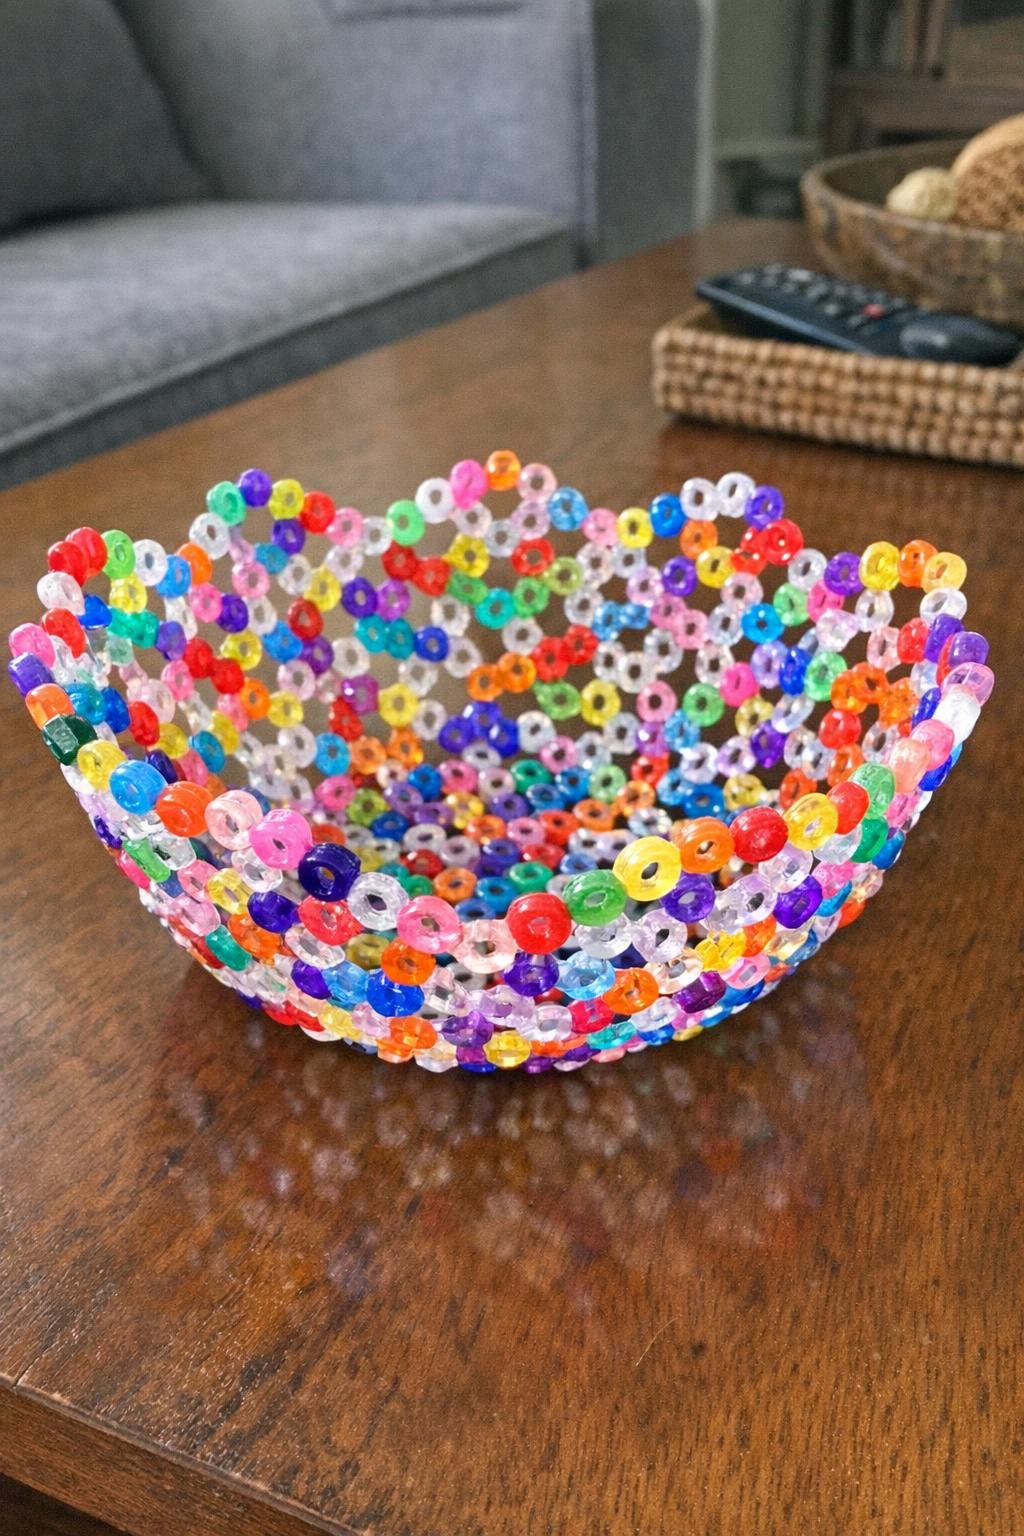
This project uses pony beads in a completely different way from the window suncatchers. I grease an oven-safe glass bowl very lightly, arrange the beads in a single layer all around the inside so they touch, and bake at 350°F until they fuse together, usually 15 to 25 minutes depending on the bowl and bead size.
Once fully cool, the bowl slips out into a translucent, lacy little dish that looks wonderful with wrapped candies, potpourri, or nothing at all. Clear beads mixed with just a few tinted ones make the prettiest version in my opinion, and again, with melted plastic, I always work with an open window and steady ventilation.
11. Oven-cured painted mason jar vases
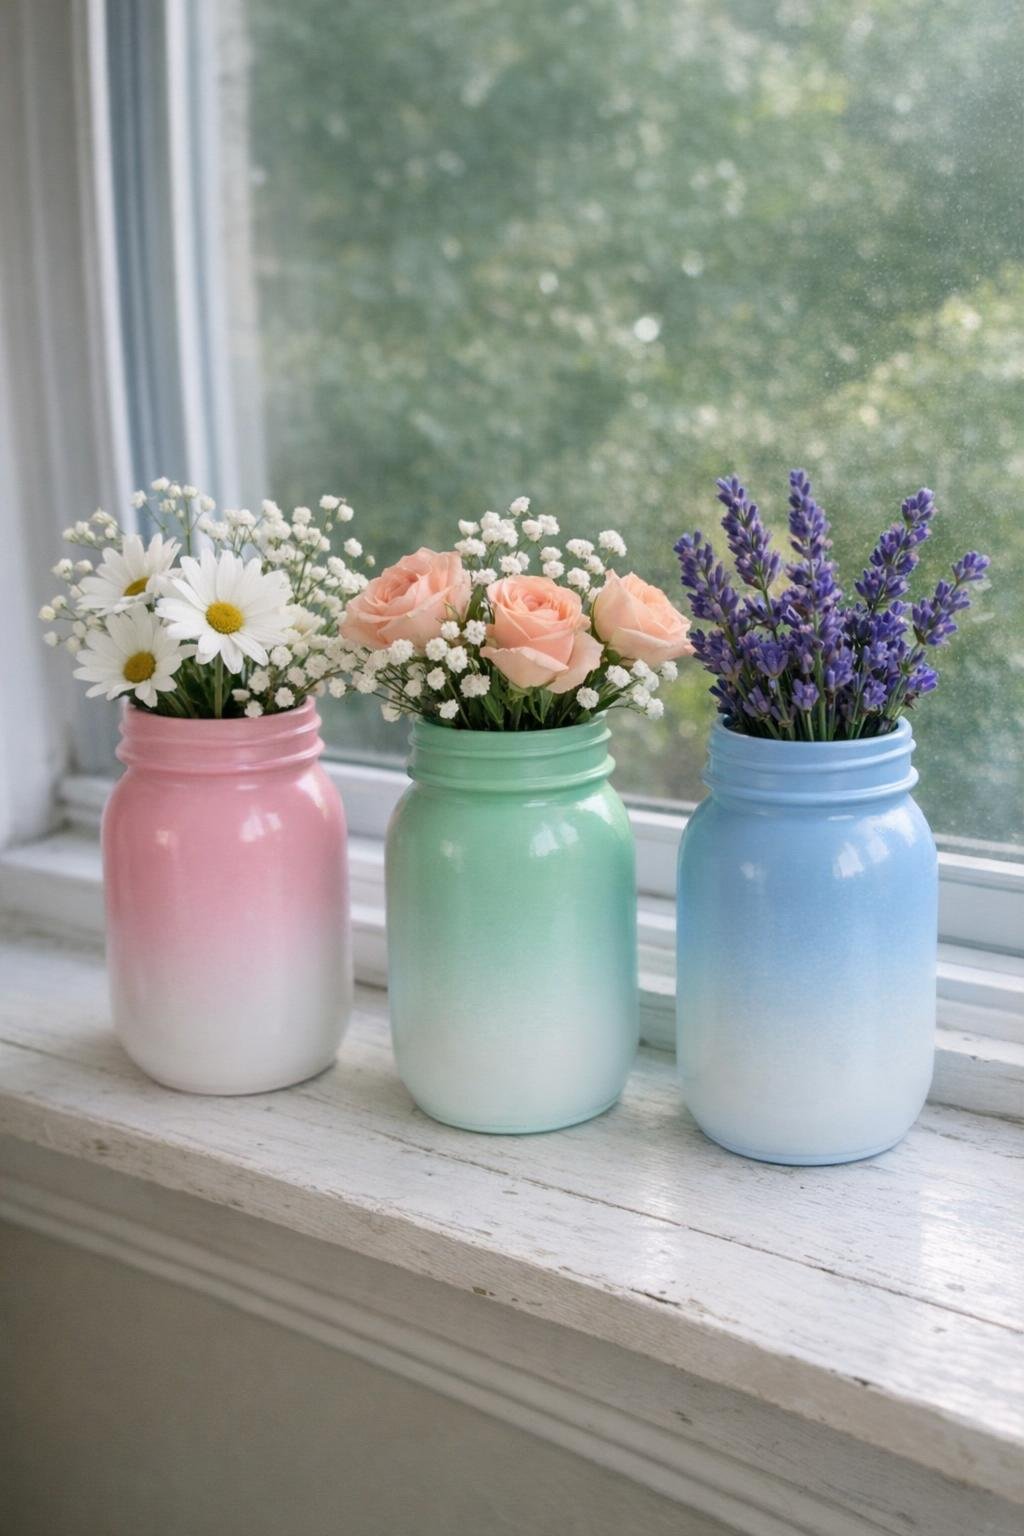
I keep a few mason jars on hand just for this because they turn out so useful. After washing and drying the jars well, I paint them with enamel craft paint in graduating shades for an ombré set, then let them air-dry according to the paint directions before curing them in the oven at 350°F for 30 minutes.
Once cured and cooled in the oven, the finish is much tougher and less likely to chip from ordinary use. A matte chalky palette looks especially expensive, and a narrow band of metallic gold around the rim can make a whole set look pulled together on a dining table or windowsill.
12. Bread dough harvest wreath
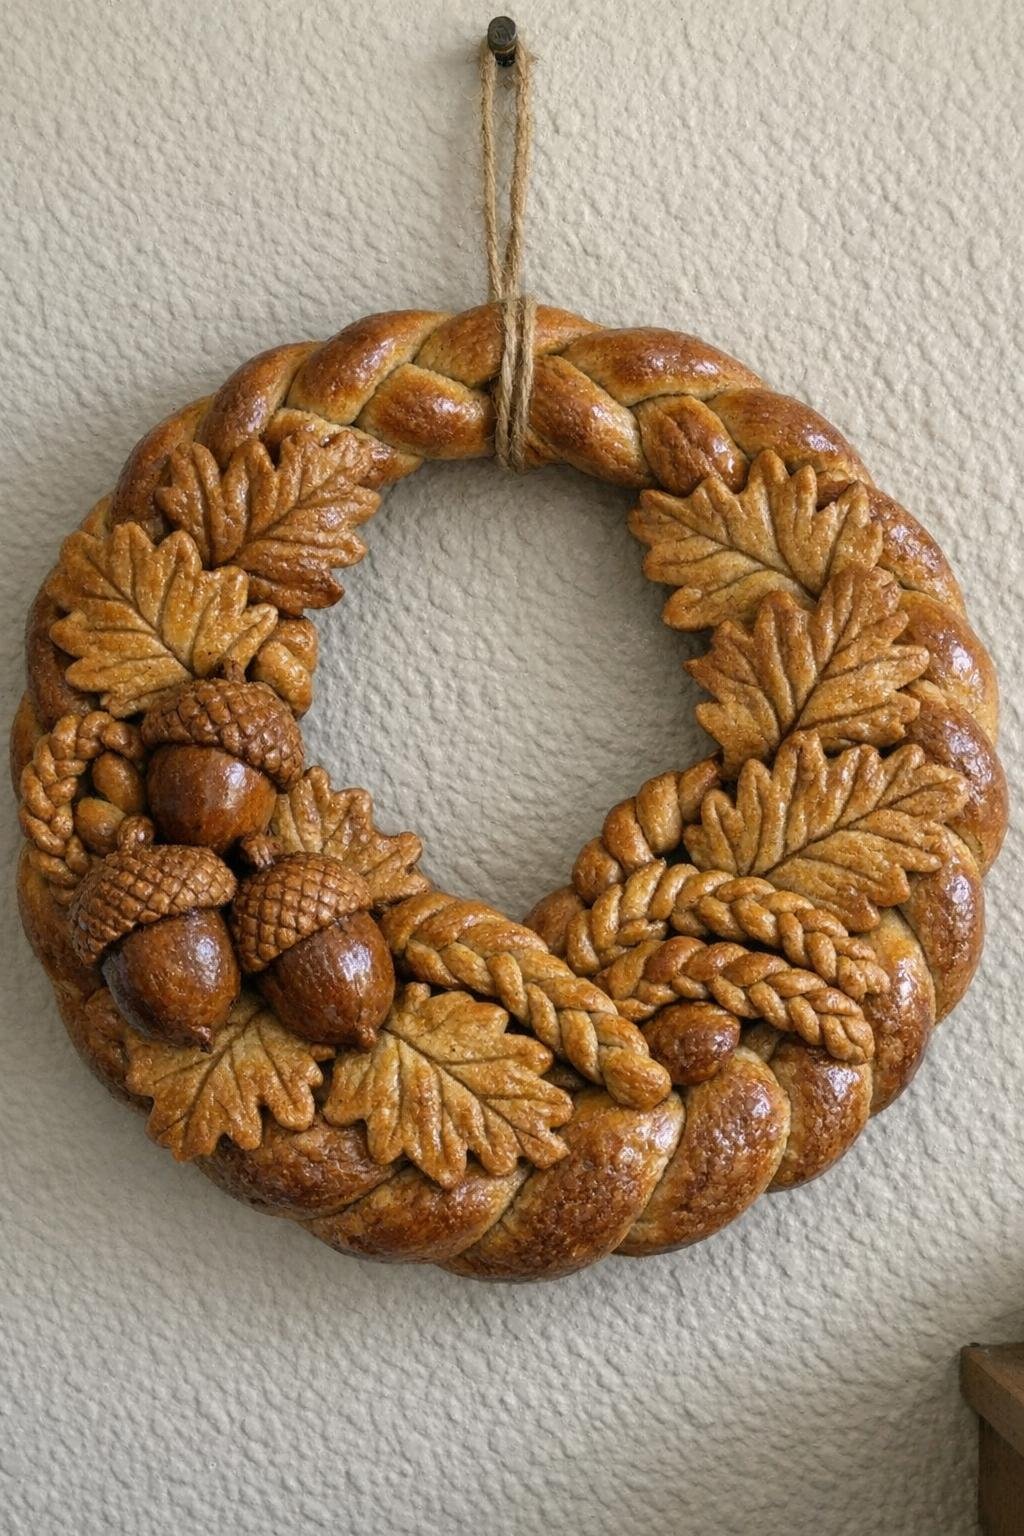
This one is old-fashioned in the best possible way. I make a simple bread-style salt dough or use a sturdy decorative dough recipe, braid it into a ring, and add hand-shaped leaves, acorns, and tiny twisted vines on top with a little water as “glue.” Then I bake it until hard and deeply golden, usually around 300°F for 45 to 60 minutes depending on thickness.
After it cools completely, I seal it with clear varnish so it can be hung and enjoyed for years. A soft antiquing wash in the creases adds depth and makes all those harvest details show up beautifully from across the room.
13. Cinnamon applesauce ornaments
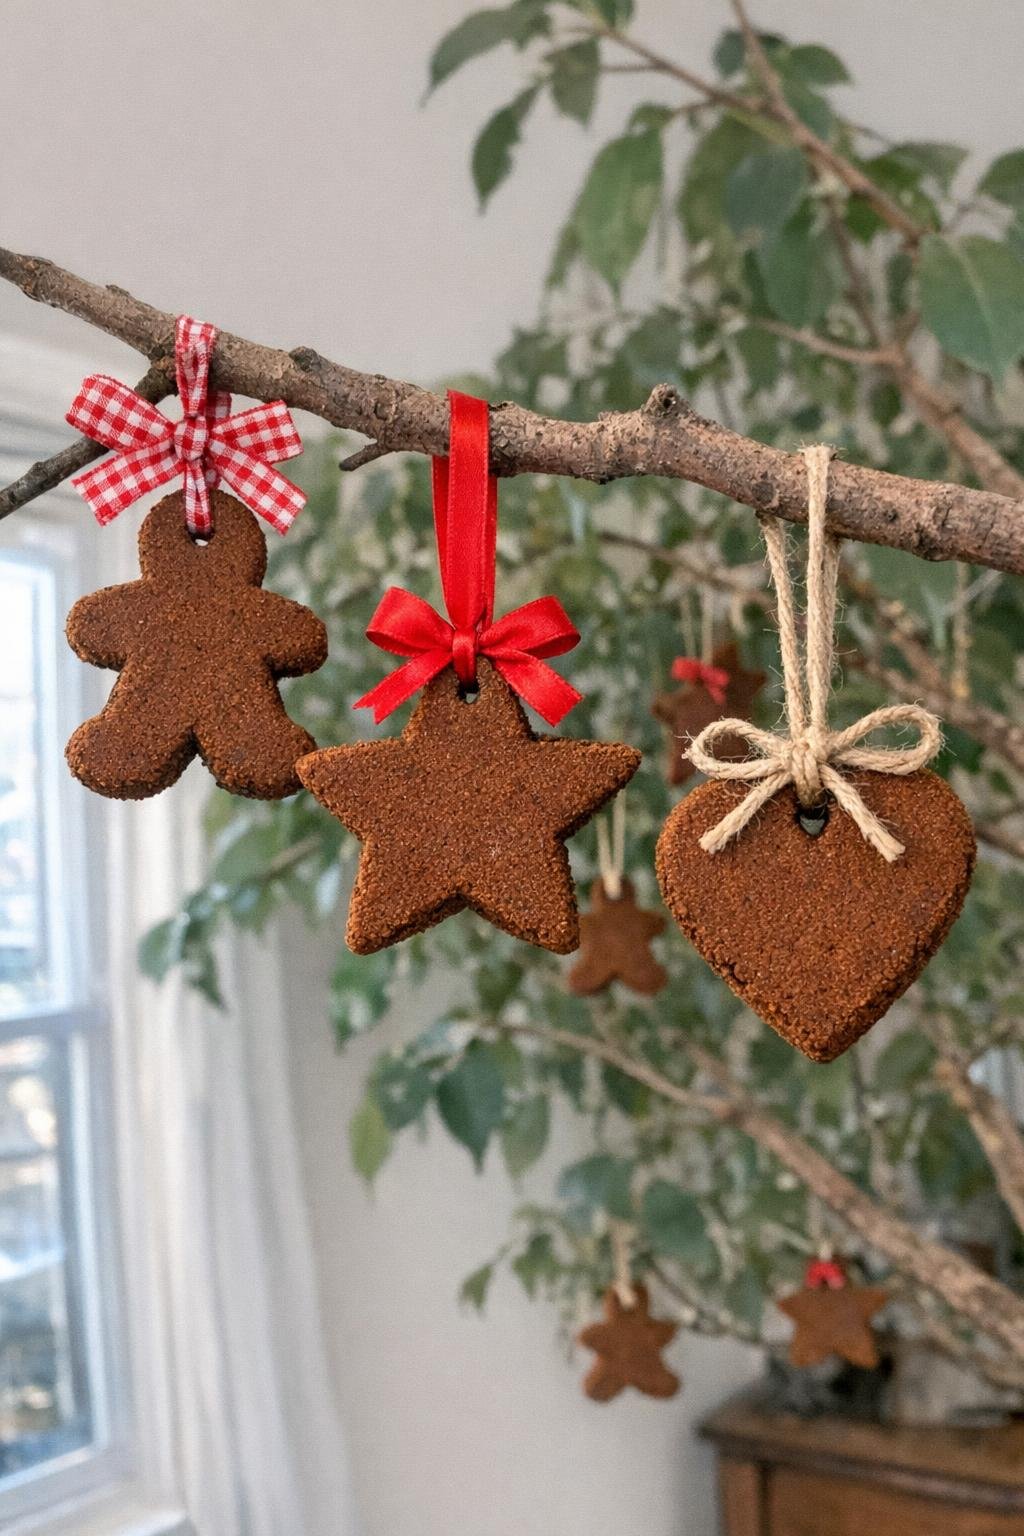
If you want your whole house to smell cozy, this is the project I’d start with. I mix equal parts cinnamon and applesauce, usually 1 cup of each, roll the dough between parchment to about 1/4 inch thick, cut shapes with cookie cutters, and poke a hanging hole at the top. Then I bake them at 200°F until dry, usually 2 to 3 hours, flipping once if needed.
They come out a rich warm brown and already look lovely, but I like to tie them with velvet ribbon or baker’s twine and brush the edges clean for a crisp silhouette. For picky kids who want to help, stars and simple circles are the easiest shapes to handle without tearing.
14. Soda bottle flower lights
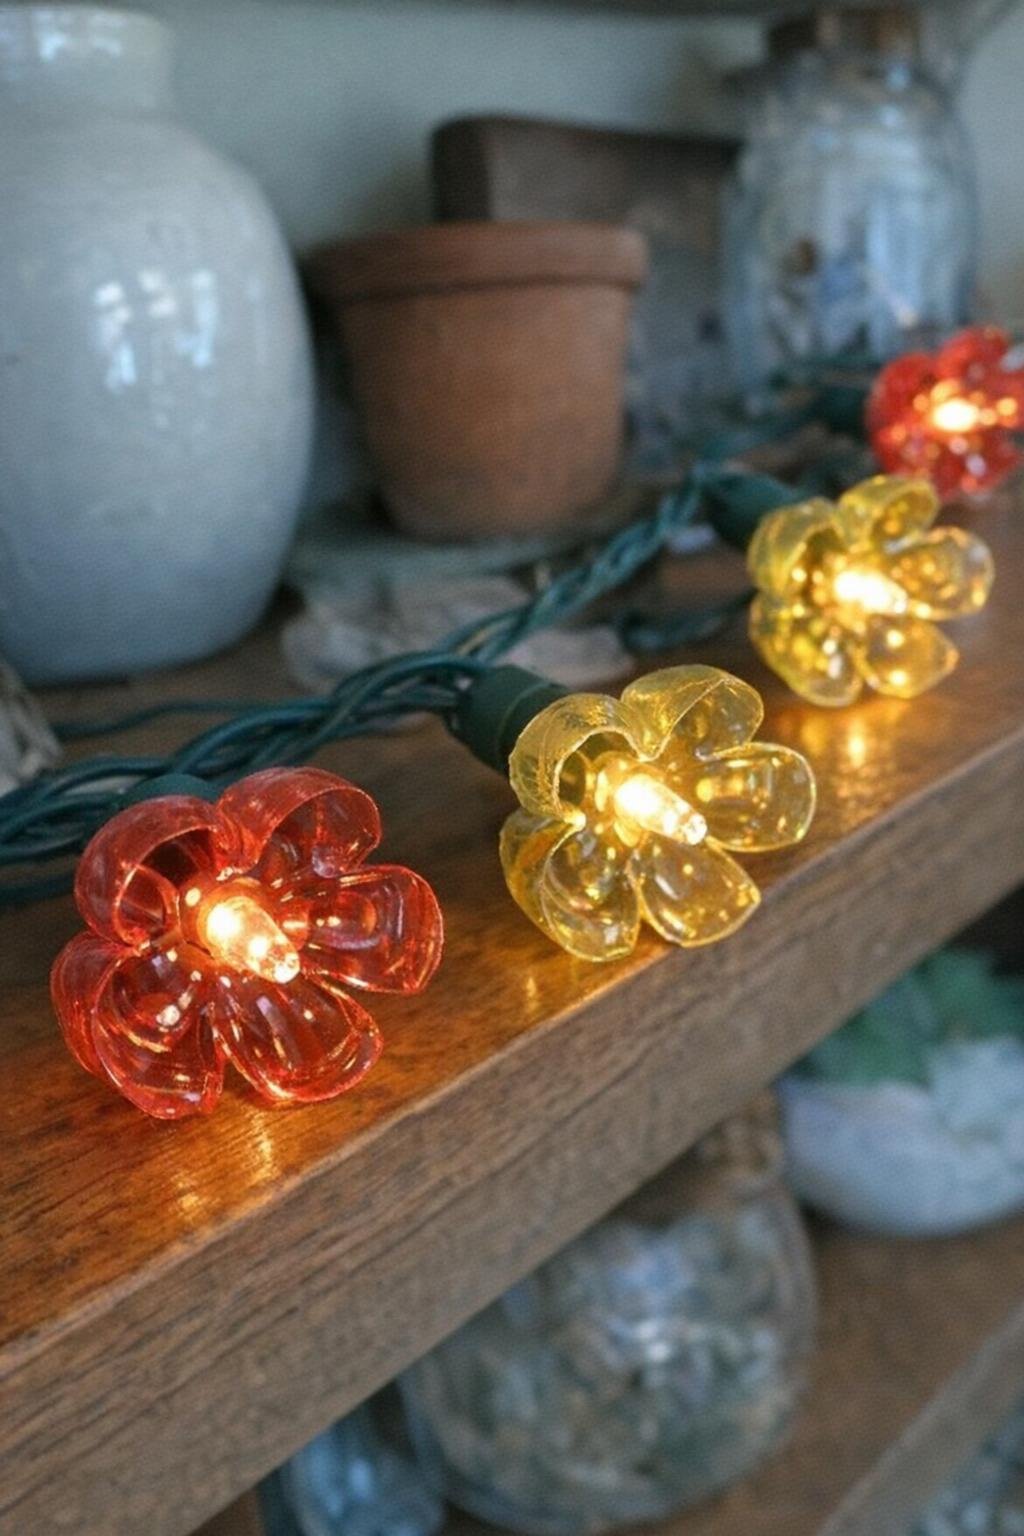
The bottoms of clear soda bottles already have a flower shape hiding in them. I cut off the bottom portions, trim them evenly, and soften them very briefly in the oven just enough to round any sharp edges and relax the plastic. Once cooled, each flower cup can be fitted over a bulb on a string of lights with a small center opening.
A soft wash of glass paint or a touch of pearl finish makes them look much more decorative at night. This one is especially pretty tucked along a shelf or around a bedroom window, and since you’re heating plastic, keep the oven low, watch closely, and ventilate the room well.
15. Chip bag shrink charms
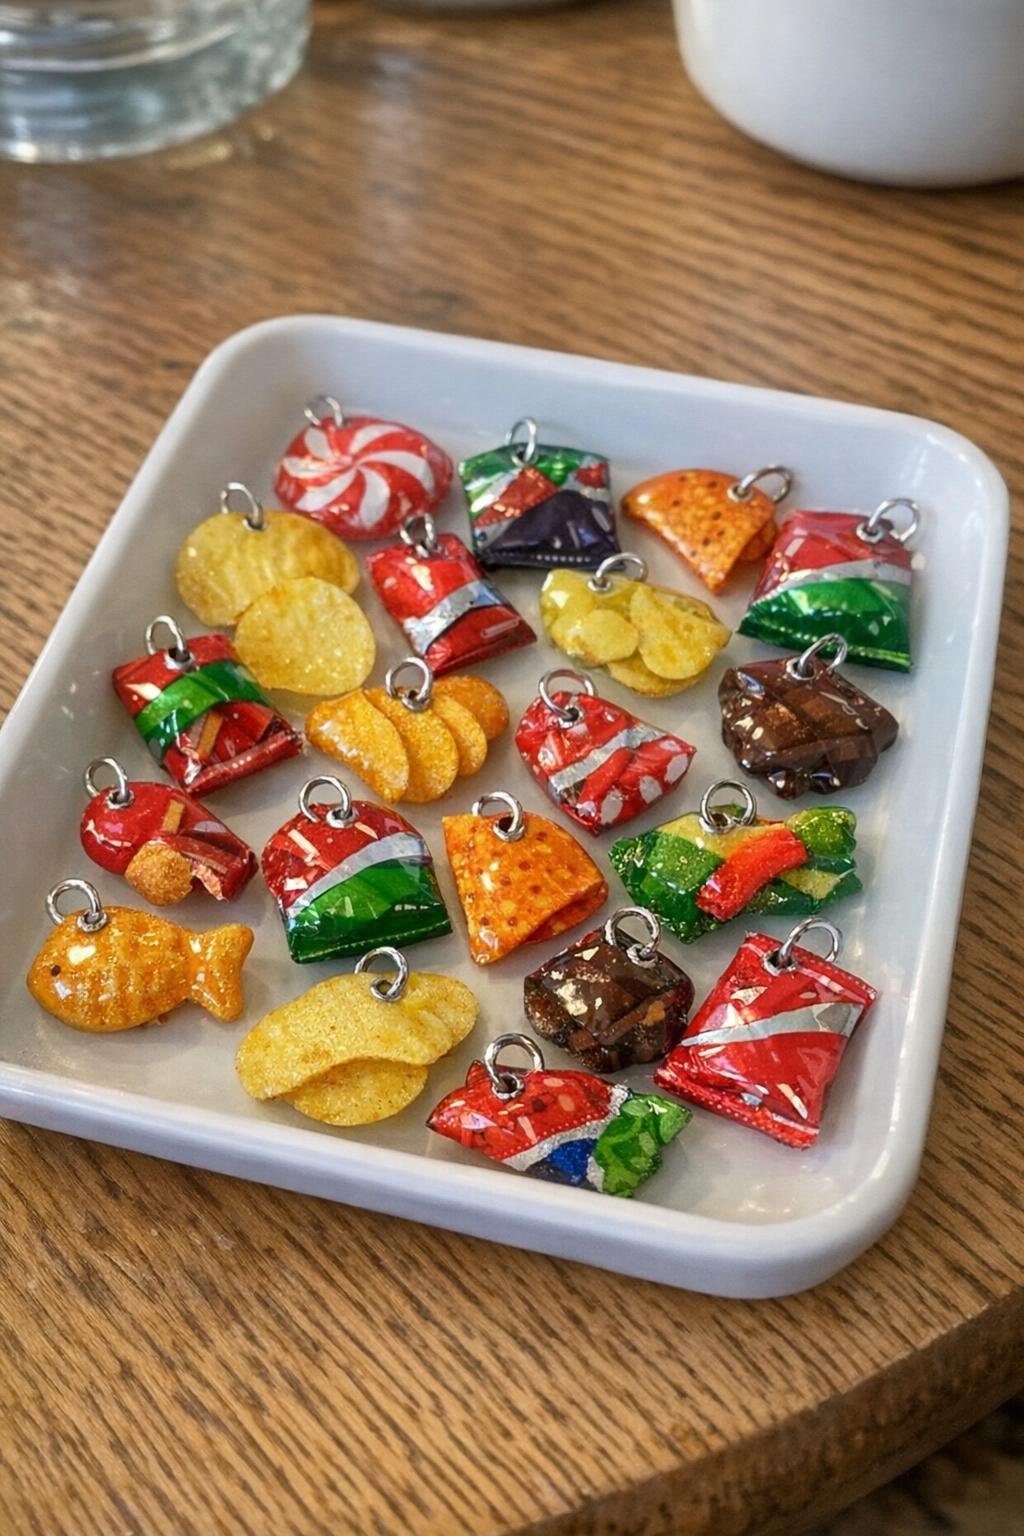
These are tiny, shiny, and a lot of fun. I wash and dry empty chip bags, cut out the most colorful sections, and bake them at 300°F on parchment for a minute or two until they shrink to about a quarter of their original size. They puff, curl, and flatten quickly, so I stay right by the oven and press them flat for a second if needed as they cool.
The finished pieces are sturdy enough for keychains, magnets, or zipper pulls, and that metallic packaging gives them a bright enamel-like look. Because it’s heated packaging plastic, I use very good ventilation and keep the batch small.
16. Pine cone fire starters
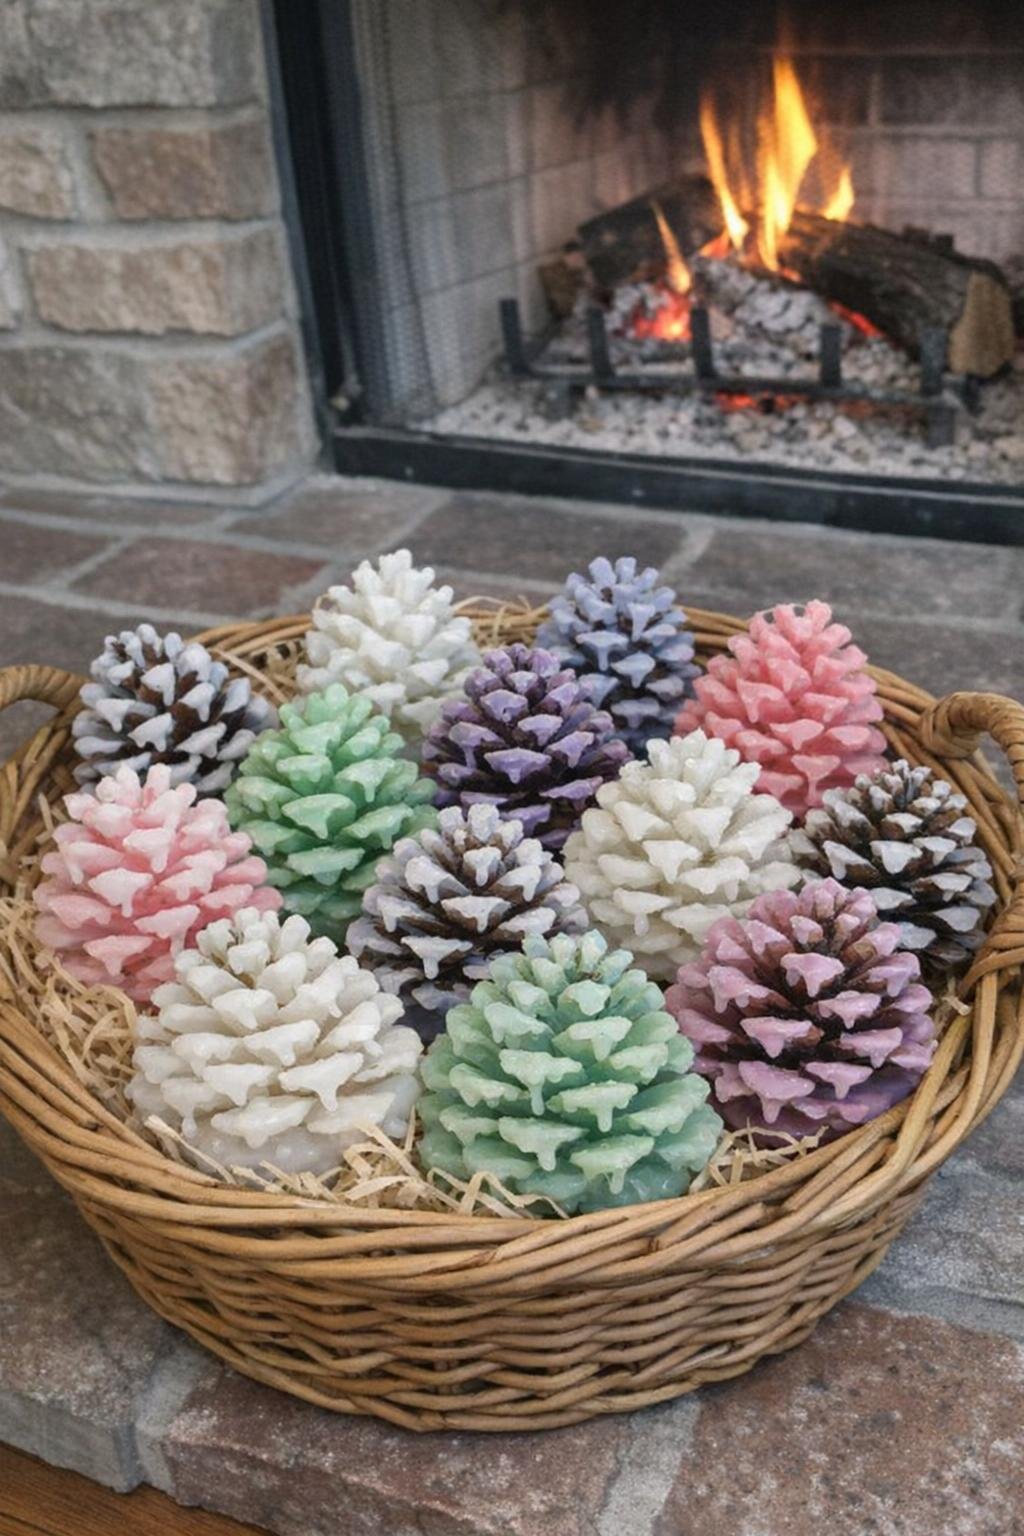
These are practical and pretty, which is my favorite combination. I bake pine cones at 200°F for about 30 minutes to dry and open them, then dip each one in melted candle wax or paraffin, often using a muffin tin setup to keep things tidy. If I want them extra useful, I tuck a little cotton wick or dryer lint into the base before the wax sets.
Arranged in a basket by the fireplace, they honestly look like something from a winter gift shop. A dusting of cinnamon while the wax is tacky smells lovely, just make sure they’re clearly stored as fire starters and kept away from direct heat until you’re ready to use them.
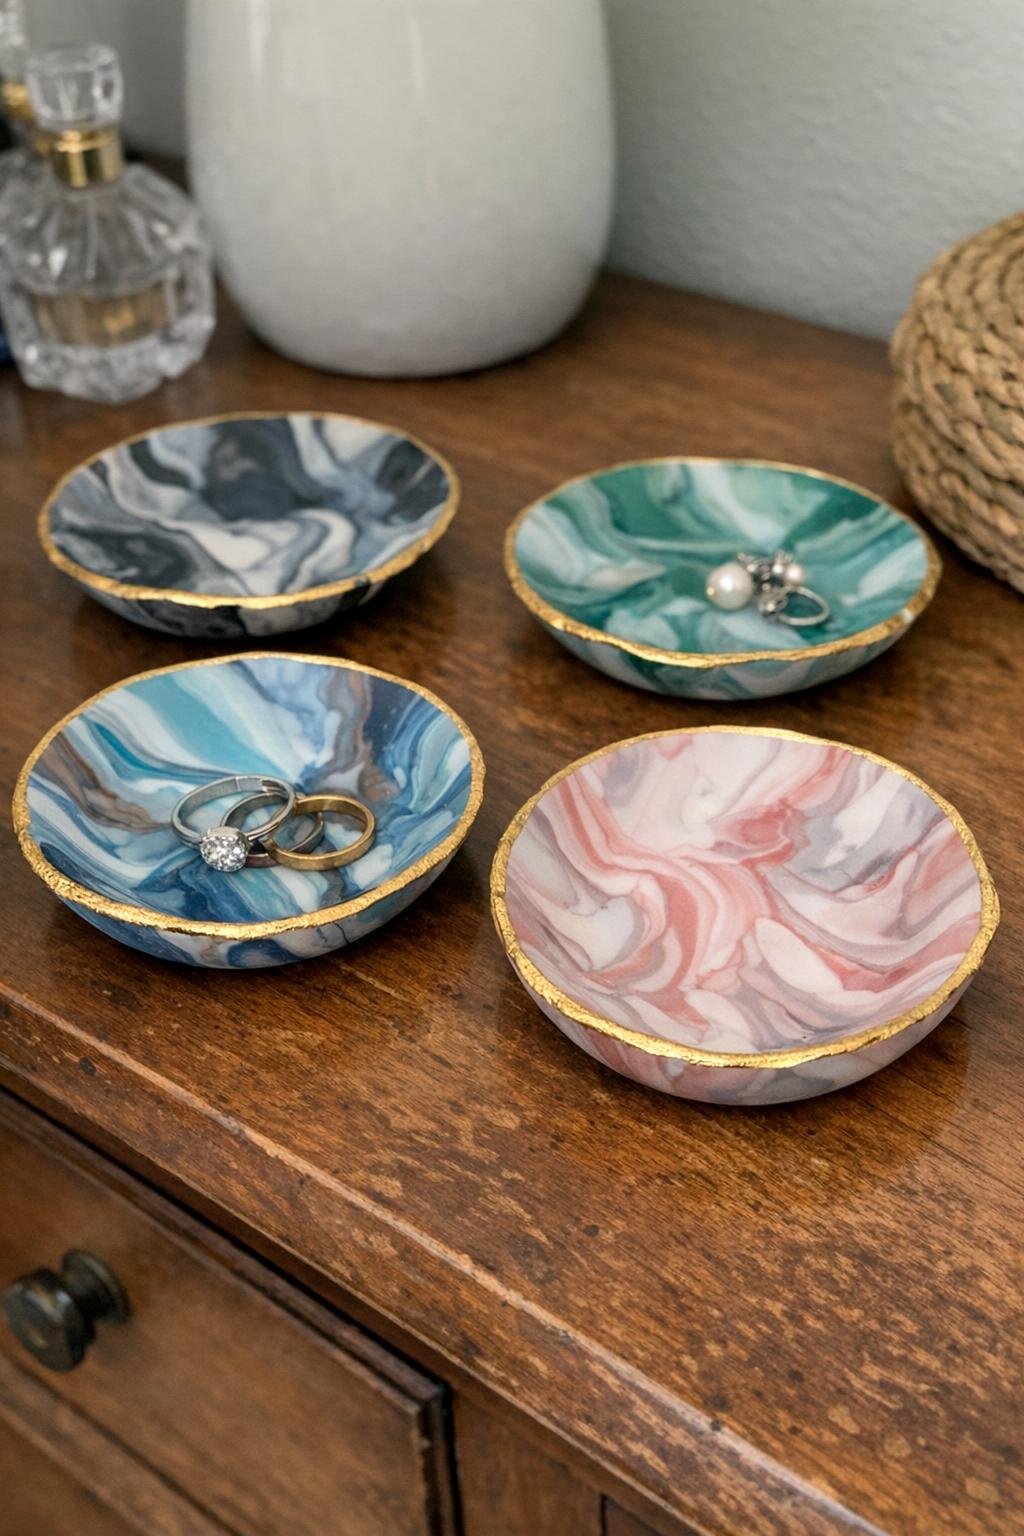
17. Marbled polymer clay ring dishes
Polymer clay is one of those materials that always looks more expensive after baking than before. I twist together two or three clay colors, flatten the slab, cut small circles or organic shapes, and drape them over the bottom of an oven-safe bowl to get that shallow dish shape. Then I bake them at 275°F according to the package time, usually around 15 to 30 minutes depending on thickness.
After cooling, I add a thin gilded edge with gold leaf pen or metallic paint, and suddenly they look like little boutique trinket trays. I keep a couple on my dresser for rings and earrings, and they also make sweet gifts that don’t take much clay at all.
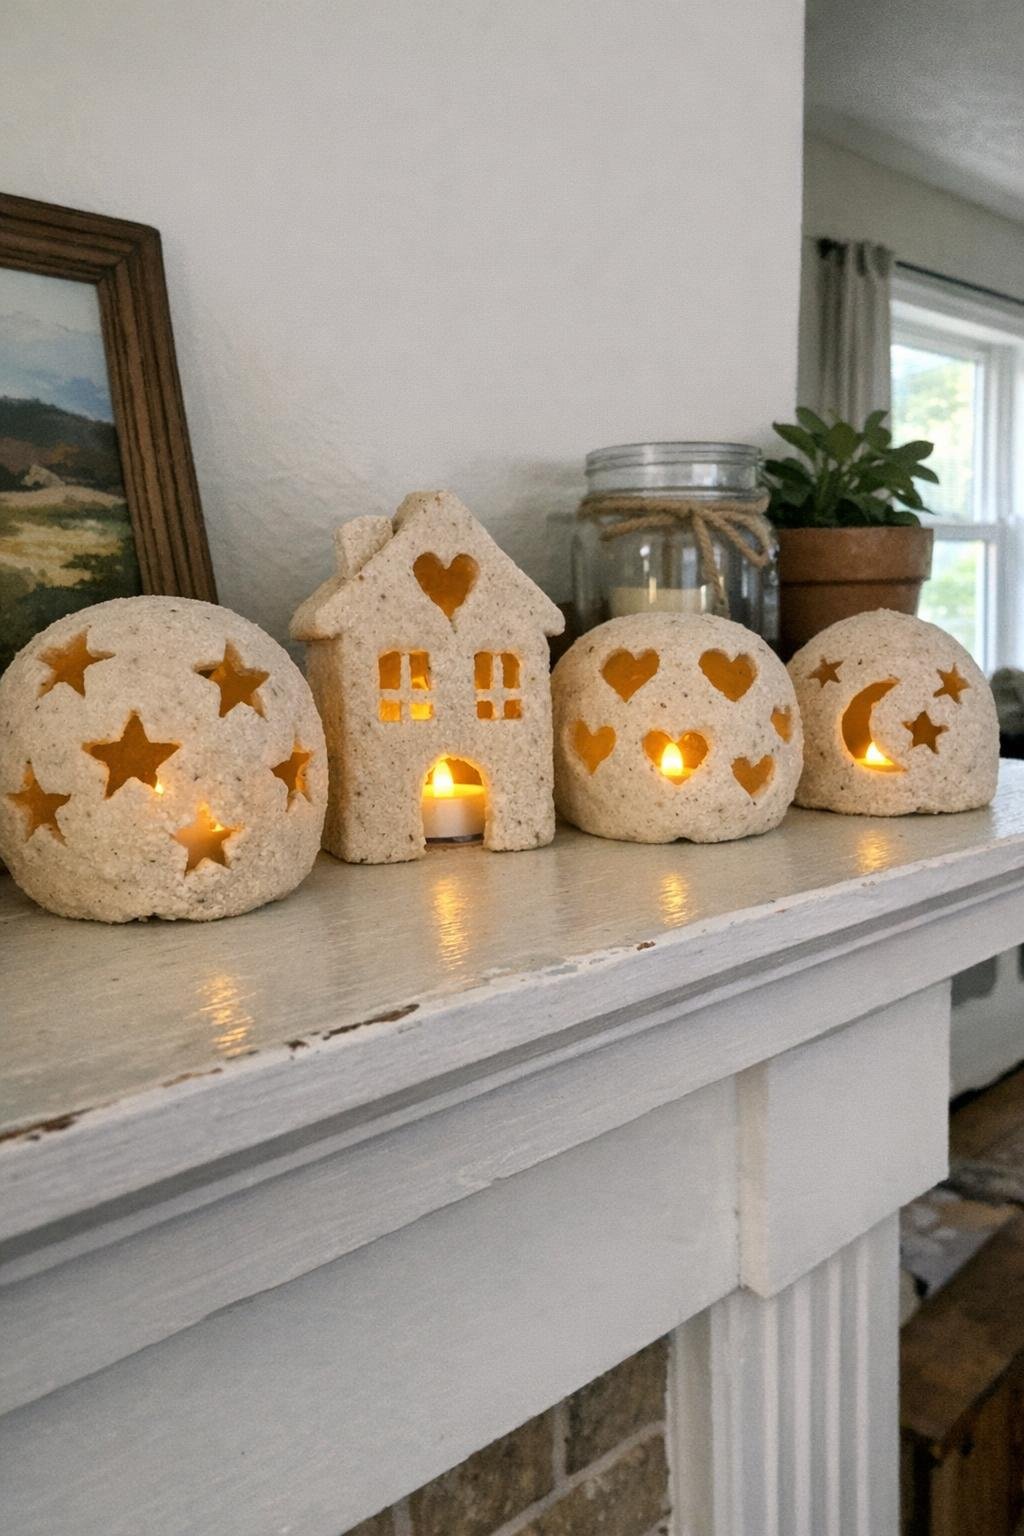
18. Salt dough luminaries
These are lovely on a mantel or as a winter table centerpiece. I roll or shape salt dough into short cylinders, about 4 to 5 inches tall, join the seam neatly, and cut small stars, leaves, or simple round holes with cookie cutters and piping tips. Then I bake them at 250°F until fully dry and firm, which can take 2 to 4 hours depending on thickness.
Once painted or left natural and sealed, they glow beautifully over battery tea lights. I prefer battery lights here rather than open flame, especially in a family home, and a soft whitewash finish makes the cutouts cast a much prettier light pattern.
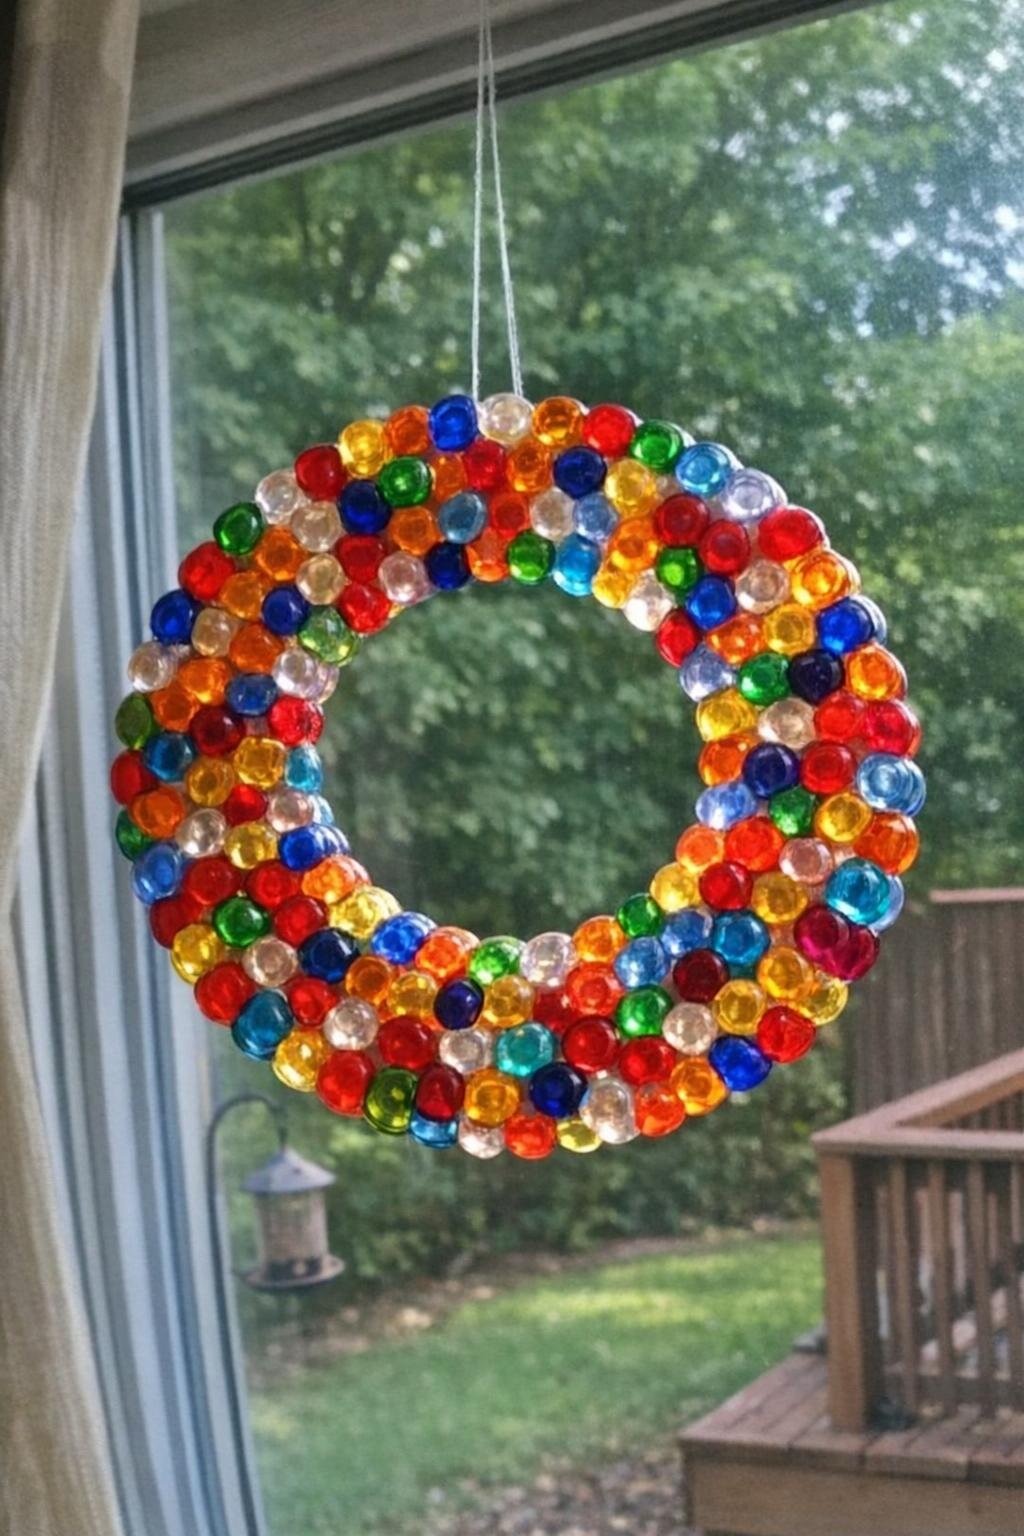
19. Pony bead Bundt-pan wreath
This project has all the cheerful color of melted bead crafts, but in a much grander shape. I arrange translucent pony beads in a metal Bundt pan in a single even layer, usually 250 to 350 beads depending on the pan size, and bake at 400°F until they fuse into one sturdy ring. Once cool, the wreath lifts out in one piece with a beautiful stained-glass effect.
I hang it with clear fishing line in a sunny window where the center hole and curved shape really show off. Mixing two shades of green with a handful of amber or clear beads gives it a soft glowing look instead of a childlike rainbow, and as with all melted plastic crafts, I keep the room ventilated while it bakes.
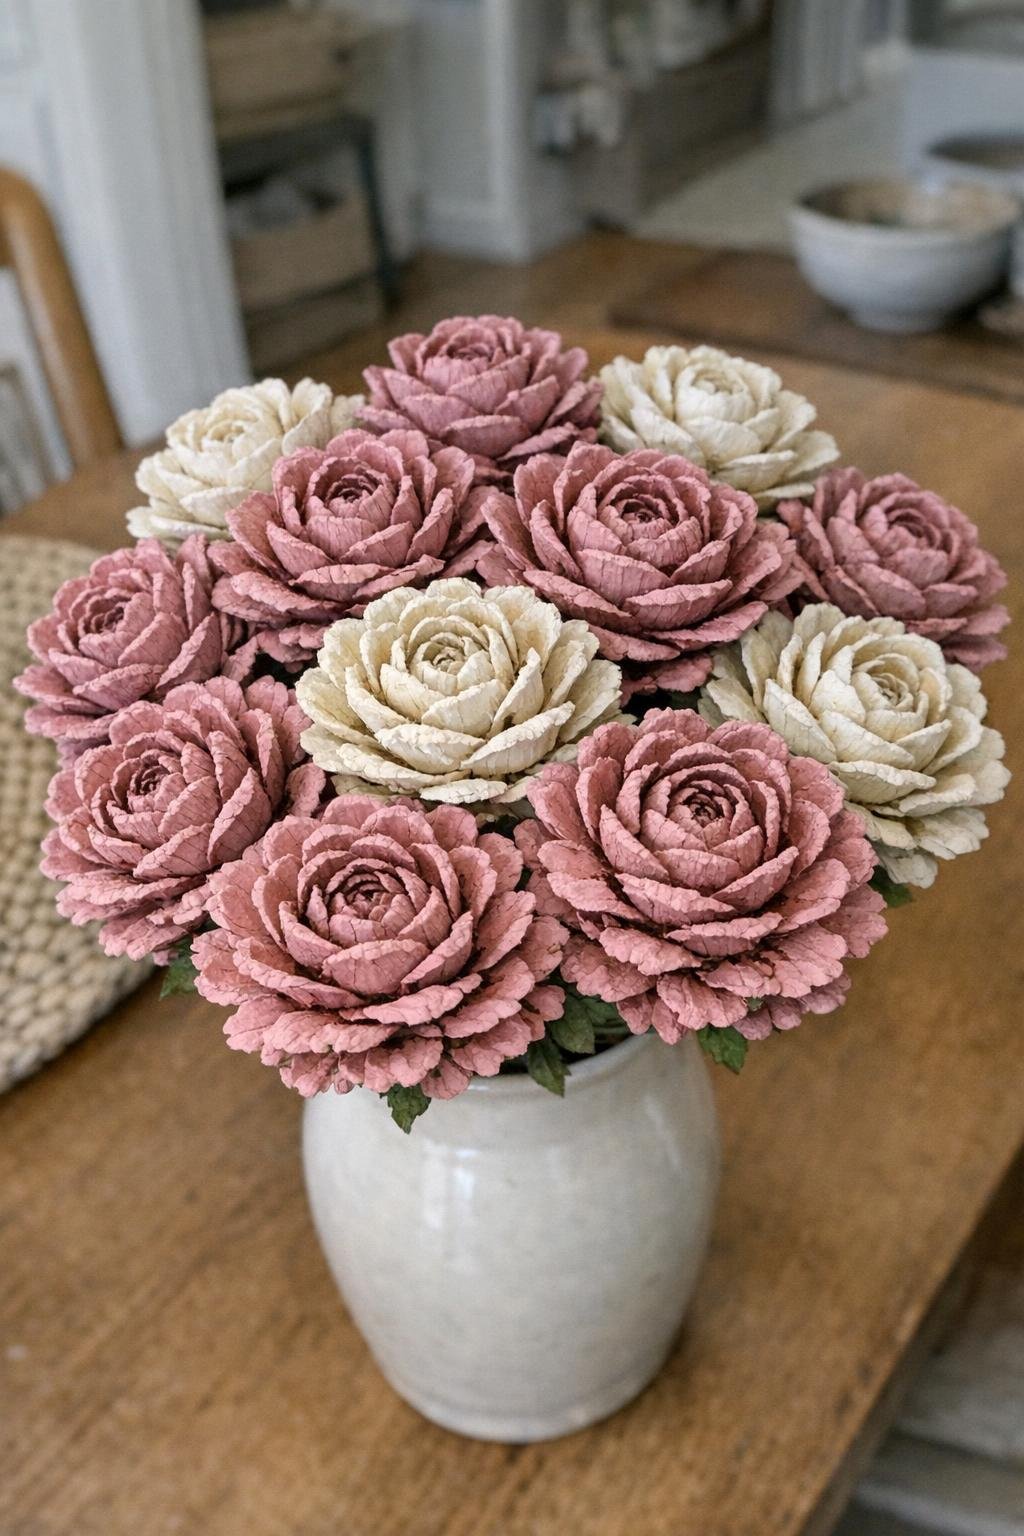
20. Pine cone rose bouquet
This last one might be my favorite because it fools people every single time. I trim the bottoms of pine cones as needed so they resemble blooming roses, then bake them at 200°F for about 30 minutes to help them open and dry fully. After cooling, I paint them in dusty pink, cream, or soft peach, keeping a little of the natural texture visible in the crevices.
I wire each cone onto a floral stem and gather them in a vase just like a real bouquet. A few painted leaves or dried eucalyptus tucked in between gives the arrangement that finished florist feel, and the best part is that it lasts far longer than fresh flowers on the kitchen table.
The fun of these projects is that they start with everyday things and end with something you’d actually be proud to display, gift, or keep out all season. If you ask me, that’s the sweetest kind of oven magic there is.