
This blanket storage ottoman is one of those projects that looks surprisingly high-end even though it’s basically smart styling with practical materials. You’re taking a large round metal tub, softening it with a burlap liner, and packing it full of neatly folded throws so it works as cozy living room storage and a statement piece at the same time.
I love projects like this because they fit real life. In my house, blankets multiply the second the weather dips below sixty, and I’m always trying to make the living room feel tidy without losing that “curl up and stay awhile” feeling. If you want something easy, useful, and genuinely conversation-worthy, this is a great weekend project.
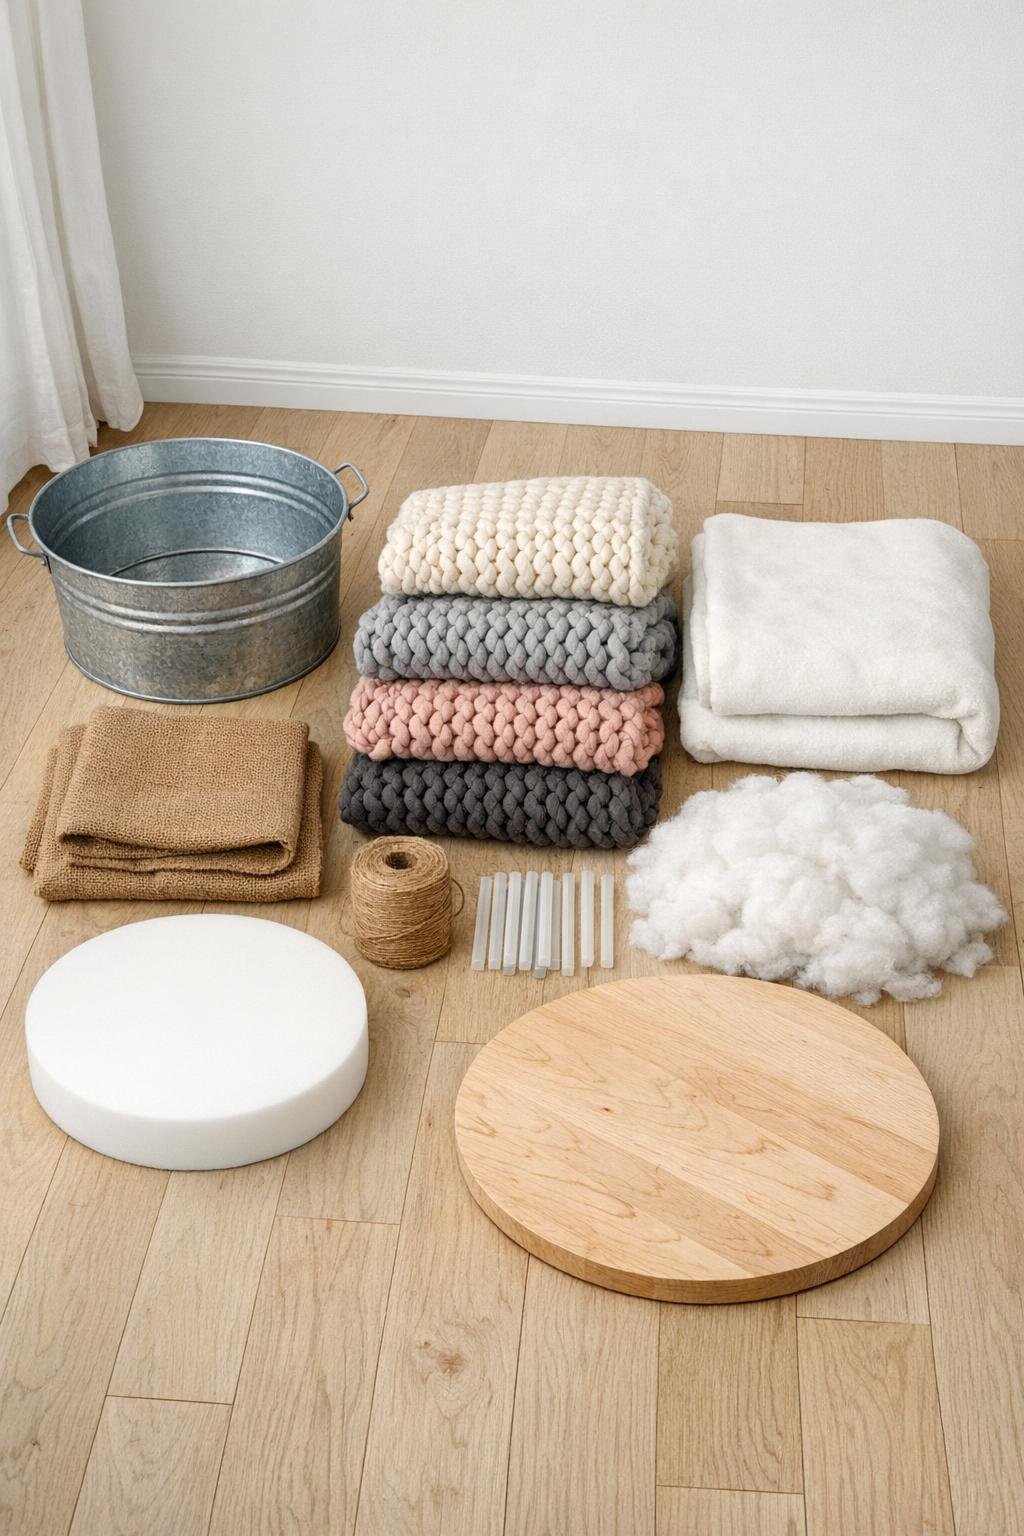
Materials
1 large round galvanized metal tub, 20 to 22 inches wide and 16 to 18 inches tall
Instructions
1. Wipe the galvanized tub clean and let it dry completely; if you want a slightly more finished look, spray the outside with a clear matte sealer and let it cure according to the can directions.
2. Cut the burlap into a rectangle long enough to wrap the inside circumference of the tub with 2 inches of overlap, then cut a circle for the bottom that matches the tub’s interior base.
3. Fit the burlap rectangle inside the tub, keeping the top edge about 1 inch above the rim, and glue it in place in a few small spots around the upper inside edge so it stays neat without looking stiff.
4. Lay the burlap circle into the bottom, tuck the edges slightly under the side liner, and glue just enough to hold it flat and covered.
5. Fold each chunky knit throw into a long, thick rectangle about 10 to 12 inches wide so the texture stays visible and plush once stacked inside the tub.
6. Stand two folded throws upright around the inside wall of the tub, then layer the other two across the center in a crisscross pattern to build a full, overstuffed look.
7. Fold the fleece blanket into a padded bundle and tuck it into any open spaces in the middle and lower half of the tub so the top looks rounded, dense, and supportive.
8. Adjust the blanket folds by pulling up some loops, softening the corners, and alternating the knit textures so the top reads as intentionally styled instead of just stuffed.
9. Cut the batting 3 inches larger than the foam all the way around, center the foam on the plywood round, wrap the batting over the top and sides, and secure it underneath with hot glue.
10. Lay your lid fabric face down, center the padded lid on it, pull the fabric snugly over the edge, and glue it neatly to the underside, trimming away excess bulk as you go.
11. Glue jute rope or thick twine around the lid edge to hide the seam, and add upholstery tacks or nailhead trim if you want a more polished furniture-style finish.
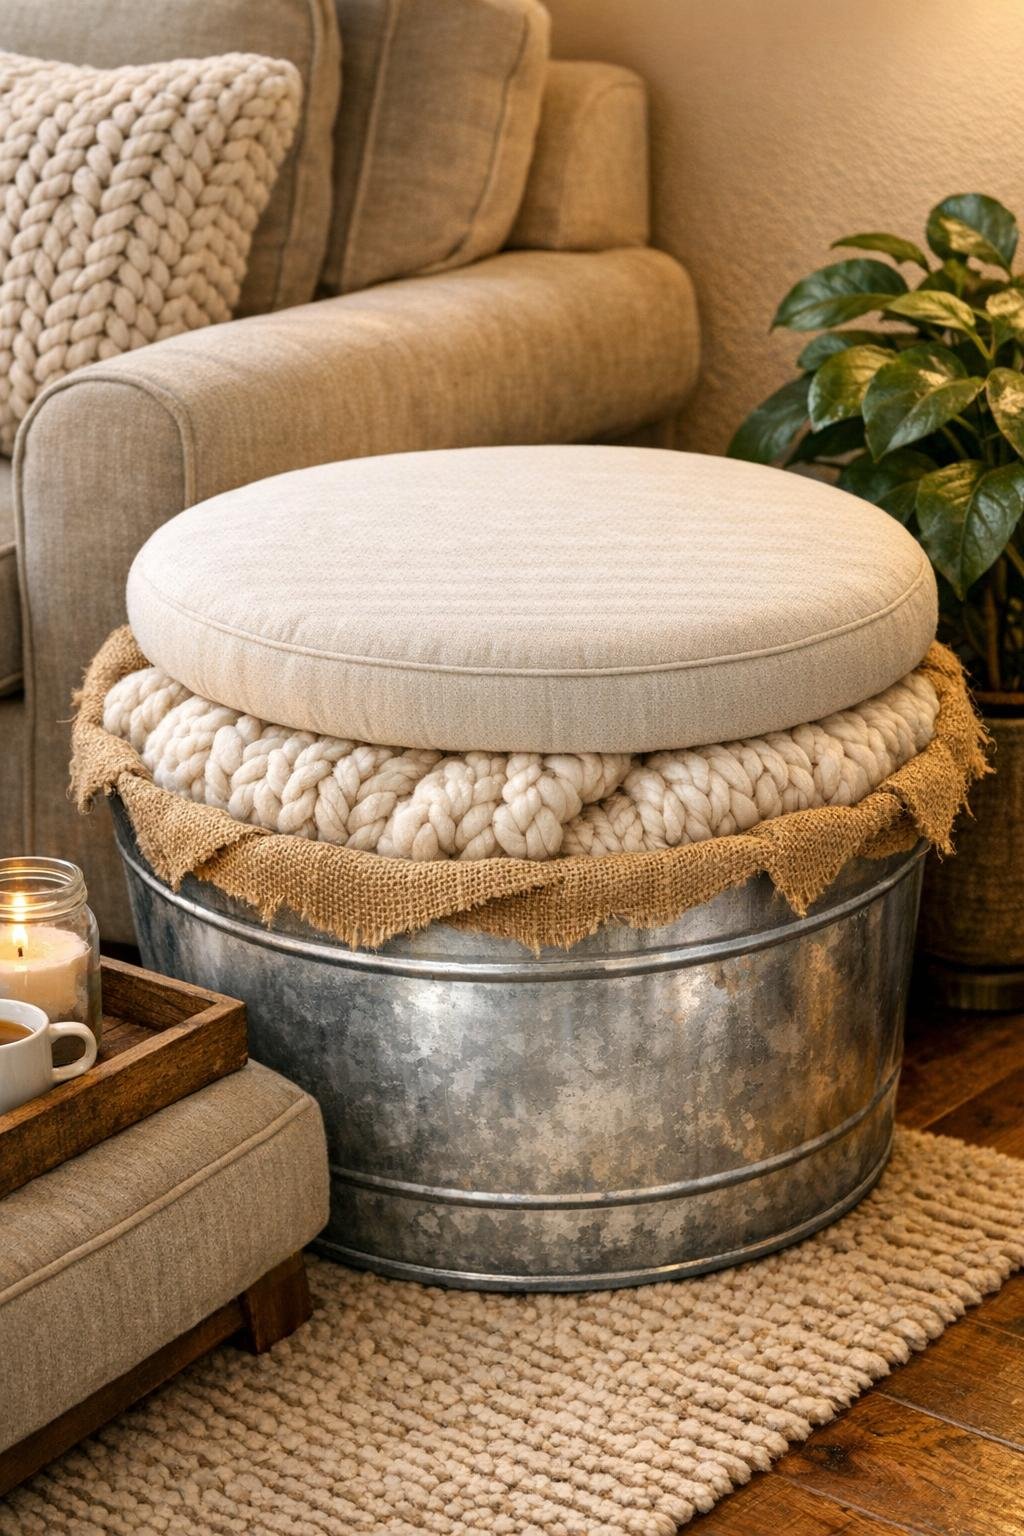
12. Set the finished lid on top of the tub, nestling it just inside the rim so it sits level over the packed blankets and creates a soft ottoman surface.
13. Give the whole piece a final styling pass by fluffing the visible blanket texture, straightening the burlap at the rim, and turning the best knit pattern toward the front of the room.
Variations & Tips
For a softer look: Use oatmeal, cream, or taupe blankets so the burlap and galvanized finish feel warm and layered instead of rustic-heavy.
If you want hidden storage: Leave one or two throws loosely folded near the top so you can lift the lid and still tuck remotes, extra pillow covers, or seasonal decor underneath.
For extra structure: Add a firm bed pillow or two inside the center before the final blanket layer if your tub is oversized and you want the lid to feel more supported.
Fabric shortcut: If sewing is not on your agenda, stick with hot glue for the lid cover and choose a textured upholstery fabric that hides tiny folds at the underside.
Best placement: I like this in front of an accent chair or at the end of a sofa where it can act as a footrest, extra blanket station, and a piece that makes the room feel finished.
Keep it practical: Choose blankets you actually use and wash often; pretty is great, but in a busy living room I’ve learned the best decor pieces are the ones that earn their spot every single day.