
I’m the kind of person who hates tossing out anything that might still be useful, and empty toilet paper rolls absolutely fall into that category. They’re sturdy enough to cut, fold, paint, and glue, and because they’re all roughly the same size, they’re oddly handy for both crafts and little organizing fixes around the house.
If you’ve got a small stash building up under the sink, here are 20 genuinely practical or decorative ways I’d reuse them before recycling. These range from quick 10-minute projects to a couple that take an afternoon, and every one starts with the same free cardboard tube.
1. String lights
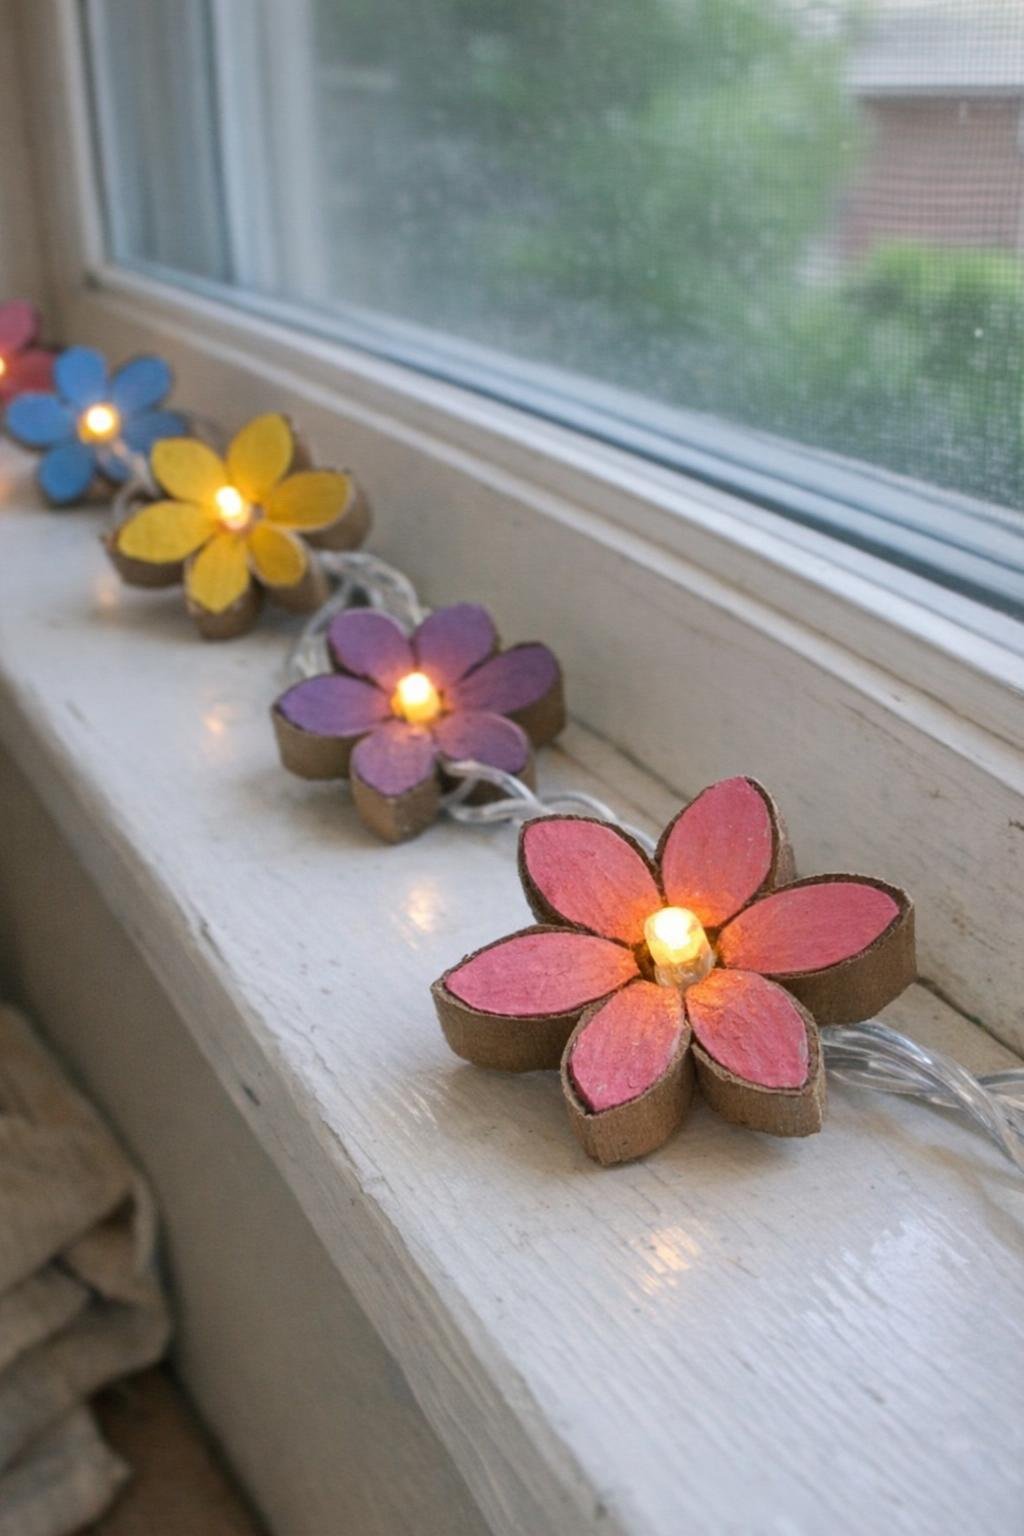
This is one of my favorite ways to dress up plain fairy lights. I flatten 6 to 10 toilet paper tubes, cut them crosswise into 1/2-inch rings, then pinch and glue five rings together into a flower shape. Once they dry, I snip a tiny opening in the center and slide one flower over each bulb on a strand of battery lights.
If you want them to last through a season, brush on acrylic paint first and let it dry for about 30 minutes before assembling. My best tip is to use cool LED lights only, not hot incandescent bulbs, so the cardboard stays safe.
2. Pumpkins for fall
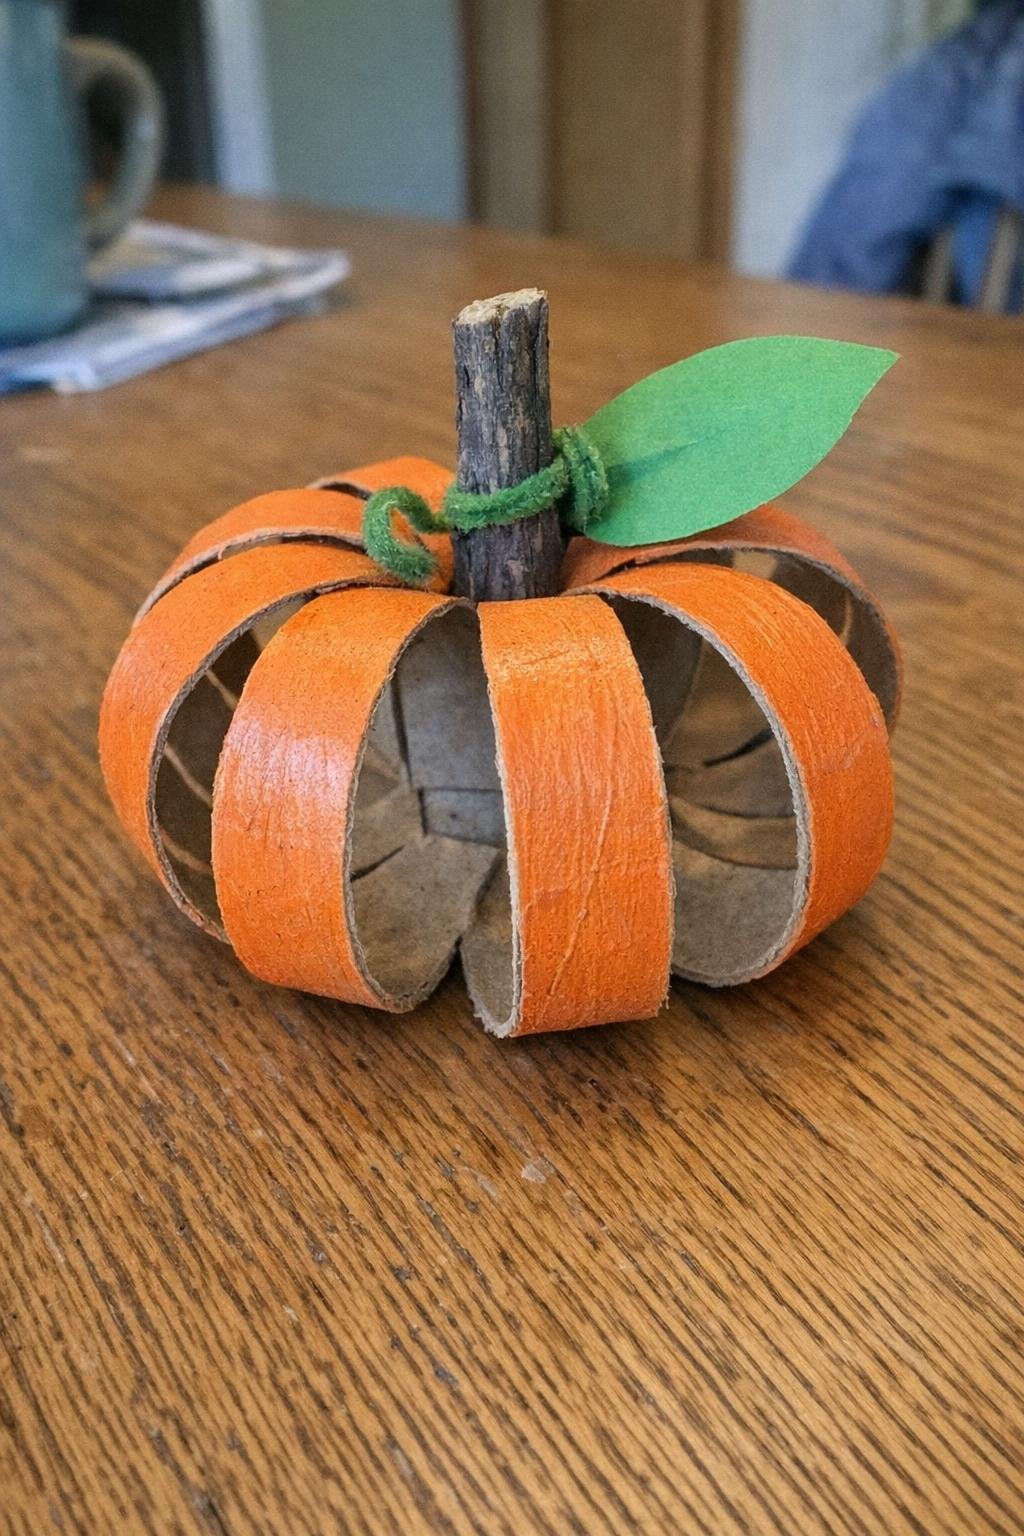
For an easy autumn centerpiece, I cut one tube into 6 or 7 equal rings, paint them orange, and let them dry on wax paper. Then I thread the rings onto a piece of twine or floral wire, fan them into a pumpkin shape, and tuck a short stick and a scrap of green paper or felt at the top for the stem and leaf.
One tube makes a small pumpkin about 4 inches wide, and three grouped together look great on a mantel or entry table. My tip is to dry-brush a little brown into the grooves so the pumpkin doesn’t look too flat or bright.
3. Twig pencil holder
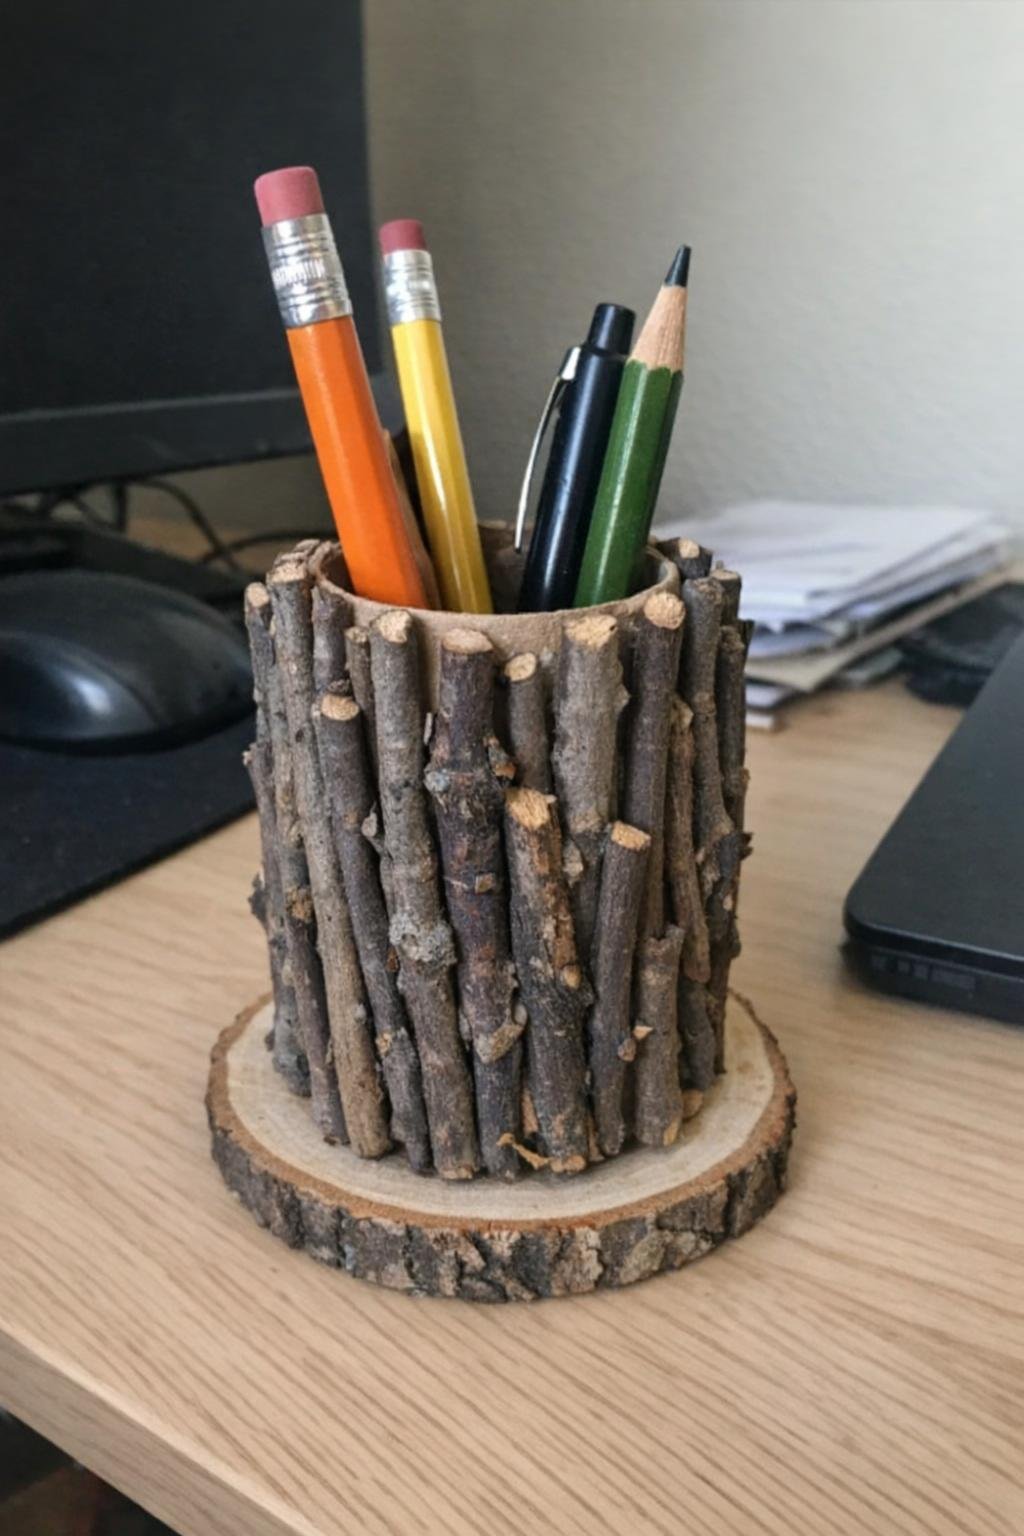
I save a tube from the recycle pile, cut twigs into 4-inch lengths, and hot-glue them vertically all the way around the outside until the cardboard disappears. Then I glue the finished tube onto a cardboard circle or a small wood slice so it can actually stand up without tipping.
It takes around 20 to 30 twigs depending on thickness, and the result looks much more expensive than it is. My tip is to sort the twigs before gluing so they’re close in diameter; that keeps the holder from looking lumpy and makes pencils sit straighter.
4. Wall art
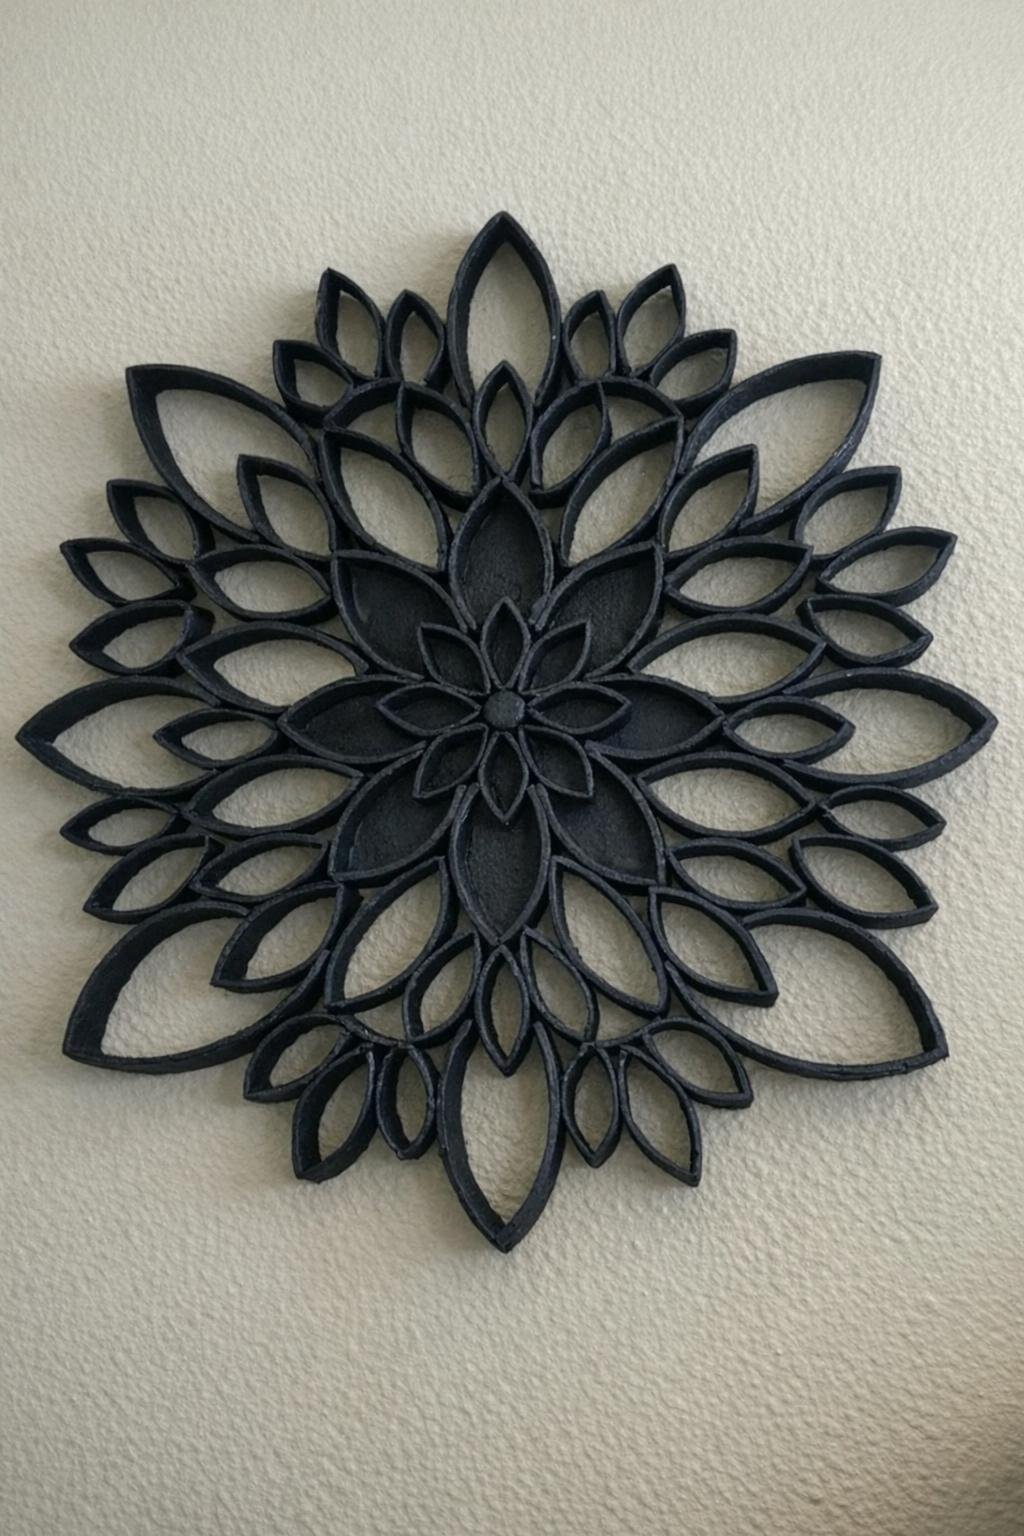
This project looks surprisingly elegant for plain cardboard. I flatten several tubes, cut them into 1/2-inch rings, then pinch each ring into a petal shape. After that, I arrange the petals into a round medallion or floral pattern and glue the touching points together until I have a larger piece about 12 to 16 inches across.
I usually finish it with matte black spray paint so it resembles wrought iron from a distance. My tip is to lay the whole design out on the table first and snap a quick phone photo before gluing, because it’s much easier to rebuild the pattern if anything shifts.
5. Power cord covers
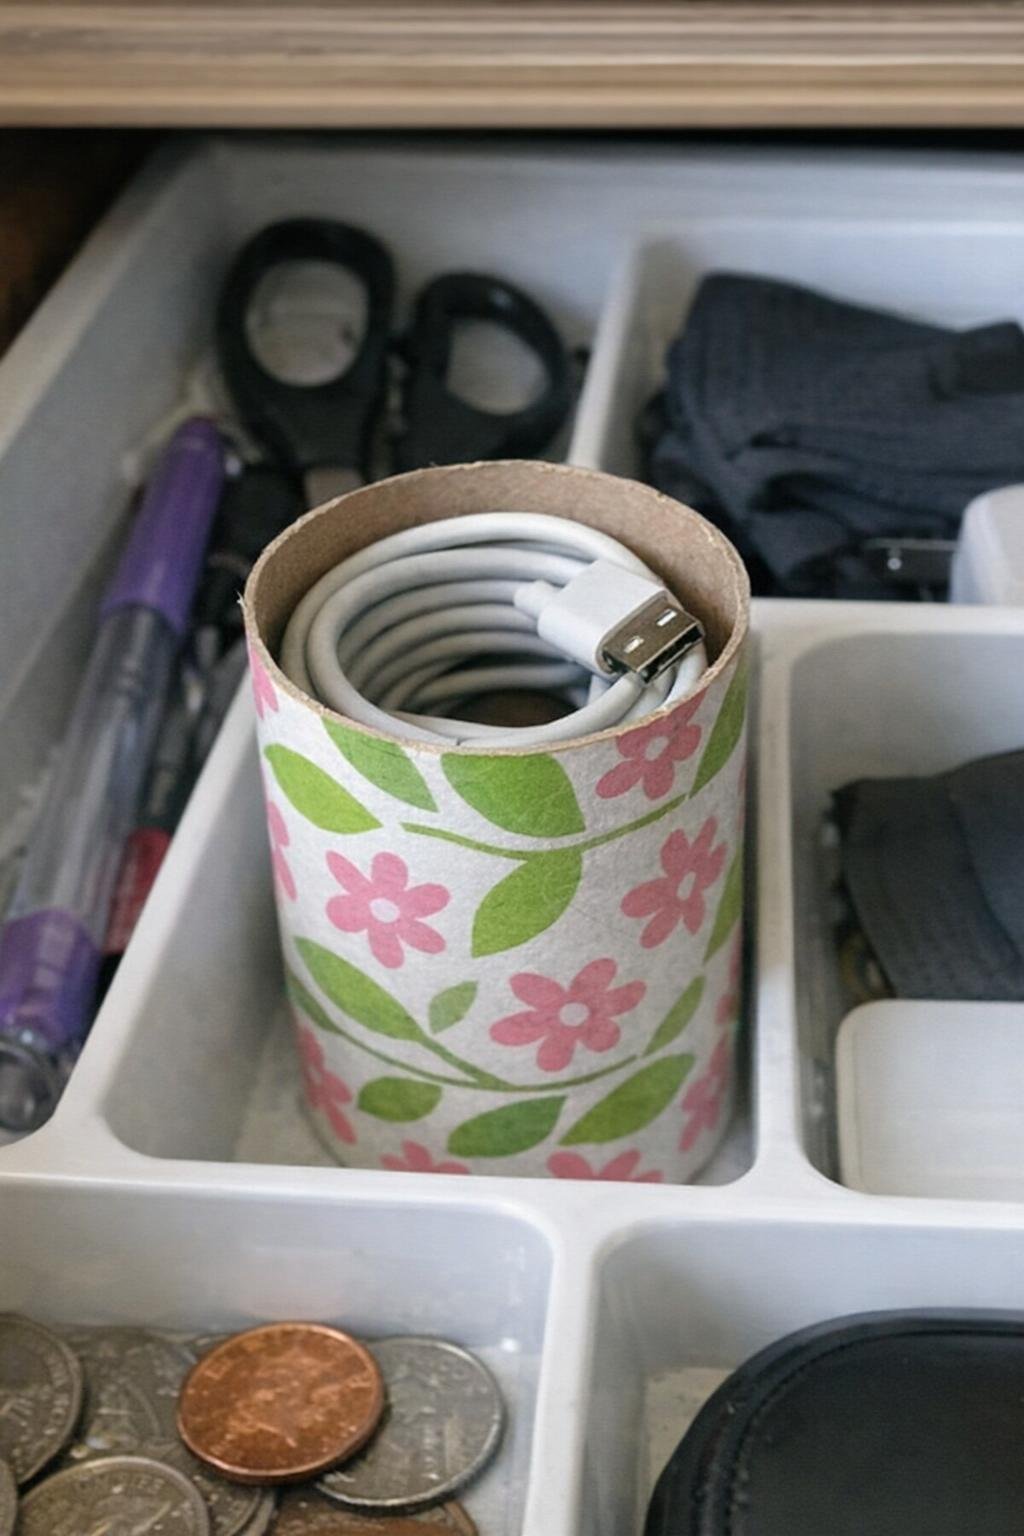
This is less decorative and more useful, which is exactly why I like it. I wrap spare phone chargers, laptop cords, or holiday light extensions into neat loops about the size of my palm, then slide each bundle into a tube so it doesn’t spring loose in the drawer.
If I want it to look tidier, I cover the tube with plain kraft paper, fabric scraps, or washi tape. My tip is to cut one short lengthwise slit down the tube first if the cord is bulky; it gives just enough flexibility to tuck the bundle in without crushing the cardboard.
6. Desk organizer
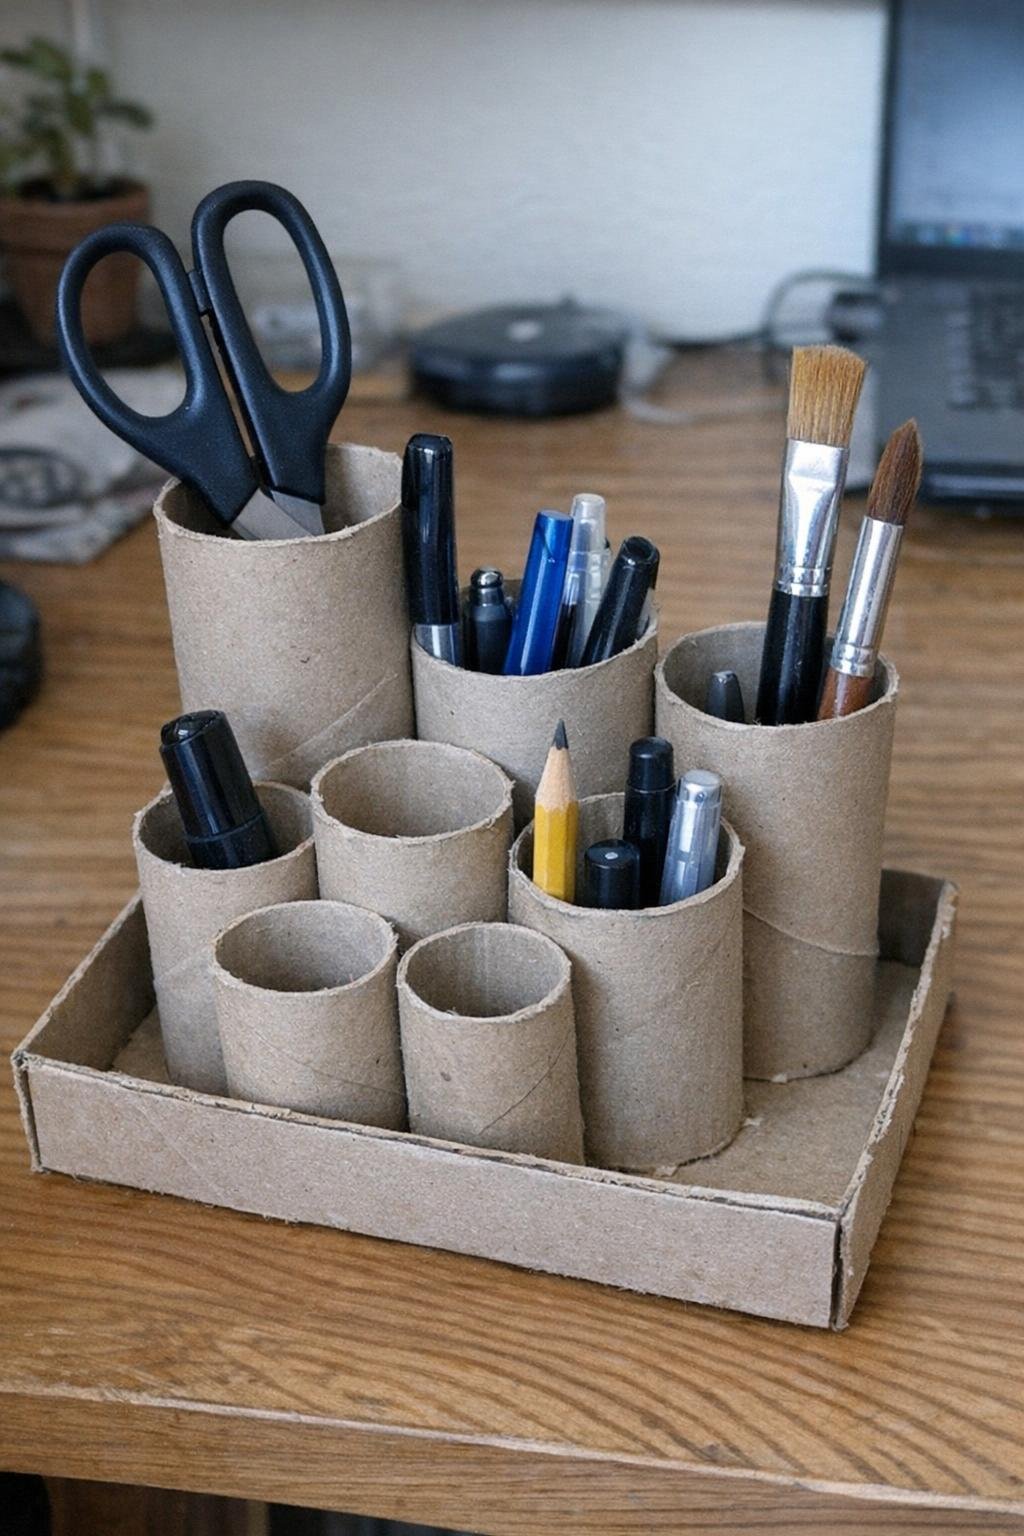
When I need to corral pens, scissors, rulers, and paintbrushes, I glue 6 to 9 tubes upright inside a shallow box lid or small shipping box. I trim some tubes shorter at 2 inches and leave others at full height, around 4 inches, so small clips don’t get lost behind taller tools.
Once everything is glued in place, I paint the whole organizer one color for a cleaner look. My tip is to place the tallest tubes at the back and heavier items like scissors near the corners, which keeps the organizer from feeling front-heavy.
7. Utensil holder
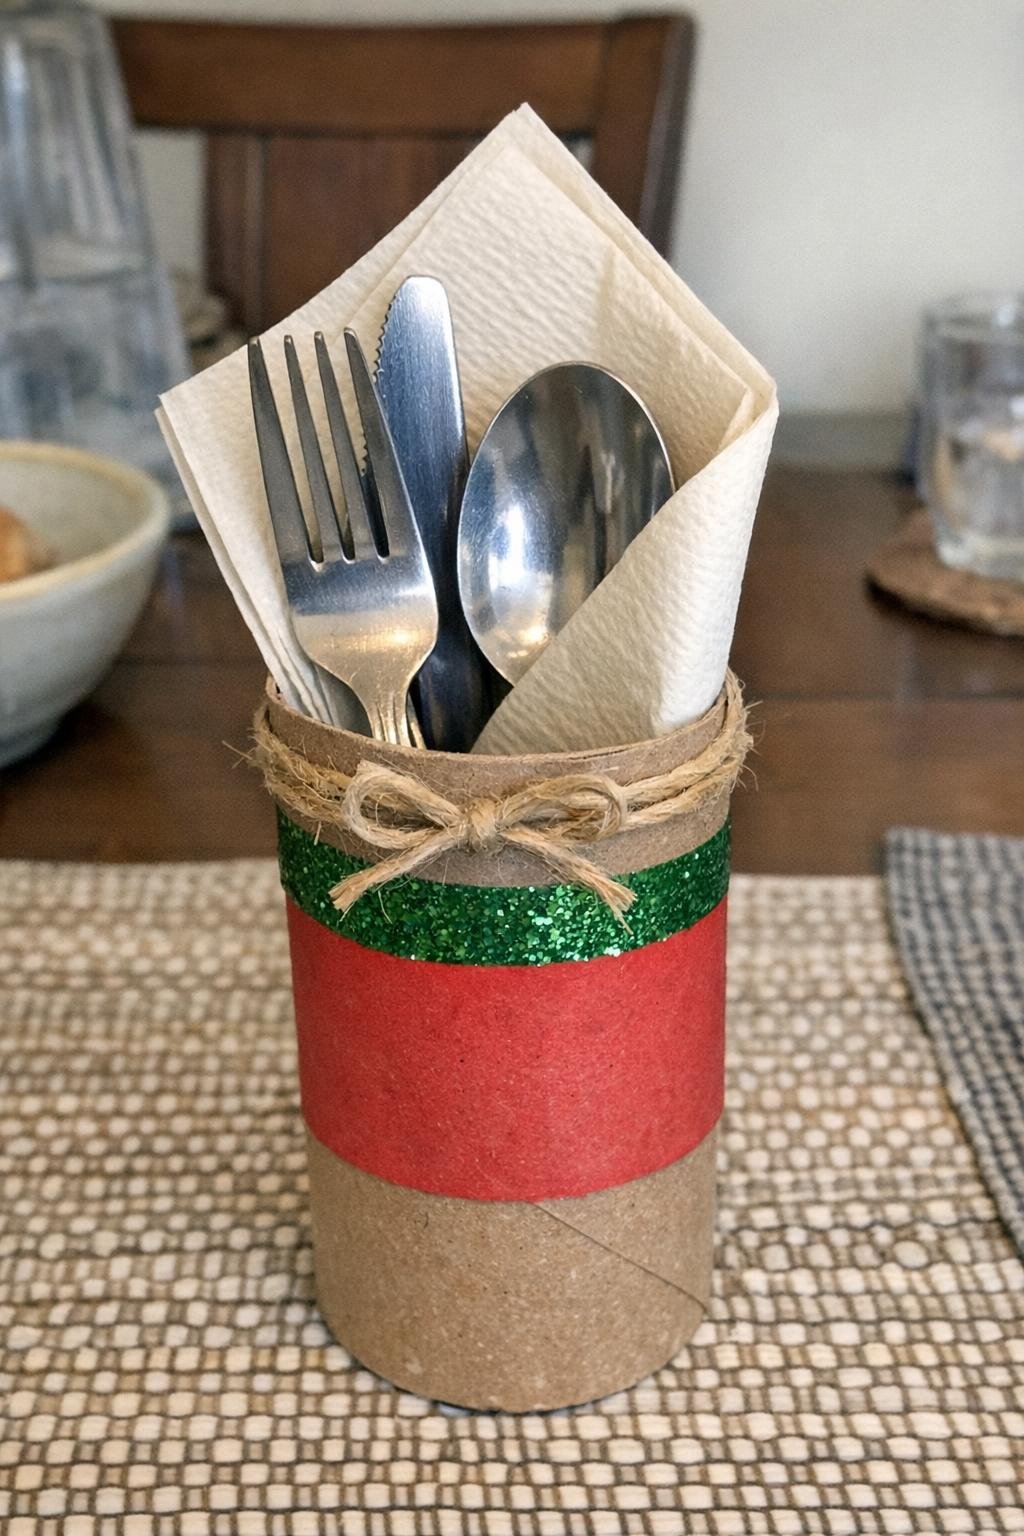
For an outdoor lunch or kid’s party, I make a simple utensil sleeve with one tube per place setting. I flatten the tube slightly, wrap it in scrapbook paper or fabric, and slide in a fork, knife, spoon, and folded napkin so everything stays together on the plate.
These are especially handy when I’m setting up a buffet and don’t want loose silverware scattered everywhere. My tip is to line the paper seam on the underside and tie a little twine around the middle so the holder looks intentional instead of improvised.
8. Phone stand
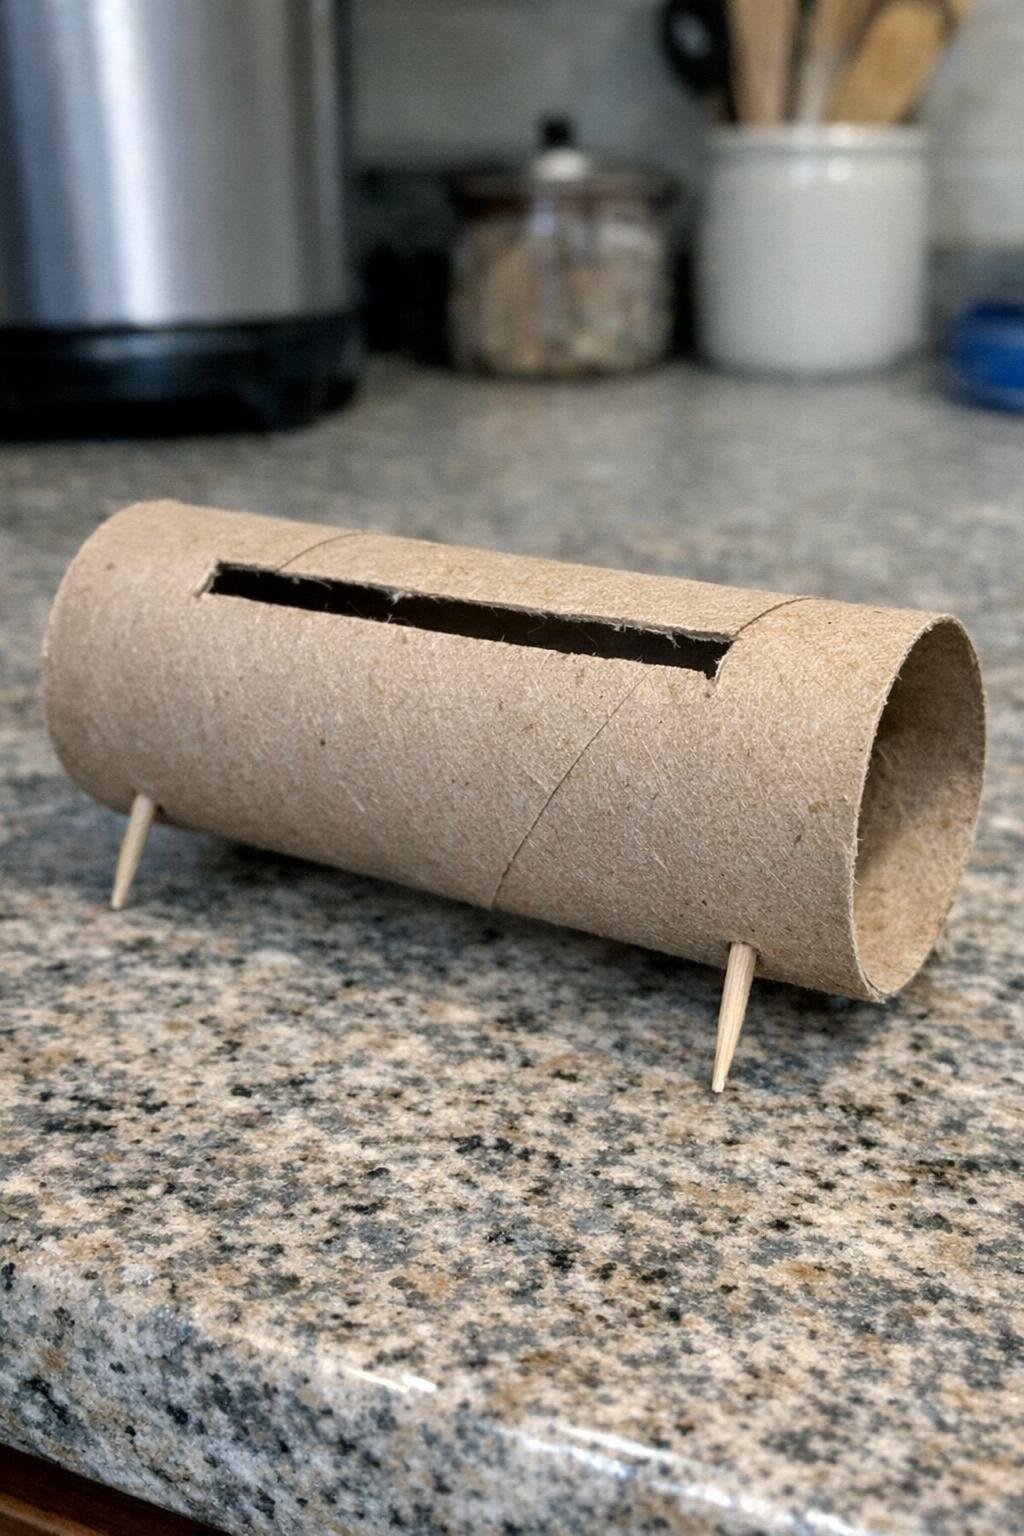
This one is wonderfully low-tech. I cut a horizontal slot about 3 inches long across the top of a tube, just deep enough for my phone to lean back securely. Then I poke a pushpin or wooden skewer through each side near the bottom to create little feet that stop the tube from rolling.
It works best for watching recipes or video calls when I don’t feel like propping my phone against a mug. My tip is to angle the slot slightly back rather than straight down, which gives the screen a more comfortable viewing tilt.
9. Grow your seedlings
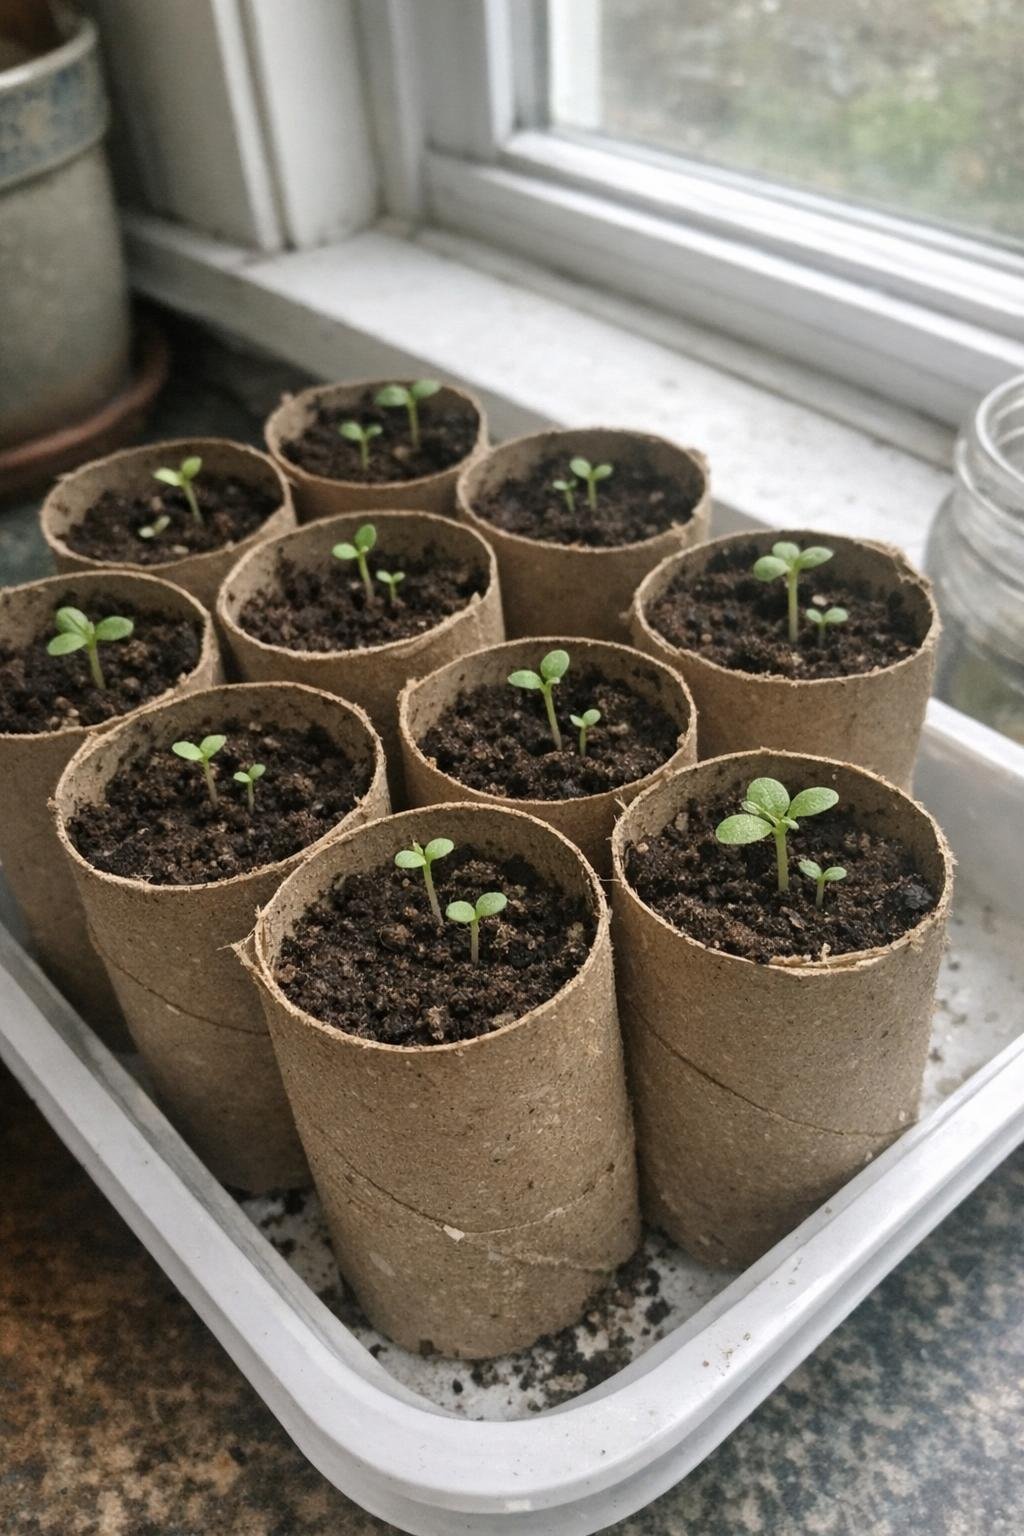
I use toilet paper tubes as tiny biodegradable seed pots every spring. I stand 8 to 12 tubes upright in a tray, fold the bottom edges inward to make a base, then fill each one with seed-starting mix and plant 1 or 2 seeds per tube depending on the crop.
They’re ideal for peas, beans, marigolds, and other seedlings that don’t love their roots disturbed. My tip is to mist them lightly and set the whole tray on a plate or waterproof tray, because the cardboard softens as you water and needs support until transplant day.
10. Bird feeder
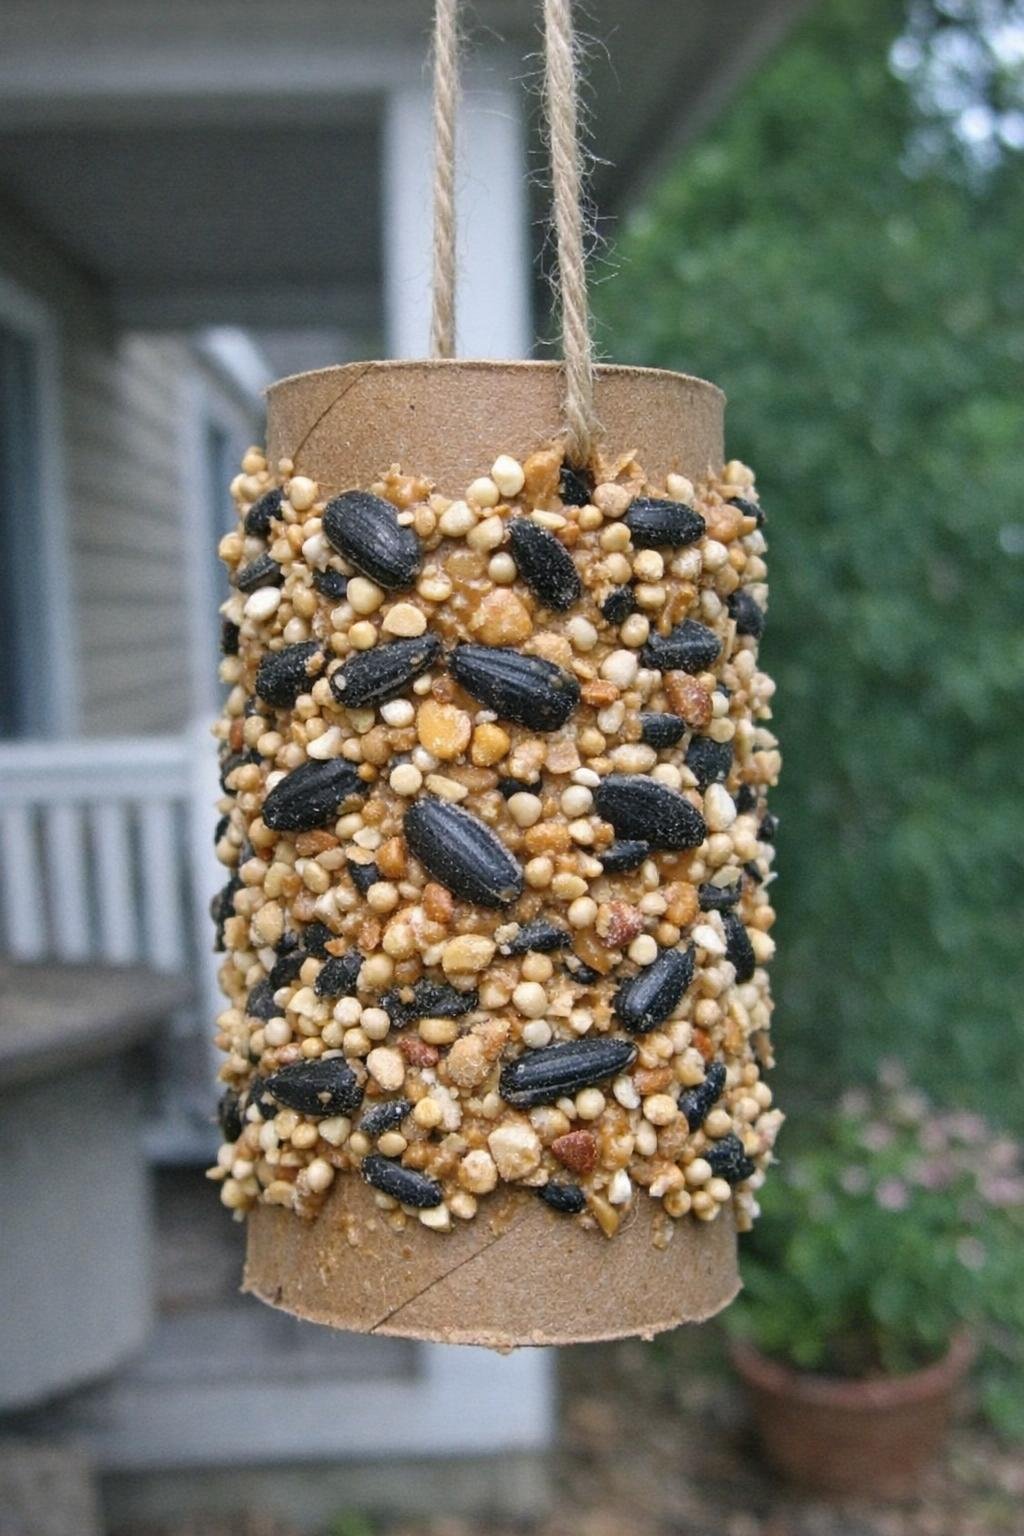
This classic is still worth making. I spread a thin layer of peanut butter around the outside of a tube, roll it in birdseed on a plate, then thread the tube onto a branch or string and hang it outside where I can see it from the window.
It takes less than 5 minutes and uses up stray birdseed at the bottom of the bag. My tip is to keep the peanut butter layer fairly thin so the seed sticks without clumping, and hang it in a sheltered spot where rain won’t turn it soggy too fast.
11. Faux-wood-block wall mosaic
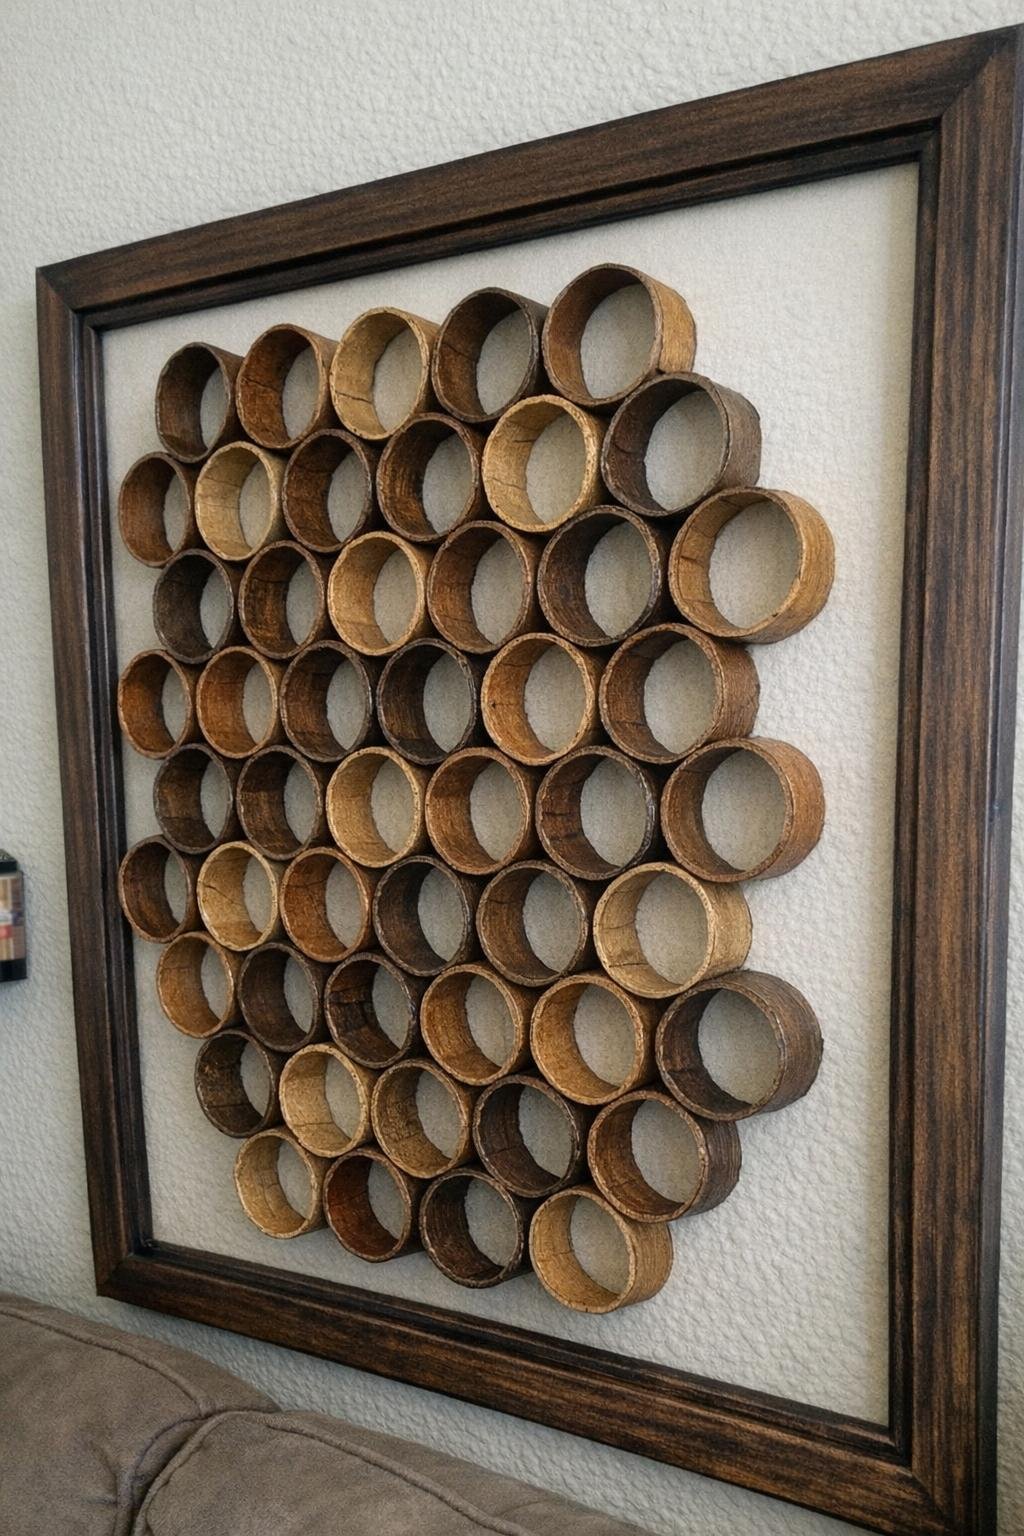
This one takes more tubes, but the finished piece looks like something from a boutique shop. I cut dozens of tubes into 3/4-inch rings, glue them side by side in a honeycomb-style arrangement on a backing board, then paint everything in layered browns, tans, and a little gray so the surface mimics carved wood blocks.
Once dry, I frame it in a simple black or natural wood frame to make it look finished. My tip is to vary the paint slightly from ring to ring and dry-brush the edges, because that small color shift is what gives the mosaic real depth.
12. Cardboard-tube snowflake ornaments
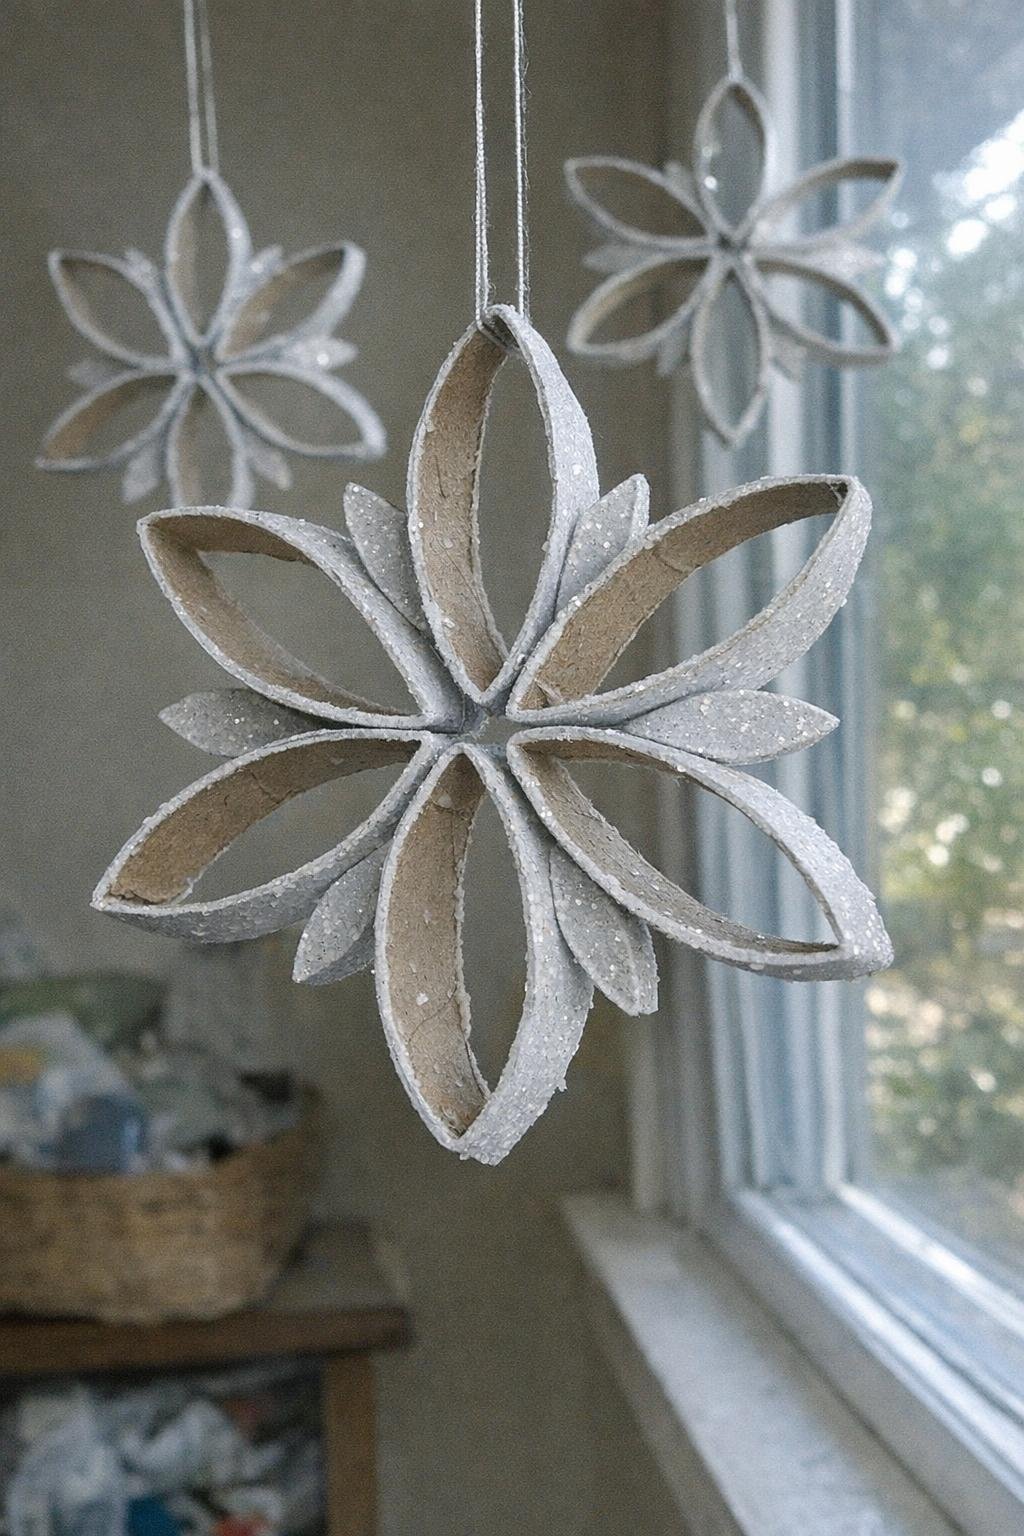
I flatten tubes, cut them into narrow 3/8-inch rings, and pinch or leave them rounded depending on the snowflake pattern I want. Then I glue six points around a center ring, add smaller loops between them, and paint the whole ornament white before dusting it lightly with clear or silver glitter.
They’re almost weightless, so they hang nicely on a tree branch or from a window latch with sewing thread. My tip is to make two or three designs at once while the glue gun is hot, because these go together quickly once you find a pattern you like.
13. Gift boxes
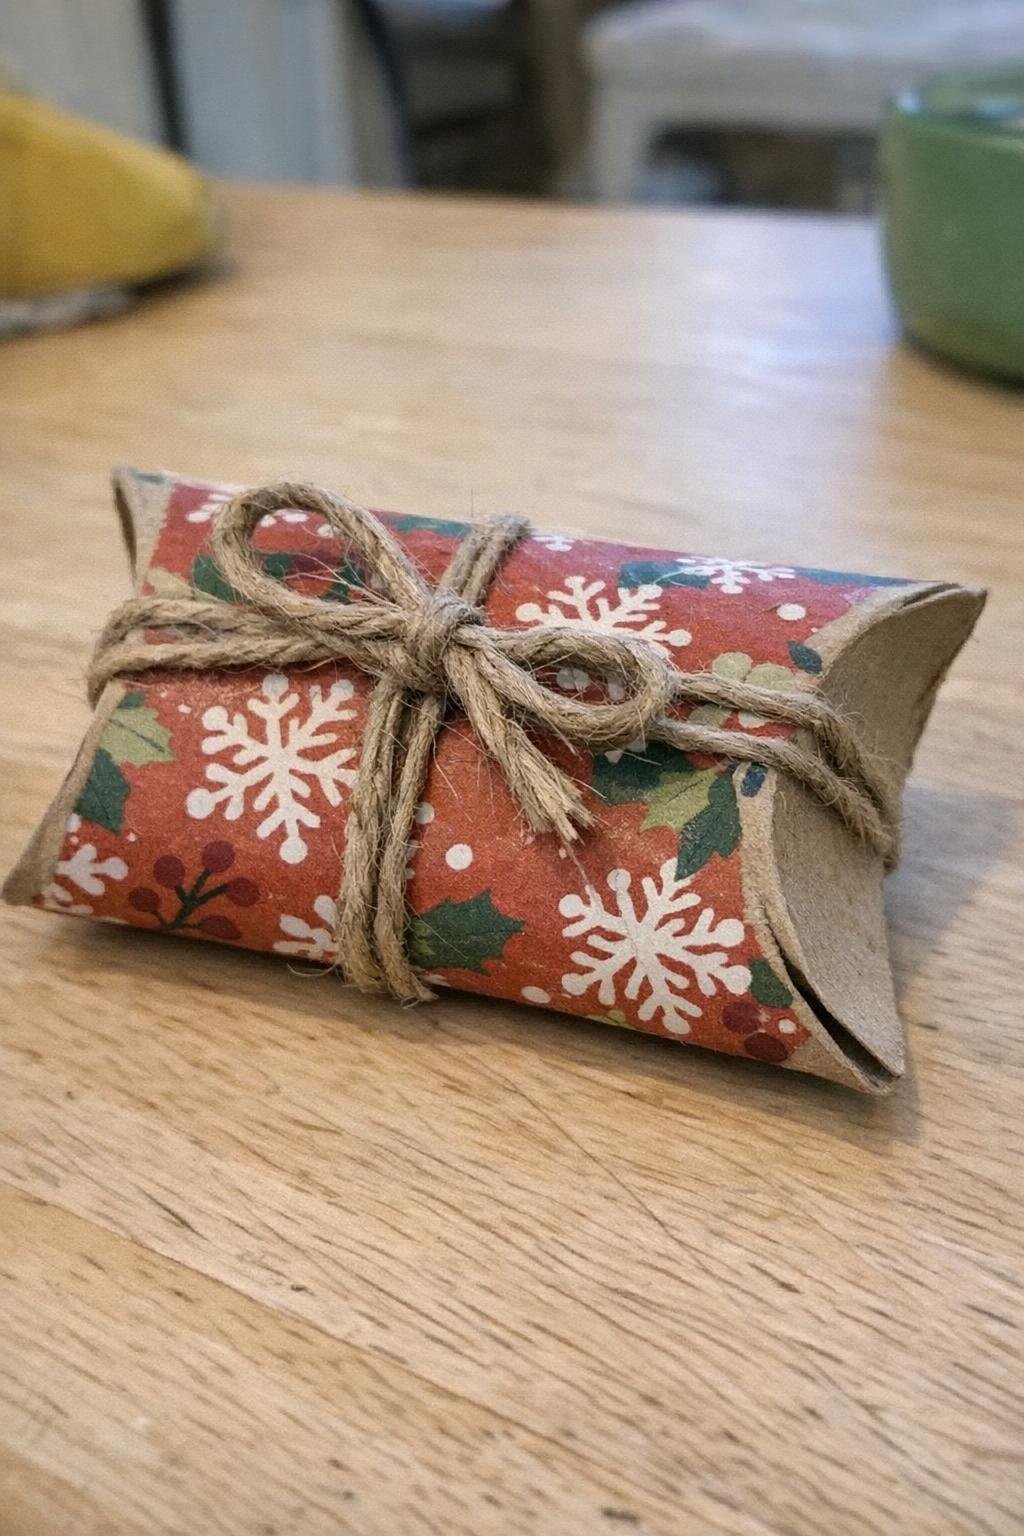
To make a small pillow-style gift box, I press in one side of each tube end with my thumb, then fold in the opposite side so both ends close in curved flaps. After that I wrap the tube in paper, fabric, or even brown kraft paper tied with string, and tuck in jewelry, cash, tea bags, or a few chocolates.
A standard tube usually fits items up to about 4 inches long, so it’s best for small presents or party favors. My tip is to fill the box first with tissue or the gift itself before folding the second end closed, which keeps the shape neat and rounded.
14. Advent calendar
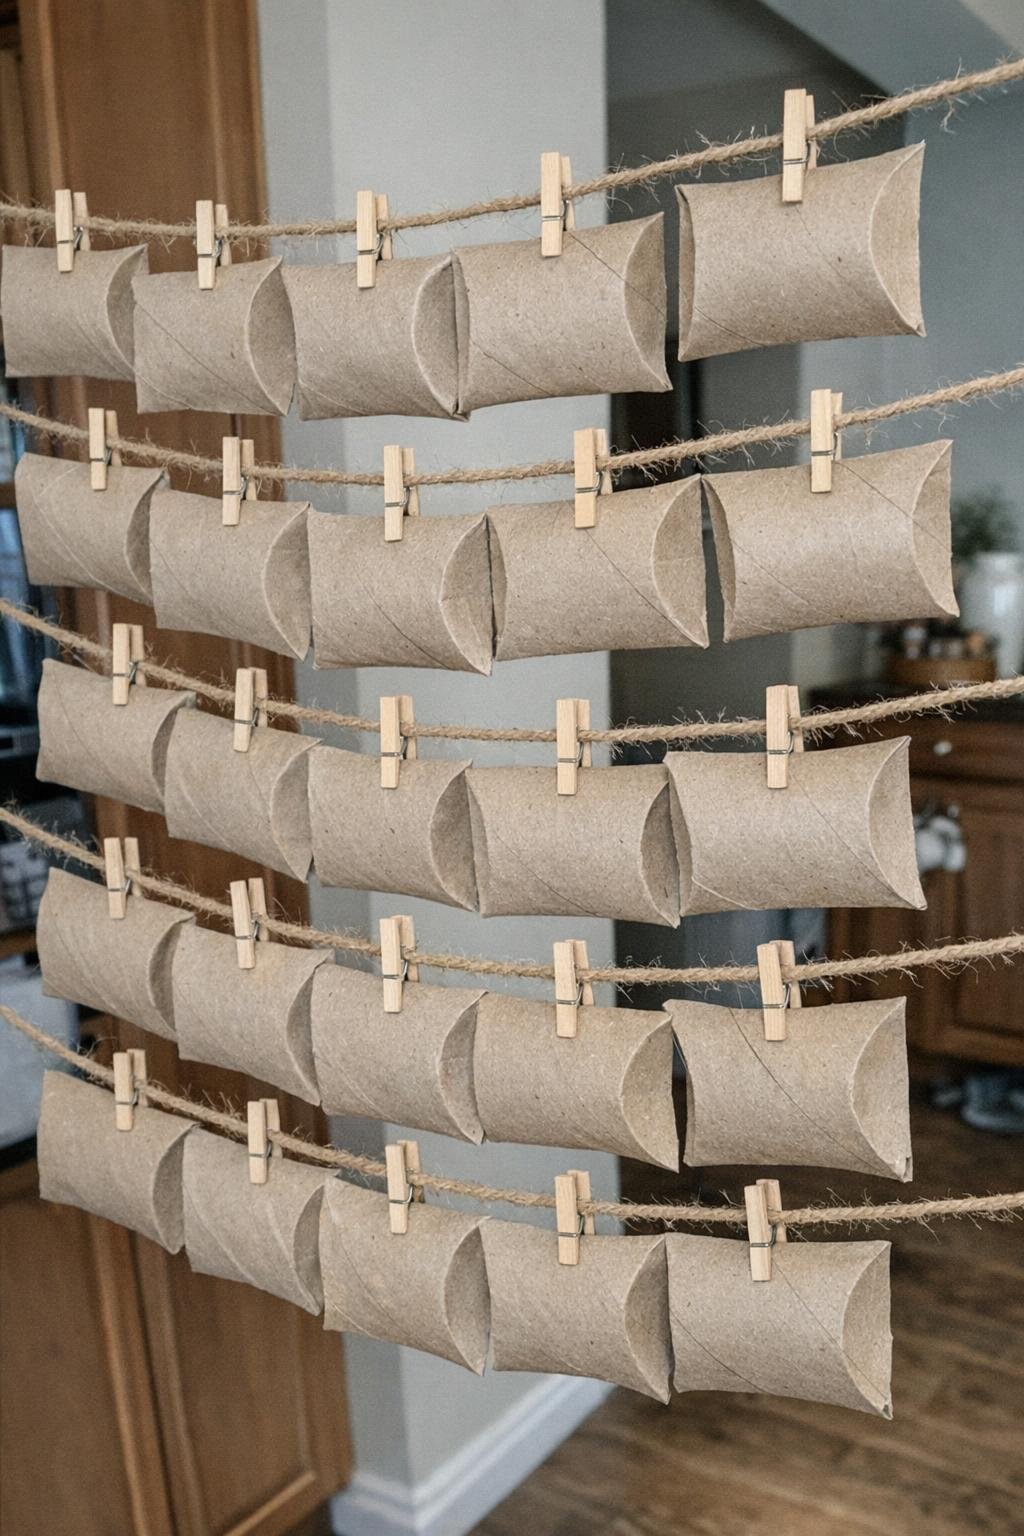
This is a bigger project, but it’s charming once it’s done. I make 24 pillow-shaped tube boxes, slip a small treat or note into each one, then hang them from lengths of twine with clothespins or tie them to a branch, ladder, or wall grid in rows.
To keep the look cohesive, I use the same paint or wrapping paper across all 24 pieces and only vary the trims. My tip is to keep the fillers tiny—think wrapped candy, coins, or little activity slips—so the tubes don’t bulge and pop open.
15. Toy car garage and marble run
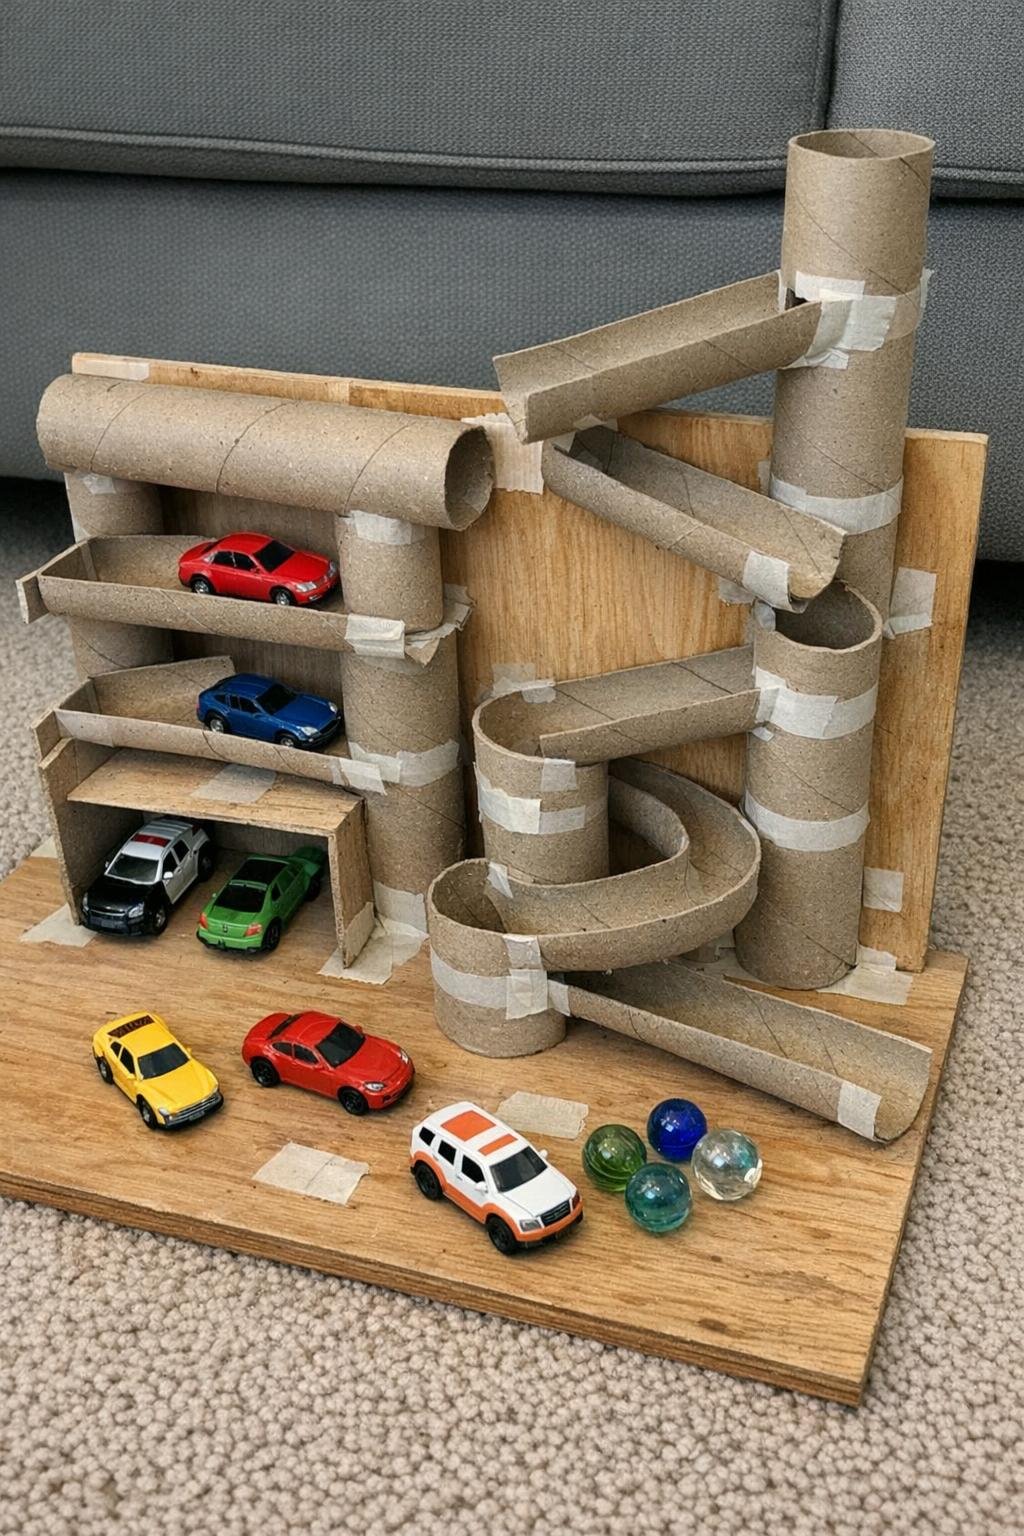
For a kid-friendly build, I tape or hot-glue several tubes horizontally onto a piece of cardboard or a narrow wall board. Stacked in a grid, they become parking bays for toy cars; angled and split, they become a marble run with tunnels, drops, and ramps.
I usually cut some tubes in half lengthwise to create open channels and leave others whole for tunnels. My tip is to test the angle with one marble or one toy car before gluing everything down permanently, because even a half-inch tilt can change how well it works.
16. Napkin rings
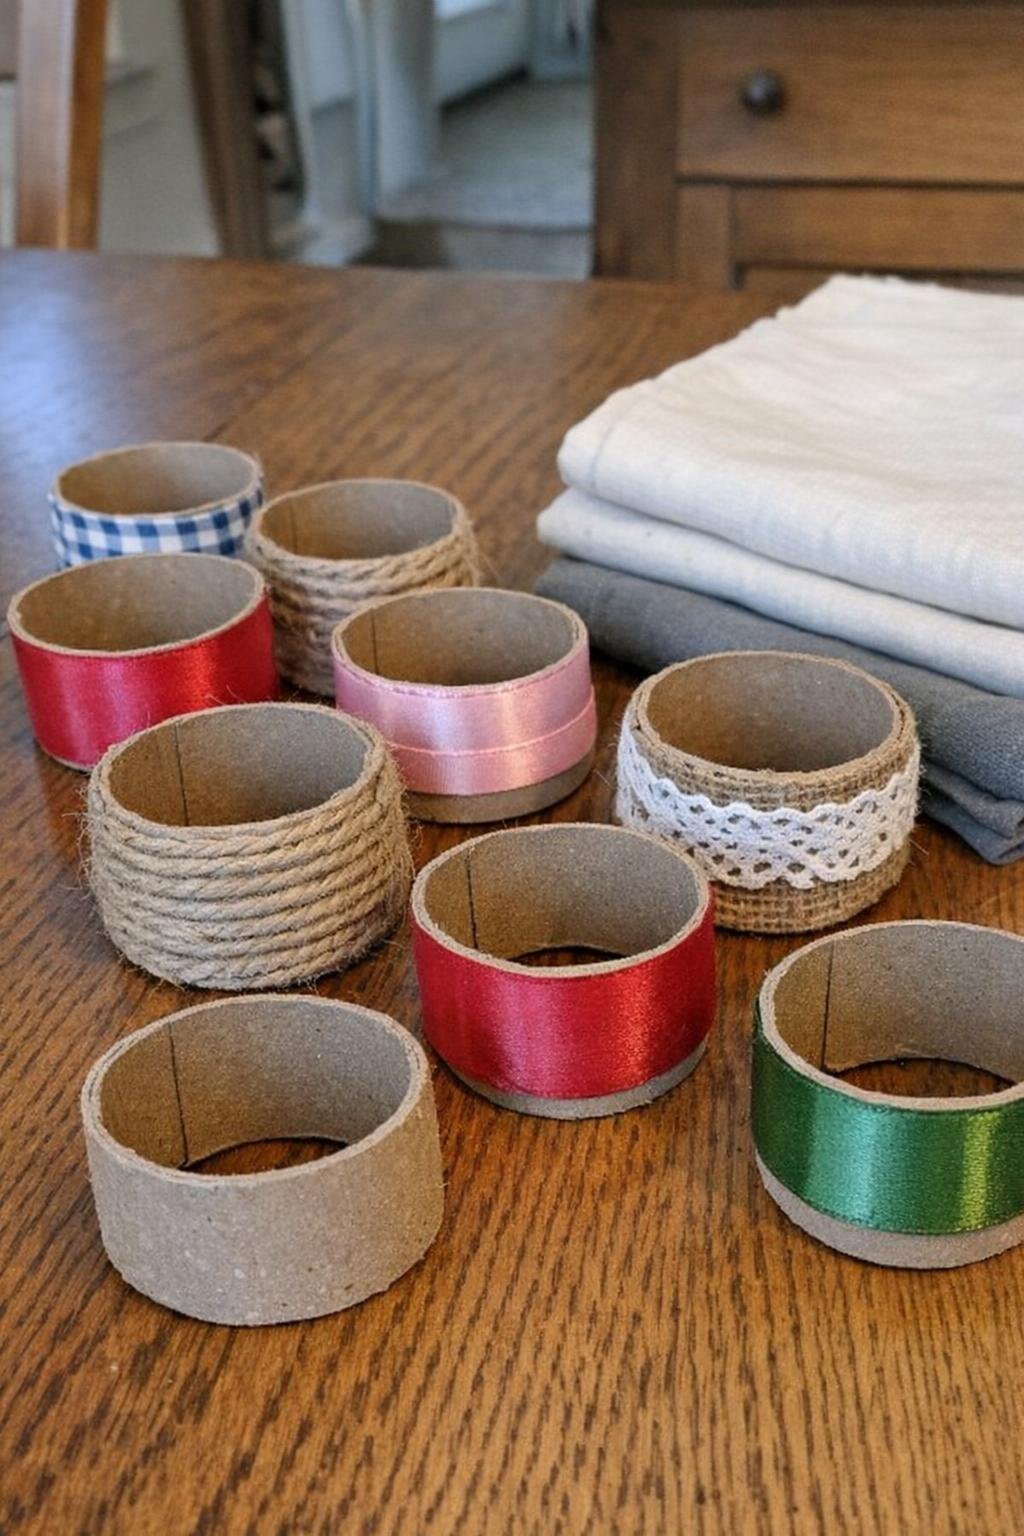
This is probably the quickest project on the list. I cut a tube into 1-inch-wide rings, then wrap each ring in ribbon, jute twine, fabric strips, or even narrow leftover wallpaper. A dot of glue at the start and end is usually enough to hold everything in place.
One tube makes about four napkin rings, so it’s easy to build a full set over time. My tip is to use double-sided tape under slippery ribbon before adding glue at the seam, especially if you want a smooth finish without unraveling ends.
17. Fire starters
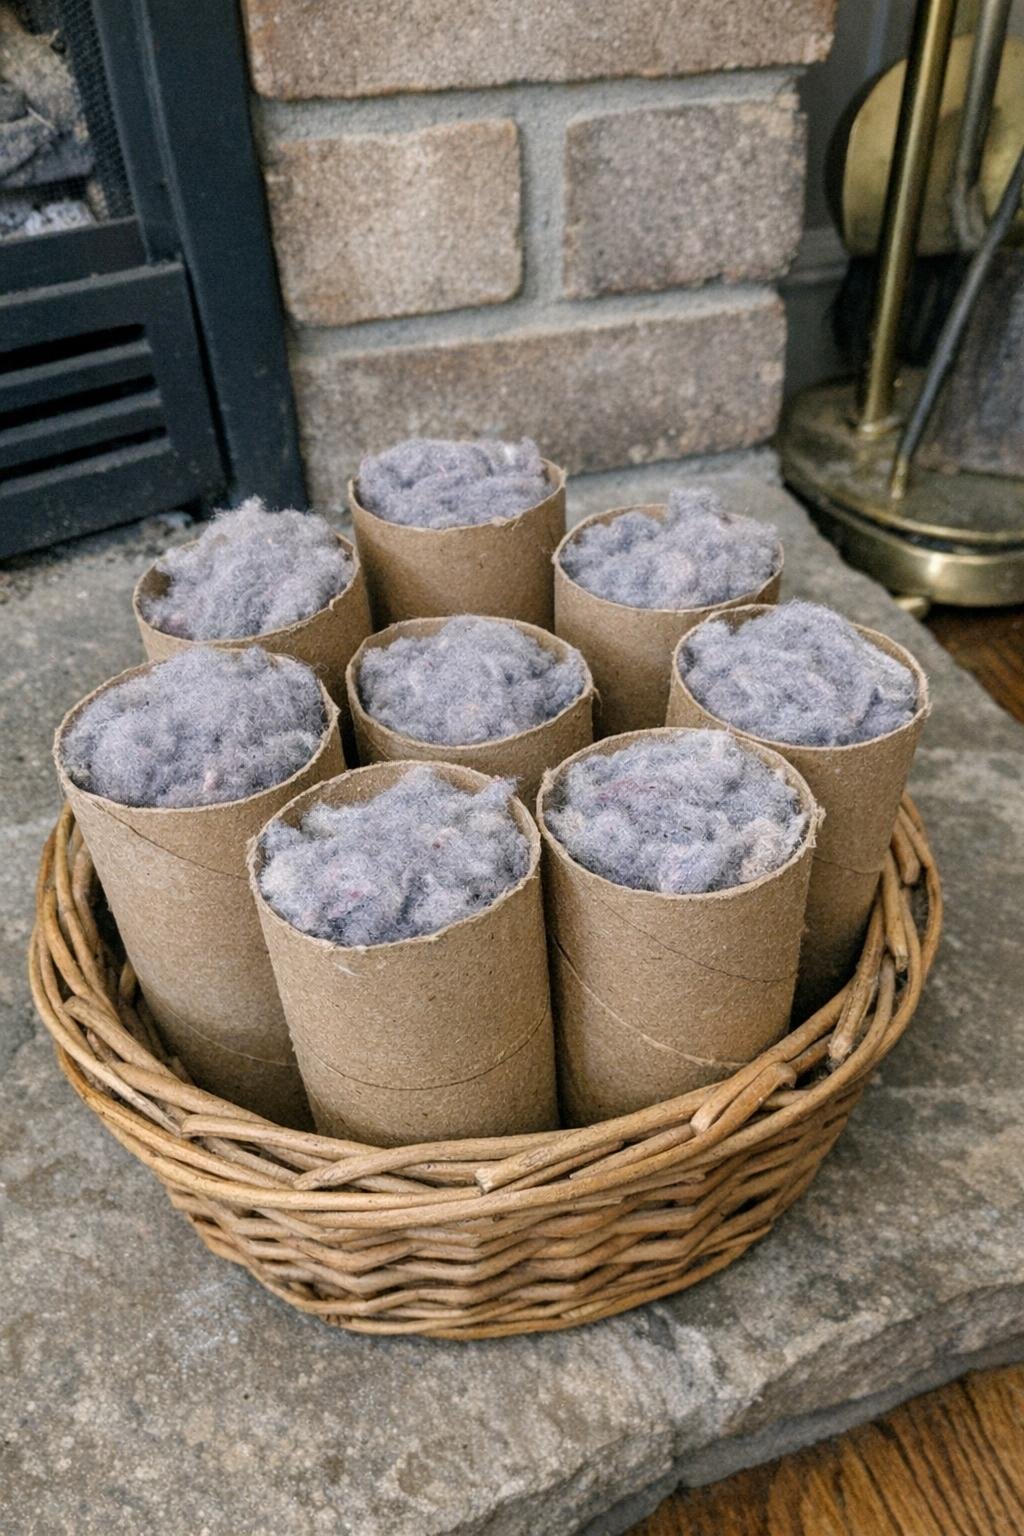
In colder months, I stuff dry toilet paper tubes tightly with dryer lint to make quick fire starters for the fireplace, wood stove, or backyard fire pit. If I want a longer burn, I drip a little melted wax over the lint or tuck in a few wood shavings before sealing the ends with a gentle fold.
They’re basically free, and one or two usually help kindling catch faster than crumpled newspaper alone. My tip is to store them in a metal tin or dry basket away from any heat source so they stay tidy and ready when you need them.
18. Owl and animal ornaments
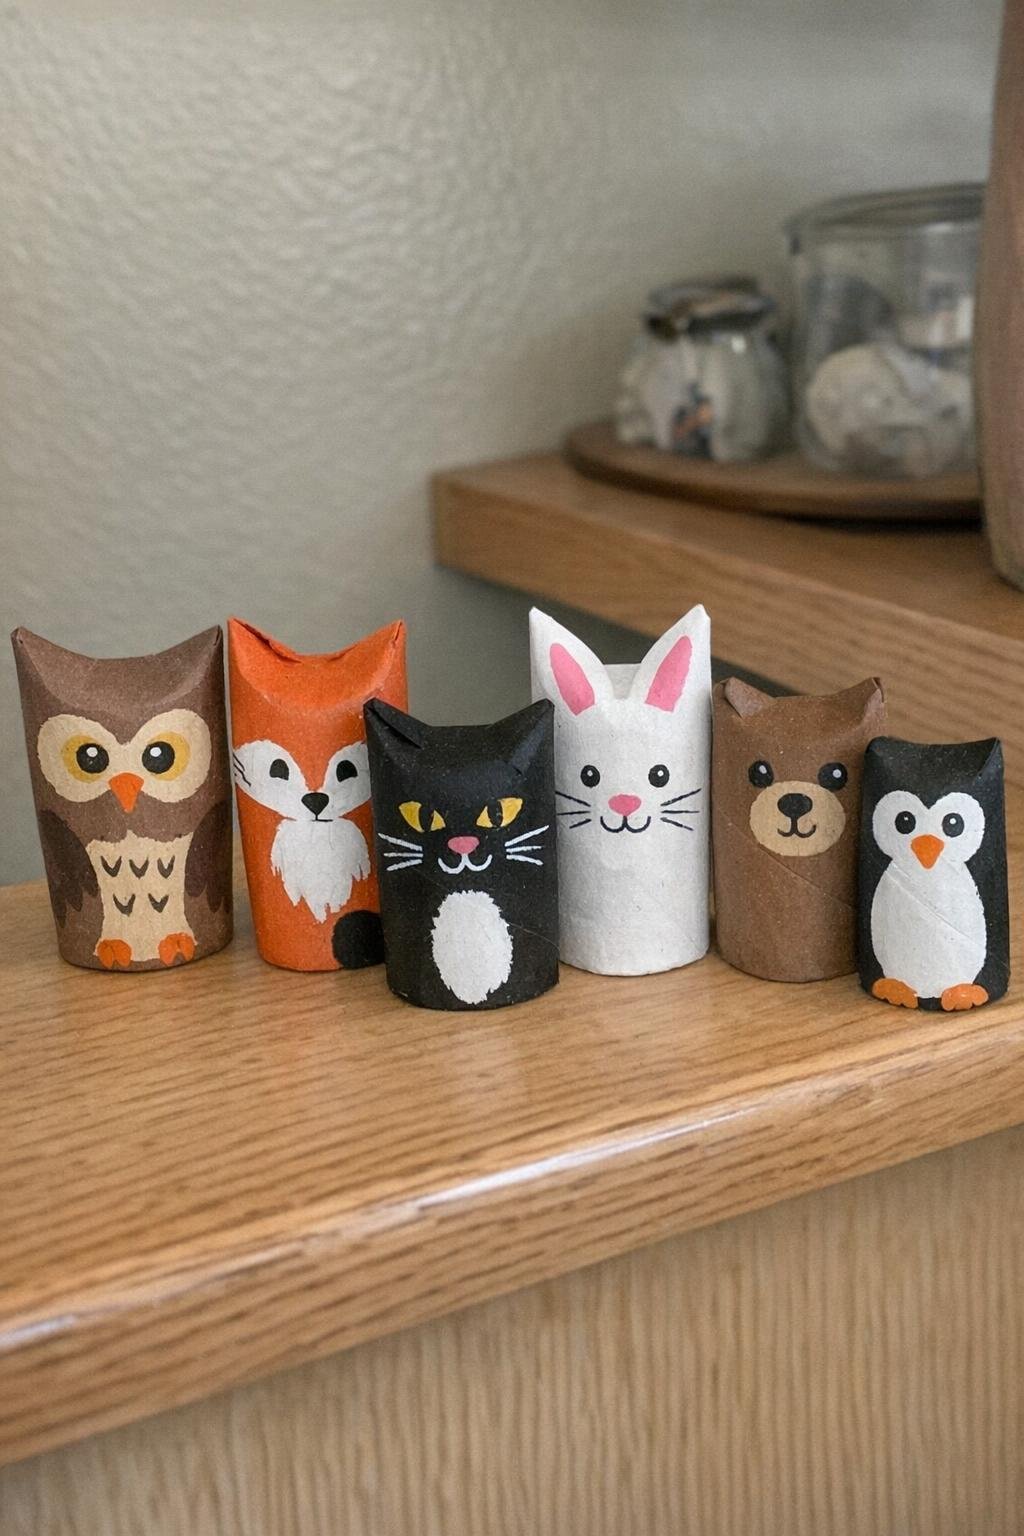
I love how easily a plain tube turns into a little animal. For an owl, I press the top edges inward to create two pointed ears, paint the tube, and add simple eyes, wings, and a beak with paper scraps or paint. The same basic shape also works for foxes, cats, or bats with a few small changes.
They make sweet shelf decor or lightweight ornaments if you add a string loop at the top. My tip is to paint the base color first and let it dry fully before adding faces, because details stay much sharper on a dry surface than on damp cardboard.
19. Kaleidoscope
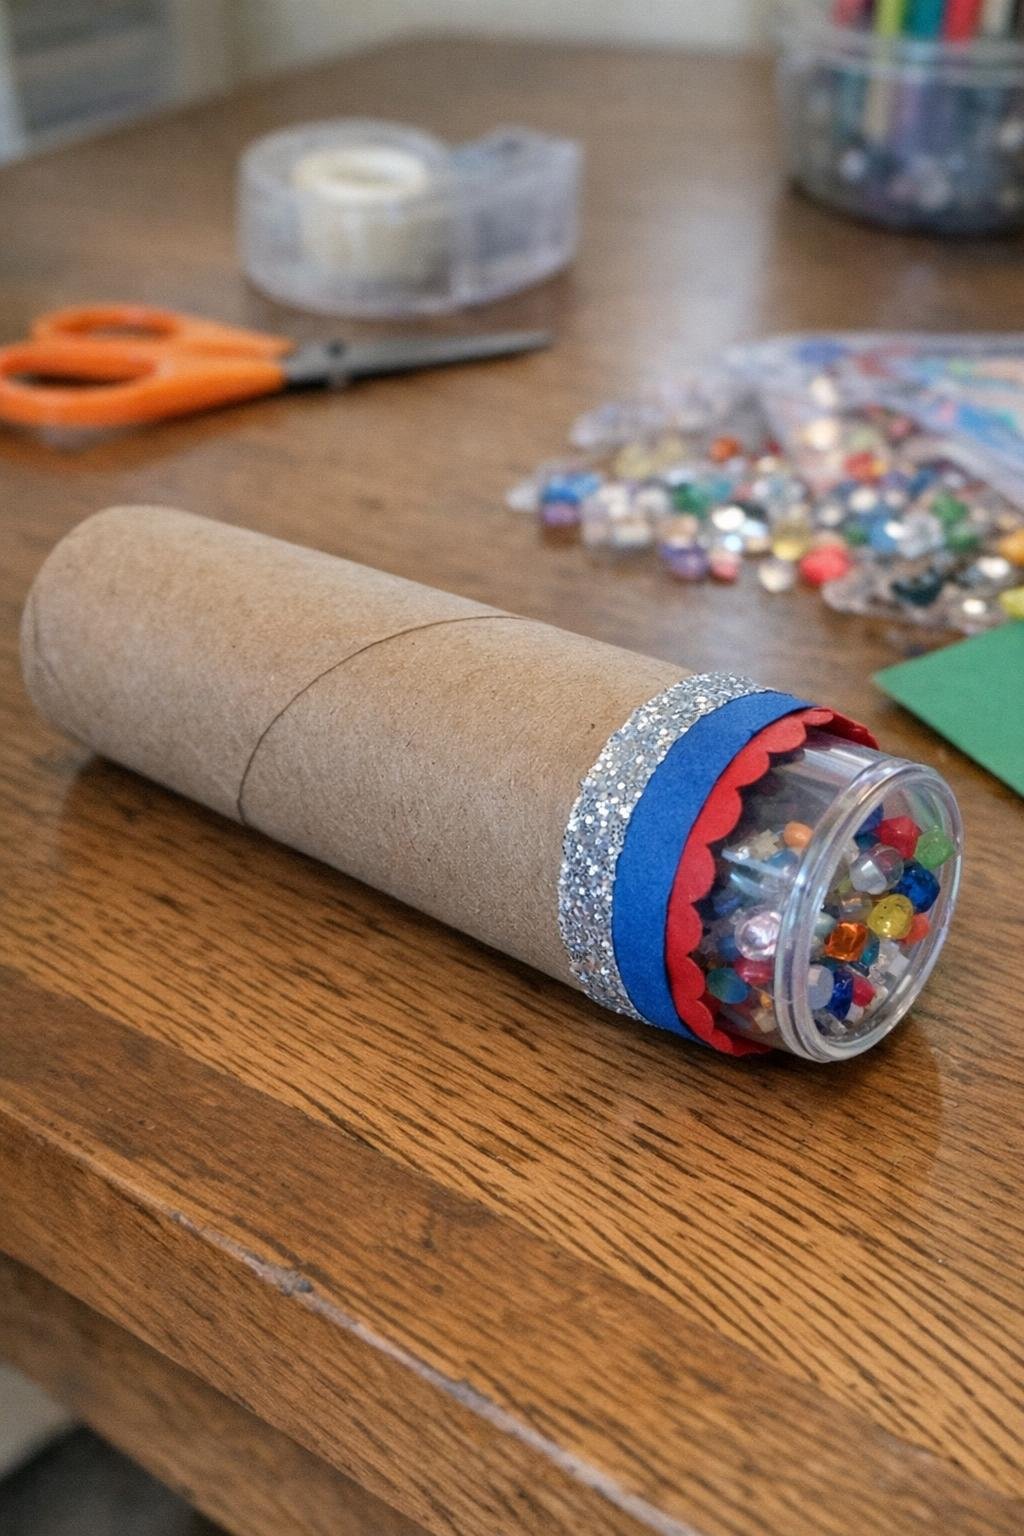
This is the most technical project here, but it’s genuinely fun. I use one tube as the outer shell, fit three narrow mirrored plastic strips inside as a triangle, and add a small clear bead chamber at one end made from plastic film and a ring cut from another tube. A circle of wax paper over the viewing end softens the light nicely.
It takes more patience than the other ideas, but when you turn it and see the shifting patterns, it feels worth it. My tip is to make sure the mirrored strips fit snugly inside the tube, because gaps let in stray light and weaken the effect.
20. Hanging wall planter sleeves
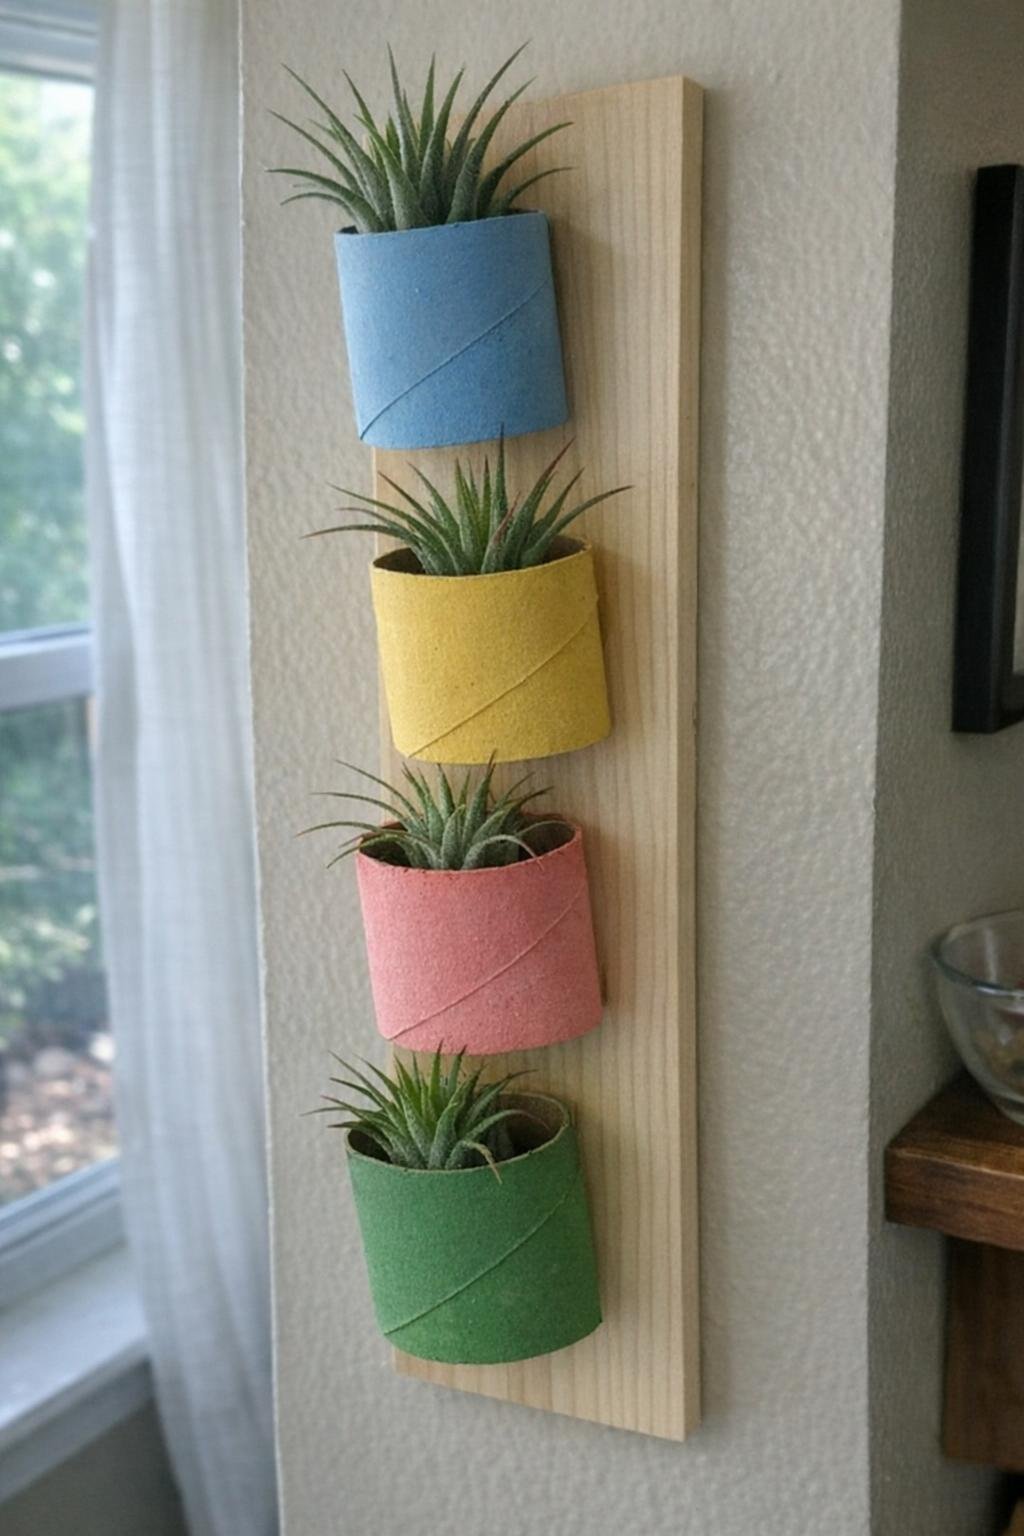
For a lightweight wall display, I seal the inside of each tube with a coat of melted wax or a snug plastic liner, paint the outside, and glue or tie the tubes onto a hanging backing like a piece of driftwood, a wood slat, or thick macramé cord. Then I tuck in air plants or very small dried arrangements that don’t need much moisture.
Because the tubes are shallow, this works best with plants that stay light and compact rather than anything that needs regular deep watering. My tip is to keep the arrangement near a bright window but not in a steamy bathroom, since too much humidity will eventually soften the cardboard.
Once you start looking at toilet paper rolls as free building material instead of trash, they’re surprisingly versatile. I’d still recycle the extras, but for crafts, seed starting, gift wrap, and little organizing jobs, these humble tubes earn their keep first.