
Cold bathroom lotion is one of those tiny annoyances that feels way bigger at 6:30 on a winter morning. I started doing this little setup after one especially dry Midwest week when my hands were so chapped that even reaching for lotion felt irritating, and warming it slightly first made it feel unexpectedly spa-like without buying a specialty gadget.
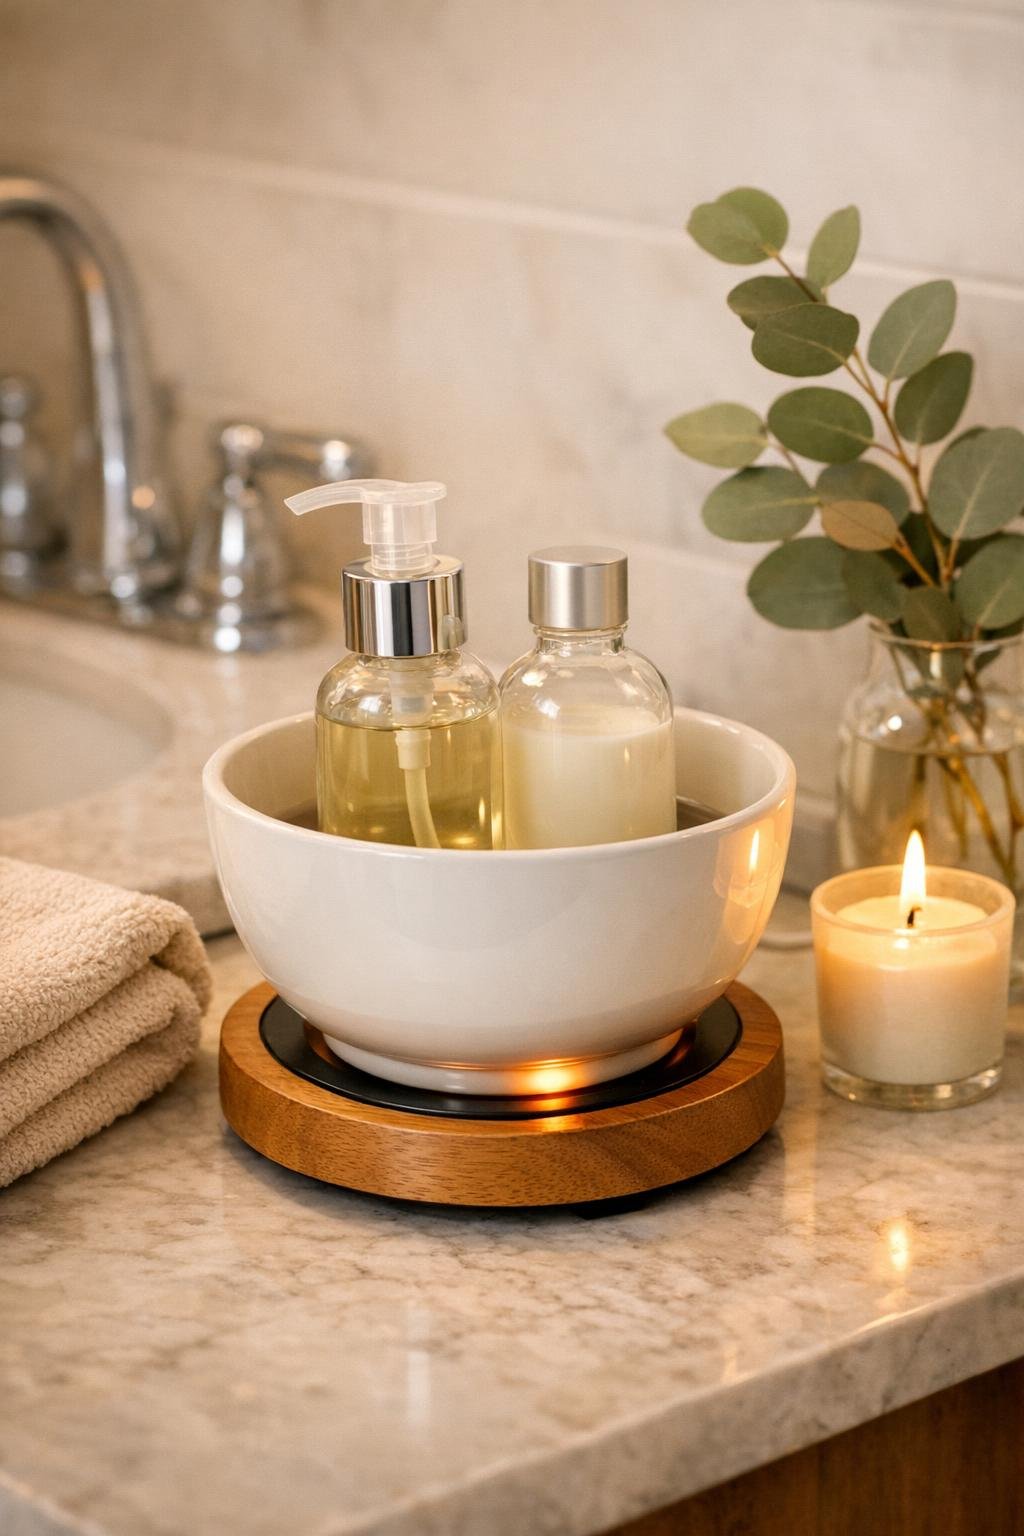
This project is really just a smart bathroom station: a small white ceramic bowl set over a mug warmer plate, with glass lotion bottles tucked inside so they warm gently and stay upright. It’s perfect for anyone who wants a nicer countertop setup, likes simple comfort upgrades, and prefers an easy DIY that looks polished without a lot of work.
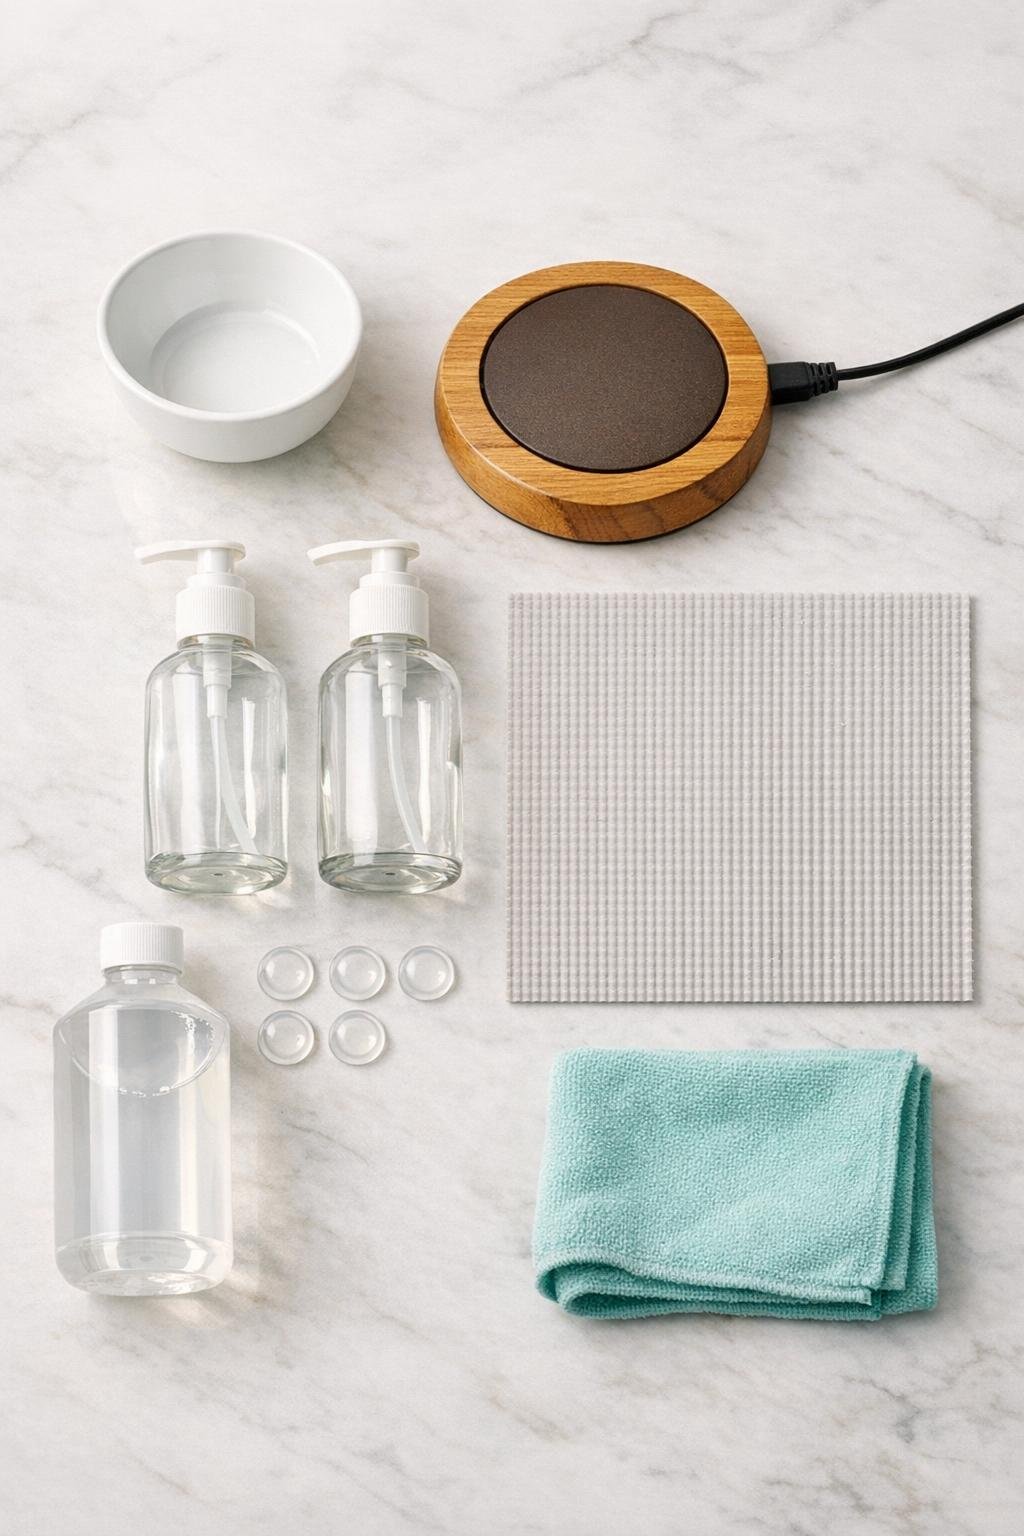
Materials
Instructions
1. Unplug the mug warmer and clear a dry spot on your bathroom counter where the cord can reach the outlet without stretching. Choose a place away from the sink splash zone so the setup stays clean and safe.
2. Wipe the mug warmer plate, the outside bottom of the ceramic bowl, and the lotion bottles with rubbing alcohol and a microfiber cloth. Let everything dry completely so the finished station looks neat and sits securely.
3. Cut a circle or rounded square from the non-slip shelf liner slightly smaller than the inside base of the bowl. Set it inside the bowl to keep the glass lotion bottles from sliding around when you pick one up.
4. Turn the bowl upside down and press the four clear rubber bumpers onto the outer bottom edge, spacing them evenly. These create a slight air gap and help the bowl sit steadily over the mug warmer plate instead of sealing tightly against it.
5. Center the bowl on top of the wooden mug warmer plate and check that it sits level without wobbling. If needed, reposition the bumpers so the bowl feels stable and the warmer stays fully underneath it.
6. Fill the glass lotion bottles, leaving about 1 inch of headspace at the top, then screw on the pump tops tightly. Wipe the bottles so there are no drips, since lotion residue shows up fast on a bathroom counter.
7. Place the filled lotion bottles upright inside the bowl and arrange them so the pumps are easy to reach. If your bowl is roomy enough, angle the bottles slightly outward for a fuller, more styled look while keeping the bases flat.
8. Plug in the mug warmer and switch it to the lowest warming setting for 10 to 15 minutes the first time you test it. The lotion should feel gently warm, never hot, so adjust by turning the warmer off between uses or shortening the preheat time.
9. Add the optional ribbon around the necks of the bottles or loosely around the bowl for a finished touch that matches your bathroom decor. Keep any ribbon well above the warming surface so it stays decorative only.
10. Use the warmer when you want that just-warmed feel, then switch it off when you’re done. I like to turn mine on while I brush my teeth at night, and by the time I’m ready for hand lotion it feels like a tiny luxury.
Variations & Tips
For small counters: Use one 8-ounce bottle instead of two and choose a 5- to 6-inch bowl so the station still looks intentional instead of crowded.
For a cleaner look: Decant matching lotions into identical clear or amber glass pump bottles. That one little swap makes the whole setup feel much more pulled together.
Temperature tip: Always start with the lowest setting on the mug warmer and test after 10 minutes. You want the lotion comfortably warm on your hands, not heated enough to change texture or irritate skin.
Bottle choice: Glass bottles work best for this project because they look polished and add a little weight, which helps them stay upright in the bowl.
Safety note: Keep cords dry, don’t place the setup near splashing water, and unplug the warmer when it’s not in use. This is a gentle warming station, not a leave-on-all-day appliance.
Gift version: Pair the finished warmer with a nice hand cream, a nail brush, and a rolled hand towel for a thoughtful guest bath or holiday gift basket idea.
Easy seasonal update: Swap the ribbon color, bottle style, or nearby accessories to match the season. In winter I love a cream-and-wood look, and in spring I usually add a soft green accent to freshen it up.