
I love a project that turns “junk drawer” or garage-shelf leftovers into something people stop and stare at, and old glass light covers are perfect for that. They already have that pretty rounded shape, they catch light beautifully, and when you group several together, the effect feels much more special than the effort it takes to make it happen.
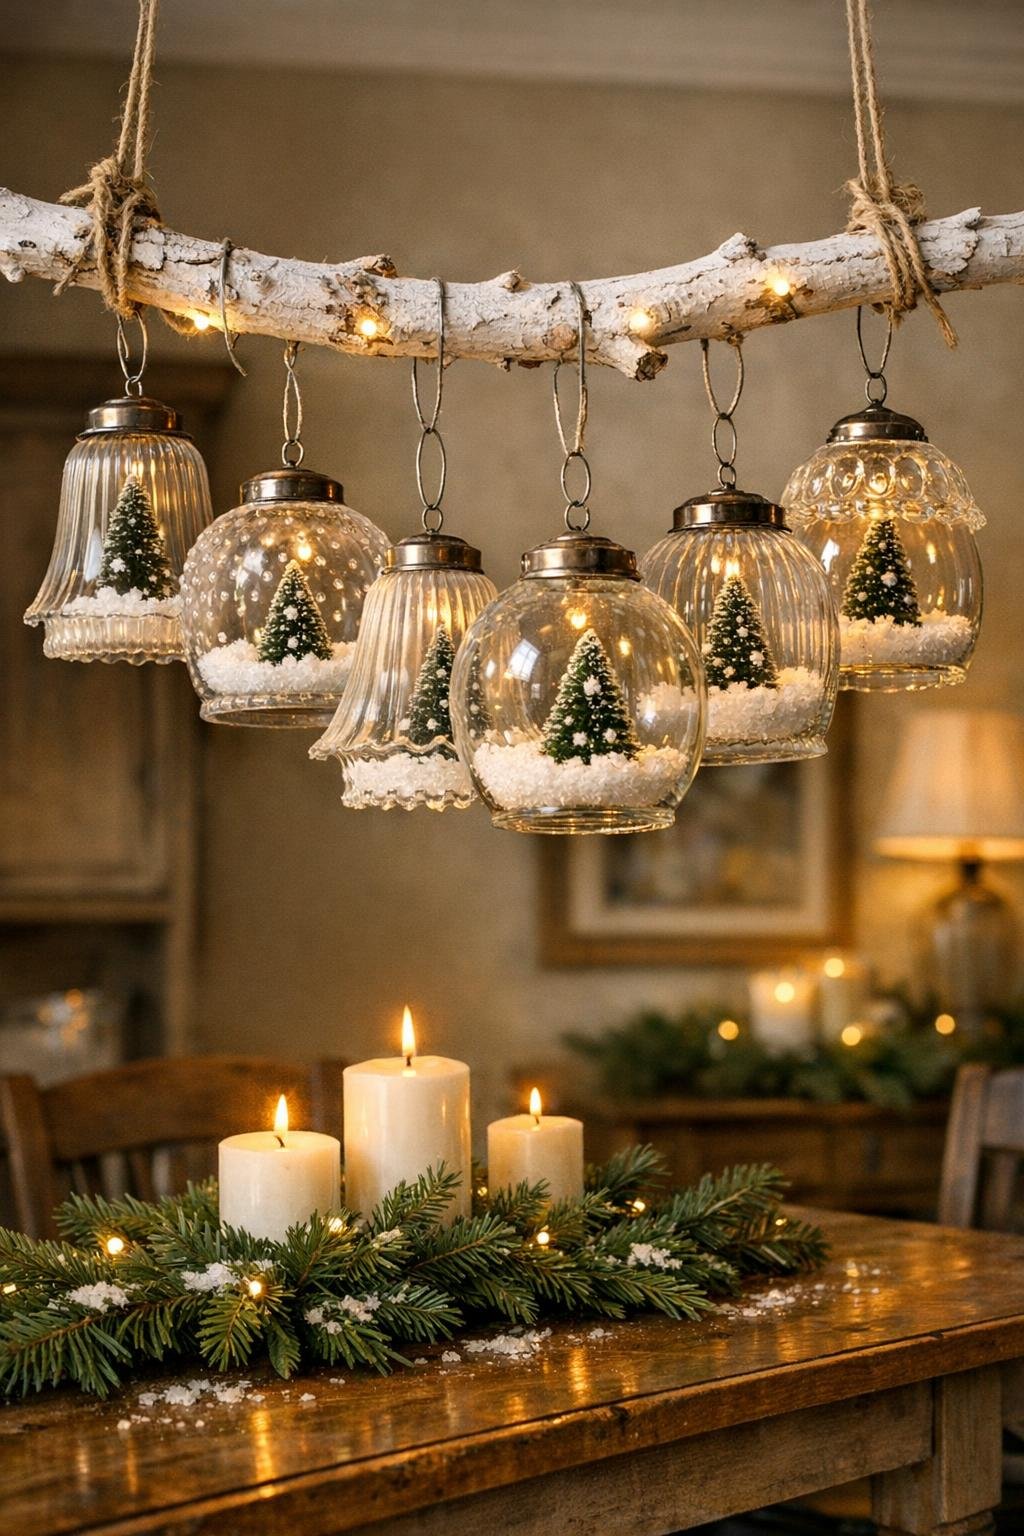
This is a wonderful weekend project if you like winter decorating, natural textures, and easy upcycles that still look polished. I built mine around a fallen branch and six matching glass covers, then added the little finishing details that make it feel complete and intentional instead of cobbled together.
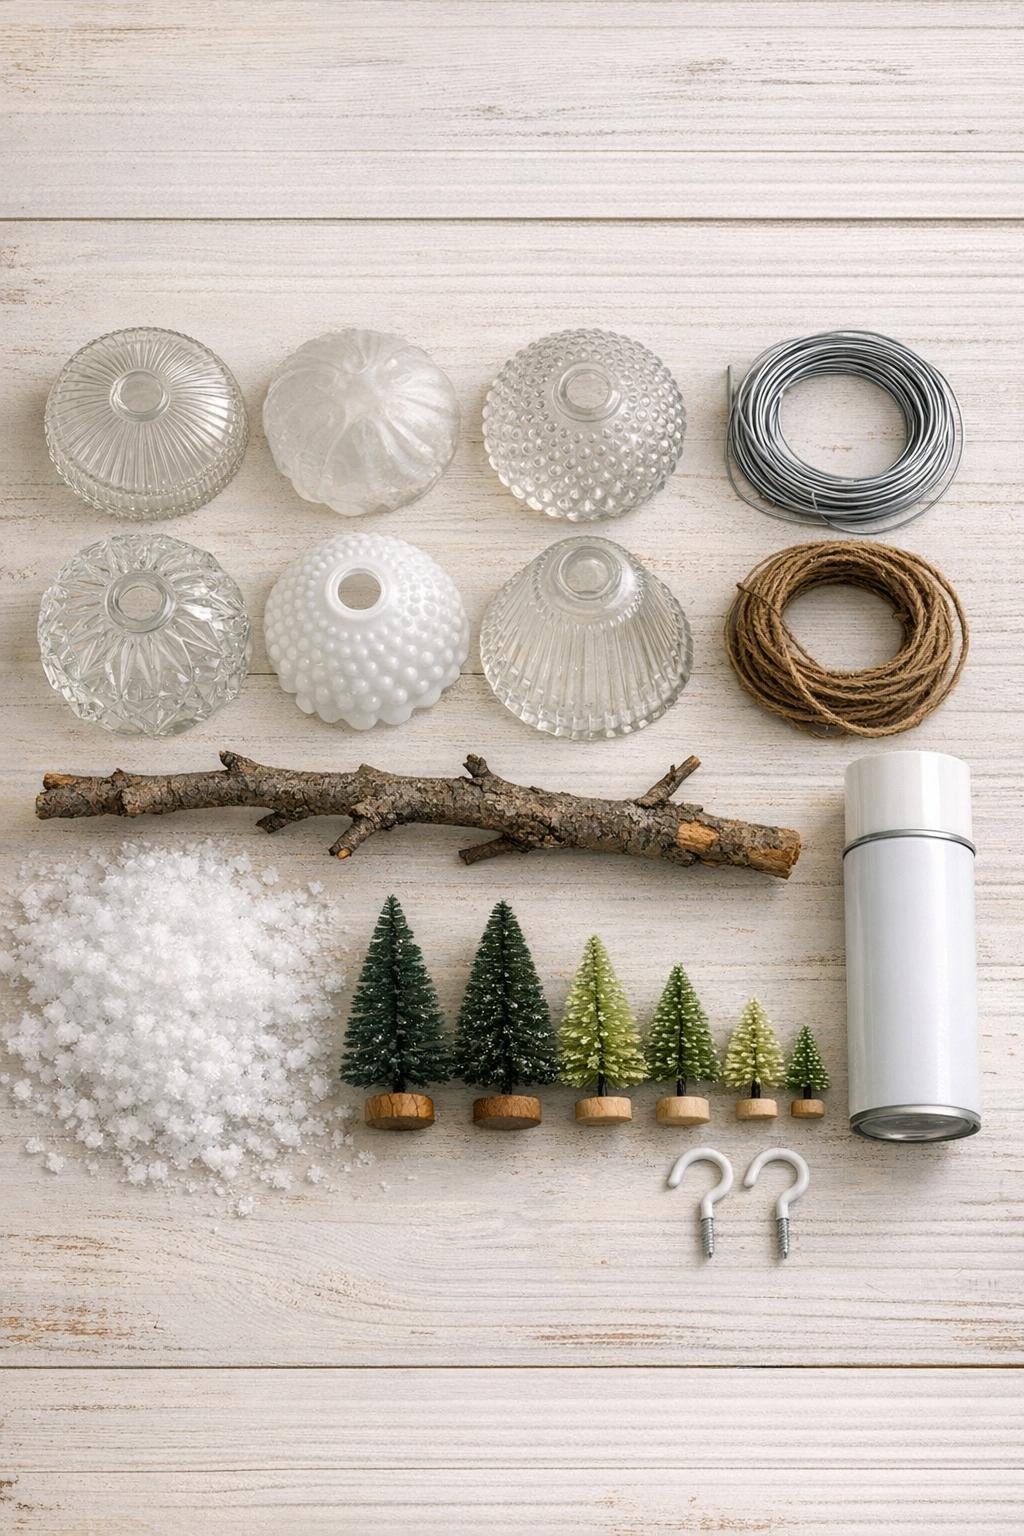
Materials
6 old glass light covers, 6 to 8 inches wide, cleaned and dried
Instructions
1. Wipe each glass light cover with rubbing alcohol and let it dry fully so the fake snow and inner details stay crisp and dust-free.
2. Brush loose dirt off the branch, trim away twig stubs, and lightly sand any rough spots so it looks rustic but won’t snag hands or hanging wire.
3. Lay the branch on a drop cloth and spray it with a full coat of matte white paint, turning it to cover all sides; let it dry, then add a second coat for an even snowy finish.
4. While the branch dries, add about 2 tablespoons of fake snow into each glass cover, tipping and rotating the glass so the snow settles in a soft drift along the bottom edge.
5. Set one mini bottle brush tree inside each glass cover, anchoring the base with a small dab of hot glue so the tree stays upright once the globe is hanging.
6. Cut six 3-foot lengths of 16 gauge wire and wrap one securely around the rim or fitter edge of each glass cover, twisting tightly with pliers to create a snug support cradle.
7. Shape the extra wire above each cover into a hanging loop, making sure all six loops are centered so the glass covers hang level instead of tilting.
8. Measure the branch and mark six evenly spaced hanging points, leaving about 4 inches in from each end and roughly 5 to 6 inches between each globe.
9. Cut six hanging wires in varied lengths from 10 to 18 inches so the covers will hang at staggered heights and look full and layered rather than flat in one line.
10. Attach each glass cover loop to one hanging wire, then twist the top end around the branch at the marked spots, tightening with pliers until every globe feels secure.
11. Use the 24 gauge floral wire to add a few extra stabilizing wraps wherever needed, especially on the heavier covers, and tuck all sharp wire ends inward with pliers.
12. Tie one 24-inch length of strong hanging wire near each end of the branch, then lift the branch carefully to test the balance and adjust the knot positions until it hangs evenly.
13. Install the two ceiling hooks into a ceiling joist or other solid support, spacing them to match the branch hanging points.
14. Hang the branch from the ceiling hooks and step back to check spacing, then rotate individual covers so the trees face outward and the snow drifts look nicely displayed.
15. Add a light sprinkle of extra fake snow inside any cover that looks sparse, and if you want a polished finish, tie short pieces of clear fishing line around a few tree tops to subtly keep them centered.
16. Give the whole piece one final safety check by gently tugging each wire connection, then style the area beneath it so the wintery look feels intentional and complete.
Variations & Tips
For mismatched covers: If your six glass covers are slightly different shapes, use that to your advantage and place the largest ones near the center for a fuller, balanced look.
For a warmer winter style: I like adding tiny white string lights around the branch before hanging the globes, as long as the cord stays hidden and the lights don’t press against the glass.
For picky decorators: In my house, not everyone loves heavy holiday themes, so this is one of those winter pieces I keep neutral with white, green, and glass only; it still feels festive without screaming Christmas.
If the branch feels too rustic: A dry-brushed coat of pearl or very pale gray over the white paint gives it a softer finished look without losing the natural texture.
For extra fullness: Instead of one tree per cover, add a second tiny tree to the two center globes so the arrangement looks richer from across the room.
Safety tip: Old glass can be heavier than it looks, so always hang this from solid structural support and test every wire connection before placing it over a table.
Easy cleanup tip: Use a small funnel when adding fake snow; it keeps the rims clean, and the glass looks much prettier when you don’t have loose snow stuck all over the sides.
Make it your own: You can swap the bottle brush trees for tiny deer, cardinals, or little woodland houses, but keep the pieces small enough that the glass light covers still remain the star.