
I love a craft that starts with the most ordinary dollar store supplies and somehow turns into something that looks like it came from a holiday boutique. This one is especially satisfying because the process is simple, a little messy in the best way, and surprisingly forgiving. If you can work a glue gun and stack pieces on a dowel, you can absolutely pull this off.
This project is great for anyone who wants a big seasonal centerpiece without spending much money or needing advanced crafting skills. I’m always looking for decorations that feel special but still fit into a busy weeknight, and this is exactly that kind of make—easy to do in stages, but dramatic enough to earn a permanent spot on a buffet, entry table, or mantel.
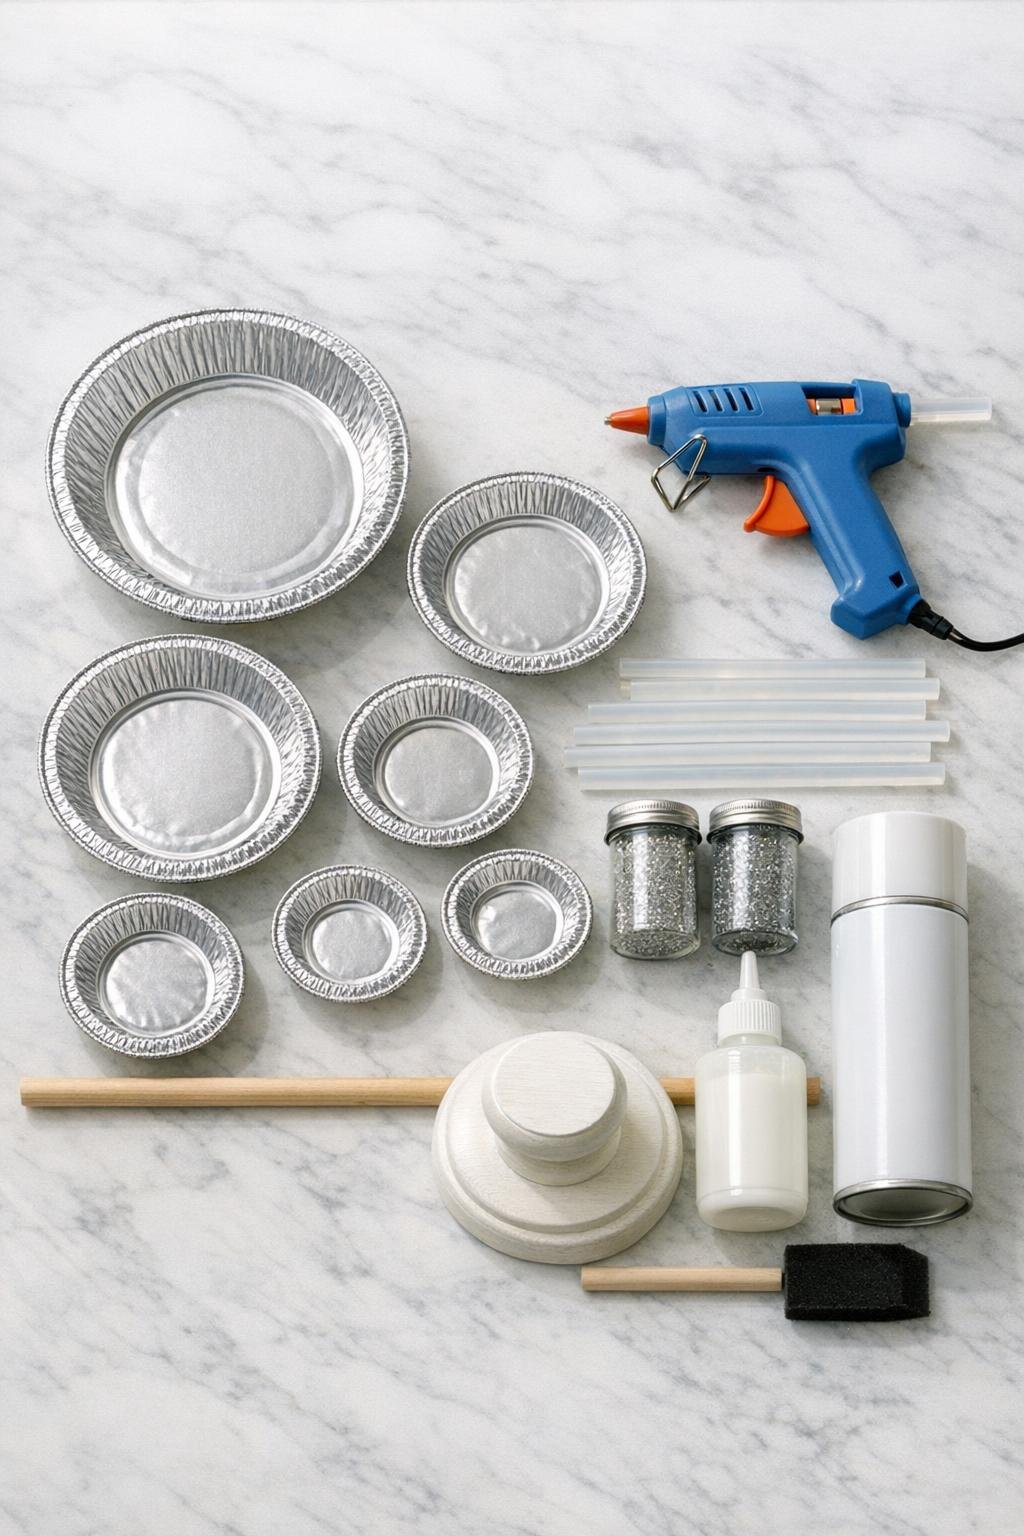
Materials
Instructions
1. Cover your work surface with wax paper and sort the 8 foil tins from largest to smallest so you can build a balanced tiered shape.
2. In each tin, scribble looping strands of hot glue across the inside base and slightly up the sides, creating an open lacy web with plenty of crossing lines; use more glue than you think so the pattern looks full once removed.
3. Let the glue cool completely for 5 to 10 minutes, then gently press the foil away from the glue webs and peel each lacy piece free; trim off any stringy glue threads with scissors.
4. Spray paint the front and back of all 8 glue lace pieces and the wooden dowel in light, even coats until fully covered, then let them dry completely.
5. Brush a thin coat of clear-drying craft glue over one lace piece at a time and sprinkle fine glitter generously on both sides, then tap off the excess and repeat until all 8 pieces sparkle.
6. Use the awl or skewer to make a small hole in the center of each glittered piece, widening only enough for the dowel to pass through snugly.
7. Attach the wooden dowel upright to the center of the candlestick base with strong craft adhesive or hot glue, and hold it steady until secure.
8. Slide the largest lace piece down the dowel first and glue it in place about 1 inch above the base, keeping it level so it forms the widest bottom tier.
9. Add the second and third largest pieces above it, angling them slightly and rotating each one so the open patterns do not line up exactly; leave 1 to 1 1/2 inches between tiers for fullness.
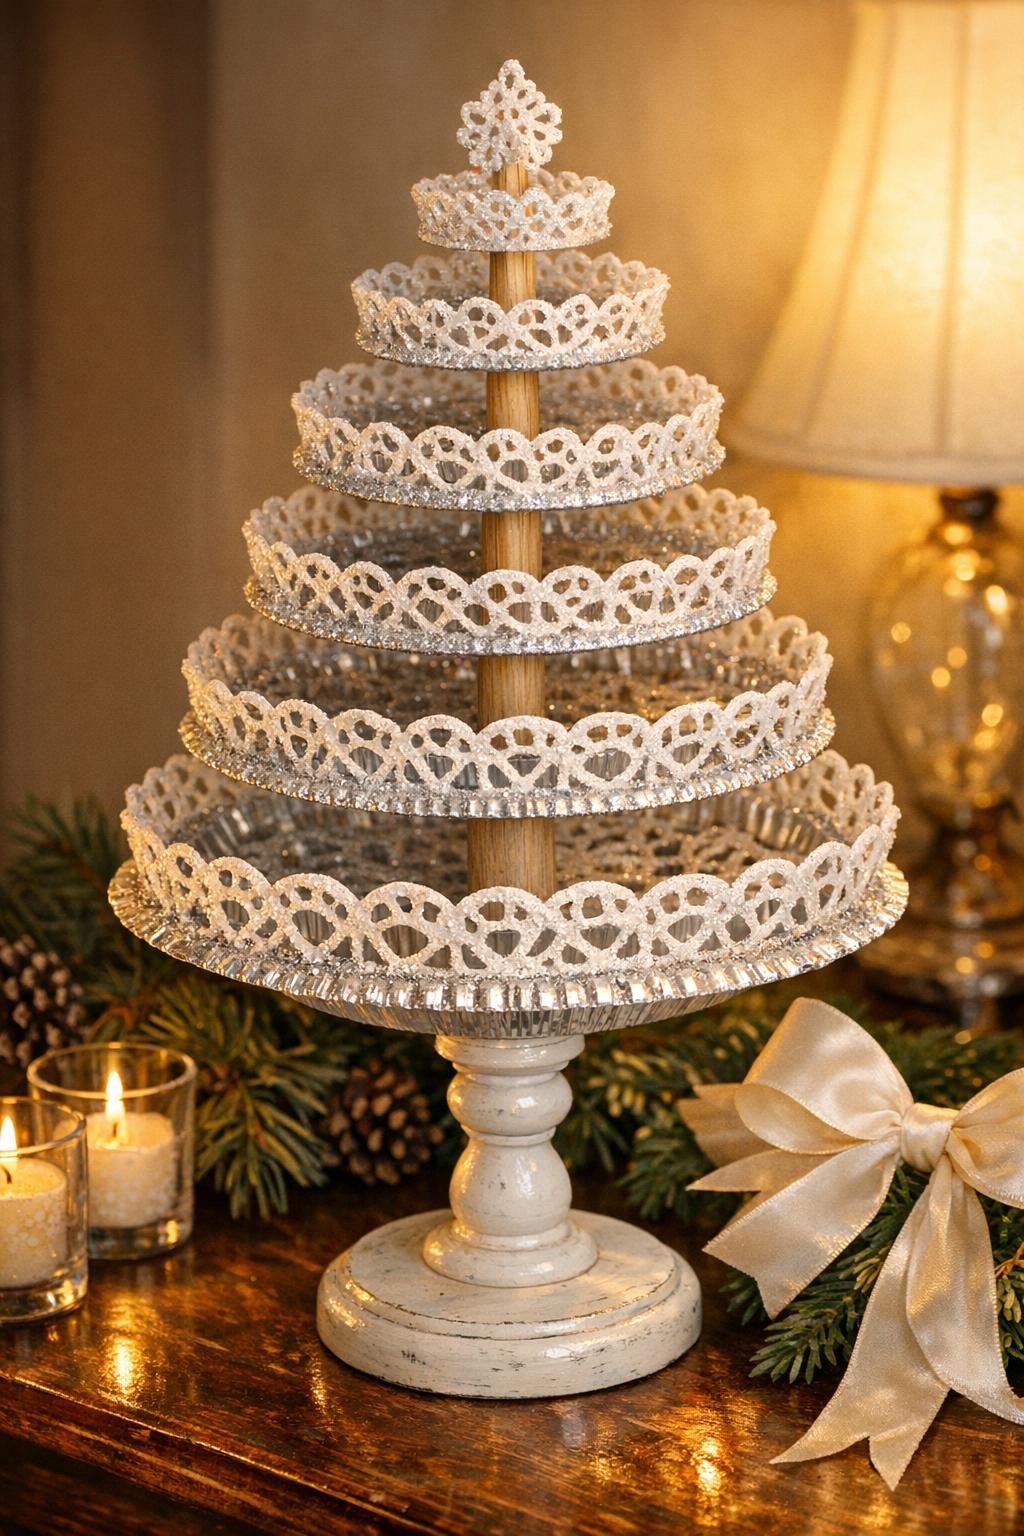
10. Continue stacking the medium and small pieces, decreasing the diameter as you go and adjusting the tilt of each layer to create a full cone-like tree silhouette.
11. Finish with the smallest piece near the top, then add a small swirl of hot glue or a rhinestone accent at the tip to give the top a polished look.
12. If you want extra detail, glue a narrow satin ribbon bow at the base and tuck pearl pins or rhinestone accents into a few of the lace intersections for a dressier finish.
Variations & Tips
Color choice: Silver glitter over white paint gives an icy look, but champagne paint with gold glitter makes this feel warmer and a little more vintage.
Make it fuller: If your glue webs look too open, add a second round of glue scribbles in the tins before removing them; denser lace makes the finished tree look much more substantial.
Keep it sturdy: A snug center hole matters more than perfect centering. If a layer wobbles, add a tiny bead of hot glue where it meets the dowel and hold it level for a few seconds.
Display idea: I like this best grouped with a few bottlebrush trees or set on a tray with candles because the sparkle catches the light and makes the whole arrangement feel intentional.
Mess control: Fine glitter gets everywhere, so I usually glitter the pieces inside a shallow box lid and pour the extra right back into the jar when I’m done.
Storage tip: Since the lace layers are lightweight but delicate, store the finished tree upright in a tall box with tissue around the base instead of laying it on its side.