
I love a project that borrows a tool from one corner of the kitchen and turns it into something that looks unexpectedly polished somewhere else. This one starts with an old metal colander and a simple bit of crochet, and the payoff is far more elegant than the humble supplies suggest. If you can work basic granny-style clusters and hold steady tension, you can make this.
What I especially like here is that the colander does half the structural work for you, so you get a sturdy, sculptural piece without wrestling with complicated shaping. It is a very satisfying make for confident beginners and seasoned crocheters alike, and because the metal stays visible beneath the stitches, the finished piece has that high-low mix that always feels a little special to me.
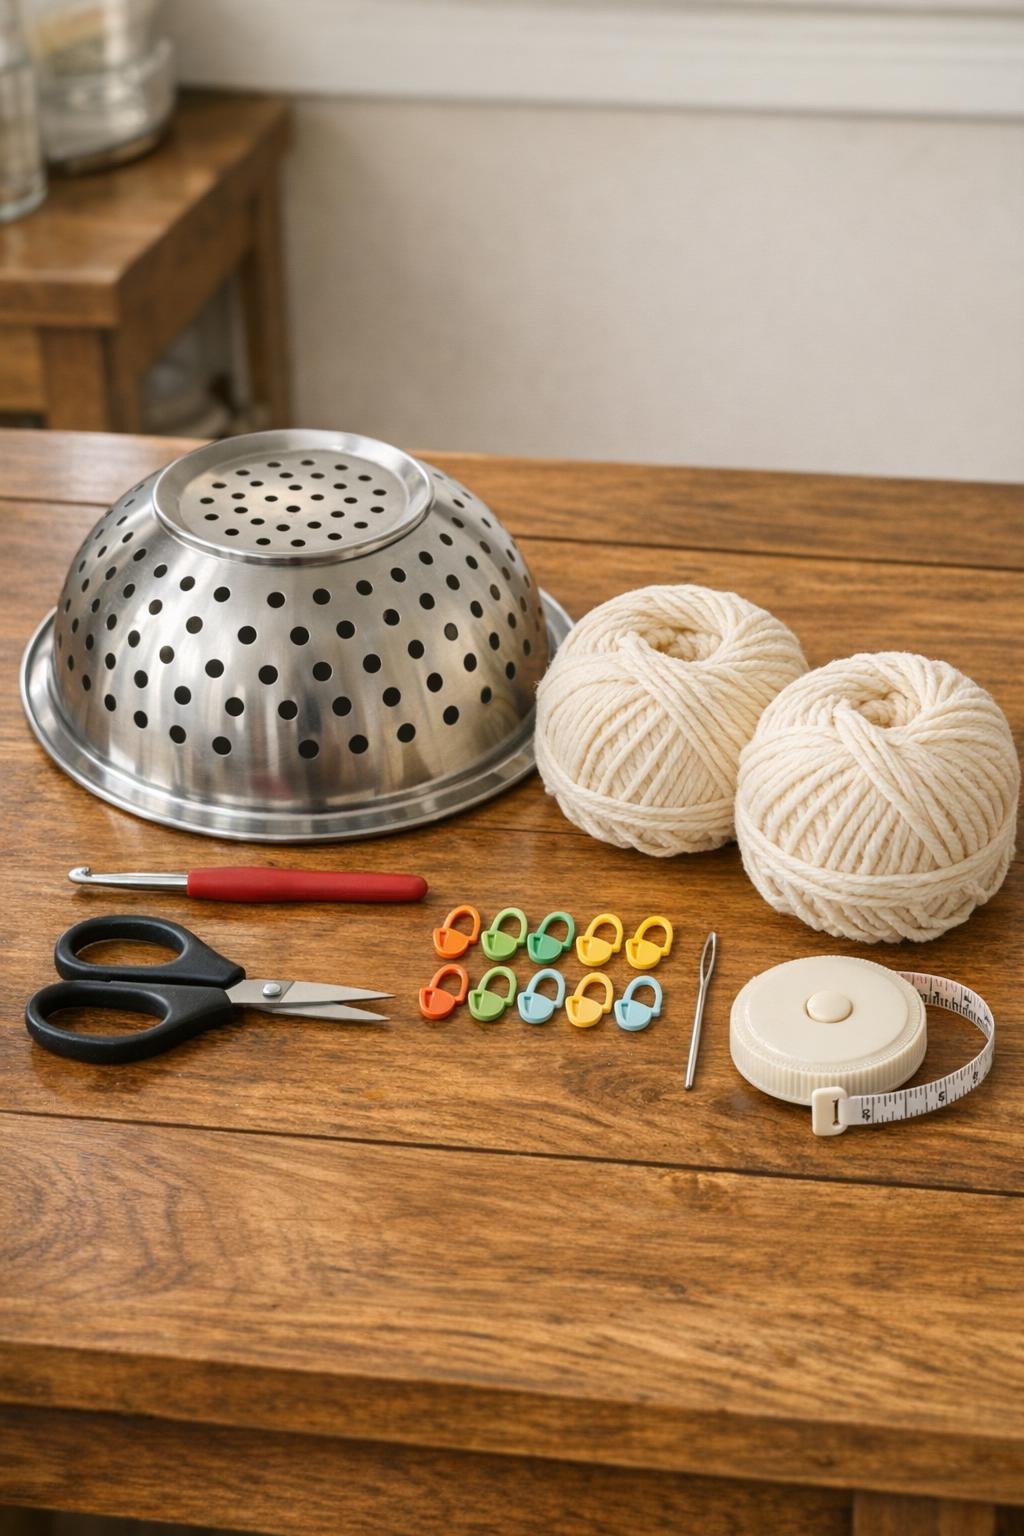
Materials
Instructions
1. Wash and dry the colander, then wipe it with a damp cloth so the yarn will slide cleanly through the holes without catching on dust or grease.
2. Turn the colander upside down so the base becomes the center of your work, and check that the holes are smooth; if any edge feels rough, avoid that hole and use the one next to it.
3. Tie the yarn securely through a hole near the center base, then work 1 single crochet through each hole around that first small center round, joining with a slip stitch to form your starting ring.
4. In the next round, begin the granny stitch pattern by working 3 double crochets into one hole, skipping to the next usable hole, then repeating 3 double crochets in each hole all the way around; join with a slip stitch.
5. Continue adding rounds of granny clusters through the colander holes, using one cluster per hole and spacing them evenly so the stitches lie flat against the metal without puckering.
6. When you reach a wider section and the fabric starts to pull, increase gently by working 2 granny clusters into every 6th hole around that round.
7. Keep crocheting outward and downward over the curved sides, adjusting as needed with an extra cluster every 5th or 6th hole whenever the work needs more ease to hug the shape smoothly.
8. Place stitch markers at the four compass points if it helps you keep the pattern balanced, especially if the hole spacing changes near the handles.
9. At the handle area, work tightly and skip any awkward openings that would leave gaps; if needed, add 1 chain between clusters to bridge a larger space neatly.
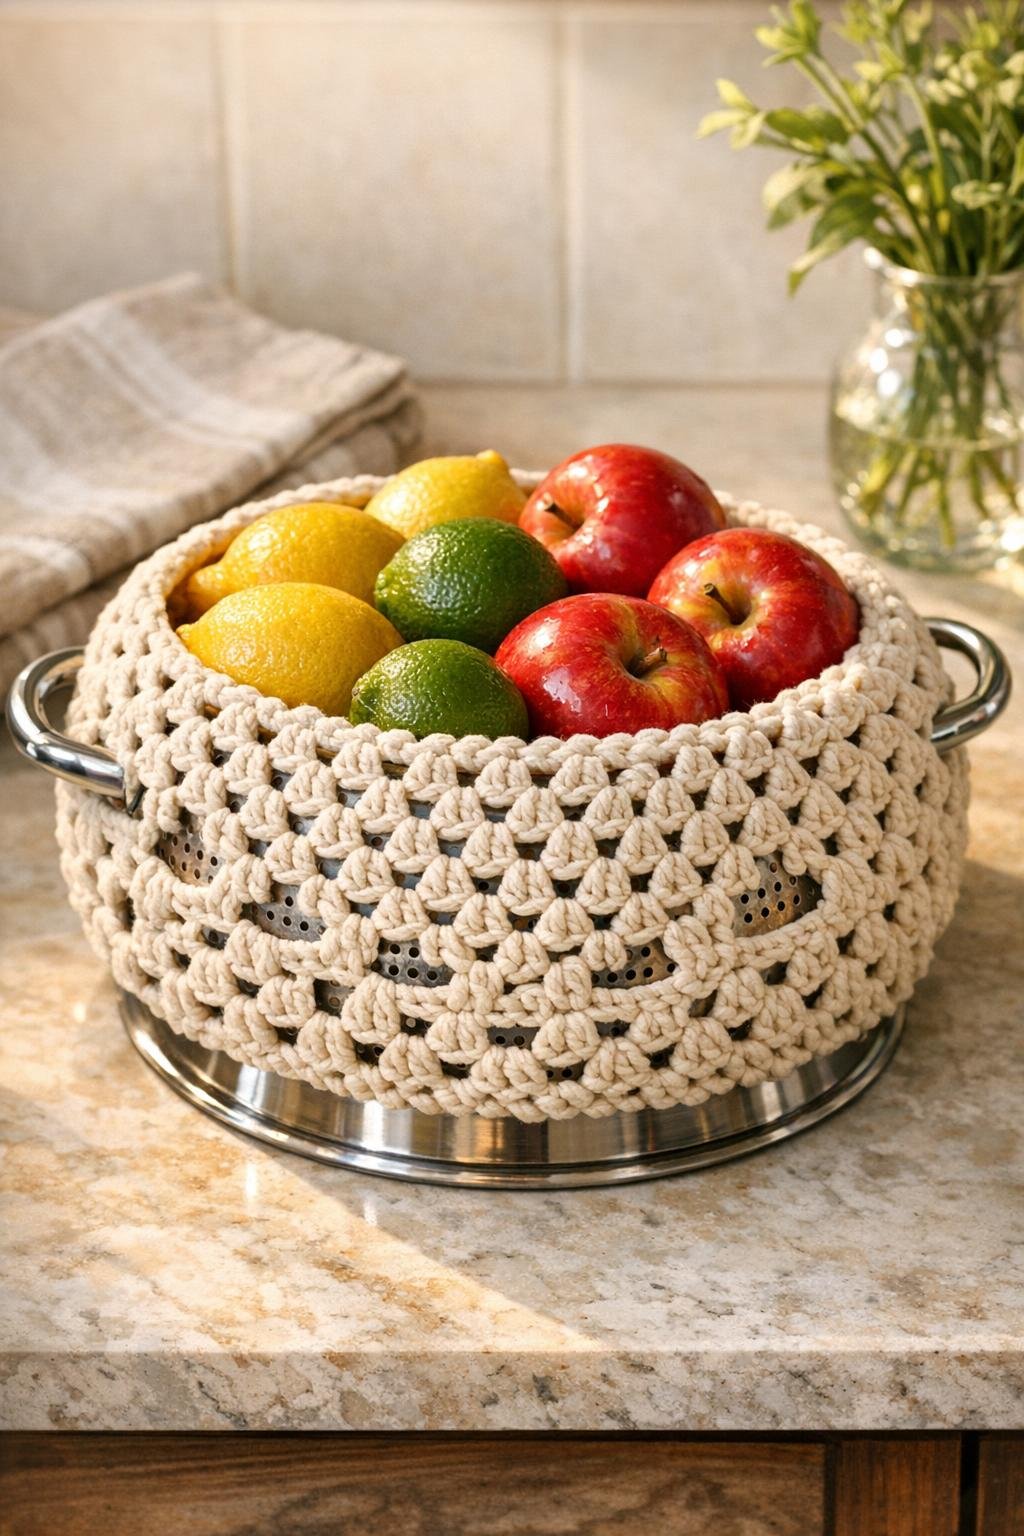
10. Continue until every visible hole on the sides has crochet through it and the yarn coverage looks full, even, and intentional from top to bottom.
11. Along the rim, work 1 round of single crochet through each hole or gap, then add a second round in a firm crab stitch or plain single crochet to give the edge a tailored finish.
12. Cut the yarn leaving an 8-inch tail, pull it through, and weave in all ends securely through the back of the stitches and around nearby metal holes so nothing loosens with use.
13. Turn the piece right side up, shape the crochet with your hands, and test it with lightweight fruit like lemons, limes, clementines, or apples to be sure the basket sits level and the stitches stay snug.
Variations & Tips
Color choice: Cream gives this project that expensive, quiet look, but soft sage, slate blue, or charcoal cotton also works beautifully if you want it to lean more modern.
Yarn matters: I strongly prefer worsted cotton here over acrylic because cotton has less stretch, wears better against metal, and feels more at home in a kitchen.
Hole spacing tip: Not every colander is drilled the same way, so treat the holes as your guide rather than forcing strict stitch counts; I increase only when the fabric starts tugging or cupping.
Best fruit to use: This basket is ideal for sturdy produce with skins or peels, such as citrus, apples, or avocados; I would skip anything very delicate or damp.
If your colander has large holes: Add a chain-1 between granny clusters more often, or begin with a single-crochet foundation round through every hole before building the clusters on top.
For a fuller look: Work the clusters close together and do not be shy about adding a few strategic increases; dense coverage is what makes the piece read as intentional and luxe instead of improvised.
Finishing touch: If you want the rim to look especially crisp, steam the crochet lightly from a distance after finishing, then let it cool in shape before filling the basket.