
Small pantries can get chaotic in a hurry, especially when you’re trying to keep snacks, seasoning packets, drink mixes, oatmeal, and all those little grab-and-go items from tumbling out every time the door opens. I’m always looking for ways to make a tight kitchen work harder without making it feel crowded, and this project is one of those wonderfully practical fixes that gives you a lot more usable storage in just a few minutes.
I love projects like this because they don’t require power tools, fancy carpentry, or a full pantry makeover to make a big difference. If you’ve got a busy household, a narrow pantry, or a family that loves individually packed snacks, this is an easy way to tidy things up, make choices visible, and turn wasted space into something genuinely useful.
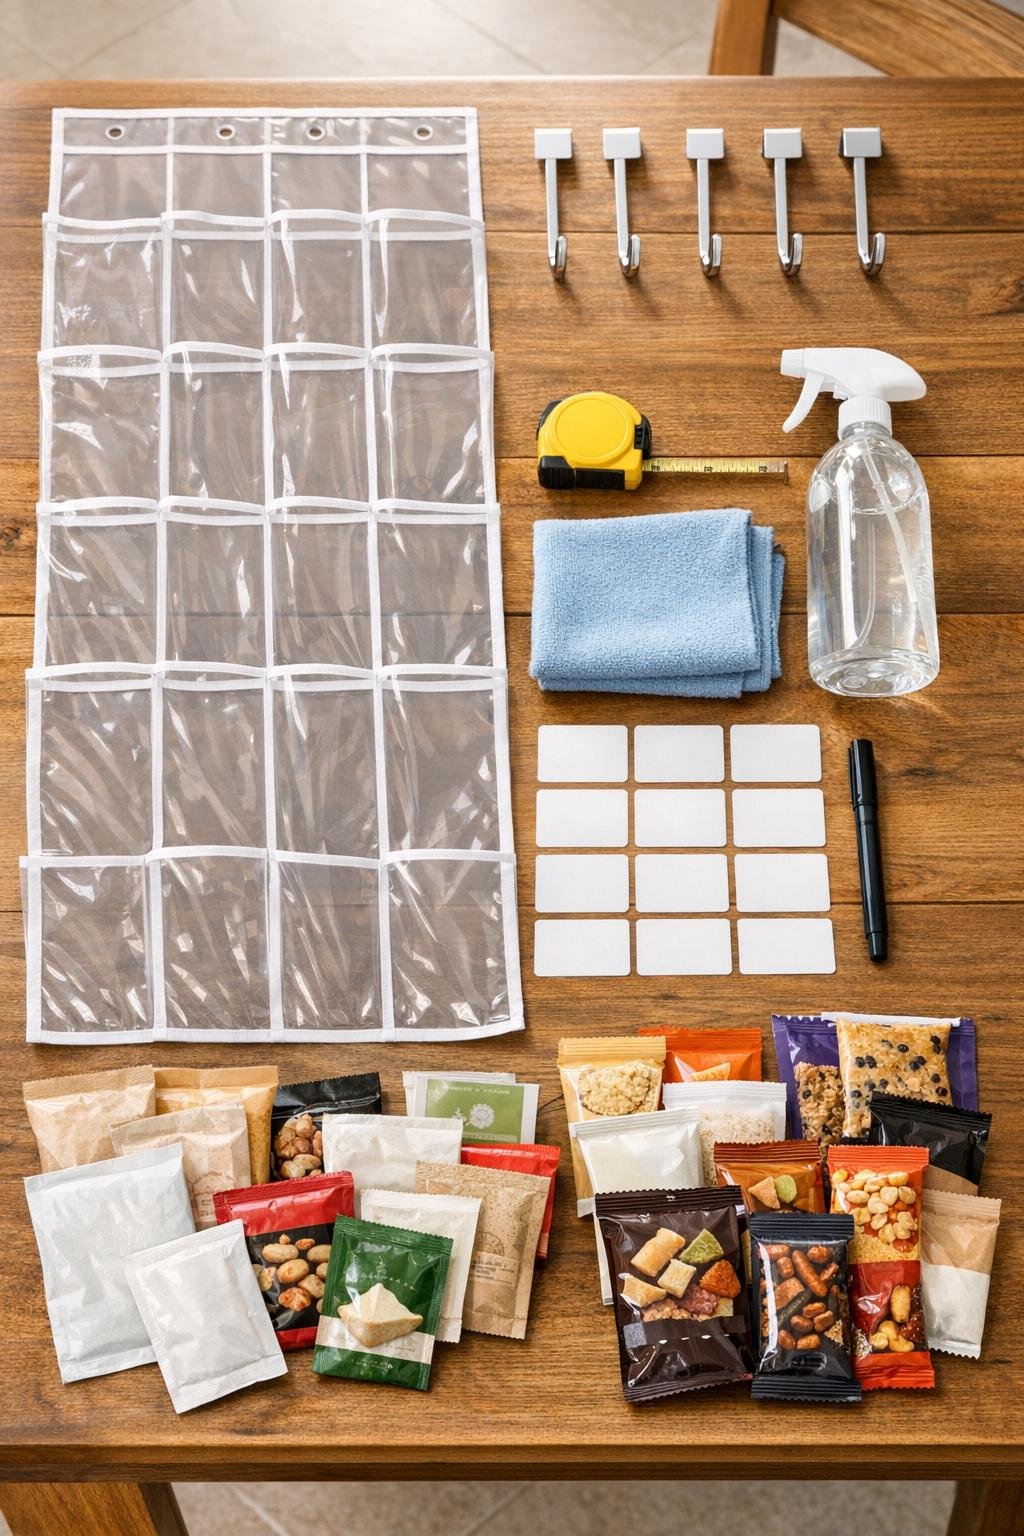
Materials
Instructions
1. Empty the inside area of your pantry door and make sure there’s enough clearance between the door and the pantry shelves for the organizer to hang freely when the door closes.
2. Measure the width and height of the usable door space, then compare it to the organizer so the bottom won’t drag and the sides won’t bump shelving or trim.
3. Wipe down the inside of the pantry door with all-purpose cleaner and a microfiber cloth so the surface is clean and dust-free before hanging anything on it.
4. Slip the over-the-door hooks into the top edge of the clear plastic shoe organizer, spacing them evenly so the weight will be supported across the whole width.
5. Hang the organizer over the inside of the pantry door and use a small level to straighten it so the rows sit evenly and the pockets don’t sag to one side.
6. Close the pantry door slowly to test the fit, then adjust the hook placement or shift the organizer slightly upward if it brushes a shelf or catches at the bottom.
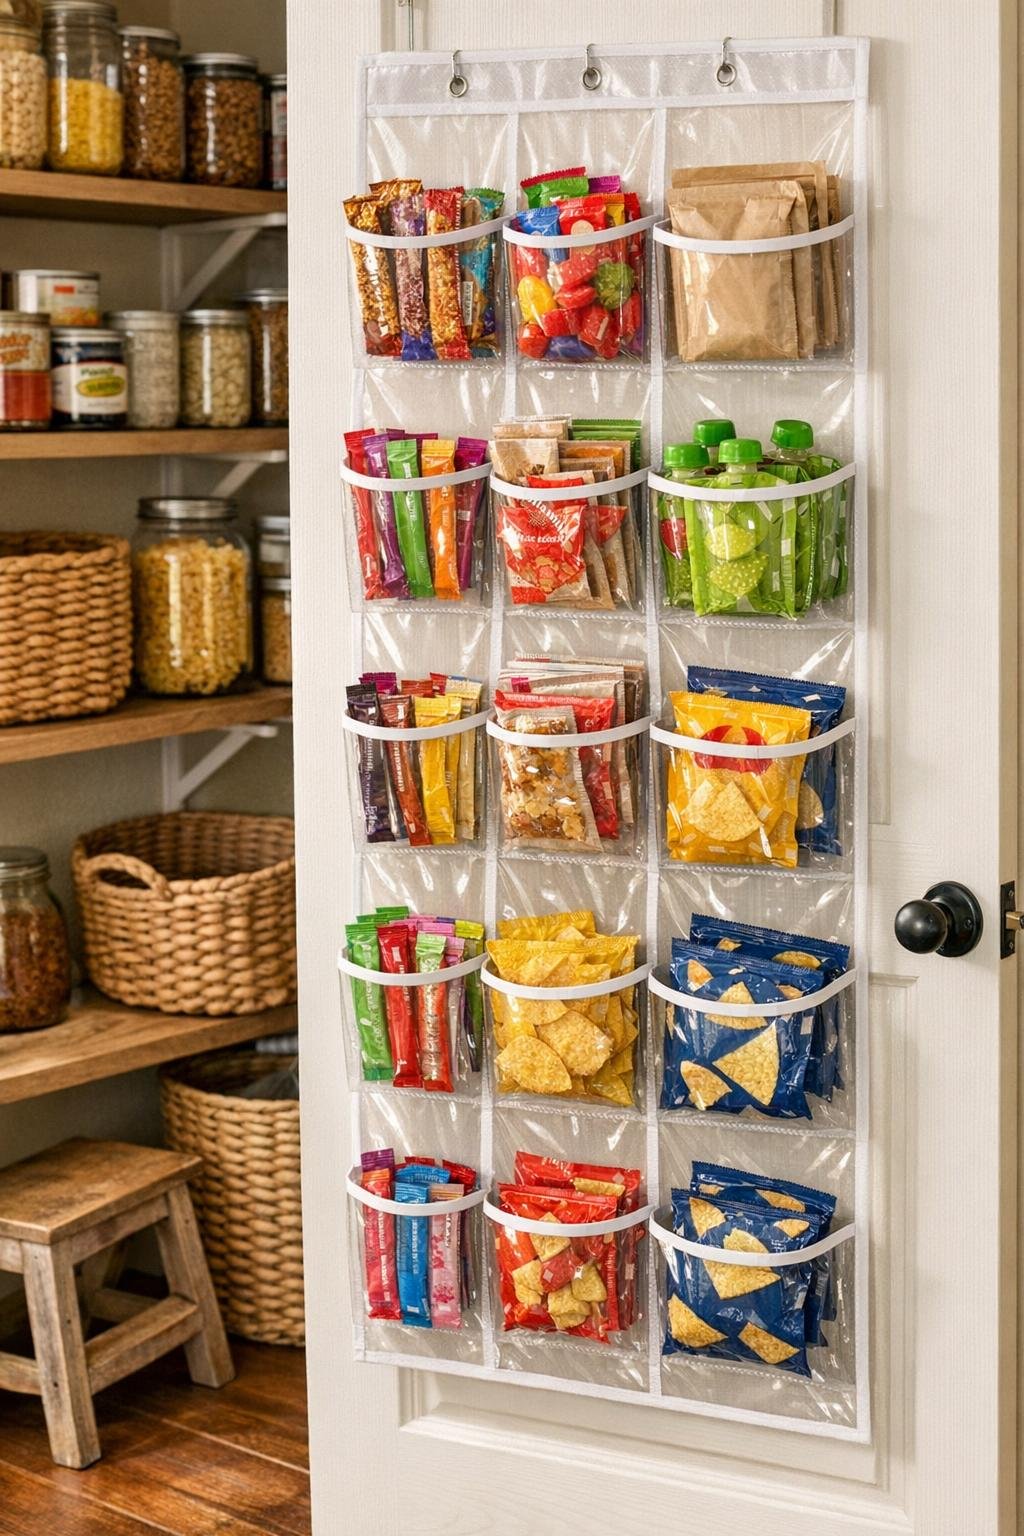
7. Gather all the loose pantry items you want to corral and sort them into simple family-friendly categories like sweet snacks, salty snacks, breakfast packets, baking packets, seasoning mixes, drink mixes, and lunchbox items.
8. Put heavier or bulkier items such as applesauce pouches, oatmeal packets, and snack bars in the middle rows where they’re easiest to reach and least likely to make the organizer pull awkwardly.
9. Fill the top rows with lighter items like gravy packets, taco seasoning, drink sticks, and instant sauce mixes, keeping similar packets together in each pocket.
10. Use the bottom rows for kids’ grab-and-go snacks, single-serve crackers, fruit snacks, and chip bags so the most frequently reached items are easy to spot at a glance.
11. If a pocket holds several thin packets, stand them upright and secure matching bundles with a binder clip so they stay neat instead of sliding down into a messy stack.
12. Avoid overstuffing each pocket; I like to keep them full enough to look abundant and organized, but loose enough that each item can be pulled out without yanking the whole row out of shape.
13. Add adhesive labels to the top edge or front of key pockets and write clear category names so everyone in the house knows where to put things back after snack time or dinner prep.
14. Step back and balance the layout by spreading similar weights across both sides, then give the door another slow open-and-close test to make sure everything stays tidy and accessible.
Variations & Tips
For picky eaters: I like to dedicate one or two rows to each child or family member’s favorites so there’s always something they’ll happily grab without digging through the whole pantry.
By meal type: Instead of sorting by snack brand, try organizing pockets into breakfast, lunchbox, after-school, baking, and dinner-helper categories to make busy weekdays run smoother.
For very small packets: If taco seasoning, yeast packets, gravy mixes, or drink sticks disappear into deeper pockets, place them in grouped bundles with binder clips so each pocket stays easy to scan.
For a cleaner look: Choose matching snacks or keep each row to one category only; that simple bit of visual order makes even a full organizer look polished instead of cluttered.
Weight tip: Don’t load all the heaviest items at the very bottom, because that can tug on the hooks and make the organizer swing when the door moves.
Restocking habit: When I unload groceries, I refill this organizer first; it keeps the pantry shelves from becoming a catch-all for little boxes and packets.
Easy label option: If you don’t want permanent labels, use removable sticker labels or tuck a small handwritten card into each pocket for flexible categories.
Kid-friendly tip: Put parent-only items like spicy noodles, strong seasonings, or specialty drink packets in the top row, and keep everyday snacks lower where kids can reach them independently.