
If your pantry shelf seems to collect a little bit of everything, this is the kind of quick organizing project I love most: inexpensive, practical, and easy enough to finish in just a few minutes. I’m always looking for ways to make busy weeknight cooking smoother, especially when I’m reaching for the same staples again and again.
This idea is perfect for anyone who wants a tidier shelf without buying fancy organizers or starting a big overhaul. It uses something many of us already have on hand, and the end result makes canned goods easier to grab, easier to see, and a lot less likely to roll around and make a mess.
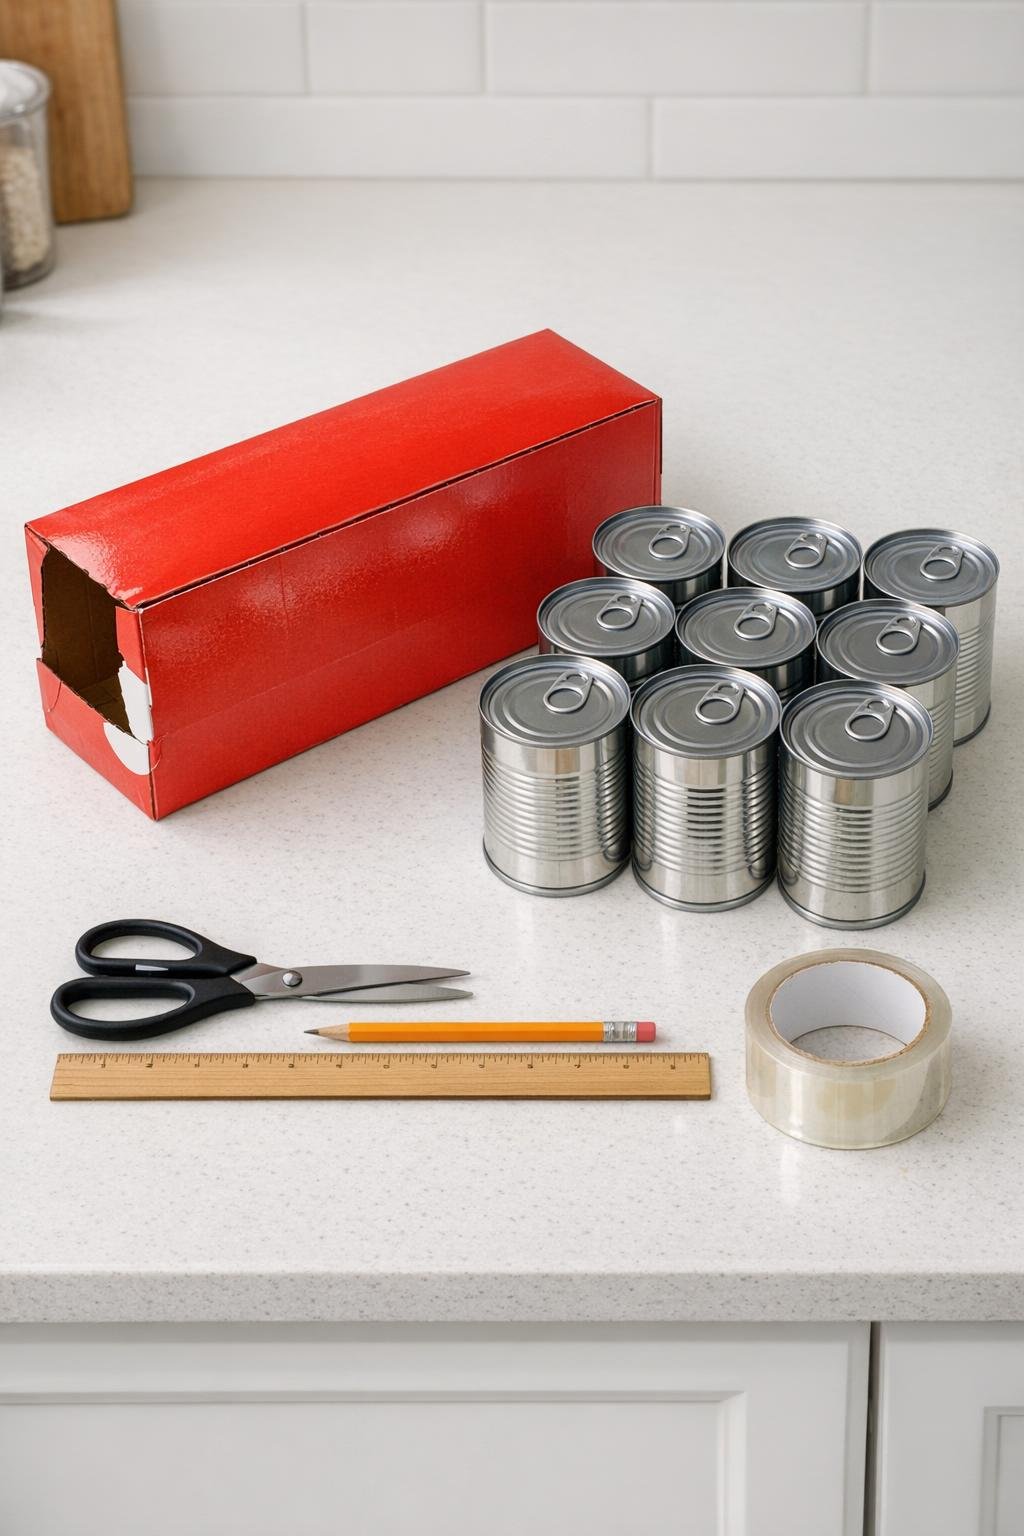
Materials
1 empty 12-pack soda can box, standard cardboard style, about 16 inches long
Instructions
1. Empty the soda can box completely and check that the cardboard is still sturdy, with the bottom fully attached and no torn corners.
2. Set the box on its long side and decide which broad panel will become the open top so the cans can be loaded in easily on the shelf.
3. Use the ruler and pencil to mark a long rectangular opening on the top panel, leaving a 1-inch border on all four sides to keep the box strong.
4. Carefully cut along the marked lines with scissors and lift out the cardboard panel to create a wide loading opening.
5. Trim away any loose cardboard fibers, then wrap packing tape over the cut edges so they feel smooth and hold up better with regular use.
6. Stand the box so one original can-dispensing end faces forward, then make sure that opening is clear enough for one soup can to roll or slide out at a time.
7. If the front opening has a loose flap hanging down, trim just that flap back slightly, cutting only enough to let a can come out neatly without dumping the whole row.
8. Place the box on your pantry shelf with the dispensing end facing out and the large cut opening facing up for easy refilling.
9. Slide the soup cans into the top opening one by one, arranging them on their sides in a single row so they feed forward toward the front opening.
10. Test the front by removing one can, then adjust the angle or trim the front edge a touch more if the cans catch instead of moving forward smoothly.
11. Fill the box with the remaining cans until it looks full but not jammed, leaving just enough room for the row to move freely.
12. Group similar canned items nearby so this new organizer becomes one easy-to-reach zone for quick lunches, simple dinners, or backup pantry meals.
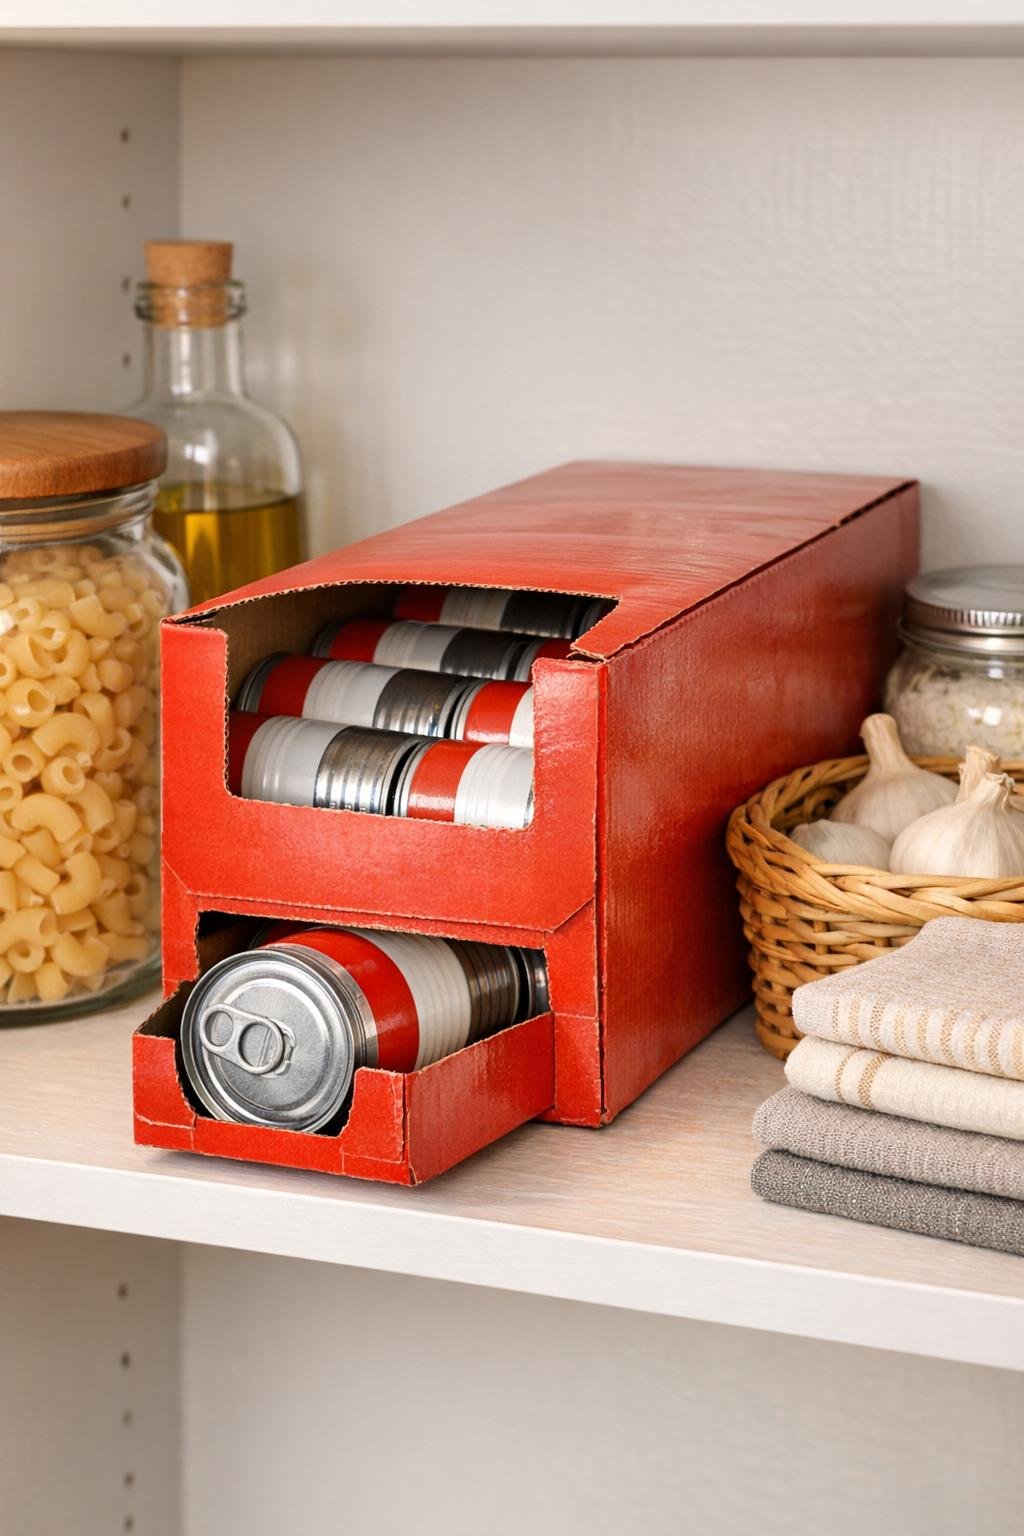
Variations & Tips
For taller cans: This works best when all the cans in one box are the same size. If you want to store chunkier cans, test one first before loading the whole row.
For extra strength: If your box feels soft in the middle, run an extra strip of packing tape along the bottom seam and around each end before filling it.
For a cleaner look: I like to trim carefully and keep the opening straight so it looks tidy on the shelf. Even a simple cardboard organizer looks nicer when the edges are smooth and even.
For picky eaters and family favorites: At my house, I’d dedicate one box just to the soups my family actually reaches for most. It makes lunch and last-minute dinners faster when the familiar choices are all in one spot.
For deeper shelves: Make two or three of these and line them up side by side for soup, vegetables, and pasta sauce cans. It gives you that satisfying organized look without spending money on matching bins.
To keep it working smoothly: Don’t overfill the box. A little breathing room helps the cans slide forward much more easily than a tightly packed row.